
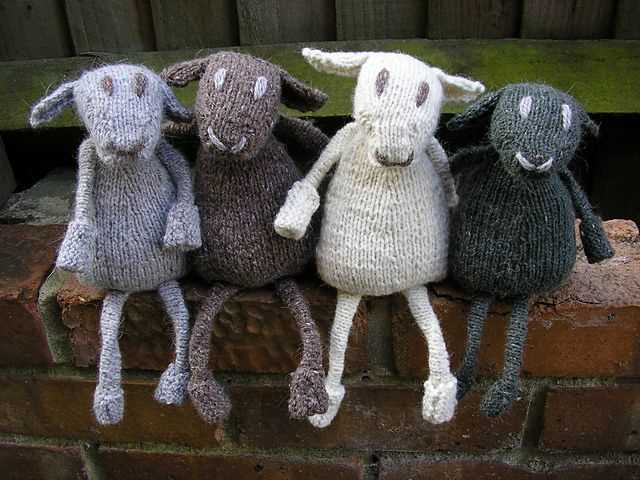
If you love knitting and want to create a cute and cuddly toy for yourself or as a gift, then this free knitting pattern for a toy sheep is perfect for you. Knitting toys can be a fun and rewarding project, and this pattern will guide you through the process with step-by-step instructions.
The toy sheep is designed to be soft and huggable, making it ideal for children or as a decoration. The pattern uses basic knitting stitches, making it suitable for knitters of all levels. Whether you are a beginner or an experienced knitter, you will enjoy creating this adorable toy.
The pattern includes detailed instructions on how to knit the body, head, limbs, and ears of the toy sheep. You will also learn how to sew the pieces together and add the finishing touches, such as eyes and a nose. Once you have completed the project, you will have a unique and handmade toy to cherish and enjoy.
How to Knit a Toy Sheep: Free Pattern and Instructions

Knitting toys can be a fun and rewarding project, and one popular option is knitting a toy sheep. With its fluffy wool and adorable design, a knitted sheep can make a charming gift or a cuddly companion for children. If you’re interested in creating your own knitted sheep, here is a free pattern and instructions to get you started.
Materials and Tools:
- Worsted weight yarn in white and black
- A pair of knitting needles, size US 8 or as per your preference
- Stuffing material
- Yarn needle
- Scissors
Pattern:
1. Start by casting on 30 stitches using the white yarn.
2. Knit every row for 15 rows to create the body of the sheep.
3. Next, decrease one stitch at the beginning of every row for 15 rows, until 15 stitches remain.
4. Cut the white yarn, leaving a long tail for sewing.
5. With the black yarn, cast on 10 stitches and knit every row for 5 rows to create the head.
6. Decrease one stitch at the beginning of each row for 5 rows, until 5 stitches remain.
7. Cut the black yarn, leaving a long tail.
8. Fold the black knitted piece in half and sew the sides together, leaving one end open.
9. Stuff the head lightly and close the open end by sewing it.
10. Attach the head to the body using the white yarn and a yarn needle.
11. Embroider the sheep’s eyes and mouth using black yarn.
12. Cut two small oval-shaped pieces from white felt for the ears and sew them to the head.
13. Finally, stuff the body of the sheep, sew the bottom closed, and shape the wool as desired.
This pattern provides a basic guide for creating a knitted toy sheep. Feel free to adjust the size, colors, and details to your preference. Knitting a toy sheep can be a fun and relaxing project, and the end result will surely bring joy to those who receive it. Happy knitting!
Gather Your Supplies

Before you start knitting your toy sheep, it’s important to gather all the necessary supplies. Having everything on hand will make the process much smoother and ensure that you don’t run into any roadblocks along the way.
Here is a list of the supplies you will need:
- Knitting needles (size 8 or as recommended in the pattern)
- Yarn (worsted weight or as specified in the pattern) in the desired color for the sheep’s body
- Small amounts of black and white yarn for the sheep’s facial features
- Stitch markers
- Tapestry needle
- Fiberfill stuffing
- Scissors
Make sure you have the correct size of knitting needles as indicated in the pattern. This will ensure that your stitches are the right size and that your toy sheep turns out as intended. Additionally, using the recommended yarn weight will give your sheep a consistent look and feel.
Gathering all the necessary yarn colors and amounts in advance will save you from having to stop and buy more in the middle of the project. You’ll also want to have stitch markers on hand to help keep track of your progress and any pattern repeats.
Once you have all your supplies ready, you’re well on your way to creating your very own adorable toy sheep. So gather everything together, find a comfortable spot, and let the knitting begin!
Choose Your Yarn and Needles

When it comes to knitting toys, choosing the right yarn and needles is an important step. The perfect combination can make your toy sheep look adorable and ensure it will stand the test of time. Here are some tips to help you make the right choices.
Yarn
For the free knitting pattern toy sheep, you’ll want to use a yarn that is soft, durable, and machine washable. Look for yarns specifically designed for toys or baby items, as they are usually made from materials that are safe for children and can withstand frequent washing. Acrylic or acrylic-blend yarns are a popular choice for toys, as they are easy to care for and come in a wide range of colors.
When selecting the color of your yarn, keep in mind the look you want to achieve. White or off-white yarn will give your toy sheep a classic and fluffy appearance, while using different colors can create unique and playful effects.
Needles

Choosing the right needles for your knitting project is essential for achieving the correct gauge and ensuring that your stitches are even and consistent. For the toy sheep pattern, you’ll want to use double-pointed needles (DPNs) or circular needles in a size appropriate for your chosen yarn. Check the label on your yarn for the recommended needle size and choose the closest match.
Using DPNs can be a bit tricky at first, but they are perfect for knitting small, round items like the legs and head of the toy sheep. Circular needles can be a great alternative if you find DPNs too fiddly. Whichever type of needles you choose, make sure they are comfortable to hold and work with for extended periods of time.
Now that you have some guidance on choosing the right yarn and needles, you’re ready to start knitting your adorable toy sheep. Remember to take your time, enjoy the process, and don’t be afraid to experiment with different yarns and colors to make your toy unique and special.
Download the Free Knitting Pattern

If you’re looking for a fun and adorable knitting project, look no further! We have a free knitting pattern available for an adorable toy sheep that will make a perfect gift or addition to your own collection.
Materials Needed:
- Yarn in white, black, and pink
- Knitting needles size US 7 (4.5 mm)
- Stuffing for the sheep
- Tapestry needle
- Scissors
Instructions:
- Begin by casting on 40 stitches with the white yarn.
- Work in stockinette stitch for 8 rows.
- Switch to black yarn and knit 1 row.
- Switch back to white yarn and work in stockinette stitch for 10 rows.
- Repeat steps 3 and 4 four more times.
- Switch to pink yarn and work in stockinette stitch for 8 rows.
- Switch back to white yarn and work in stockinette stitch for 10 rows.
- Repeat steps 6 and 7 four more times.
- Finish by knitting 1 row with black yarn.
- Bind off all stitches and leave a long tail for sewing.
Assembly:
Sew the sides of the knitted piece together, leaving a small opening for stuffing. Once stuffed, sew the opening closed and attach the pink yarn for the sheep’s nose. Use the black yarn to embroider the sheep’s eyes and mouth. Finally, attach small pieces of black yarn for the sheep’s legs.
Now you’re ready to enjoy your adorable knitted toy sheep! Download the free knitting pattern and start creating your very own cuddly friend. Happy knitting!
Casting On: Start Your Sheep
When it comes to choosing your yarn, look for a soft and durable option that will be comfortable to handle. Worsted weight yarn is a popular choice for toy making as it is thick enough to create a sturdy stuffed animal, but not too bulky. Consider using a natural color, like white or cream, to give your sheep a realistic appearance.
Once you have your materials, it’s time to cast on and start knitting! Follow the instructions in the free knitting pattern to cast on the required number of stitches. Most toy sheep patterns will start with the body or head, which is usually knit in the round. This will create a seamless finish and make the stuffing process easier.
As you knit your sheep, remember to keep a consistent tension so that your stitches are even throughout. Take your time and enjoy the process – knitting can be a relaxing and therapeutic activity. It’s also a great way to showcase your creativity and make a one-of-a-kind toy for yourself or a loved one.
Once you’ve finished knitting all the required pieces, it’s time to assemble your sheep. Sew the body and head together, leaving a small opening for stuffing. Carefully stuff the sheep, making sure to distribute the stuffing evenly so that the toy has a nice shape. Once you’re satisfied with the stuffing, sew up the opening.
Finally, add any finishing touches to give your sheep some personality. You can embroider eyes and a mouth, sew on a small nose, or add some details with felt or fabric scraps. Be creative and have fun with it!
By following a free knitting pattern and using your own creativity, you can create a charming toy sheep that will be loved for years to come. Happy knitting!
Knit the Body
To start knitting the body of the toy sheep, use your chosen color of yarn to cast on stitches. The number of stitches you cast on will depend on the size of the toy you want to create. For a small sheep, cast on around 40-50 stitches, and for a larger sheep, cast on around 70-80 stitches.
Once you have cast on the desired number of stitches, you will begin knitting in the round. Use double-pointed needles or a circular needle, depending on your preference. Knit every stitch for the first round to create the base of the body.
After completing the first round, you will begin working in a pattern to create the texture of the sheep’s body. One popular pattern is the garter stitch, where you knit every stitch in every round. This creates a bumpy texture that resembles sheep’s wool. Another option is to alternate rounds of knit and purl stitches to create a ribbed texture.
Continue knitting in your chosen pattern until the body of the sheep measures your desired length. You can use a tape measure to ensure consistency. Remember to periodically stuff the body with polyester fiberfill as you go to give it shape and volume.
Once you have reached the desired length, you will finish knitting the body by binding off the stitches. Cut the yarn, leaving a long tail, and thread it through the remaining stitches to secure them. Pull the tail tight to close the top of the body. Your knitted sheep body is now complete and ready for the next steps in the pattern!
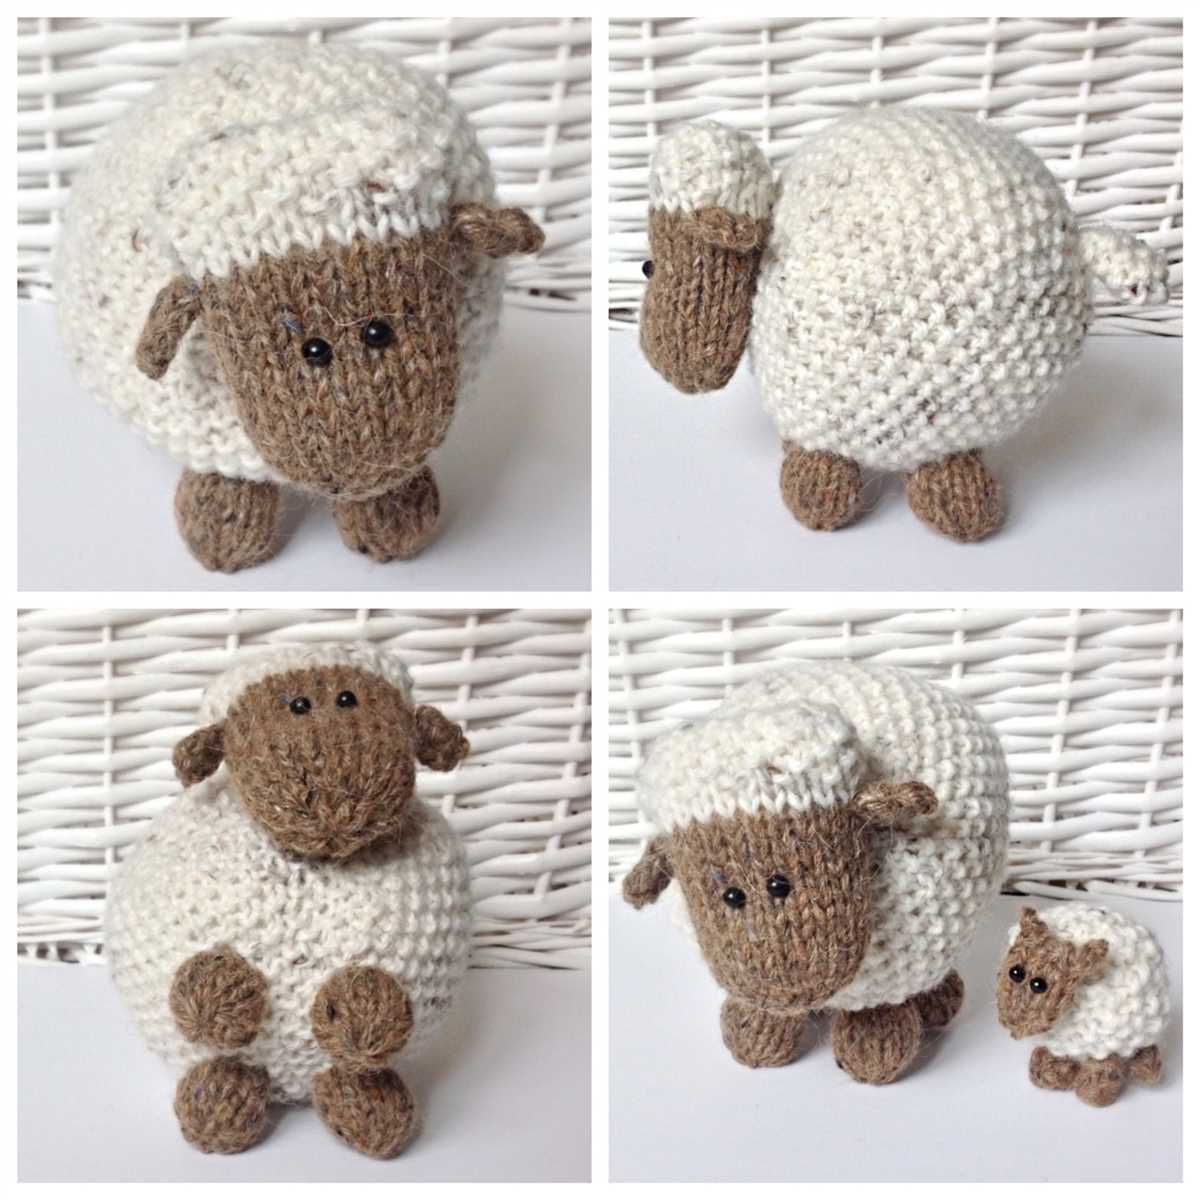
Shape the Head and Ears

Once you have completed the body of your toy sheep, it’s time to shape the head and ears. The head is created by knitting a separate piece that will be attached to the body later. To start, cast on the required number of stitches and work in stockinette stitch until it reaches the desired length. You can use the same yarn and needle size as the body, or choose a smaller size to create a more compact head.
To shape the head, begin decreasing stitches gradually on each side of the piece. There are different techniques you can use, such as knitting two stitches together or slipping stitches. Follow the instructions of the knitting pattern that you are using, or experiment with different decrease methods to achieve the desired shape. Continue decreasing until you reach the desired width for the top of the head.
Next, it’s time to shape the ears. These can be knitted separately and sewn onto the head, or created by increasing stitches on the sides of the head during the knitting process. If you prefer to knit separate ears, cast on the required number of stitches and work in stockinette stitch until the desired length is reached. Then, shape the ears by decreasing stitches at the top. Sew the ears onto the sides of the head, making sure they are evenly placed.
And there you have it! Your toy sheep is starting to take shape with its head and ears. The next step is to attach the head to the body and continue knitting the other details, such as the legs and face. Keep following the knitting pattern instructions and soon you’ll have a lovely toy sheep to play with or gift to someone special.
Stuff and Sew the Sheep
Now that you have finished knitting all the parts of your toy sheep, it’s time to stuff and sew them together. This is the final step in creating your sheep and bringing it to life!
1. Stuffing: Begin by stuffing the body of the sheep with polyester fiberfill. Make sure to stuff it firmly, but not too tightly, as you still want the sheep to be soft and cuddly. Use small amounts of filling at a time and distribute it evenly throughout the body. You can use a knitting needle or pencil to help push the stuffing into smaller areas.
2. Sewing: Once the body is stuffed, it’s time to sew it closed. Thread a needle with matching yarn and make small, neat stitches along the open edge of the body. Start at the bottom and work your way up, making sure to secure the stuffing inside as you go. Knot the yarn at the end to secure the seam.
Next, sew the head to the body using the same technique. Position the head where you want it to be, and sew it in place with small, even stitches. Make sure to sew through both layers of knitting to ensure a secure attachment.
3. Final touches: Finally, sew on the ears, eyes, and nose of the sheep. Use small, tight stitches to attach the features securely. You can also add any additional embellishments, such as a ribbon bow or button eyes, to give your sheep a personalized touch.
Once you have finished sewing all the parts together and added any final touches, your toy sheep is complete! Give it a gentle shake to fluff up the stuffing and shape the body. Your soft and cuddly sheep is now ready to be enjoyed or given as a thoughtful handmade gift.
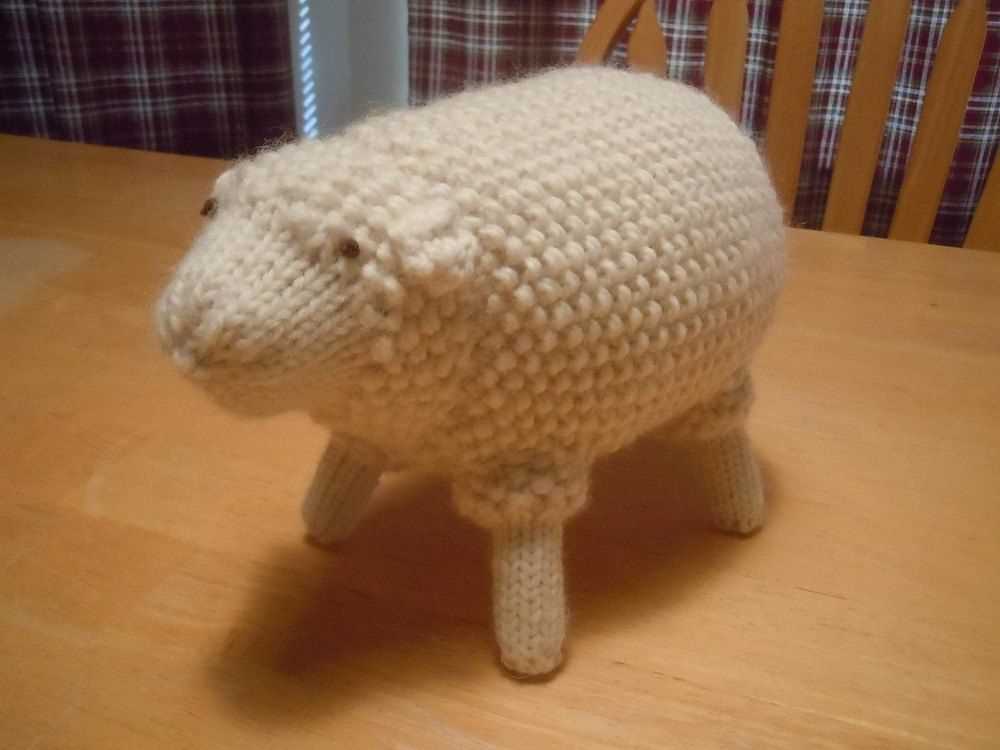
Knit the Legs
Now that you have finished knitting the body of your toy sheep, it’s time to move on to the next step: knitting the legs. These tiny limbs will give your sheep its characteristic shape and make it look adorable.
To start, you will need four double-pointed knitting needles and your chosen yarn color. Begin by casting on the required number of stitches for the first leg. The pattern will usually specify this number, depending on the size of your toy.
Once you have cast on the stitches, divide them evenly across three needles. This will ensure that you can easily knit in the round. Join in the round by knitting the first stitch with your working yarn, being careful not to twist the stitches.
Now you can begin knitting the legs in your desired stitch pattern. This could be simple stockinette stitch, ribbing, or any other pattern that you prefer. Follow the instructions in your pattern for the specified number of rows or until the leg reaches the desired length.
Once you have completed the first leg, transfer the stitches from the other two needles onto one needle, leaving the working yarn attached. This will allow you to continue knitting the second leg seamlessly. Repeat the same steps for knitting the second leg as you did for the first.
Once both legs are complete, you can either stuff them lightly with fiberfill or leave them unstuffed, depending on your preference and the desired effect. Make sure to securely bind off the stitches and weave in any loose ends. Congratulations, you have successfully knitted the legs of your toy sheep!
Attach the Legs to the Body

Once you have completed knitting the legs, it is time to attach them to the body of the toy sheep. Make sure you have all the necessary materials, including a tapestry needle and some yarn that matches the color of the sheep’s body.
Begin by positioning the legs on the underside of the sheep’s body. Take your tapestry needle and thread it with the matching yarn. Insert the needle into one side of the body, right at the base of the leg. Then, carefully bring the needle through the corresponding stitch on the leg.
Tip: It may be helpful to use a small stitch marker to hold the leg in place as you sew. This will prevent the leg from shifting or moving while you are attaching it.
Continue sewing around the base of the leg, using a whipstitch or a mattress stitch to secure the leg to the body. Make sure to sew through each stitch on the leg and body, ensuring a strong and secure attachment.
Repeat this process for the second leg, making sure to position it symmetrically to the first leg. Once both legs are securely attached, weave in any remaining yarn ends and trim them to tidy up the toy sheep.
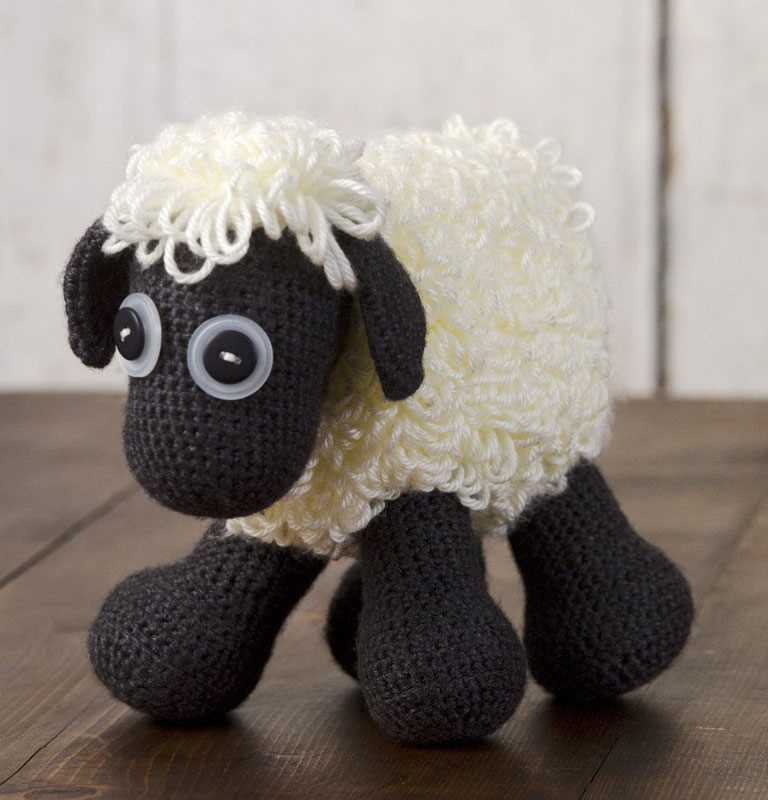
Final Details and Finishing Your Toy Sheep
Once you have completed knitting your toy sheep, it’s time to add the final details and finish it off. This will give your sheep its cute and realistic appearance. Here are a few steps to follow:
- Sew the body parts together: Start by sewing the legs onto the body. Make sure they are positioned correctly and securely attached. Next, sew the head onto the body, ensuring it is centered and straight. Lastly, attach the tail to the back of the sheep.
- Embroider the facial features: Use black or dark brown yarn to embroider the eyes, nose, and mouth of the sheep. This will bring the face to life and give it a cute expression.
- Add the ears: Attach the ears to the sides of the sheep’s head. They can be positioned slightly forward to make the sheep look more alert and adorable.
- Trim and shape the wool: Using a pair of scissors, carefully trim and shape the knitted wool to give your sheep a neat and fluffy appearance. Pay attention to the body, legs, and head to create a uniform look.
- Optional details: If you want to add some extra touches, you can use colorful yarn to create a collar or scarf for your toy sheep. This will add a touch of personality to your creation.
Once you have completed these steps, your toy sheep is ready to be enjoyed or gifted. It can make a charming addition to a nursery, a cute toy for a child, or a delightful present for a knitting enthusiast. Have fun creating and personalizing your toy sheep!