
If you love knitting and want to keep your hands warm and cozy during the cold winter months, we have a treat for you! We are sharing a free pattern for knitted hand warmers that are not only stylish but also practical. Hand warmers are a great accessory for those chilly days when you need something to keep your hands warm while still being able to use your fingers freely. And the best part is, they are quick and easy to knit, making them a perfect project for both beginners and experienced knitters.
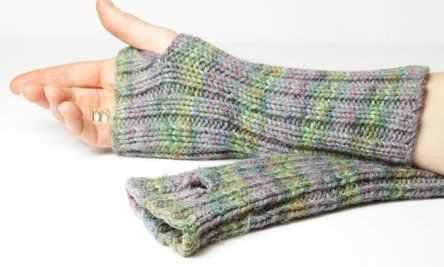
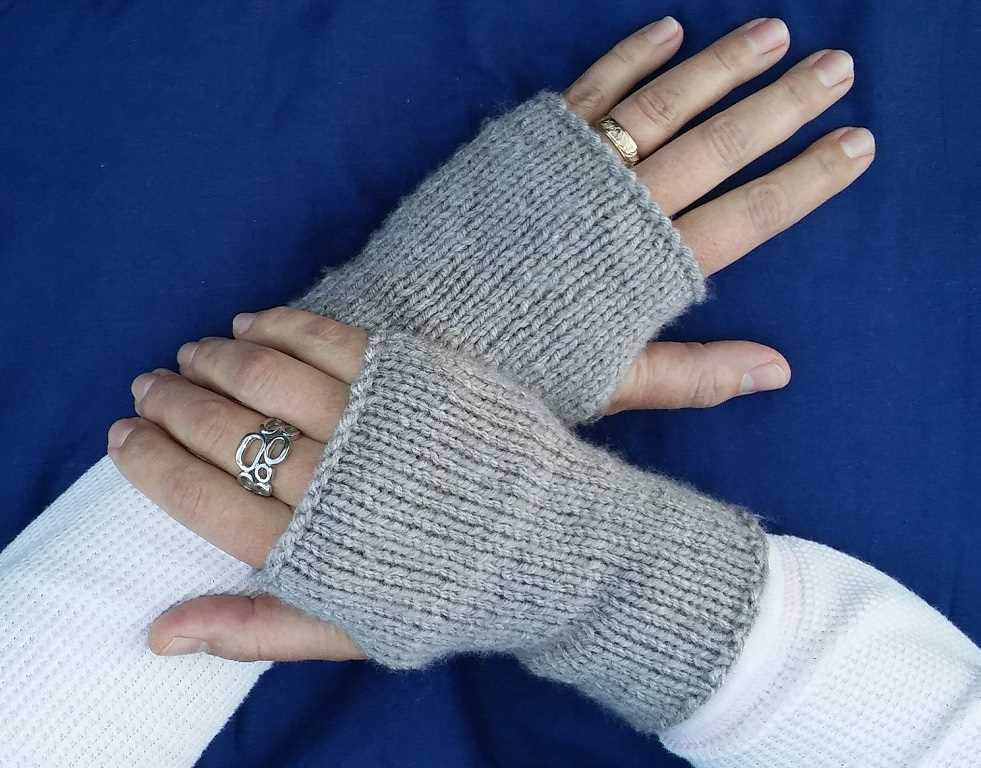
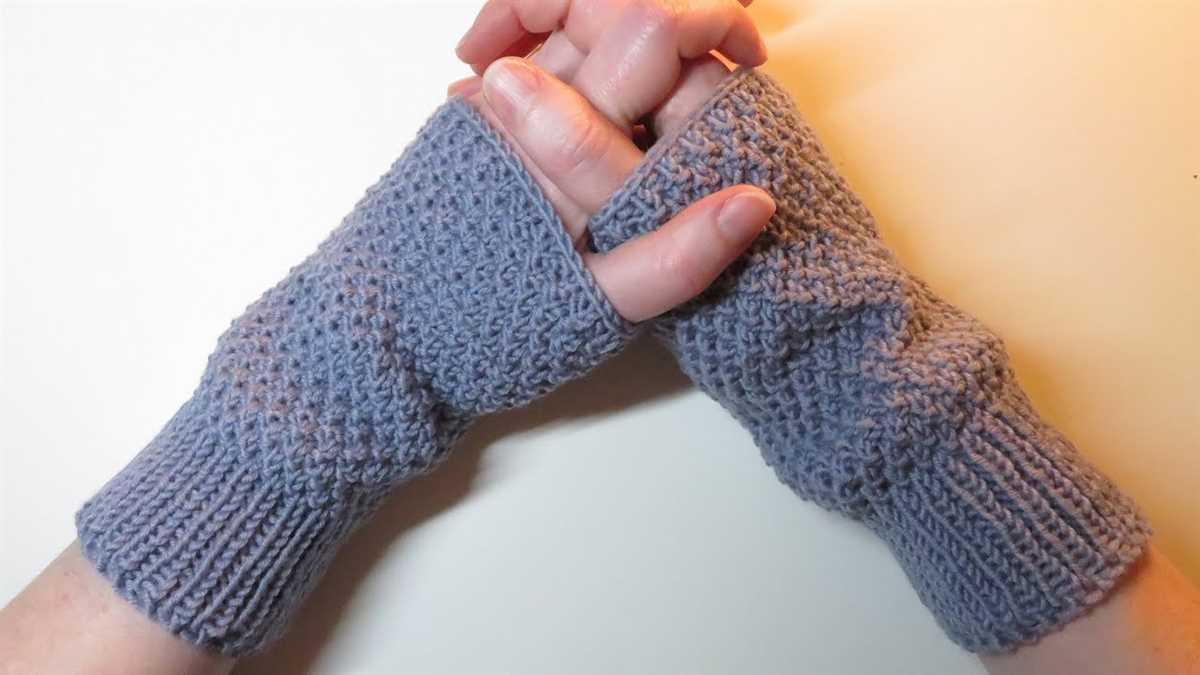
These hand warmers feature a simple yet elegant ribbed pattern that adds a touch of texture and visual interest to the design. The ribbing also creates a snug and comfortable fit, ensuring that your hands stay warm and protected from the cold. The pattern includes instructions for both a basic version and a more advanced version with a cable twist, allowing you to customize your hand warmers to suit your personal style.
What makes these hand warmers even more special is the fact that they can be knit with any type of yarn, making them a versatile project that can be adapted to your preferences. Whether you prefer a soft and cozy yarn for extra warmth or a lightweight and breathable yarn for a more comfortable fit, you can easily find the perfect yarn for your hand warmers. So grab your knitting needles and get ready to create a pair of hand warmers that are not only functional but also a stylish addition to your winter wardrobe!
What are Knitted Hand Warmers?
Knitted Hand Warmers are cozy and functional accessories that help keep your hands warm during colder months. They are designed to cover your wrists and hands, providing insulation and protecting you from the cold weather. Hand warmers are typically made from soft, insulating yarns like wool or acrylic, making them comfortable and warm to wear.
These hand warmers are an excellent alternative to gloves or mittens, as they allow for more finger mobility and dexterity while still keeping your hands warm. They are also convenient for activities like typing, texting, or using your phone outdoors, as they keep your hands warm while leaving your fingers free to move. Hand warmers come in various designs and patterns, ranging from simple and classic to more intricate and decorative options.
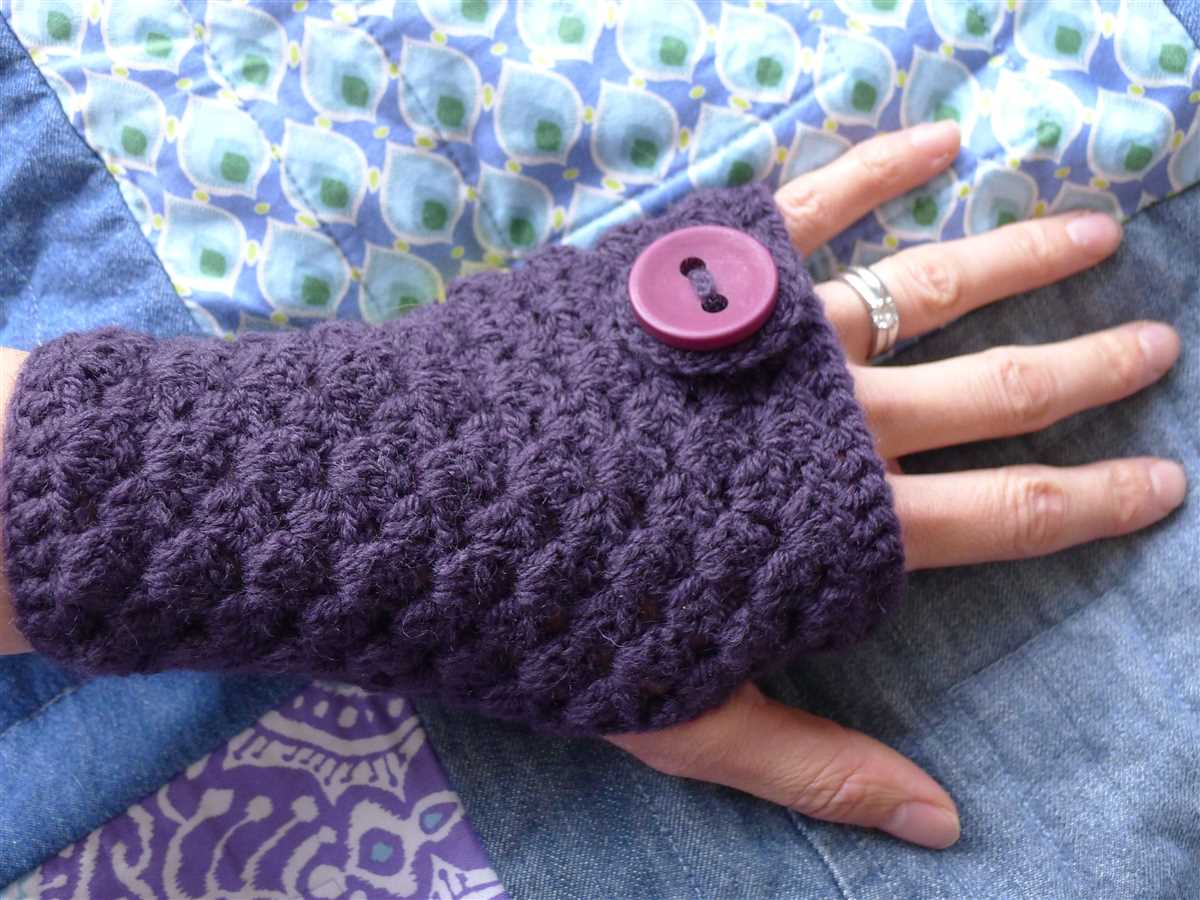
Knitted Hand Warmers are not only practical but also fashionable accessories. They can add a touch of style and personality to your winter outfits. With a wide range of colors and patterns available, you can find hand warmers that match your personal style or coordinate with the rest of your winter wardrobe. Some hand warmers even feature intricate cable or lace patterns, adding an extra level of elegance to the design.
Hand warmers are also a popular project among knitters, as they are relatively quick and easy to make. Many knitting patterns for hand warmers are available for free online, making them accessible for both beginner and experienced knitters. Knitting your own hand warmers allows you to choose the yarn, pattern, and size that best suits your needs, as well as providing the satisfaction of creating something with your own hands.
Benefits of Knitted Hand Warmers

Knitted hand warmers are a fantastic accessory for colder weather, providing warmth and comfort to your hands while also adding a touch of style to your outfit. These small but mighty accessories offer several benefits that make them an essential item for anyone looking to keep their hands cozy and functional in chilly temperatures.
1. Warmth and Insulation
Knitted hand warmers are designed to provide an extra layer of warmth and insulation to your hands. The tight-knit construction traps heat and prevents it from escaping, keeping your hands toasty even in the coldest of temperatures. Whether you’re spending time outdoors or simply navigating your daily routine during winter, these hand warmers will ensure that your hands stay comfortably warm throughout the day.
2. Freedom of Movement
Unlike bulky gloves or mittens, knitted hand warmers offer the advantage of allowing greater freedom of movement for your fingers. Their fingerless design keeps your hands warm while keeping your fingers accessible for tasks that require dexterity, such as typing, texting, or handling small objects. This practical feature makes knitted hand warmers a popular choice for individuals who need to keep their hands warm while performing activities that require precise finger movements.
3. Fashionable and Versatile
Knitted hand warmers come in a wide range of styles and designs, making them a fashionable accessory that can complement any outfit. Whether you prefer a classic cable-knit pattern or a more modern and colorful design, you can find hand warmers to suit your personal taste. Additionally, their versatility allows you to wear them indoors and outdoors, making them a functional and stylish addition to your winter wardrobe.
4. Easy to Make and Customize
If you enjoy knitting or are looking to start a new knitting project, hand warmers are an excellent option. They are relatively quick and easy to knit, making them a great project for knitters of all skill levels. The patterns for hand warmers are widely available, and you can customize them to fit your hand size and desired length. Knitting your own hand warmers not only allows you to unleash your creativity but also gives you the satisfaction of wearing a handmade accessory.
In conclusion, knitted hand warmers offer warmth, insulation, freedom of movement, fashion, and customization. They are a practical and stylish accessory that can enhance your winter wardrobe while keeping your hands cozy and comfortable. Whether you choose to knit them yourself or purchase them from a store, hand warmers are a must-have item for anyone who wants to brave the cold weather with warm and functional hands.
Choosing the Right Yarn for Hand Warmers
When it comes to knitting hand warmers, choosing the right yarn is crucial to ensure the perfect balance of warmth, comfort, and durability. The yarn you select will determine not only the overall appearance and feel of the hand warmers but also their practicality and ability to keep your hands cozy during the cold winter months.
Choosing the right weight: The first step in selecting the right yarn for hand warmers is to consider the weight or thickness of the yarn. Hand warmers typically require a medium to bulky weight yarn to provide enough insulation for your hands. A thicker yarn will create a denser fabric, ensuring better warmth and protection against the cold.
Considering the fiber: Another important factor to consider is the fiber content of the yarn. Natural fibers, such as wool and alpaca, are excellent choices for hand warmers as they have excellent insulation properties and retain heat even when wet. Acrylic blends can also be a good option as they are soft, durable, and easy to care for.
Looking at the texture and stitch definition: The texture and stitch definition of the yarn can greatly impact the appearance of your hand warmers. If you’re looking for a more textured or patterned look, opt for a yarn with a higher twist or a blend with other fibers. If you prefer a smoother and more sleek design, a single-ply yarn or a yarn with a silk or cotton blend can be a good choice.
Considering the color: Lastly, don’t forget to consider the color of the yarn. Hand warmers can be a great opportunity to add a pop of color to your winter wardrobe. You can choose a bold and vibrant color to make a statement or go for a more neutral shade that will easily complement any outfit.
Overall, take the time to carefully consider the weight, fiber content, texture, and color of the yarn when choosing the perfect yarn for your hand warmers. By selecting the right yarn, you can ensure that your hand warmers will not only keep you warm but also be a stylish and cozy accessory for the cold season.
Selecting the Appropriate Needle Size
When knitting hand warmers, selecting the appropriate needle size is important to ensure the correct gauge and fit for the finished project. The needle size determines the size of the stitches and the overall fabric tension. It can also affect the drape and texture of the hand warmers.
Before starting the project, it is necessary to check the pattern for the recommended needle size. The pattern may specify a specific size or provide a range of sizes to achieve the desired gauge. It is essential to follow these recommendations to ensure the final product matches the intended measurements.
Factors to Consider for Needle Size Selection:
- Gauge: The needle size recommended in the pattern usually corresponds to the gauge provided. If the gauge is too tight, the hand warmers may end up too small, and if the gauge is too loose, the hand warmers may end up too large. Therefore, it is crucial to use the recommended needle size to obtain the correct gauge.
- Yarn Thickness: The thickness of the yarn being used also influences the needle size selection. Thicker yarns usually require larger needle sizes, while thinner yarns require smaller needle sizes to achieve the desired stitch tension and fabric density.
- Desired Drape and Texture: The needle size can also affect the drape and texture of the finished hand warmers. Using larger needles can create a looser and more open fabric, whereas smaller needles can result in a tighter and denser fabric. Consider the desired drape and texture when selecting the appropriate needle size.
Experimentation may be required to find the perfect needle size for a specific yarn and desired outcome. It is important to knit a gauge swatch before starting the hand warmers to ensure that the needle size yields the correct gauge. Adjustments may need to be made by changing needle sizes until the desired gauge is achieved.
By carefully selecting the appropriate needle size, knitters can ensure their hand warmers have the right fit, gauge, drape, and texture to match their vision for the finished project.
Understanding basic Knitting Stitches
Knitting is a craft that involves creating fabric by interlocking loops of yarn using knitting needles. To get started, it’s important to understand the basic knitting stitches, which form the foundation of most knitting projects.
Garter Stitch: The garter stitch is one of the simplest and most common knitting stitches. It is created by knitting every stitch in every row. This stitch produces a fabric with ridges on both sides and is often used for scarves, blankets, and dishcloths.
Stockinette Stitch: The stockinette stitch is another fundamental knitting stitch. It is created by knitting one row and purling the next row, alternating between the two. This stitch produces a smooth and flat fabric on one side (the right side) and a ridged fabric on the other side (the wrong side). It is commonly used for making garments like sweaters and hats.
Other basic knitting stitches include:
- Seed Stitch: This stitch alternates between knitting and purling stitches in the same row, creating a textured pattern.
- Ribbing: Ribbing is a stretchy and flexible stitch pattern created by alternating knit and purl stitches in a specific sequence. It is often used for cuffs, edgings, and collars.
- Cable Stitch: The cable stitch creates a braided or twisted pattern in the fabric. It involves crossing a set of stitches over each other to form a cable design.
By mastering these basic knitting stitches, you’ll gain the foundation to explore more complex stitch patterns and create a wide range of knitted items.
Knit Stitch
The knit stitch is one of the most basic and commonly used stitches in knitting. It is also known as the knit stitch or the plain stitch. The knit stitch is characterized by its V-shaped appearance and is used to create the majority of knitted fabric.
To create a knit stitch, insert the right-hand needle from front to back into the first stitch on the left-hand needle. Then, wrap the yarn around the right-hand needle, bringing it from back to front. Use the right-hand needle to pull the yarn through the loop on the left-hand needle, creating a new loop on the right-hand needle.
The knit stitch is often used to create the stockinette stitch, which is a common stitch pattern used in many knitting projects. The stockinette stitch is created by alternating rows of knit stitches and purl stitches. This creates a fabric with a smooth and uniform appearance on the right side and a bumpy texture on the wrong side.
Knit stitches can be used to create a variety of different knitted items, including sweaters, scarves, hats, and socks. They can also be used to add decorative details to a project, such as cables or textured patterns.
To learn more about the knit stitch and how to create it, there are many online tutorials and instructional videos available. Knitting books and magazines also often include instructions and patterns that utilize the knit stitch.
Purl Stitch
The purl stitch is one of the basic stitches in knitting and is commonly used in many patterns, including hand warmers. It creates a textured fabric with bumps on one side and smooth loops on the other. To work the purl stitch, you will need a pair of knitting needles and yarn.
To start the purl stitch, hold the knitting needle with the cast-on stitches in your left hand. Insert the right needle into the first stitch on the left needle from right to left, keeping the yarn at the front of the work. Take the working yarn and wrap it under and over the right needle, pulling it through the stitch on the left needle.
Repeat this process for each stitch on the left needle, creating a new stitch on the right needle. Make sure to keep the tension even and not to pull too tightly on the yarn. Practice makes perfect, so don’t worry if your first attempts at the purl stitch don’t look perfect. With time and practice, your hand warmers will have a beautiful and professional finish.
- Tips for purling:
- Hold the yarn with your right hand and keep it in front of the work.
- Keep the tension even and not too tight.
- Move the yarn between the needles smoothly to avoid any snagging.
- Practice knitting a few rows of purl stitches to get comfortable with the technique.
- Remember to relax and enjoy the process of knitting!
With the purl stitch mastered, you can now confidently follow patterns for various knitted items, including hand warmers. Experiment with different yarns, colors, and stitch patterns to create unique and cozy accessories for yourself or as gifts for your loved ones.
| Purl Stitch |
|---|
 |
Rib Stitch

The rib stitch is a popular knitting pattern used to create a stretchy and textured fabric. It is often used in garments such as scarves, hats, and hand warmers. The rib stitch consists of alternating knit and purl stitches, creating vertical columns of knits and purls.
To create the rib stitch, you will need to have a basic knowledge of knitting techniques such as casting on, knitting, and purling. The stitch pattern is created by repeating a sequence of knit and purl stitches across a row.
The rib stitch is known for its elasticity and flexibility, making it an excellent choice for projects that require a close fit. The alternating knit and purl stitches create rows of raised bumps and ridges, adding texture to the fabric.
- Materials needed: Knitting needles, yarn
- Instructions:
- Cast on the desired number of stitches.
- Row 1: *Knit 1, purl 1; repeat from * to the end of the row.
- Row 2: *Purl 1, knit 1; repeat from * to the end of the row.
- Repeat rows 1 and 2 until the desired length is reached.
- Bind off all stitches.
With this simple pattern, you can create beautiful hand warmers with a ribbed texture. The rib stitch is also a great option for blankets, cowls, and other accessories. Experiment with different yarns and needle sizes to achieve the desired look and feel of your project.
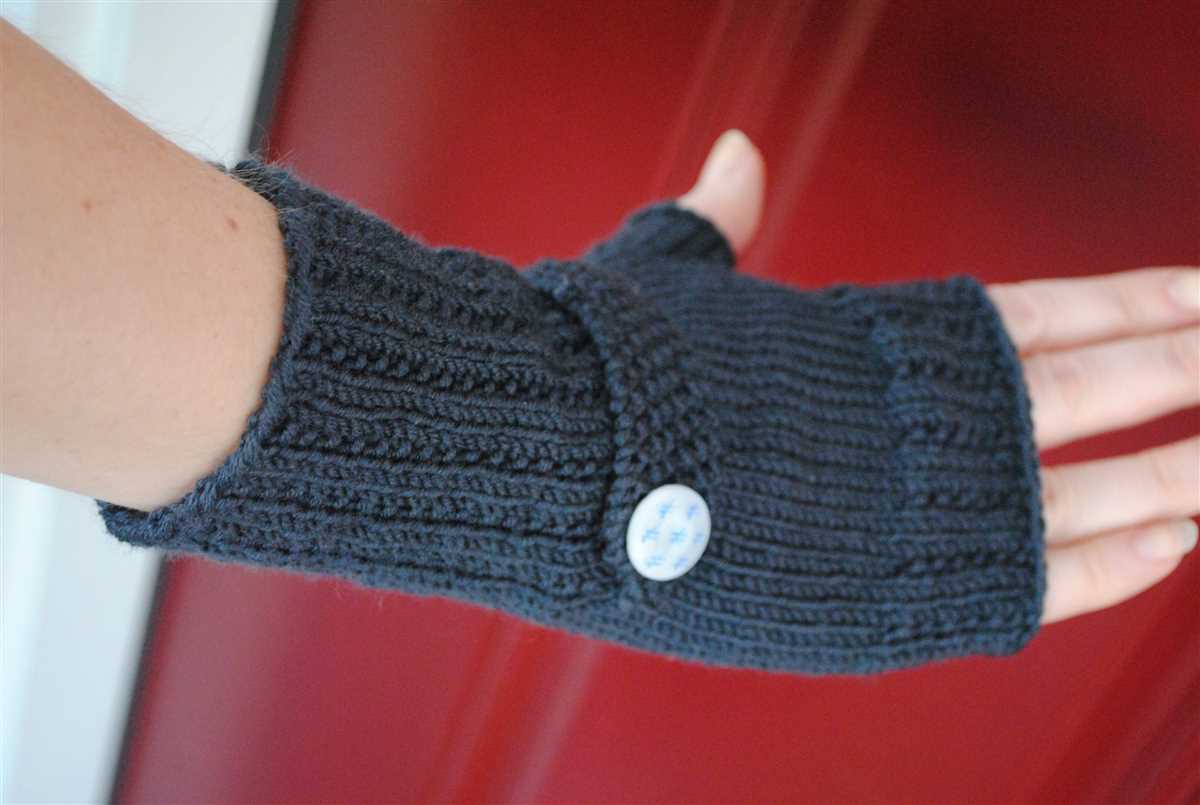
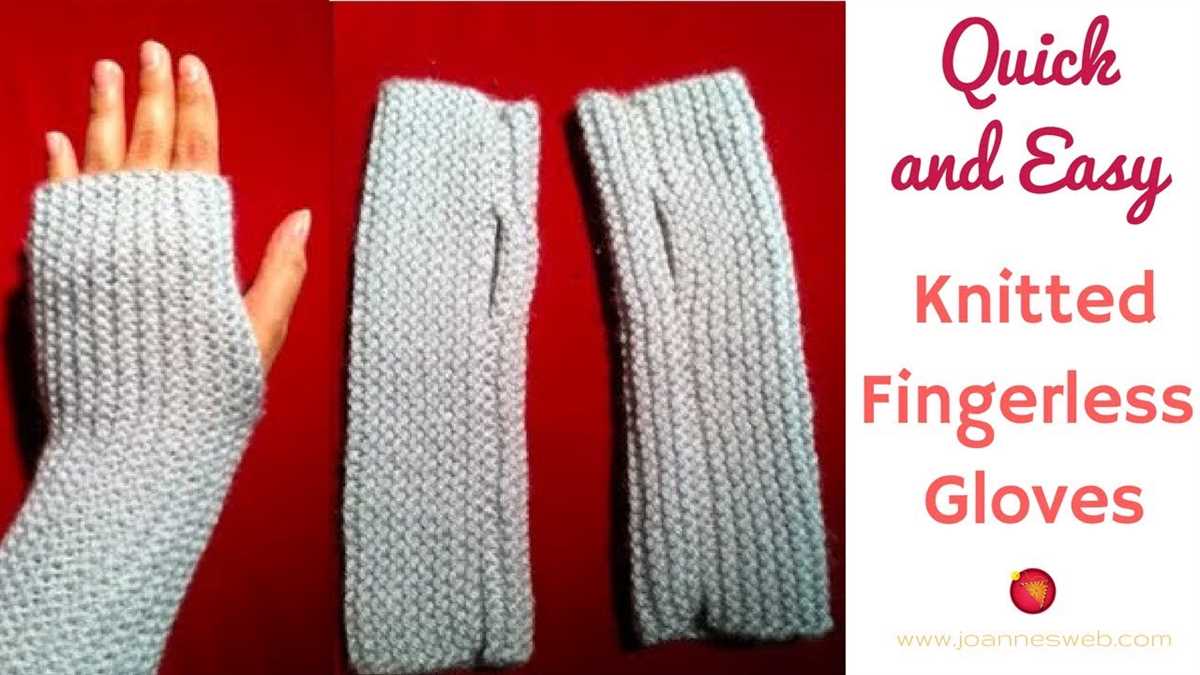
Free Knitting Pattern for Hand Warmers
If you’re looking for a cozy and stylish accessory to keep your hands warm during the colder months, look no further than this free knitting pattern for hand warmers. Hand warmers are a versatile and practical item that can be worn while you’re outside or even indoors when you need a little extra warmth. This pattern is perfect for knitters of all skill levels and can be customized to fit your personal style.
To get started on this project, you’ll need a set of double-pointed knitting needles and a skein or two of your favorite yarn. The pattern calls for a simple rib stitch, which creates a stretchy and snug fit. You’ll also need to know how to cast on stitches, knit, purl, and bind off. If you’re a beginner, don’t worry! This pattern is a great way to practice and improve your knitting skills.
The pattern begins with a ribbed cuff, which will keep the hand warmers securely in place on your wrists. From there, you’ll continue knitting in the rib stitch for the body of the hand warmers. The length can be easily adjusted to fit your preference, whether you prefer shorter wrist warmers or longer ones that cover your fingers as well.
For an extra touch of style, you can experiment with different yarn colors or even add some embellishments like buttons or small bows. When you’re finished knitting, simply weave in the loose ends and give your hand warmers a quick steam block to help them hold their shape.
Once you’ve completed your first pair of hand warmers using this free pattern, you’ll likely want to make more. They make great gifts for friends and family, and you can even create a matching set for yourself. So grab your needles and yarn, and start knitting your way to cozy hands with this free knitting pattern for hand warmers.
Step-by-Step Instructions
Knitting a pair of hand warmers is a fun and rewarding project that can be completed in just a few hours. With this free pattern, you can create stylish and cozy hand warmers to keep your hands warm in cold weather. Follow these step-by-step instructions to get started:
Materials:
- Worsted weight yarn in your choice of color
- Size 8 (5mm) knitting needles
- Tapestry needle
- Scissors
Instructions:
- Cast on: Begin by casting on 32 stitches using the long tail cast on method.
- Ribbing: Knit in a 2×2 rib pattern (knit 2 stitches, purl 2 stitches) for 2 inches.
- Main body: Switch to stockinette stitch (knit every row) and knit for 4 inches.
- Thumb hole: Begin the thumb hole by knitting 6 stitches, then binding off 4 stitches. Knit to the end of the row.
- Continuing the hand warmer: Knit in stockinette stitch for another 3 inches.
- Decrease rounds: On the next round, knit 2 stitches together across the row. Repeat this decrease round every inch, decreasing the total number of stitches by 8 on each decrease round until there are 8 stitches remaining.
- Thumb: For the thumb, pick up 4 stitches from the bound-off edge of the thumb hole. Knit in stockinette stitch for 1 inch, then bind off.
- Finishing: Use a tapestry needle to weave in any loose ends and trim off excess yarn.
- Repeat for second hand warmer: Repeat the entire process to create a second hand warmer.
Once you have finished knitting both hand warmers, you can wear them individually or as a pair. They make great gifts, and you can easily customize the pattern by adding stripes or a different stitch pattern. Enjoy your new hand warmers!
Casting On
Before you can start knitting your hand warmers, you need to cast on your stitches. Casting on is the process of creating the foundation row of stitches on your knitting needle. There are several methods for casting on, but for this pattern, we will be using the long-tail cast on method.
To begin, measure a length of yarn that is about three times the width of the item you will be knitting. Make a slip knot about 8 inches from the end of the yarn and place it on your knitting needle. Hold the needle in your right hand and the yarn in your left hand, with the tail of the yarn over your thumb and the working yarn over your index finger.
1. Bring the needle under the yarn on your thumb. With your right hand, bring your needle under the yarn that is over your thumb, from right to left.
2. Bring the needle over the yarn on your index finger. With your right hand, bring your needle over the yarn that is over your index finger, from left to right.
3. Bring the needle through the loop on your thumb. With your right hand, bring your needle through the loop on your thumb, from top to bottom.
4. Slide the loop off your thumb and onto the needle. Release the loop from your thumb and slide it onto the needle, forming your first stitch.
Repeat steps 1 to 4 until you have cast on the required number of stitches for your hand warmers. Pay attention to the tension of your stitches to ensure they are not too tight or too loose. Once you have finished casting on, you are ready to start knitting the first row of your hand warmer pattern.
Knitting the Body
Once you have finished knitting the ribbed cuff of the hand warmers, it’s time to move on to knitting the body. This is where the main part of the hand warmer takes shape and provides the warmth and comfort for your hands.
To knit the body, you will continue using the same stitch pattern as the cuff. If you’re following a pattern, it will usually specify the number of stitches you need to cast on for the body. Make sure to check your gauge to ensure the correct sizing.
As you knit the body, you can choose to add any additional design elements or stitches. This is where you can get creative and make the hand warmers unique to your style. You may also choose to knit the body in a different stitch pattern or texture to add visual interest.
It’s important to regularly try on the hand warmers as you knit the body to ensure a proper fit. You don’t want them to be too tight or too loose. If needed, you can adjust the number of stitches by increasing or decreasing, or even modify the length by adding or removing rows.
Once you have reached the desired length for the body, you will then move on to finishing the hand warmers, which typically involves shaping the top and closing the seams. But before that, make sure to carefully bind off the stitches to prevent unraveling. Now you’re one step closer to completing your hand warmers!
Shaping and Decreasing
Shaping and decreasing play an important role in creating a well-fitted and comfortable pair of hand warmers. By decreasing stitches at specific points, you can shape the hand warmers to hug your hands more snugly and provide a better fit.
One common method of decreasing stitches is called “k2tog” or “knit two together”. To do this, simply insert your right needle into two stitches at the same time and knit them together as if they were one stitch. This decreases the number of stitches by one.
Another popular decrease is called “ssk” or “slip, slip, knit”. To do this, slip the next stitch knitwise onto the right needle, then slip the following stitch knitwise onto the right needle. Insert the left needle into the fronts of these two slipped stitches and knit them together. This also decreases the number of stitches by one.
You can incorporate these decreases at specific points in your hand warmer pattern to create a shaped and tailored fit. For example, you might decrease a few stitches at the wrist to make the hand warmers more secure, or decrease near the fingertips to create a tapered shape.
Summary
Shaping and decreasing are essential techniques in knitting hand warmers. By strategically decreasing stitches, you can create a well-fitted and comfortable pair of hand warmers that provide a tailored fit. The “k2tog” and “ssk” decreases are commonly used to shape the hand warmers. Remember to plan and incorporate decreases at specific points to achieve the desired fit and shape.