
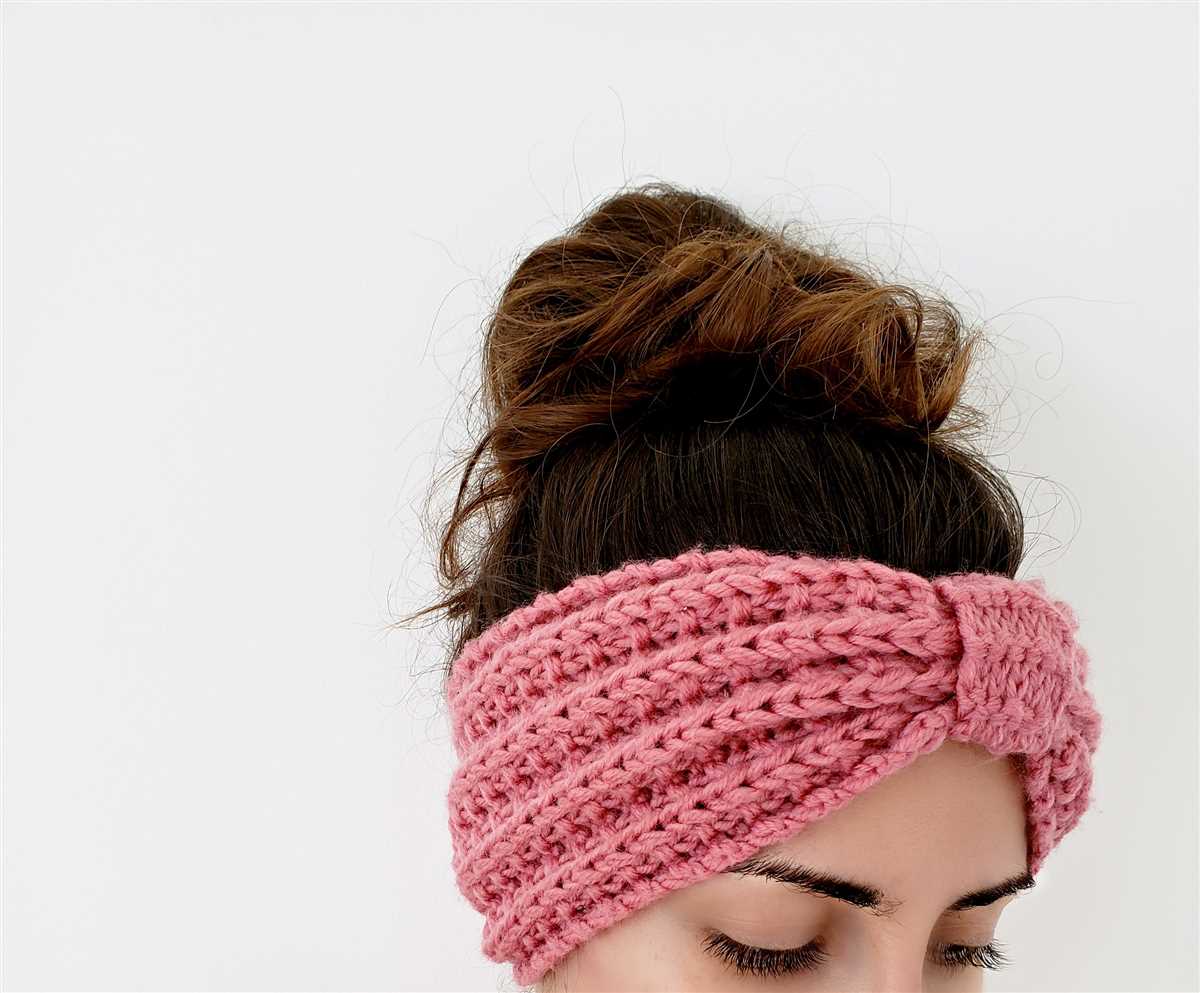
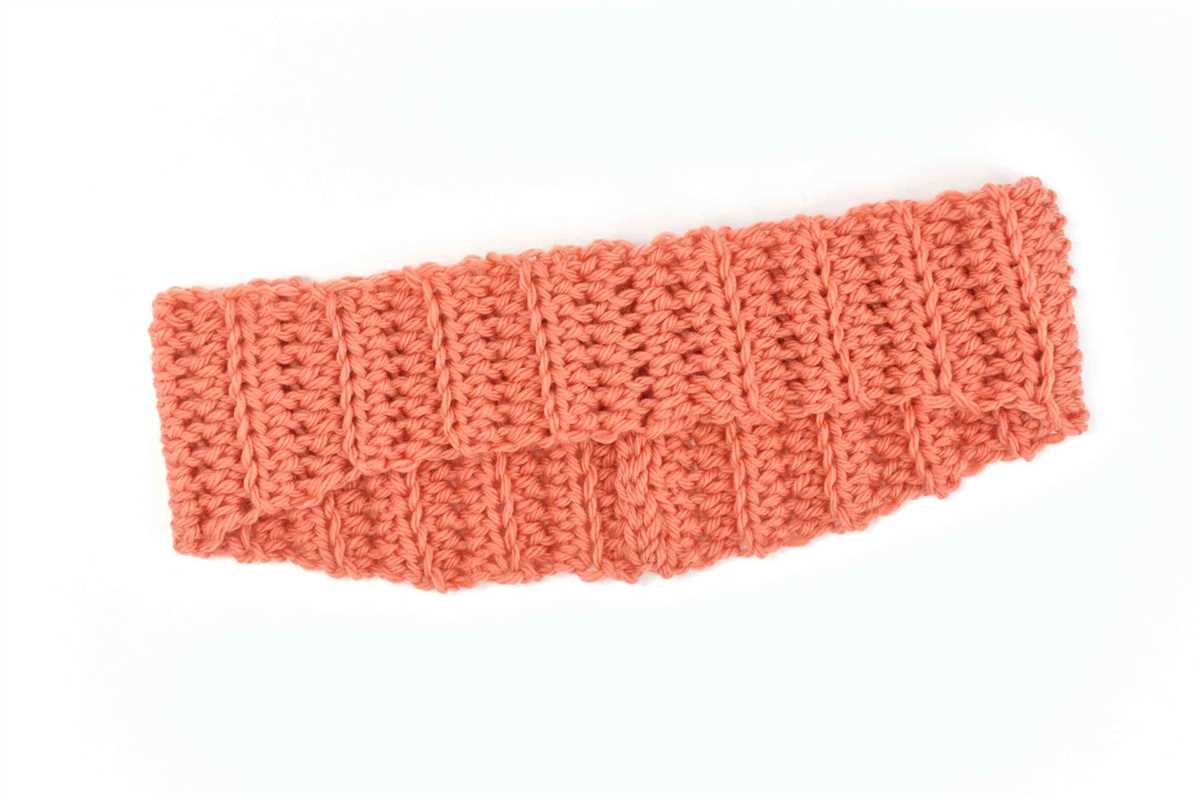
If you’re looking for a stylish and practical accessory to keep you warm during the colder months, then look no further than a knitted headband with a button closure. This free pattern is perfect for beginners and experienced knitters alike, and can be customized to fit any head size.
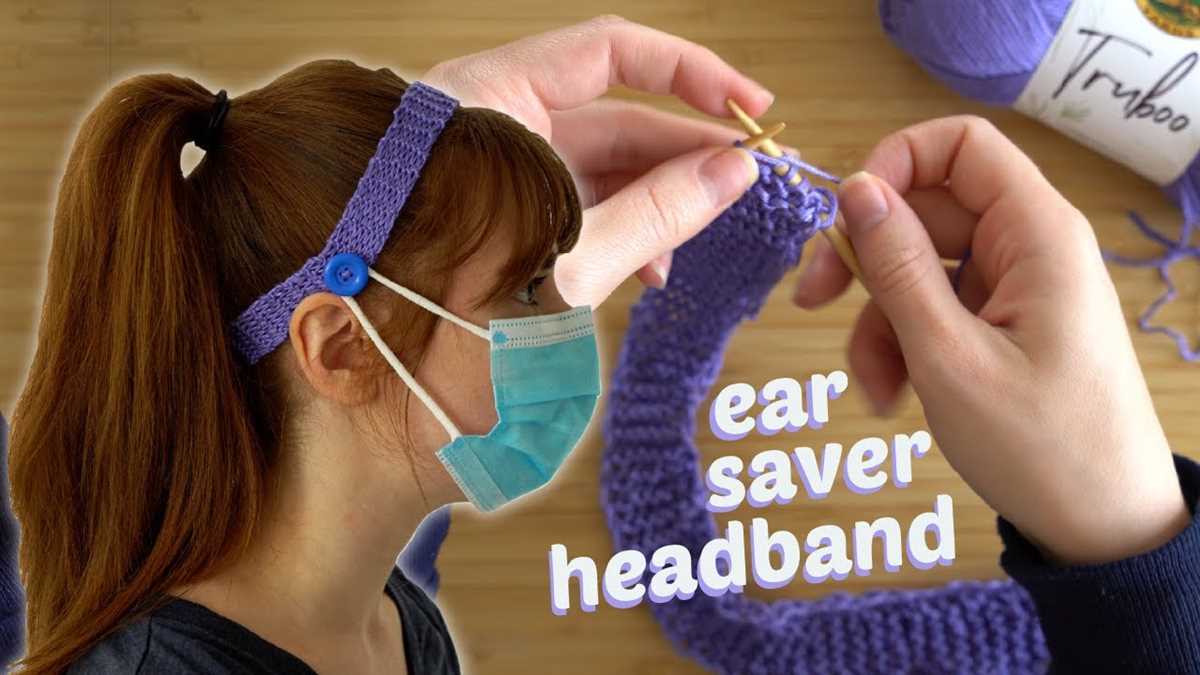
Knitted headbands are not only fashionable, but they also serve the purpose of keeping your ears warm on chilly days. With a button closure, you can easily adjust the size of the headband to ensure a perfect fit. Plus, the button adds a cute and trendy detail to the design.
With this free pattern, you’ll be able to create a headband that is not only functional but also stylish. The pattern includes step-by-step instructions and a list of materials you’ll need, making it easy for even the most novice knitter to follow along. Whether you’re making one for yourself or gifting it to a loved one, this knitted headband is sure to be a hit.
Knitted Headband with Button Closure: Free Pattern and Instructions
If you’re looking for a stylish and practical accessory to keep your ears warm during the colder months, a knitted headband with a button closure is the perfect option. This versatile headband can be easily adjusted to fit different head sizes and can be customized to match your personal style. Best of all, you can create your own knitted headband with a button closure using a free pattern and simple instructions.
To begin, gather the necessary materials for your project. You’ll need a pair of knitting needles (size may vary depending on your desired tension), worsted weight yarn in your preferred color, and a button for the closure. Once you have your materials ready, you can begin knitting the headband.
Instructions:
- Cast on an appropriate number of stitches, depending on the width you want for your headband. A common starting point is around 16-20 stitches.
- Proceed with your chosen stitch pattern, such as a simple garter stitch or ribbing. Knit rows in your pattern until your headband reaches the desired length, making sure to leave enough length for buttonhole placement.
- To create the buttonhole, stop knitting and bind off a few stitches in the middle of a row, leaving an opening large enough for your button to fit through comfortably. You can refer to a buttonhole tutorial if you’re unsure of the technique.
- Continue knitting in your chosen stitch pattern until the headband reaches the same length as the beginning.
- Bind off all stitches and weave in any loose ends.
- Attach the button to one end of the headband, ensuring that it aligns with the buttonhole on the opposite end.
Once you’ve completed these steps, your knitted headband with button closure is ready to wear. Simply wrap the headband around your head and secure it in place by slipping the button through the buttonhole. This practical accessory not only adds an extra layer of warmth but also adds a touch of style to any outfit.
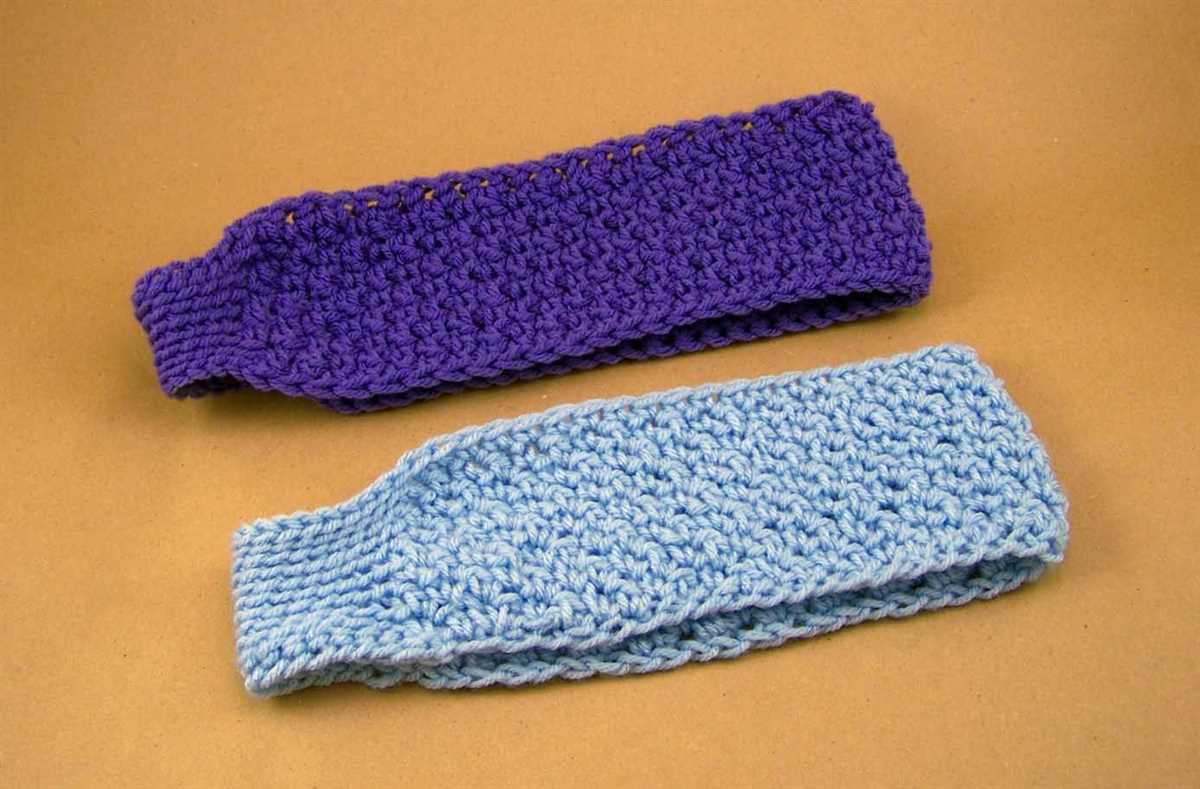
Materials needed for knitting a headband with button closure
Knitting a headband with button closure requires several materials to complete the project. Here is a list of the essential items you will need:
- Yarn: Choose a soft and warm yarn that is suitable for the desired thickness of the headband. Worsted weight or chunky yarns are commonly used.
- Knitting Needles: Use knitting needles that are appropriate for the yarn thickness. A pair of straight or circular needles in the recommended size should work well.
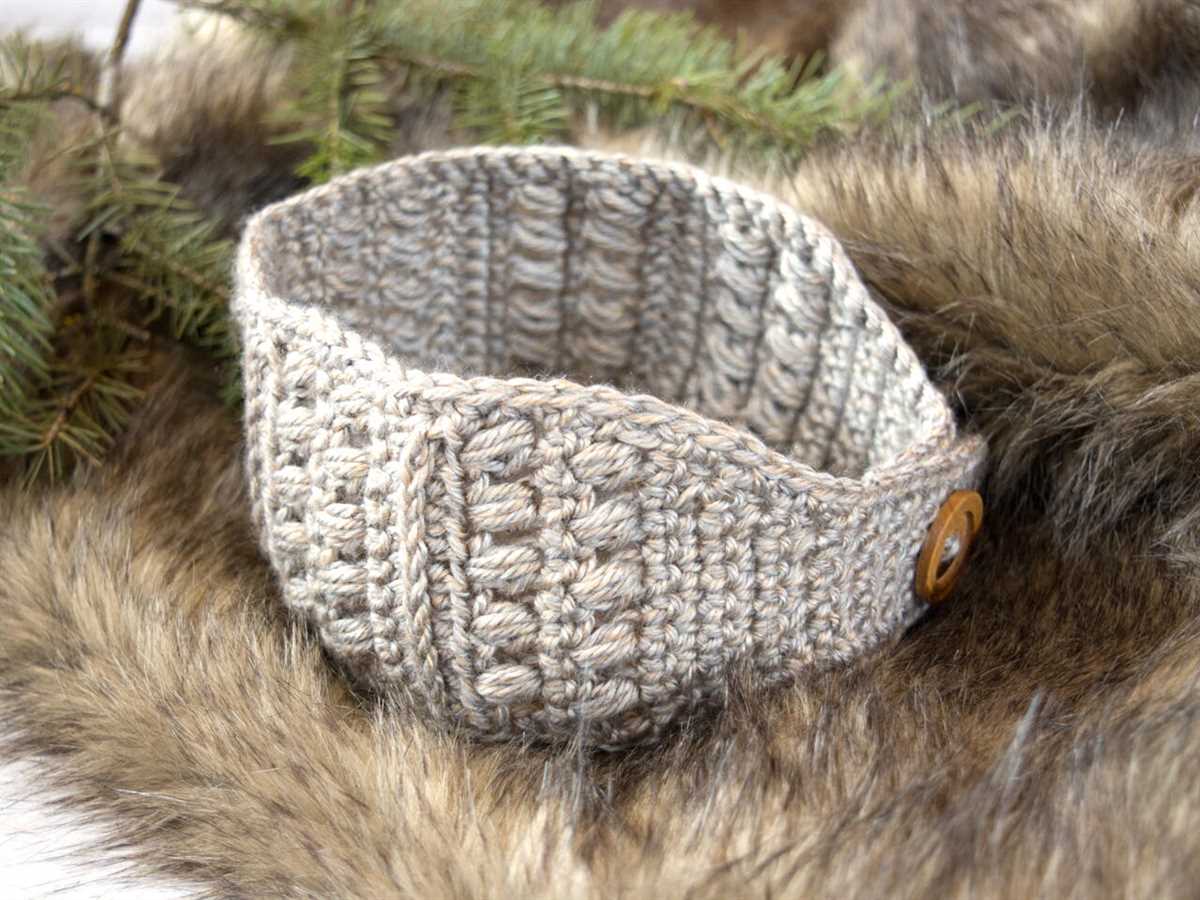
- Buttons: Select buttons that complement the yarn color and style of the headband. Make sure the buttons are large enough to securely fasten the closure.
- Tapestry Needle: This needle will be used for weaving in ends and sewing on buttons.
- Scissors: A pair of sharp scissors will be needed for cutting yarn and trimming any excess.
- Measuring Tape: A measuring tape is useful for taking measurements and ensuring the headband has the correct size.
With these materials on hand, you will be ready to start knitting your headband with a button closure. Remember to choose a yarn color and button style that you love, as the headband will be both functional and stylish.
Choosing the right yarn for your knitted headband
When it comes to knitting a headband with a button closure, it’s important to choose the right yarn to ensure both comfort and functionality. The yarn you select will determine the overall texture, stretch, and durability of your finished headband.
Fiber content: One of the first considerations when choosing yarn is the fiber content. For a headband that will be worn directly against the skin, it’s important to select a soft and comfortable yarn. Natural fibers like merino wool or cotton are popular choices due to their softness and breathability. However, if you’re looking for something more lightweight or moisture-wicking, a synthetic fiber like acrylic or nylon might be a better option.
Weight: The weight of the yarn will also play a role in the final look and feel of your headband. Bulky or chunky weight yarns will create a thicker and warmer headband, perfect for colder climates. If you prefer a more lightweight and delicate headband, a fingering or sport weight yarn would be more suitable.
Elasticity: Since the headband will need to stretch to fit comfortably on the wearer’s head, it’s important to select a yarn with enough elasticity. Yarns that contain a small percentage of elastic fibers like spandex or nylon can provide the necessary stretch and help maintain the shape of the headband over time.
Color and pattern: Finally, consider the color and pattern of the yarn. The headband is an accessory that can add a pop of color or act as a neutral accent to an outfit. Consider the wearer’s personal style and the intended purpose of the headband when selecting the color and pattern for your yarn.
By considering factors such as fiber content, weight, elasticity, and color, you can choose the perfect yarn for your knitted headband with a button closure. Whether you opt for a cozy wool or a lightweight cotton, the right yarn will enhance both the appearance and functionality of your headband.
Selecting the perfect buttons for your headband
Choosing the right buttons for your knitted headband can make a big difference in the overall look and functionality of the accessory. Here are some tips to help you select the perfect buttons:
Consider the size and weight
When selecting buttons for your headband, it’s important to consider the size and weight of the buttons. If you choose buttons that are too large or heavy, they may weigh down the headband and cause it to become uncomfortable to wear. On the other hand, buttons that are too small or lightweight may not provide enough secure closure for the headband to stay in place. Look for buttons that are just the right size and weight to ensure both comfort and functionality.
Think about the style and design

The style and design of the buttons can greatly impact the overall look of your headband. Consider the style of your headband and the outfit or occasion you will be wearing it for. Are you going for a more casual and playful look? In that case, you may want to opt for colorful and whimsical buttons. If you prefer a more elegant and sophisticated look, consider buttons with a sleek and minimalist design. The buttons you choose should complement the style and design of your headband while also reflecting your personal taste and style.
Ensure durability and functionality
Buttons on a headband are not just for decoration; they also serve a functional purpose in securing the headband in place. Therefore, it’s important to choose buttons that are durable and can withstand repeated use. Look for buttons that are made from quality materials and have a sturdy construction. Additionally, consider how easy it is to fasten and unfasten the buttons. Buttons that are too difficult to operate may become frustrating to use on a daily basis. Test the buttons for ease of use and make sure they are practical for the intended purpose of your headband.
By considering the size and weight, style and design, and durability and functionality of the buttons, you can select the perfect ones for your knitted headband. Remember to have fun experimenting with different button options and don’t be afraid to get creative to create a truly unique and stylish accessory.
Getting started: Casting on stitches for your headband

Before you can start knitting your headband, you need to cast on the required number of stitches onto your knitting needle. This will create the foundation row for your project. The number of stitches you cast on will depend on the size of the headband you want to create.
To begin, hold the knitting needle in your dominant hand and the yarn in your other hand. Make a slipknot at the end of the yarn, leaving a short tail. Insert the needle through the loop of the slipknot and tighten it onto the needle. This will be your first stitch.
Long-tail cast on: One common method for casting on stitches is the long-tail cast on. In this technique, you will use both hands to create the stitches. Hold the needle in your dominant hand and the yarn in your other hand. Using your thumb and index finger, create a loop of yarn over your thumb, leaving a long tail. Insert the needle into the loop from front to back and, with your needle, draw the yarn through the loop to create a new stitch. Repeat this process until you have cast on the desired number of stitches.
Knitted cast on: Another method you can use is the knitted cast on. To start, make a slipknot and insert the needle through the loop. Hold the needle with the slipknot in your dominant hand. Using your other hand, bring the working yarn between the needle tips. Insert the right needle into the first stitch on the left needle as if to knit. Wrap the yarn around the needle tip, from back to front. Draw the loop through the stitch, creating a new stitch on the right needle. Repeat this process until you have cast on the required number of stitches.
It’s important to ensure that your cast on stitches are not too tight or too loose, as this can affect the fit and comfort of the headband. You can adjust the tension of your cast on stitches by slightly tightening or loosening the yarn as you create each stitch. Take your time and practice the casting on method that you prefer until you are comfortable with it.
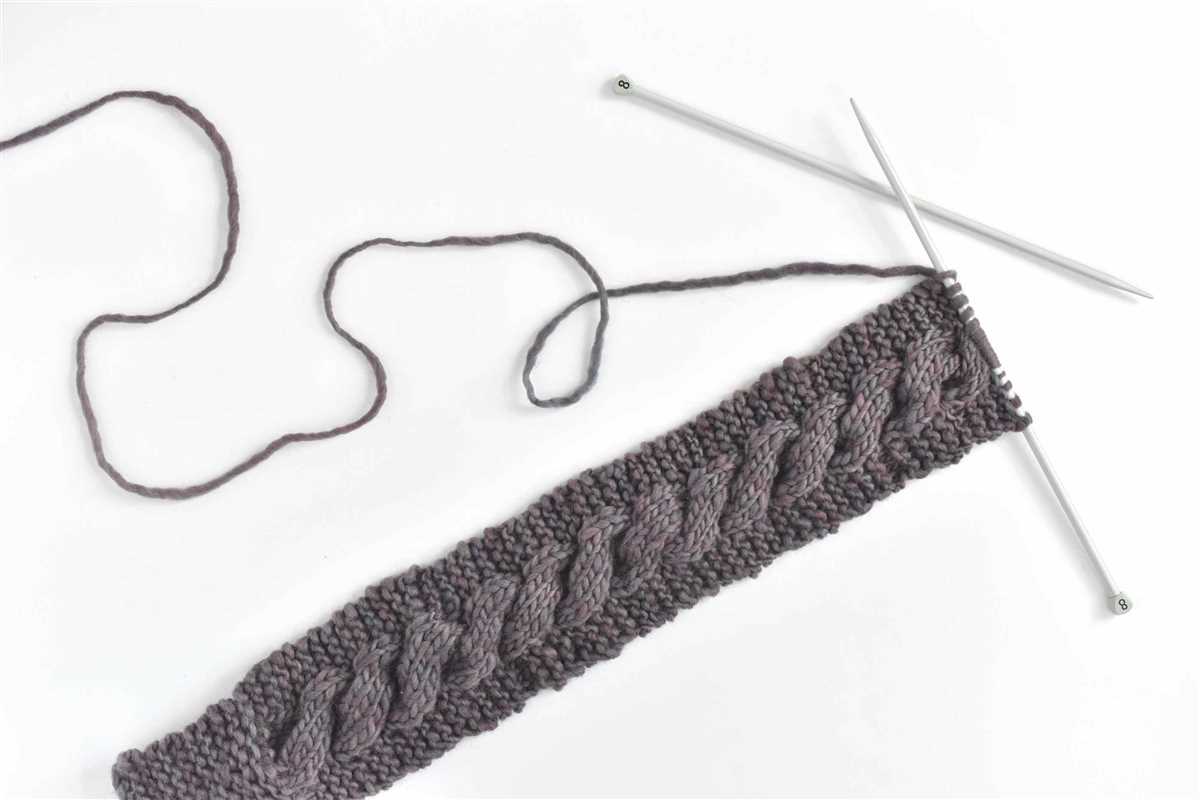
Knitting the main body of the headband
Once you have gathered all the necessary materials, including the yarn, knitting needles, and button, you can begin knitting the main body of the headband. It is important to choose a yarn that is soft and comfortable against the skin, as the headband will be worn around the forehead. Consider using a medium-weight yarn for a balance between warmth and breathability.
To start, cast on the desired number of stitches, which will depend on the size of your head and the desired width of the headband. You can use a knitting needle size that is appropriate for your chosen yarn, but it is generally recommended to use a slightly larger size than what is suggested on the yarn label to achieve a looser, more flexible fabric.
Continue knitting in the desired stitch pattern until the headband reaches the desired length, keeping in mind that it will stretch slightly when worn. Simple stockinette stitch or garter stitch can be good options for a classic look, or you can experiment with more intricate stitch patterns for added interest.
Once you have reached the desired length, bind off the stitches to secure the edge of the headband. Cut the yarn, leaving a tail for weaving in later. The main body of the headband is now complete, and you can move on to adding the button closure.
Creating the buttonholes in your knitted headband
Once you have completed the main portion of your knitted headband, it is time to create the buttonholes. Buttonholes provide a functional and decorative element to your headband, allowing you to easily secure it in place with a button of your choice.
To begin, determine the placement and size of your buttonholes. Mark these positions on your headband using a stitch marker or a piece of contrasting yarn. Generally, buttonholes are spaced evenly along the edge of the headband, with a distance of approximately an inch between each one. The size of each buttonhole will depend on the diameter of the buttons you plan to use.
Once you have marked the positions, it is time to create the buttonholes. This is typically done by binding off a certain number of stitches and then casting them back on in the following row. The exact technique for creating buttonholes may vary depending on the pattern you are following or your personal preference.
One common method is to bind off the required number of stitches for the buttonhole, knit to the next marked position, and then cast on the same number of stitches in the following row. This creates a small gap in the fabric that allows the button to slip through. Repeat this process for each marked position to create all of the buttonholes.
Once you have finished creating the buttonholes, try inserting your buttons through the gaps to ensure they fit comfortably. If necessary, adjust the size of the buttonholes or the chosen buttons to achieve the desired fit. Finally, sew the buttons onto the opposite edge of the headband, aligning them with the buttonholes.
Shaping the headband for a comfortable fit
When knitting a headband with a button closure, it is important to shape it correctly to ensure a comfortable fit. The shaping of the headband can vary depending on the desired style and the thickness of the yarn being used. Here are some key steps to consider when shaping the headband:
- Measuring the head: Start by measuring the circumference of the wearer’s head. This will give you an idea of how long the headband needs to be to fit comfortably.
- Calculating the number of stitches: Based on the gauge of your knitting and the head circumference, calculate the number of stitches needed for the headband. This will ensure that the headband is not too tight or too loose.
- Proper increases and decreases: To shape the headband, you may need to work increases and decreases at specific points. For example, you might start with a certain number of stitches and gradually increase or decrease at the sides to create a tapered shape.
- Testing the fit: As you knit the headband, it is important to periodically try it on the intended wearer to ensure a proper fit. This will help you make any necessary adjustments to the shaping as you go along.
By following these steps and paying attention to the measurements and fit, you can create a knitted headband with a button closure that is comfortable and stylish. The button closure adds a unique touch and allows for adjustability, making the headband suitable for different head sizes.
Adding button closures to your headband
If you want to give your knitted headband a functional and stylish closure, adding buttons can be a great option. Buttons not only provide a secure way to keep the headband in place, but they also add an extra touch of style and versatility to your accessory.
To add button closures to your headband, you will need a few extra materials. Firstly, choose buttons that complement the color and style of your headband. It’s best to opt for buttons that are not too big or heavy to ensure they won’t weigh the headband down. You will also need a needle and thread to attach the buttons securely.
Step 1: Mark the button placement
Before attaching the buttons, it’s important to determine where they should be placed on your headband. Measure the width of the headband and decide how many buttons you want to use. To ensure even spacing, mark the positions where the buttons will be sewn.
Step 2: Sew the buttons
Thread your needle with a strong thread that matches the color of your headband. Begin sewing the buttons onto the headband at the marked positions. Ensure that the thread is securely attached and the button is tightly sewn onto the fabric.
Step 3: Test the closures
Once all the buttons are sewn on, test the closures by sliding the headband on and fastening the buttons. Make sure the buttons hold the headband securely in place without any slipping or discomfort. Adjust the button placement if needed.
Adding button closures to your knitted headband not only keeps it securely in place but also adds a stylish touch to your accessory. Have fun selecting buttons that match your style and personality, and enjoy the added functionality they bring to your headband.
Finishing touches: Weaving in ends and blocking your headband
Once you have finished knitting your headband and have bound off the last stitch, there are a few final steps to give it a polished look and ensure it holds its shape.
To start, weave in any loose ends of yarn that may be sticking out from your headband. Using a tapestry needle, thread the end of the yarn through the stitches on the wrong side of the headband to secure it. Make sure to weave the yarn in a few different directions to prevent it from unraveling.
In addition to weaving in ends, blocking your headband is an important step to take. Blocking involves gently wetting your headband and reshaping it to the desired size and shape. This process can help even out any irregularities in your knitting and ensure that the headband sits nicely on your head.
To block your headband, fill a basin or sink with lukewarm water and a small amount of gentle detergent. Immerse the headband in the water, making sure it is fully saturated. Allow it to soak for about 10 minutes.
After soaking, remove the headband from the water and gently squeeze out any excess moisture. Lay it flat on a clean towel and use your hands to reshape it to the desired size and shape. If you want a wider headband, you can stretch it gently in the width. To ensure the headband stays in place while drying, you can use rust-proof pins or blocking wires to secure it in position.
Leave the headband to dry completely, which can take several hours or overnight. Once dry, you can remove the pins or wires and your headband will be ready to wear!
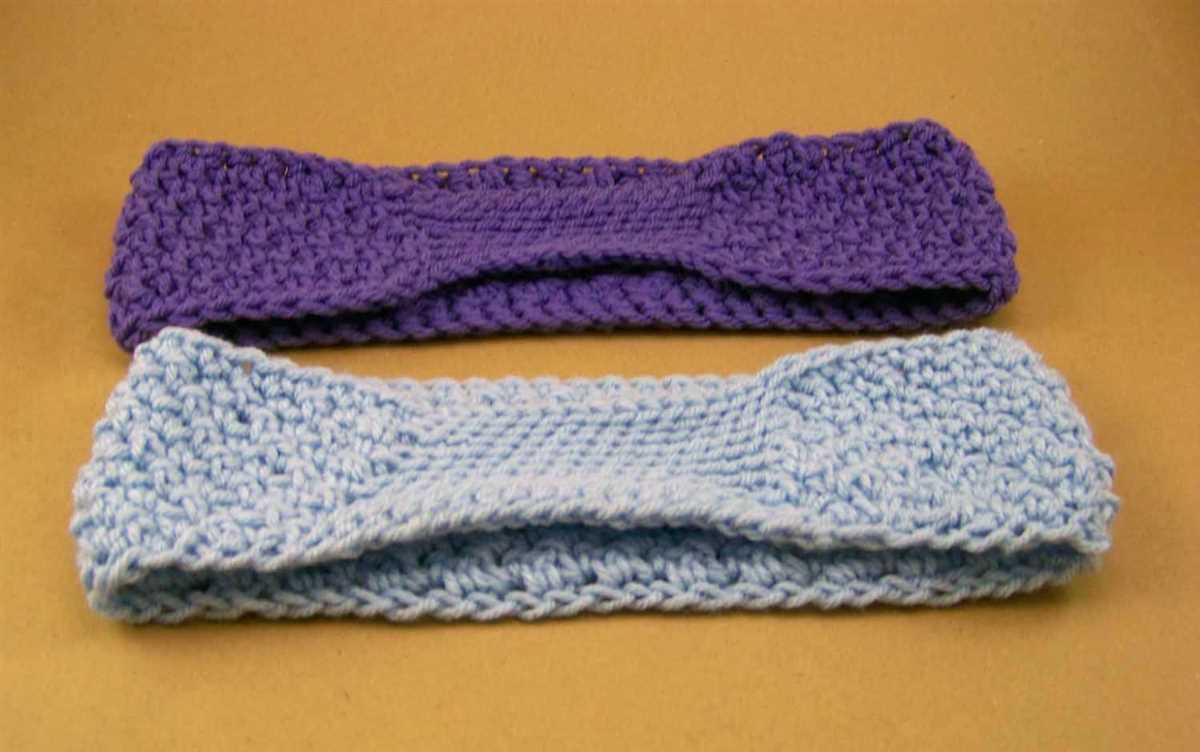
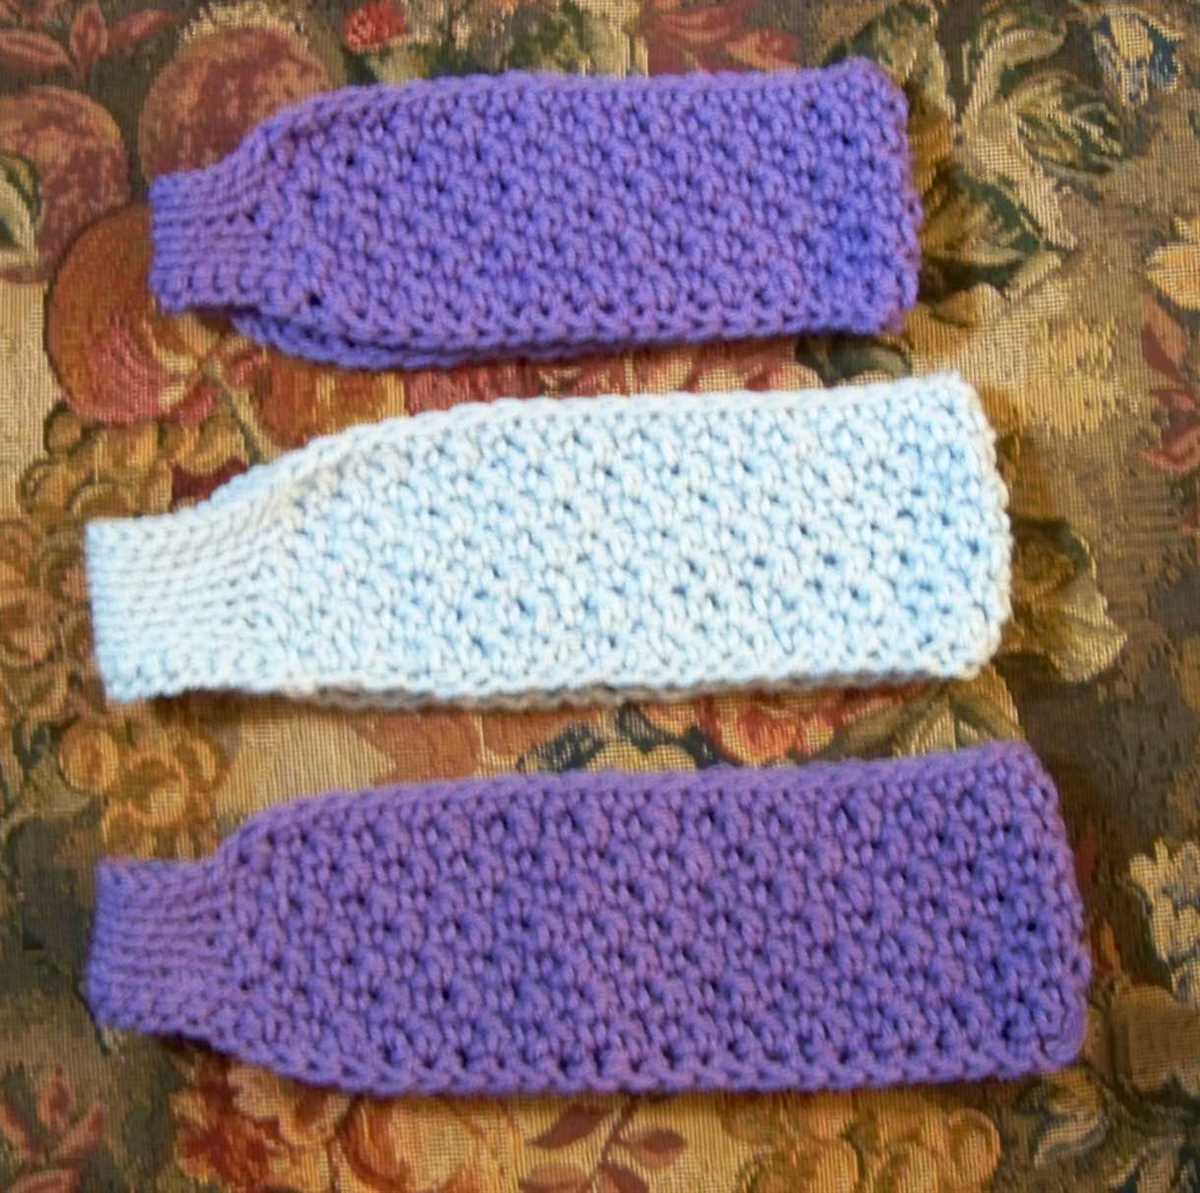
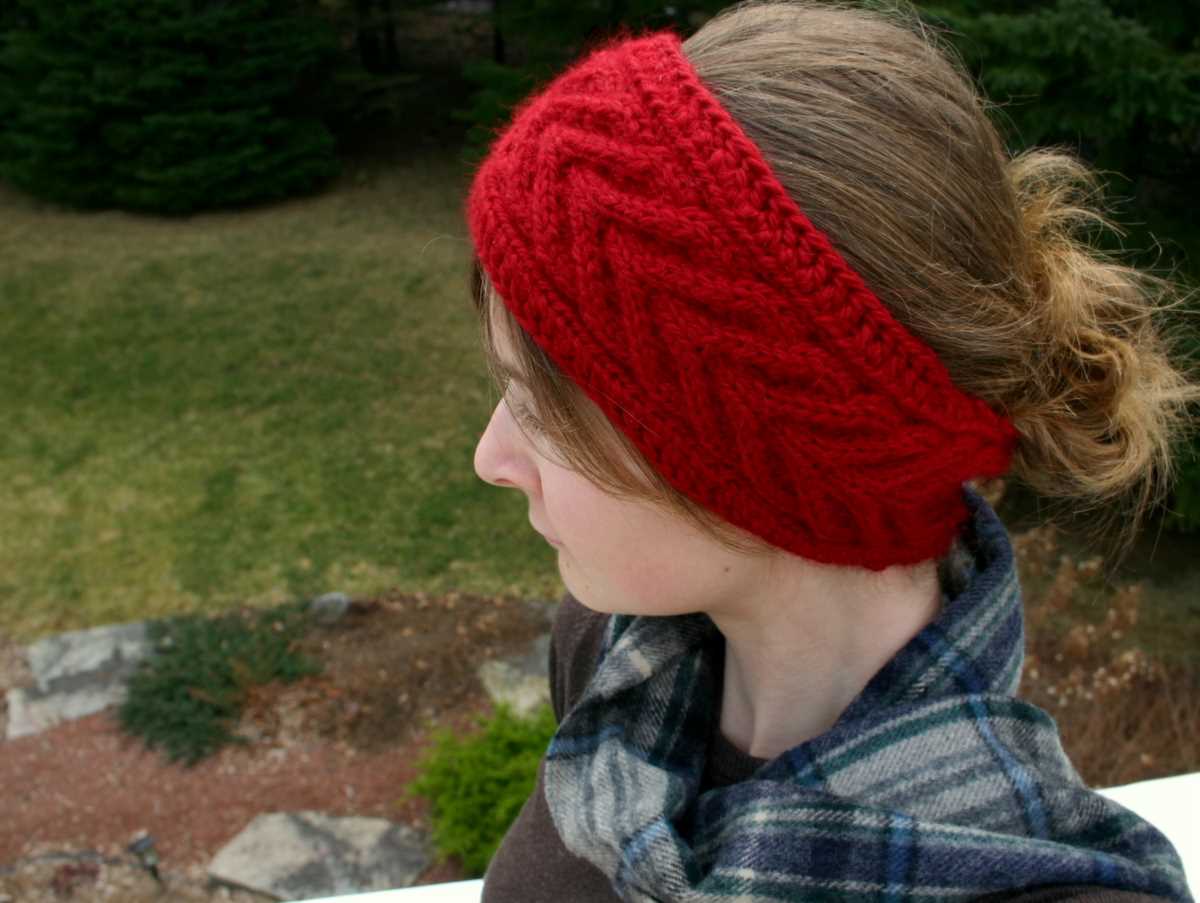
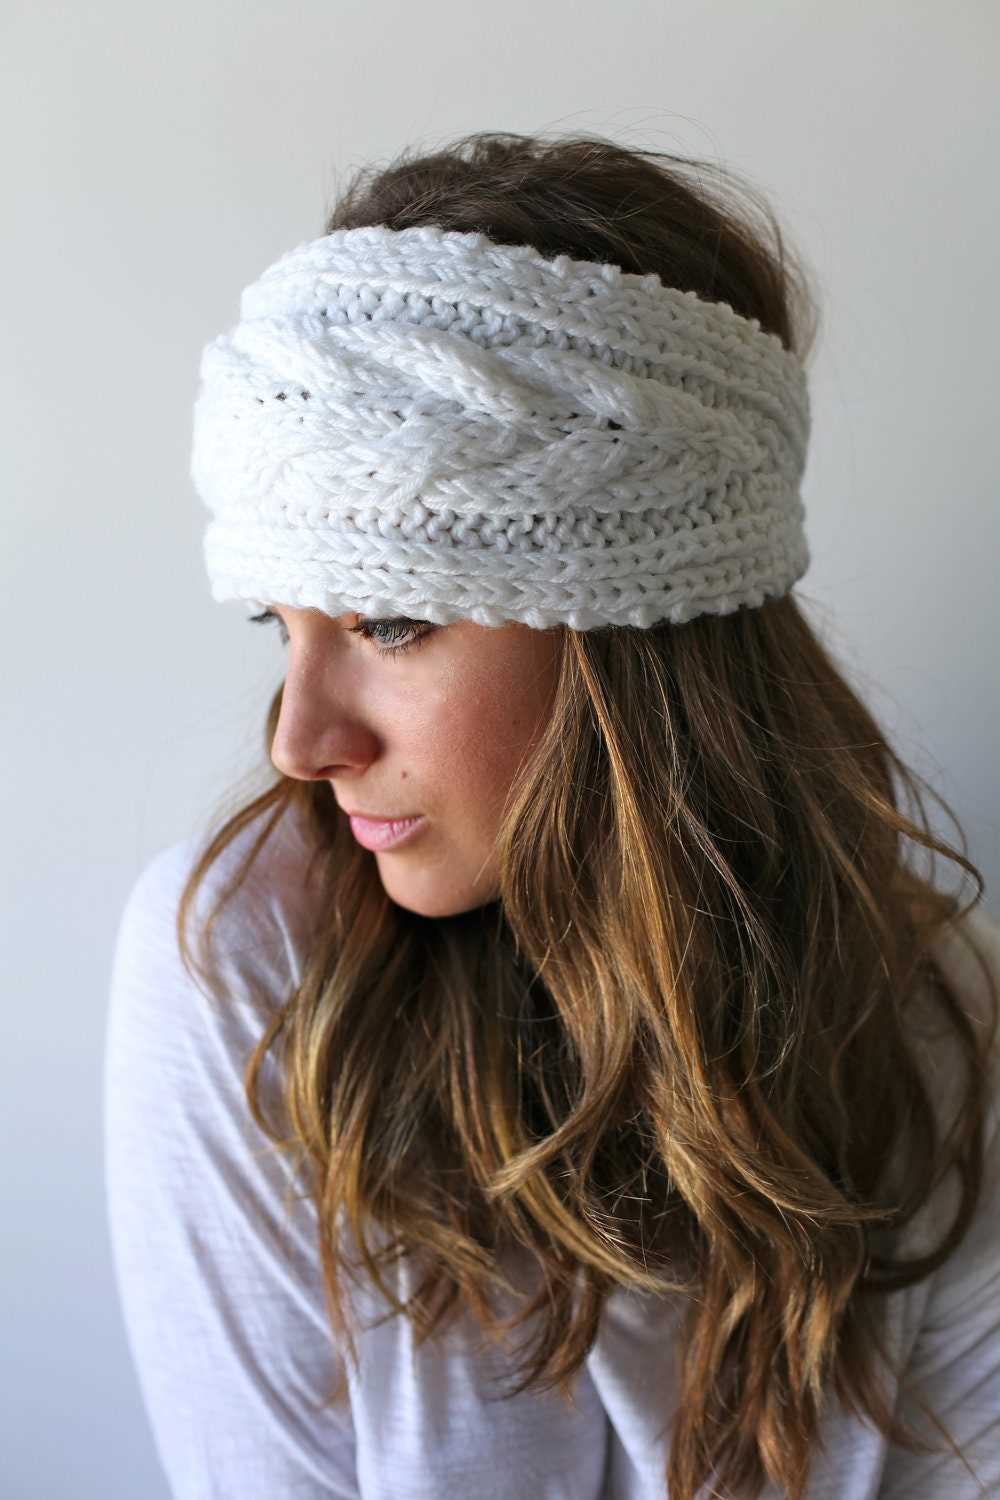
Styling and wearing your knitted headband with button closure
The knitted headband with button closure is not only a practical accessory for keeping your ears warm in colder weather, but it can also be a stylish addition to your outfit. With its unique design and customizable options, you can easily incorporate it into your everyday looks.
One way to style your knitted headband is by wearing it with your hair down. This allows the headband to stand out and adds a touch of sophistication to your overall look. You can choose a color that complements your outfit or go for a bold contrast to make a statement. Either way, the button closure adds an interesting detail that catches the eye.
If you prefer an updo or a ponytail, you can still wear the knitted headband with button closure. Simply gather your hair and secure it in place with a hair tie or bobby pins. Then, slide the headband over your head, making sure the button closure is at the back. This style is perfect for a casual day out or even a workout session, as it keeps your hair in place while adding a fashionable touch.
For a more bohemian look, you can wear the knitted headband as a forehead band. This style works best with a looser fit, allowing the headband to sit comfortably across your forehead. Pair it with flowy dresses, wide-leg pants, or a boho-inspired top for a whimsical and carefree vibe. The button closure adds a charming detail that sets it apart from traditional headbands.
With the versatility and unique design of the knitted headband with button closure, you can experiment with different hairstyles and outfits to create your own personal style. Whether you want to add a pop of color to a monochromatic look or make a statement with a bold pattern, this accessory is a must-have in any fashion enthusiast’s wardrobe.
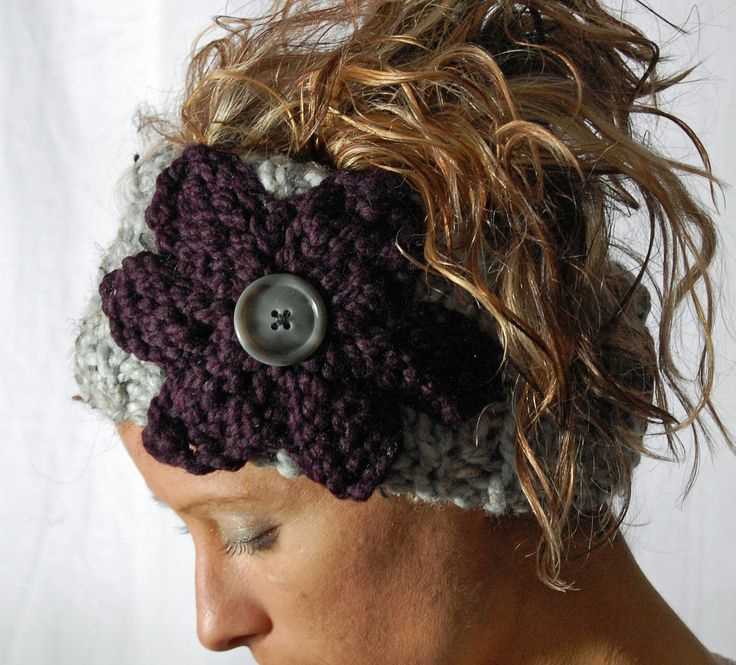
Additional tips and ideas for customizing your headband

Once you’ve mastered the basic pattern for a knitted headband with a button closure, you can get creative and personalize your headband with these additional tips and ideas:
- Color combo: Experiment with different color combinations by using multiple yarns or changing colors within the same yarn. This allows you to customize your headband to match your outfit or favorite colors.
- Texture play: Instead of using a plain yarn, try incorporating different textures by using a yarn with a mixed texture or combining different types of yarns together. This adds visual interest and makes your headband unique.
- Embellishments: Add buttons, beads, or other small embellishments to your headband for extra flair. You can sew them on or attach them using a crochet hook.
- Lace details: Give your headband a delicate touch by incorporating lace stitches into the pattern. This can be done by adding lace panels or incorporating lace motifs throughout the headband.
- Adjusting size: If you find that the headband is too tight or loose, you can easily adjust the size by increasing or decreasing the number of stitches in the initial rows.
Remember, these are just some ideas to get you started. Feel free to experiment and let your creativity shine through in your knitted headbands!
Conclusion
Knitting a headband with a button closure is a fun and practical project that allows you to keep warm and stylish during the colder months. By following the free pattern and using the additional tips and ideas provided, you can create a headband that suits your personal style and preferences. Whether you prefer bold colors, delicate lace details, or unique embellishments, the possibilities are endless with knitted headbands. Happy knitting!