
Get ready to be spookily creative this Halloween with these fun and festive toy knitting patterns. Whether you’re a knitting expert or just a beginner, these patterns are perfect for adding some extra charm to your Halloween decor or for surprising your little ones with a cute and cuddly Halloween toy.
Knitting toys is a great way to celebrate the Halloween season and showcase your knitting skills. From witches and ghosts to black cats and pumpkins, there are endless possibilities for creating the perfect Halloween toy. These patterns range from easy to intermediate difficulty, so there’s something for everyone.
Not only are these knitting patterns a fun and creative way to celebrate Halloween, but they also make great gifts for friends and family. Imagine the delight on a child’s face as they unwrap their very own knitted Halloween toy. Plus, knitting toys allows you to customize them to your heart’s content, whether it’s choosing the color of the witch’s dress or adding extra details to a spooky ghost.
So grab your knitting needles, some colorful yarn, and get ready to bring some Halloween magic to life with these adorable toy knitting patterns. Whether you’re looking to add some festive flair to your home or surprise a loved one with a handmade gift, these patterns are sure to bring a smile to your face and add some extra Halloween spirit to your celebrations.
Halloween Toy Knitting Patterns
Looking to add some spooky fun to your knitting projects? Halloween toy knitting patterns are a great way to bring some festive spirit to your creations. Whether you’re an experienced knitter or just starting out, there’s a wide range of patterns available to suit all skill levels.
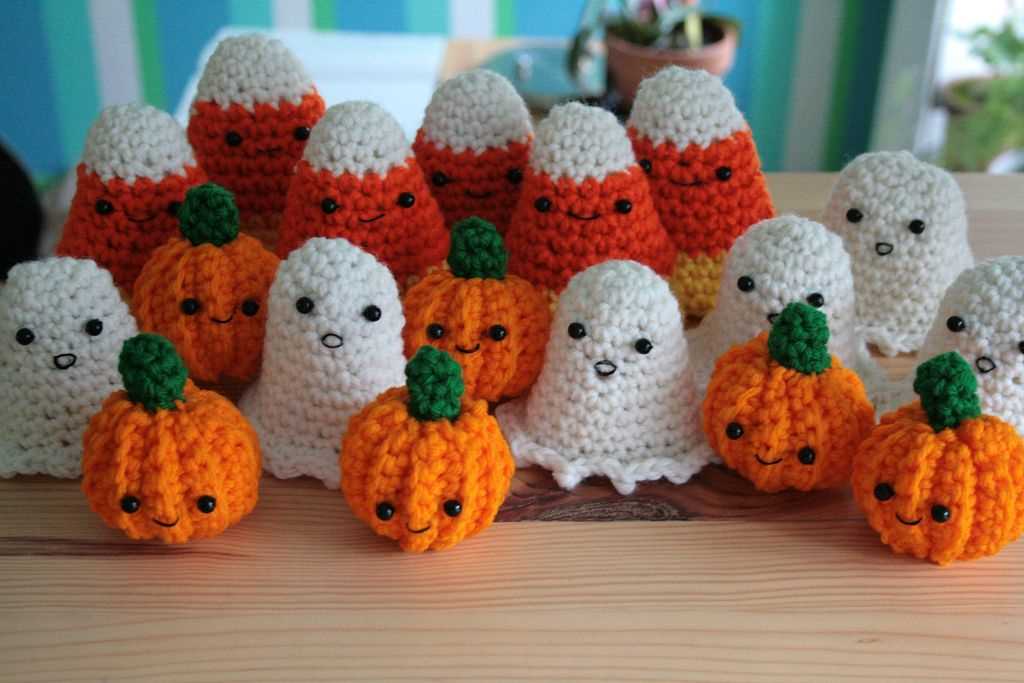
One popular Halloween toy knitting pattern is the classic pumpkin. This pattern typically includes instructions for knitting a small stuffed pumpkin, complete with a stem and facial features. It’s a versatile pattern that can be customized with different colors and expressions to create a unique and personalized Halloween decoration.
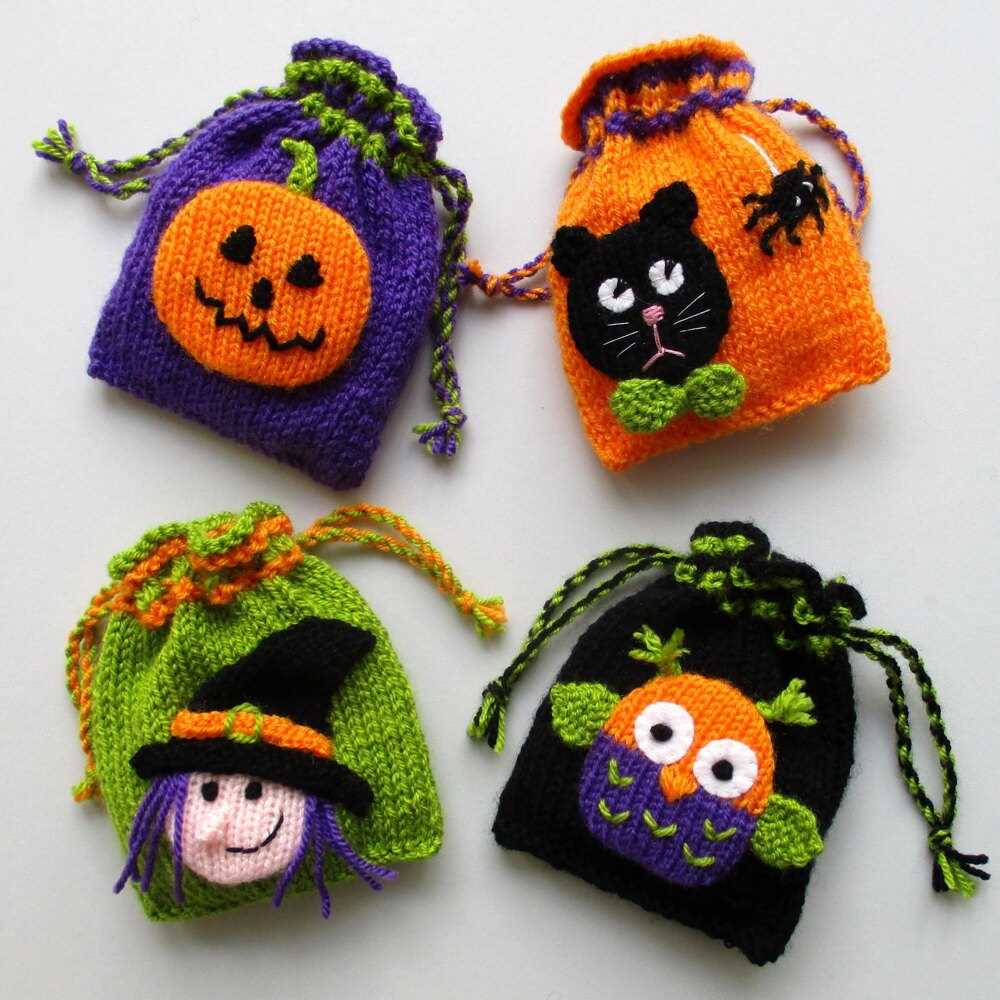
Another fun option is knitting patterns for witches. You can find patterns for knitting cute witch dolls or even miniature broomsticks. These toys make great decorations for Halloween parties or can be given as gifts to friends and family.
If you’re feeling adventurous, you can try knitting patterns for spooky creatures like bats, spiders, or black cats. These patterns often include detailed instructions for shaping the toys and adding small details like wings or fangs. They can be a fun challenge for more experienced knitters and can result in adorable and unique Halloween decorations.
To make your Halloween toys even more special, consider using yarn in festive Halloween colors like orange, black, and purple. You can also add extra embellishments like ribbons or googly eyes to give your creations a playful touch. Whichever patterns you choose, Halloween toy knitting is a fun and creative way to celebrate the season and add a unique touch to your home decor.
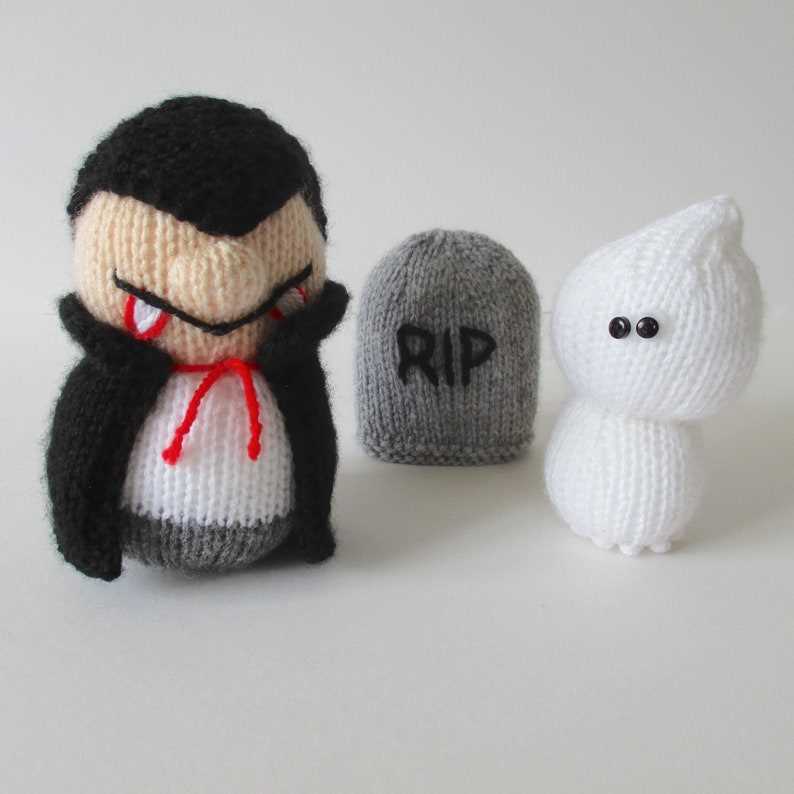
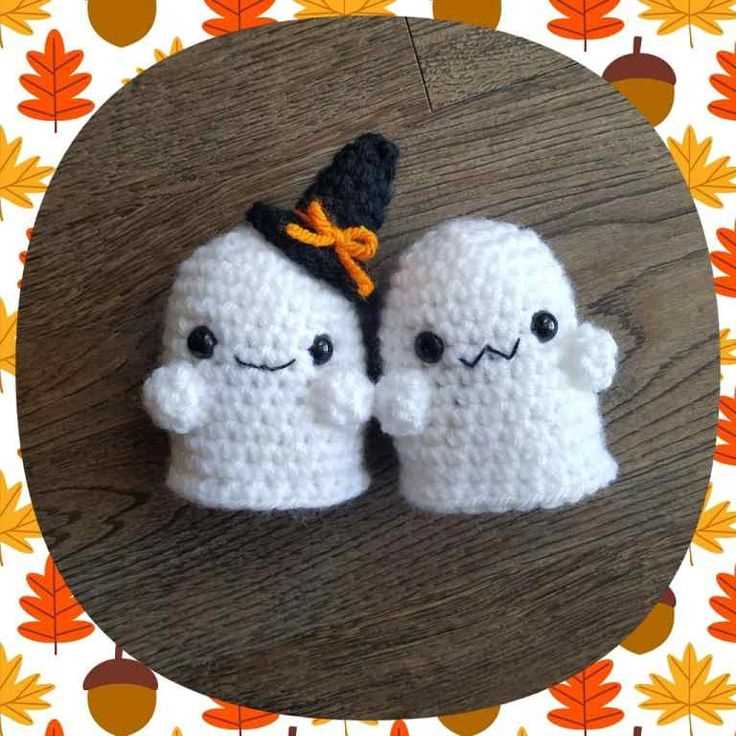
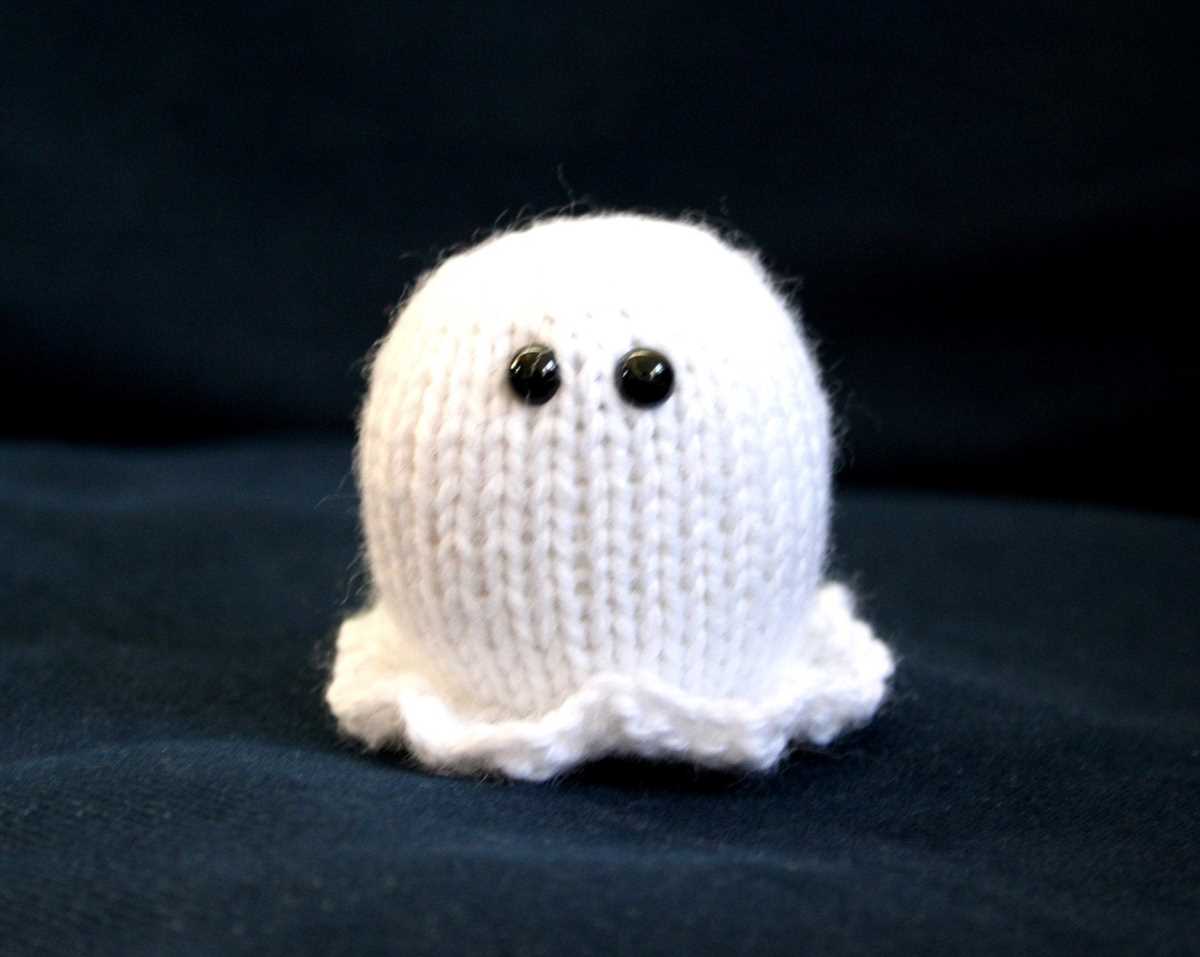
Spooky Ghost Knitting Pattern
Are you looking for the perfect Halloween toy to knit? Look no further than this spooky ghost knitting pattern! This pattern is perfect for all levels of knitters and will result in a adorable ghost that will be sure to add a touch of Halloween fun to your home.
Materials:
- White knitting yarn
- Black knitting yarn
- Knitting needles
- Stuffing
- Tapestry needle
Instructions:
- Using the white knitting yarn, cast on 40 stitches.
- Work in stockinette stitch for 10 rows.
- Switch to the black knitting yarn and work in garter stitch for 5 rows.
- Switch back to the white knitting yarn and work in stockinette stitch for 10 rows.
- Repeat steps 2-4 three more times.
- Shape the head by decreasing 2 stitches at the beginning and end of each row for 10 rows.
- Break yarn, leaving a long tail. Thread the tapestry needle and slip the stitches onto the needle, pulling tight to close the top of the head.
- Stuff the body of the ghost using the stuffing.
- Shape the body by decreasing 2 stitches at the beginning and end of each row for 15 rows.
- Break yarn, leaving a long tail. Thread the tapestry needle and slip the stitches onto the needle, pulling tight to close the bottom of the ghost.
- Using the black knitting yarn, embroider eyes and a mouth onto the ghost’s head.
And voila! Your spooky ghost toy is complete. This knitting pattern is a fun and creative way to celebrate Halloween and create a unique decoration for your home. Happy knitting!
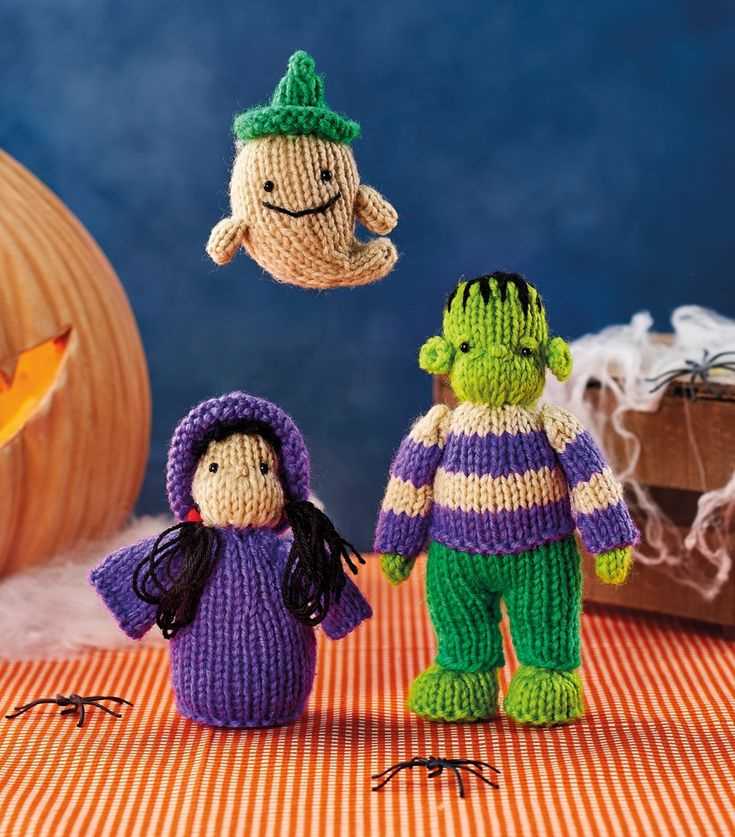
Cute Witch Toy Knitting Pattern
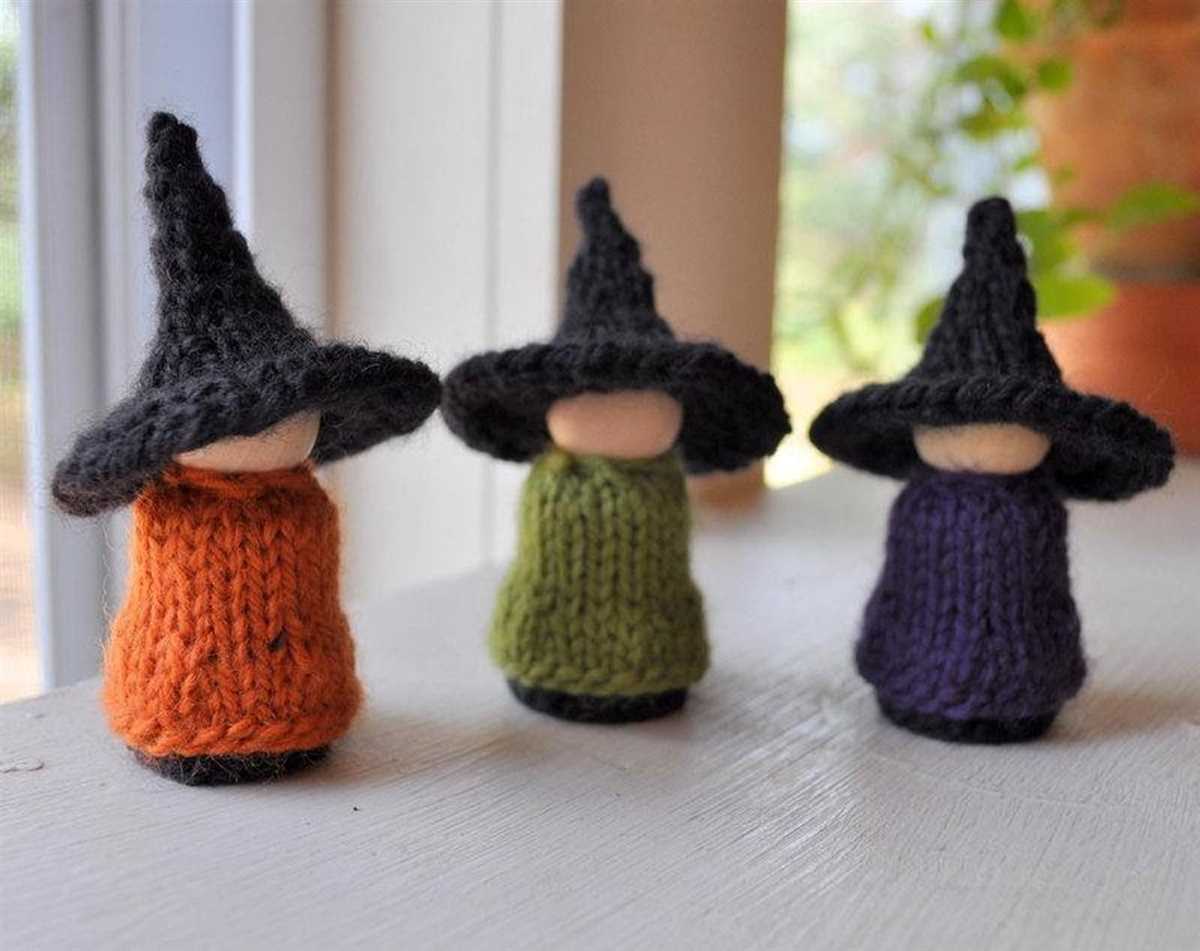
If you’re looking to add some Halloween charm to your knitting projects, this Cute Witch Toy Knitting Pattern is a must-try. With its adorable design and whimsical details, this toy will make a perfect addition to your Halloween decor or a delightful gift for a loved one.
Materials:
- DK weight yarn in black, purple, and green
- 3.5mm knitting needles
- Polyester fiberfill for stuffing
- Tapestry needle
- Scissors
Instructions:
- Using black yarn, cast on 20 stitches.
- Knit in stockinette stitch for 10 rows.
- Switch to purple yarn and knit in stockinette stitch for 5 rows.
- Switch to green yarn and knit in stockinette stitch for 10 rows.
- Switch back to black yarn and knit in stockinette stitch for 10 rows.
- Switch to purple yarn and knit in stockinette stitch for 5 rows.
- Switch to black yarn and knit in stockinette stitch for 10 rows.
- Bind off all stitches.
- Continue knitting and following the pattern for the witch’s hat, arms, and broomstick.
Tips:
- Make sure to stuff the toy firmly to give it a nice shape.
- Use the tapestry needle to stitch the different parts together.
- Feel free to get creative with the colors and add any additional embellishments you’d like, such as a tiny cape or a sparkly hat band.
With this Cute Witch Toy Knitting Pattern, you’ll have a charming and festive toy that will bring a touch of magic to your Halloween celebrations. Enjoy the process of knitting and watch as this adorable witch comes to life in your hands.
Vampire Teddy Bear Knitting Pattern
Looking for a spooky and adorable Halloween toy to knit? Look no further than the Vampire Teddy Bear knitting pattern! This pattern is perfect for anyone who loves vampires and cuddly bears. With its fangs, cloak, and bow tie, this teddy bear is ready to haunt your dreams in the most adorable way.
To make this Vampire Teddy Bear, you will need some basic knitting skills and materials. The pattern includes instructions to knit the body, arms, legs, and head. You will also need to embroider the bear’s facial features and sew on the fangs. Don’t forget to add the cape and bow tie for that extra touch of vampire charm.
When making this Vampire Teddy Bear, you have the freedom to choose your own yarn colors. Whether you want a classic black and red vampire bear or something more unique, the choice is up to you. The pattern also includes instructions for different sizes, so you can make a small or large bear depending on your preference.
This Vampire Teddy Bear is not only a fun Halloween decoration, but also a great gift for vampire enthusiasts of all ages. Whether you keep it for yourself or give it as a present, this adorable vampire bear is sure to bring a smile to anyone’s face. So grab your knitting needles and get ready to create your very own Vampire Teddy Bear!
Materials Needed:
- Knitting needles
- Yarn in desired colors
- Embroidery needle
- Stuffing
- Safety eyes
- Black thread
- Scissors
Instructions:
- Start by knitting the body of the bear.
- Continue onto the arms and legs.
- Knit the head and embroider the facial features.
- Sew on the fangs and attach the safety eyes.
- Make the cape and bow tie.
- Assemble all the parts together.
- Stuff the bear and sew up any openings.
- Your Vampire Teddy Bear is now complete!
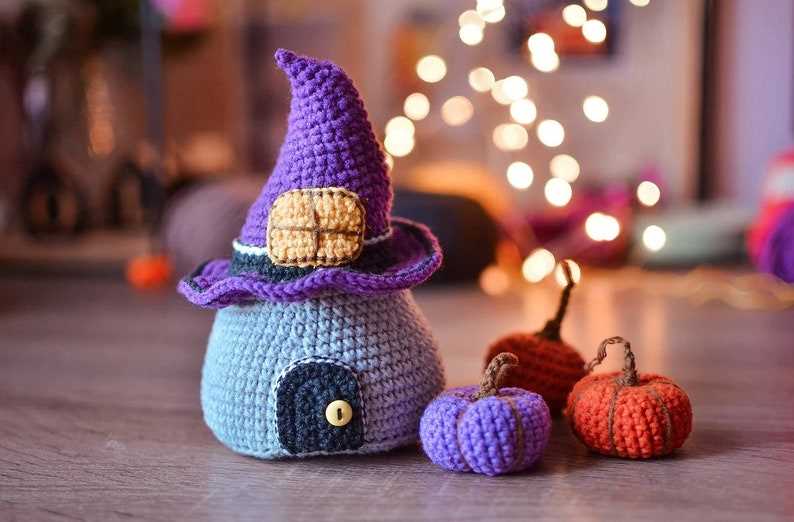
Pumpkin Toy Knitting Pattern
If you’re looking for a fun and festive knitting project for Halloween, why not try making your own pumpkin toy? This knitting pattern is perfect for beginners and is a great way to add a touch of Halloween spirit to your home decor.
To make this pumpkin toy, you will need orange and green yarn, as well as knitting needles and stuffing. The pattern uses basic knitting stitches, such as knit and purl, and is worked in the round. The finished toy is about 5 inches tall, making it the perfect size for decorating your home or giving as a gift.
Materials:
- Orange yarn
- Green yarn
- Knitting needles
- Stuffing
- Yarn needle
Instructions:
- Cast on 24 stitches with orange yarn.
- Knit in the round for 10 rows, alternating between knit and purl stitches.
- Switch to green yarn and knit 2 rows.
- Switch back to orange yarn and knit 10 rows.
- Switch to green yarn and knit 2 rows.
- Switch back to orange yarn and knit 10 rows.
- Decrease by knitting 2 stitches together every other row until you have 6 stitches left.
- Thread the yarn through the remaining stitches and pull tight to close the top of the pumpkin.
- Stuff the pumpkin with stuffing, making sure to fill it evenly.
- Thread the yarn needle with green yarn and stitch a few stitches at the top to create the pumpkin stem.
Once you’ve finished knitting and stuffing your pumpkin toy, you can use it to decorate your home for Halloween or give it as a gift to a friend. This cute and festive toy is sure to bring a smile to anyone’s face!
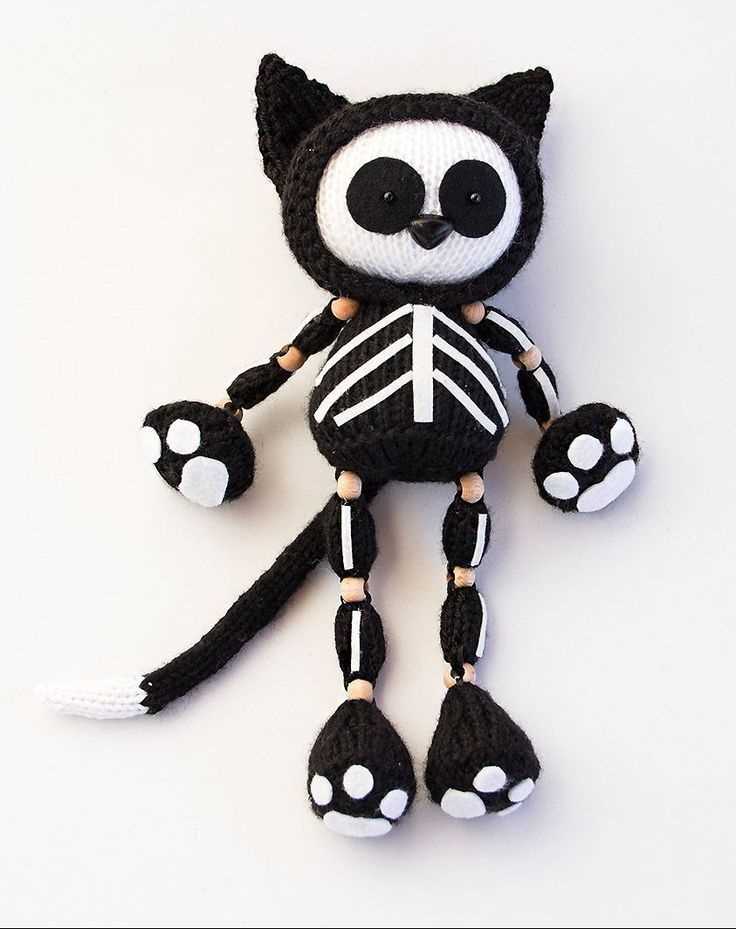
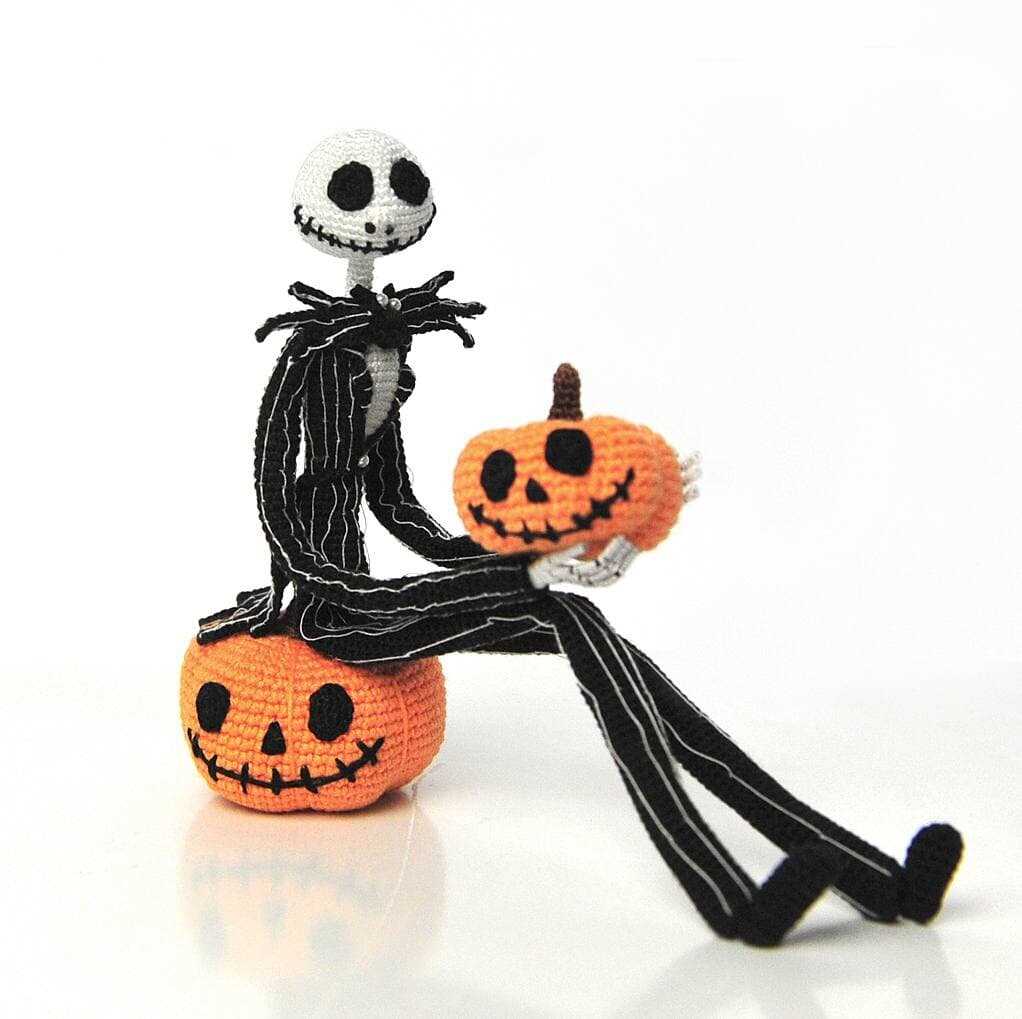
Skeleton Doll Knitting Pattern
The Skeleton Doll Knitting Pattern is a perfect toy for Halloween. With its spooky and skeletal design, it adds an eerie touch to any Halloween decoration or display. This knitting pattern provides a step-by-step guide to creating your very own skeleton doll, complete with movable limbs and a detachable skull. The finished doll is approximately 10 inches tall, making it an ideal size for displaying on a shelf or using as a prop for storytelling or imaginative play.
The pattern requires intermediate knitting skills, as it involves techniques such as knitting in the round, decreasing stitches, and seaming. The materials needed for this project include worsted weight yarn in black and white, double-pointed knitting needles, stuffing, and safety eyes. The pattern also includes instructions for adding additional details such as a rib cage and spinal column, giving the doll a more realistic skeleton appearance.
The Skeleton Doll Knitting Pattern is a versatile project that can be customized to fit your Halloween decorating theme. You can choose to knit the doll in different colors or add accessories such as a miniature top hat or a cape. Additionally, you can experiment with different yarn weights to create dolls of varying sizes.
Whether you’re a knitting enthusiast looking for a unique Halloween project or a parent wanting to create a spooky toy for your child, the Skeleton Doll Knitting Pattern is a great choice. With its detailed instructions and customizable options, you can create a one-of-a-kind skeleton doll that will be sure to delight and spook all who see it.
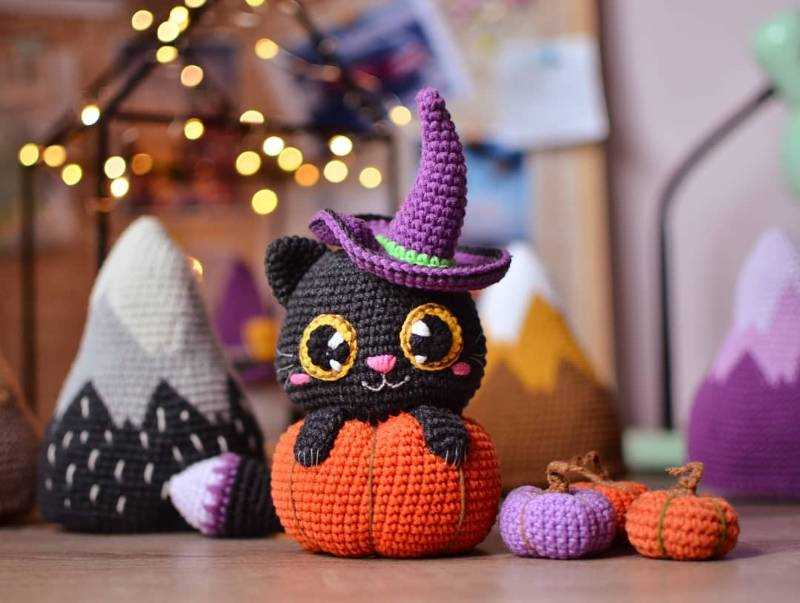
Black Cat Toy Knitting Pattern
If you’re looking for a fun and spooky knitting project to celebrate Halloween, why not try making your own black cat toy? This adorable toy will add a touch of Halloween magic to your home decor, and it’s also a great gift idea for cat lovers.
To create your black cat toy, you’ll need a few essential knitting skills and materials. First, gather some black yarn and knitting needles in a suitable size. You may also want to add a small amount of white yarn for the eyes and nose. Once you have your materials ready, it’s time to start knitting!
Begin by casting on the required number of stitches to form the body of the cat. Use a simple knitting stitch to create the stockinette pattern, working back and forth in rows. As you progress, shape the toy by decreasing and increasing stitches to create the distinctive shape of a cat. Don’t forget to leave a small opening for stuffing!
After completing the body, move on to the ears, tail, and limbs. These can be knitted separately and then sewn onto the body. Use black yarn for these parts as well, and you can also add some details like stripes or spots if desired. Attach the eyes and nose using small amounts of white yarn, and embroider any additional facial features.
Once you have all the pieces knitted and assembled, it’s time to stuff the toy. Use polyester fiberfill or another suitable stuffing material to give the cat a soft and cuddly feel. Make sure to stuff it evenly and firmly, paying special attention to the limbs and tail.
Finally, sew up the opening on the body and give your black cat toy a final inspection. Adjust any details if necessary and trim any excess yarn. Your Halloween black cat toy is now ready! Display it proudly as part of your Halloween decorations or give it as a special gift to someone who appreciates handmade items.
Frankenstein Monster Knitting Pattern
If you’re looking for a spooky and fun Halloween toy knitting project, look no further than this Frankenstein Monster Knitting Pattern. With its iconic green skin, bolts on the neck, and stitched details, this toy is sure to delight both kids and adults alike.
The pattern provides step-by-step instructions on how to create your very own Frankenstein Monster toy. It includes detailed knitting techniques, such as how to knit in the round, how to increase and decrease stitches, and how to sew the different parts together. Whether you’re a beginner or an experienced knitter, you’ll find this pattern easy to follow and rewarding to complete.
Materials needed:
- Green yarn for the body
- Black yarn for the hair
- White yarn for the eyes and mouth
- Needles in the appropriate size for the yarn
- Stuffing
- Two small buttons for the bolts
- Tapestry needle for sewing
- Scissors
Instructions:
- Start by knitting the body in the round using the green yarn.
- Next, knit the head separately and attach it to the body.
- Continue by knitting the hair and sewing it onto the head.
- Embroider the eyes and mouth using the white yarn.
- Attach the small buttons as bolts on the sides of the neck.
- Finally, stuff the toy with the stuffing and sew up the bottom.
This Frankenstein Monster Knitting Pattern is a great way to get into the Halloween spirit and create a unique and adorable toy. Whether you’re giving it as a gift or decorating your home, this little monster is sure to be a hit!
Spider Toy Knitting Pattern
If you’re looking to add a creepy-crawly touch to your Halloween decorations, a knitted spider toy is the perfect choice. This spider toy knitting pattern will guide you through creating your own adorable yet spooky spider companion.
Materials:
- Yarn in black and white
- Knitting needles
- Stuffing
- Black safety eyes
Instructions:
- Start by casting on 10 stitches with black yarn.
- Knit each row until the piece measures 4 inches in length.
- Switch to white yarn and knit 2 rows.
- Switch back to black yarn and knit 2 rows.
- Repeat steps 3 and 4 two more times.
- Next, knit 2 stitches together at the beginning and end of each row until there are only 2 stitches left. Bind off.
- Repeat steps 1-7 to create a second piece.
- With white yarn, embroider a web pattern onto one of the black pieces.
- Using black yarn, sew the two black pieces together, leaving a small opening for stuffing.
- Insert stuffing into the spider, making sure to stuff evenly throughout.
- Attach the black safety eyes to the front of the spider.
- Sew up the opening used for stuffing.
- Your knitted spider toy is now complete and ready for spooky adventures!
Zombie Doll Knitting Pattern

If you’re looking for a spooky and unique knitting project for Halloween, why not try making a Zombie Doll? This Zombie Doll Knitting Pattern will guide you through the process of knitting a cute and creepy toy that is perfect for the Halloween season.
This pattern provides step-by-step instructions on how to knit various parts of the Zombie Doll, including the head, body, limbs, and even the tattered clothing. The pattern also includes detailed instructions on how to embroider the doll’s facial features, including the hollow eyes and stitched mouth, giving the doll its zombie-like appearance.
Materials:
- Worsted weight yarn in green, gray, and black
- Knitting needles in size US 6
- Stuffing
- Yarn needle
Instructions:
- Start by knitting the head of the Zombie Doll using the green yarn. Follow the provided pattern for the head, including decreasing and shaping to create a rounded shape.
- Next, knit the body using the gray yarn. The body should be slightly larger than the head to create a more realistic zombie shape.
- Once the head and body are complete, move on to knitting the limbs. You will need to knit two arms and two legs using the green yarn.
- After all the body parts are knitted, stuff them with the stuffing to give the doll a plush and cuddly feel.
- Using black yarn, embroider the doll’s facial features, such as the eyes and mouth. You can make the eyes hollow and add a stitched mouth to give the doll its zombie-like appearance.
- Finally, attach the limbs to the body using the yarn needle, making sure they are securely attached.
You can get creative with this Zombie Doll Knitting Pattern by adding additional details, such as torn clothing or even a small brain accessory. This spooky toy will make a great addition to your Halloween décor or a unique gift for a Halloween enthusiast.
Bat Toy Knitting Pattern
If you’re looking to add a spooky touch to your Halloween decorations, this bat toy knitting pattern is the perfect choice. With its adorable design and soft texture, it will surely become a favorite among kids and adults alike. Follow the step-by-step instructions below to create your very own bat toy.
Materials:
- DK weight yarn in black
- 4 double-pointed knitting needles, size 3.5mm
- Polyester fiberfill stuffing
- Yarn needle
- Black embroidery floss
- 2 small black buttons for eyes
Instructions:
- Cast on 12 stitches and distribute them evenly across 3 needles.
- Join in the round and knit in stockinette stitch for 10 rounds.
- Next round: *K1, K2tog, repeat from * to end of round (8 stitches remaining).
- Knit 1 round.
- Next round: *K2tog, repeat from * to end of round (4 stitches remaining).
- Cut yarn, leaving a long tail. Thread the tail through the yarn needle, slide the needle through the remaining stitches, and pull tight to close the top of the bat’s head.
- Stuff the bat’s head firmly with polyester fiberfill.
- Rejoin yarn and knit 2 rounds.
- Next round: *K1, K2tog, repeat from * to end of round (6 stitches remaining).
- Knit 1 round.
- Next round: *K1, K2tog, repeat from * to end of round (4 stitches remaining).
- Cut yarn, leaving a long tail. Thread the tail through the yarn needle, slide the needle through the remaining stitches, and pull tight to close the bat’s body.
- Stuff the bat’s body firmly with polyester fiberfill.
- Join the stitches of the bat’s wings: Pick up and knit 6 stitches from the side of the head, knit across the 4 stitches at the bottom of the body, and pick up and knit 6 stitches from the other side of the head.
- Knit 2 rounds.
- Next round: *K1, K2tog, repeat from * to end of round (16 stitches remaining).
- Knit 1 round.
- Next round: *K2tog, repeat from * to end of round (8 stitches remaining).
- Cut yarn, leaving a long tail. Thread the tail through the yarn needle, slide the needle through the remaining stitches, and pull tight to close the bat’s wings.
- Using black embroidery floss, stitch two small French knots for the bat’s eyes. Sew two small black buttons above the eyes for added detail.
And there you have it – your very own bat toy! This pattern is perfect for Halloween, but it can also be enjoyed throughout the year as a fun and cuddly toy. Happy knitting!
Q&A:
Where can I find Halloween toy knitting patterns?
You can find Halloween toy knitting patterns on various websites like Ravelry, Etsy, and LoveCrafts. There are also many books and magazines dedicated to knitting patterns that you can find in craft stores or online.
What are some popular Halloween toy knitting patterns?
Some popular Halloween toy knitting patterns include pumpkin toys, black cat toys, witch dolls, and ghost toys. These patterns can be customized with different colors and details to fit your personal style and preferences.
Are there beginner-friendly Halloween toy knitting patterns?
Yes, there are beginner-friendly Halloween toy knitting patterns available. Look for patterns labeled as “easy” or “beginner” to start with. These patterns usually have detailed instructions and simple designs that are great for those who are just starting out in knitting.
Can I knit Halloween toy patterns for my kids?
Yes, you can definitely knit Halloween toy patterns for your kids. It can be a fun and personalized gift for them during the Halloween season. Just make sure to choose patterns that are appropriate for their age and always supervise them while playing with knitted toys to ensure their safety.