
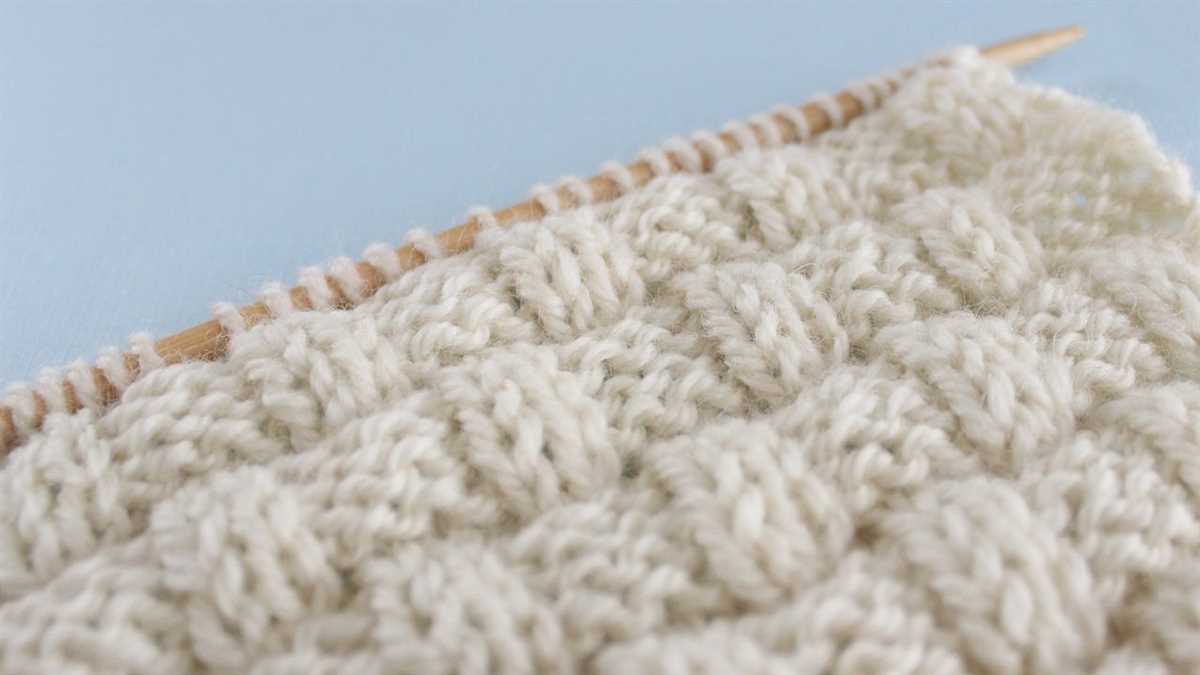
Are you looking for a new knitting project that will test your skills and create a stunning finished product? Look no further than the herringbone knit stitch blanket pattern. This pattern creates a beautiful, textured fabric that is perfect for cozy blankets.
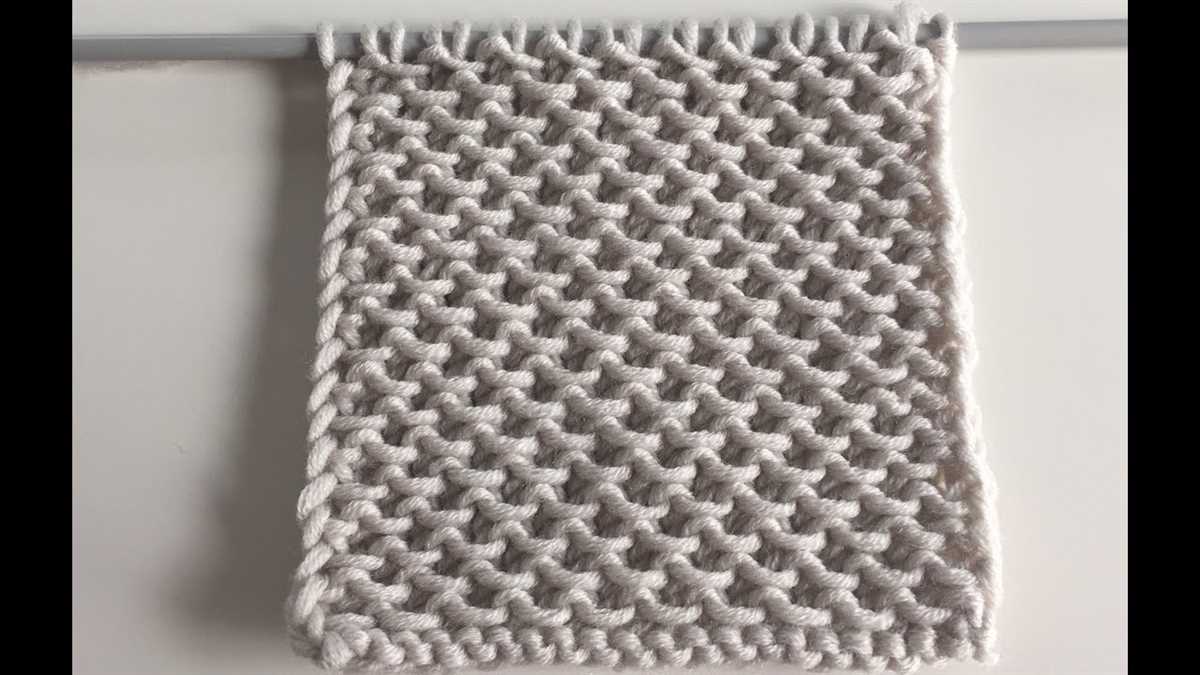
The herringbone knit stitch is a unique stitch pattern that creates a diagonal, zigzag pattern. It may look complex, but with a little practice, you’ll be able to master this technique and create a one-of-a-kind blanket that will impress everyone who sees it.
Not only is the herringbone knit stitch beautiful, but it’s also functional. The texture created by this stitch pattern makes for a warm, thick fabric that will keep you cozy on even the coldest winter nights. The blanket will also make a great gift for friends and family members who appreciate the art of knitting.
Herringbone Knit Stitch Blanket Pattern
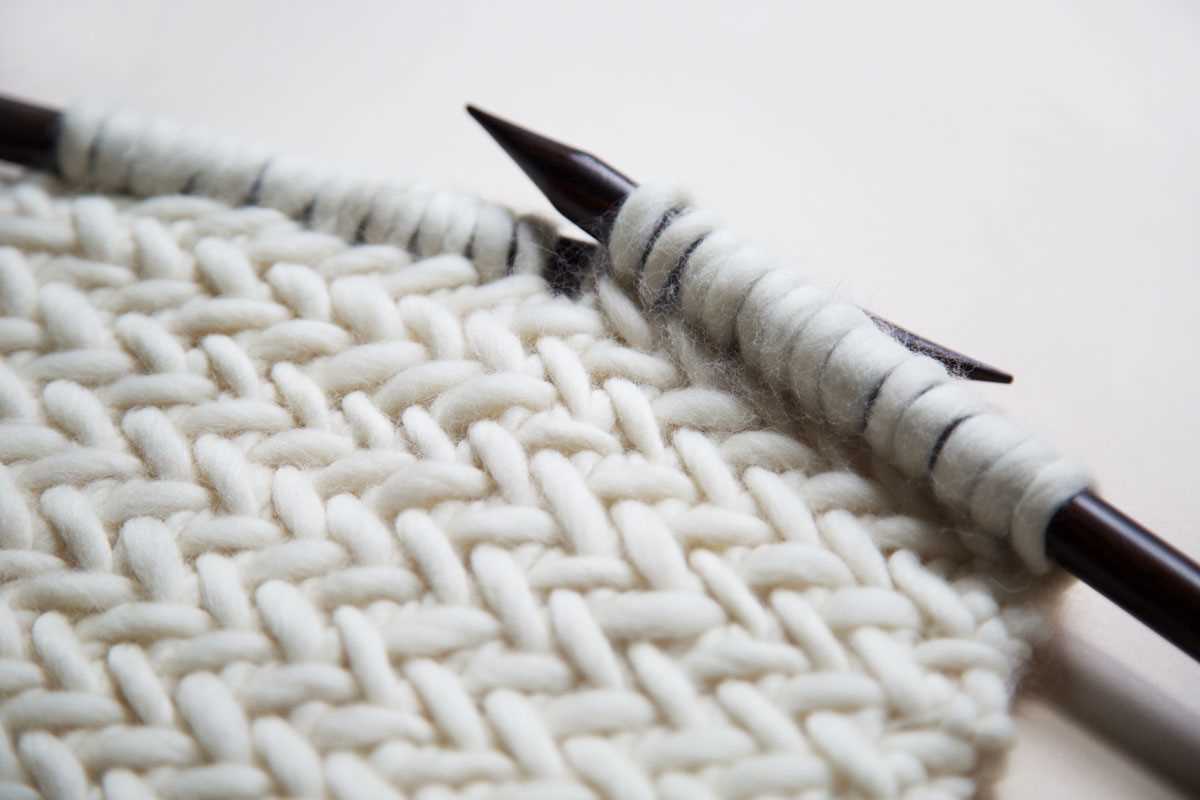
The herringbone knit stitch blanket pattern is a beautiful and intricate design that adds texture and visual interest to any room. The herringbone pattern is created by alternating knitted stitches in a diagonal pattern, similar to the bones of a herring. This stitch is relatively easy to learn, making it a great project for both beginner and experienced knitters.
To create a herringbone knit stitch blanket, you will need a set of knitting needles, yarn in your desired color, and knowledge of basic knitting techniques such as casting on, knitting, and purling. The pattern usually begins with casting on a multiple of stitches, such as 24 or 48, to create the desired width of the blanket. From there, the herringbone pattern is repeated across each row, creating the diagonal lines.
To knit the herringbone stitch, you will need to have a good understanding of knitting abbreviations, such as K2tog (knit two stitches together) and SSK (slip, slip, knit). These abbreviations are commonly used in the pattern to create the unique texture and diagonal lines of the herringbone stitch.
Once you have finished knitting the blanket using the herringbone stitch, you can finish it off with a border or edging of your choice. This could be a simple garter stitch border or a more elaborate lace pattern. The finished blanket will be cozy, warm, and a stunning addition to your home decor.
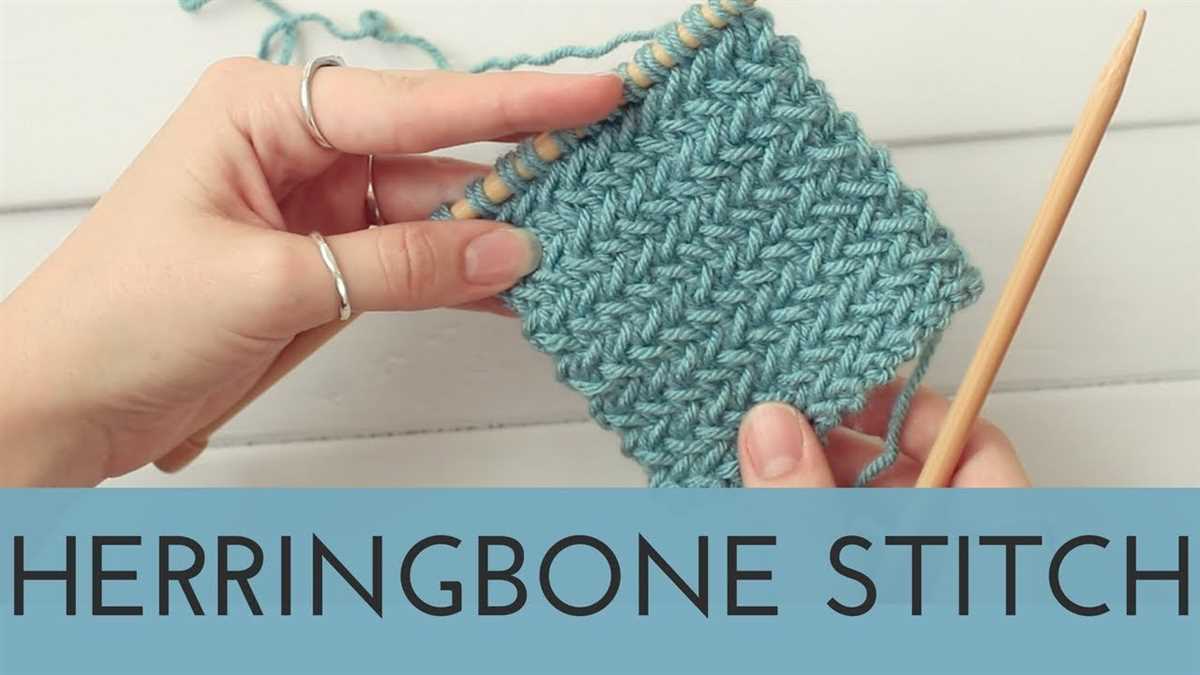
If you are new to knitting or the herringbone stitch, it is recommended to practice the stitch on a small swatch or sample before starting the blanket. This will help you get a feel for the stitch and ensure that you are comfortable with the pattern before committing to a larger project. There are also many online tutorials and videos available that can provide step-by-step instructions for knitting the herringbone stitch.
What is a Herringbone Knit Stitch?

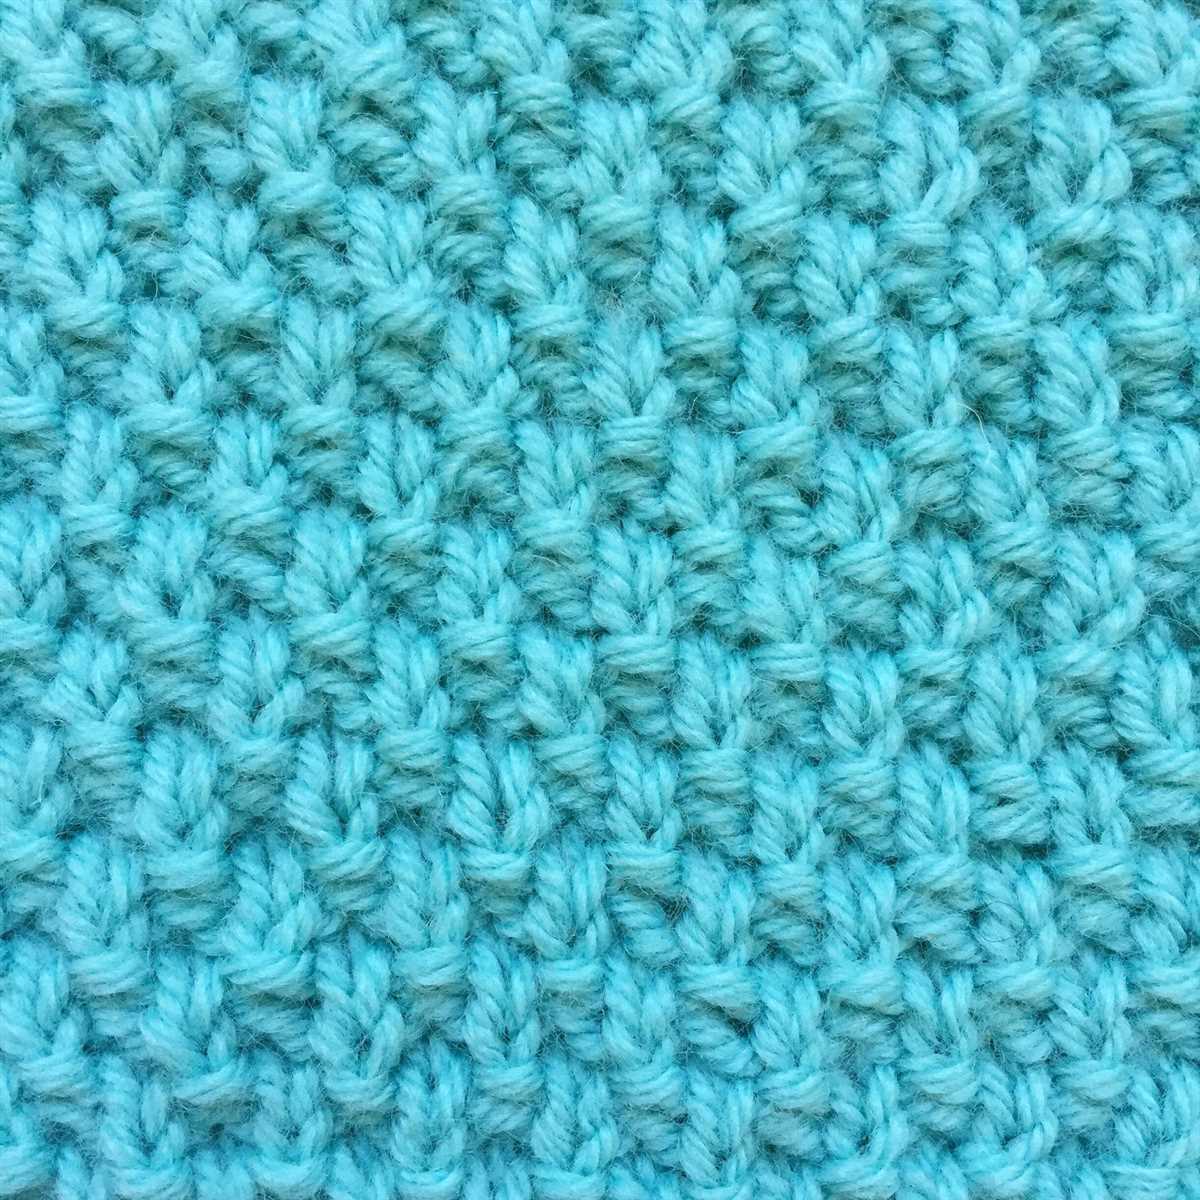
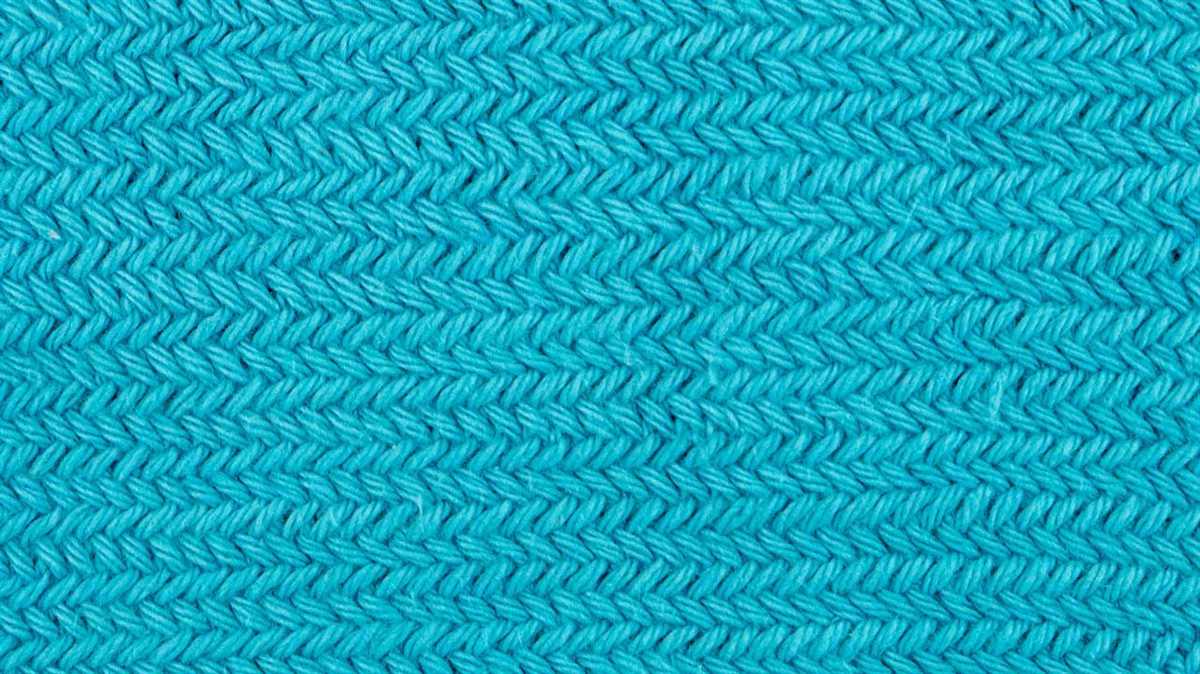
The herringbone knit stitch is a popular knitting technique that creates a textured pattern resembling the bones of a herring fish. It is a combination of knit and slip stitches, resulting in a distinctive V-shaped pattern.
To create the herringbone knit stitch, you will need to know how to knit and slip stitches. The technique involves knitting two stitches together through the back loops, then slipping one stitch as if to purl, and repeating this pattern across the row. This creates the unique diagonal lines and texture that resemble the herringbone pattern.
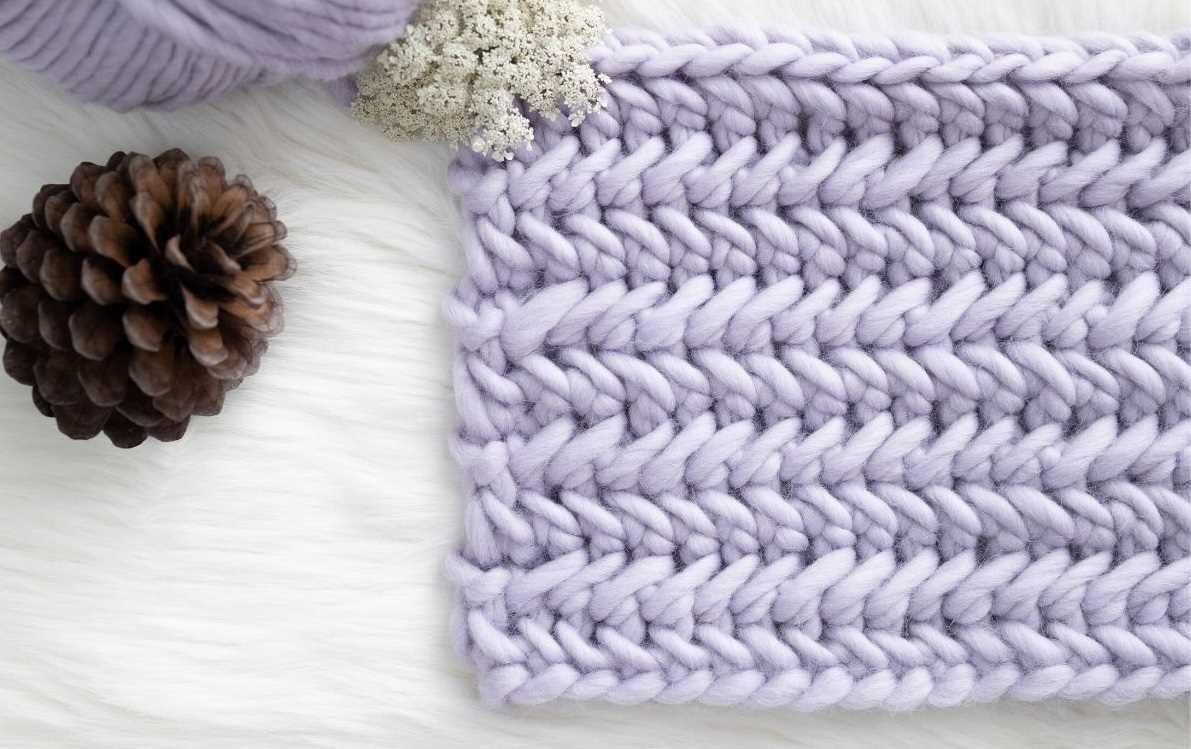
The herringbone knit stitch is often used in a variety of knitting projects, including blankets, scarves, and sweaters. Its textured design adds visual interest and depth to the finished piece. This stitch is particularly popular for creating cozy and warm blankets, as the texture traps heat and provides extra insulation.
When knitting with the herringbone stitch, it is important to maintain an even tension to ensure that the stitches are consistent. This stitch pattern can be easily customized by changing the number of stitches and rows, as well as the choice of yarn and needle size. Whether you are a beginner or an experienced knitter, the herringbone knit stitch can be a fun and rewarding technique to incorporate into your projects.
- Key phrases: herringbone knit stitch, textured pattern, knitting technique, V-shaped pattern, knit and slip stitches, diagonal lines, texture, knitting projects, visual interest, cozy and warm blankets, even tension, customize, choice of yarn and needle size, beginner, experienced knitter, fun and rewarding.
Materials Needed for the Herringbone Knit Stitch Blanket
In order to make a Herringbone Knit Stitch Blanket, you will need several materials. These include:
- Yarn: Choose a chunky or super bulky weight yarn in the color of your choice. Make sure to have enough yarn to complete the desired size of the blanket.
- Knitting Needles: Use knitting needles in the appropriate size for your chosen yarn. You may need circular needles if your blanket will be larger than the length of straight needles.
- Tapestry Needle: This needle will be used to weave in any loose ends and finish off the blanket.
- Scissors: A pair of scissors will be necessary for cutting the yarn and trimming any excess.
- Stitch Marker: A stitch marker can be helpful for keeping track of your stitches, especially if you are working with a large number of stitches.
- Measuring Tape: Having a measuring tape on hand will allow you to check the size of your blanket as you work, ensuring that it meets your desired dimensions.
With these materials, you will be well-equipped to begin working on your Herringbone Knit Stitch Blanket. It is always a good idea to gather all the necessary materials before starting a new project to ensure a smooth and uninterrupted knitting experience. Once you have everything ready, you can begin casting on and working the herringbone stitch pattern to create a cozy and visually appealing blanket.
Choosing the Right Yarn for the Herringbone Knit Stitch Blanket

When it comes to choosing the yarn for your herringbone knit stitch blanket, there are a few factors to consider. The right yarn can make a big difference in the final look and feel of your project, so it’s important to choose wisely.
Fiber Content: The first thing to consider is the fiber content of the yarn. Different fibers have different properties and will create different textures in your blanket. For a soft and cozy blanket, you might consider using a yarn made from natural fibers such as wool or alpaca. If you prefer something with a bit of sheen, a yarn with silk or bamboo might be a good choice. Synthetic fibers like acrylic or nylon can also be used, as they are often more affordable and easier to care for.
Yarn Weight: The weight of the yarn is also an important consideration. The herringbone knit stitch is a dense stitch pattern, so you’ll want to choose a yarn that will create a substantial fabric. Bulky or super bulky weight yarns are ideal for this pattern, as they will give you the desired thickness and weight. However, if you prefer a lighter and more drapey blanket, you could also use a worsted or aran weight yarn.
Color and Texture: Lastly, think about the color and texture of the yarn. The herringbone knit stitch creates a beautiful textured pattern, so you’ll want a yarn that will highlight and enhance this. Solid or semi-solid colors will show off the stitch pattern best, while variegated or speckled yarns can add visual interest to your blanket. Consider the overall look and feel you want to achieve and choose a yarn that complements your vision.
In summary, when choosing the yarn for your herringbone knit stitch blanket, consider the fiber content, yarn weight, and color and texture. By selecting the right yarn, you’ll be able to create a beautiful and cozy blanket that you’ll cherish for years to come.
Tools Required for the Herringbone Knit Stitch Blanket
When embarking on knitting a herringbone stitch blanket, it’s important to have the right tools to ensure successful and enjoyable knitting experience. Below are the essential tools you will need to complete this project:
1. Knitting Needles:
To knit the herringbone stitch blanket, you will need a pair of knitting needles. The specific size of the needles will depend on the yarn you choose to use. It’s recommended to use medium to large-sized needles to achieve a looser and more drapey fabric.
2. Yarn:
Choosing the right yarn is crucial for this project. Opt for a yarn that is soft and warm, as it will make the blanket more cozy and comfortable. You can choose any color or color combination that suits your preference and the intended use of the blanket.
3. Stitch Markers:
Stitch markers will help you keep track of your stitches and ensure that you don’t lose your place in the herringbone stitch pattern. These small markers can be placed on the needles to mark specific points in your knitting, such as the beginning of a row or a stitch pattern repeat.
4. Yarn Needle:
A yarn needle or tapestry needle is essential for weaving in the loose ends of yarn once you have finished knitting the blanket. This will give your project a polished and finished look.
5. Scissors:
You will need a good pair of scissors to cut the yarn when starting and finishing your project, as well as for any necessary yarn adjustments or repairs along the way.
With these tools in hand, you’ll be ready to embark on your herringbone knit stitch blanket project and create a beautiful and cozy blanket to enjoy.
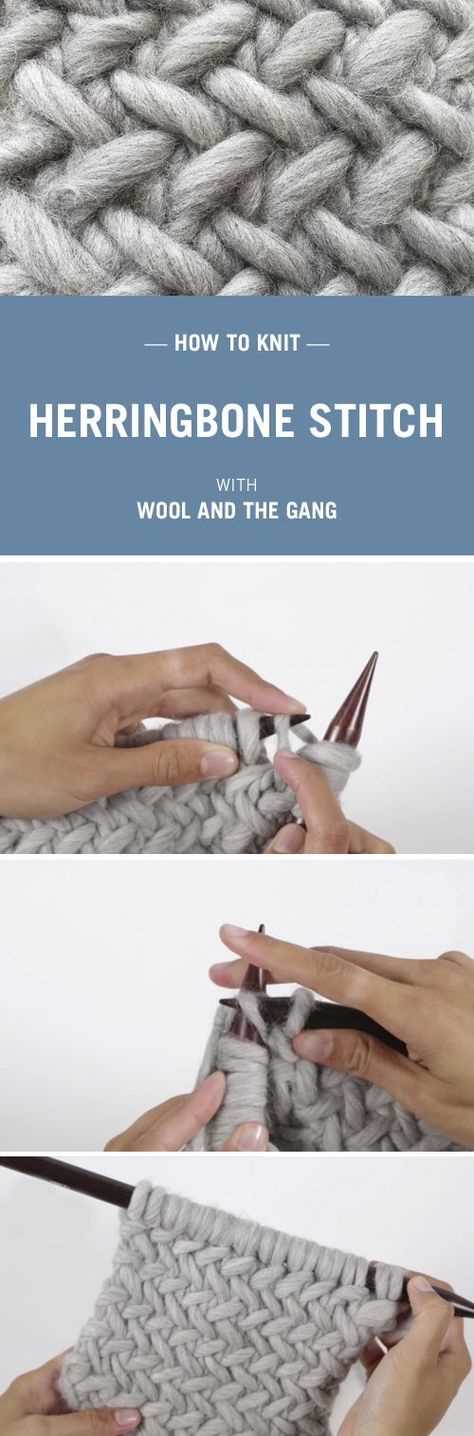
Step-by-Step Guide to Knitting the Herringbone Stitch
If you’re looking to add some interest and texture to your knitting projects, the herringbone stitch is a great option. This stitch creates a beautiful herringbone pattern that resembles the bones of a fish, hence the name. With its unique zigzag design, the herringbone stitch is perfect for creating scarves, blankets, and even garments. Follow this step-by-step guide to master the herringbone stitch and incorporate it into your knitting projects.
Step 1: Gather Materials
Before you begin knitting the herringbone stitch, gather all the necessary materials. You will need a pair of knitting needles in the appropriate size for your yarn, as well as a ball of yarn in the color of your choice. Make sure to choose a yarn type that is suitable for the herringbone stitch pattern, such as a worsted weight or bulky weight yarn.
Step 2: Cast on Stitches
Start by casting on an even number of stitches onto your knitting needles. The herringbone stitch requires an even number of stitches to create the zigzag pattern. You can use any cast-on method that you prefer, such as the long-tail cast-on or the knitted cast-on.
Step 3: Knit the First Two Rows
To begin the herringbone stitch, knit the first two rows. These initial rows will serve as the foundation for your herringbone pattern. Simply knit each stitch across the first row, and then knit across the second row as well.
Step 4: Start the Herringbone Stitch Pattern
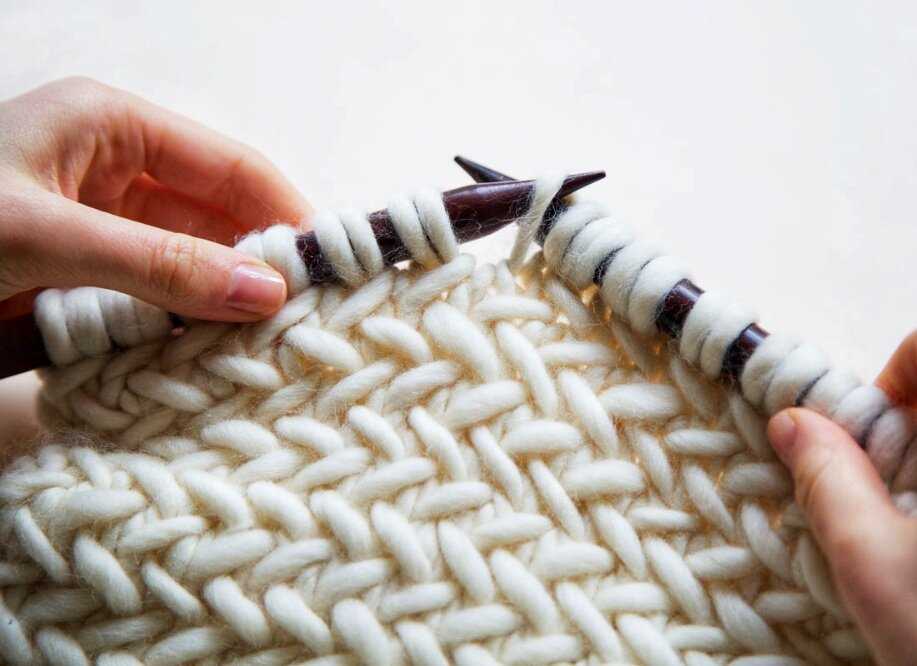
Now it’s time to start the herringbone stitch pattern. The pattern is created by alternating between two different steps: the slip stitch and the knit two together (k2tog) stitch. Follow the pattern instructions below:
- Slip the first stitch knitwise.
- K2tog (knit two stitches together).
- Do not slip the stitches off the left needle.
- Knit into the first stitch on the left needle again.
- Slip both stitches off the left needle.
- Repeat steps 1-5 until you reach the end of the row.
Step 5: Continue the Pattern
Continue knitting rows in the herringbone stitch pattern until your project reaches the desired length. Remember to always start each row with a slipped stitch and end each row with a k2tog stitch. As you work, you’ll start to see the herringbone pattern emerge.
Step 6: Bind Off
Once you’ve reached the desired length, it’s time to bind off your stitches. Use your preferred bind-off method to secure the stitches and create a neat edge for your project.
Now that you’ve followed this step-by-step guide, you’re ready to incorporate the herringbone stitch into your knitting projects. Whether you’re creating a cozy blanket or a stylish scarf, the herringbone stitch is sure to add a touch of elegance and sophistication to your knitting.
Tips and Tricks for Perfecting the Herringbone Knit Stitch
When working on a herringbone knit stitch blanket pattern, it’s important to pay attention to the details and techniques to achieve a perfect result. Here are some tips and tricks to help you master this unique stitch:
1. Use the Right Yarn
Choosing the right yarn is crucial for achieving a beautiful herringbone knit stitch. Opt for a yarn that has good stitch definition and is not too bulky. A lighter weight yarn with a smooth texture will allow the stitches to show off the intricate herringbone pattern.
2. Practice Tension Control
Consistent tension is key to creating neat and even stitches in herringbone knit. It’s important to maintain an even tension throughout your work to ensure that the stitches are not too loose or too tight. Practicing your tension control will help you achieve an evenly textured blanket.
3. Use Stitch Markers
Stitch markers can be extremely helpful when working on herringbone knit stitch patterns, especially if there are multiple pattern repeats or shaping involved. Placing stitch markers at the beginning and end of each pattern repeat can help you stay on track and easily identify any mistakes.
4. Keep an Eye on Your Slant
The herringbone knit stitch creates a beautiful slanted pattern, but it’s important to pay attention to the direction of the slant. Make sure that you are consistently working the decreases in the same direction to maintain a cohesive look. Keeping an eye on the slant will help you achieve a polished and professional finish.
5. Block Your Finished Blanket
Blocking is an important step in any knitting project, and herringbone knit stitch blankets are no exception. Blocking helps to even out the stitches, open up the pattern, and give your blanket a finished look. Make sure to follow the blocking instructions for your specific yarn to get the best results.
By following these tips and tricks, you’ll be able to perfect the herringbone knit stitch and create a stunning blanket that showcases this beautiful pattern. Happy knitting!
Adding Borders to the Herringbone Knit Stitch Blanket
The herringbone knit stitch blanket is a beautiful and intricate pattern that creates a textured and cozy fabric. To enhance the overall appearance of the blanket and give it a finished look, you can add borders to the edges. Borders not only provide a nice frame for the blanket but also help to prevent the edges from curling over time.
There are several options for adding borders to your herringbone knit stitch blanket. One popular choice is to use a simple garter stitch border. This involves knitting every stitch on every row along the edges of the blanket. The garter stitch creates a contrasting texture to the herringbone stitch and adds a clean and neat finish to the edges of the blanket. You can choose to make the garter stitch border wide or narrow, depending on your personal preference.
Another option for adding borders is to use a ribbing pattern. A ribbed border can give your herringbone knit stitch blanket a more polished and tailored look. You can use a 1×1 or 2×2 ribbing pattern by alternating knit and purl stitches. This creates a stretchy and elastic border that will complement the texture of the herringbone stitch. The ribbing can be worked for a few rows or continued for the entire width of the border.
If you want to add a decorative touch to your herringbone knit stitch blanket, you can consider using a lace border. Lace patterns add an elegant and delicate look to any knitted project. You can find numerous lace stitch patterns that will complement the herringbone stitch. To add a lace border, you’ll need to follow a lace stitch pattern and repeat it along the edges of the blanket. Keep in mind that lace patterns usually require some experience and attention to detail.
Adding borders to your herringbone knit stitch blanket is a personal choice that allows you to customize your project and make it unique. Whether you prefer a simple garter stitch border, a ribbed border, or a lace border, any option will enhance the beauty and functionality of your herringbone knit stitch blanket.
Customizing the Herringbone Knit Stitch Blanket Size
When it comes to knitting a herringbone stitch blanket, the size of the blanket can be easily customized based on individual preferences and needs. Whether you want to knit a small baby blanket or a large throw for your living room, the herringbone stitch pattern can be adapted to create the perfect size for your project.
One way to customize the size of a herringbone stitch blanket is by adjusting the number of stitches and rows. The herringbone stitch pattern is typically worked over an even number of stitches. To make a smaller blanket, you can cast on fewer stitches, and to make a larger blanket, you can cast on more stitches. Similarly, you can add or subtract rows to adjust the length of the blanket.
Another way to customize the size of the blanket is by changing the needle size and yarn weight. Using a smaller needle size and a lighter weight yarn will result in a finer, tighter knit fabric, which is ideal for smaller blankets. Conversely, using a larger needle size and a heavier weight yarn will create a larger, looser fabric that works well for larger blankets.
To ensure that the herringbone stitch pattern is maintained consistently throughout the blanket, it is important to maintain the proper stitch gauge. This can be achieved by knitting a gauge swatch before starting the blanket and adjusting the needle size and yarn weight if necessary. Remember to measure your gauge swatch after blocking, as the stitches may relax and change in size.
By customizing the size of your herringbone stitch blanket, you can create a unique and personalized knitted item that fits your specific needs. Whether it’s a cozy baby blanket or a stylish throw for your home, the herringbone stitch pattern can be adapted to create the perfect size and finished product.
Washing and Caring for Your Herringbone Knit Stitch Blanket
When it comes to washing and caring for your herringbone knit stitch blanket, there are a few important things to keep in mind. The herringbone knit stitch creates a beautiful texture, but it can also be more delicate than other knitting patterns. It’s essential to handle and clean your blanket with care to ensure it stays in good condition for years to come.
Handwashing is typically recommended for herringbone knit stitch blankets. Fill a basin or sink with cool water and add a gentle wool or delicate fabric detergent. Gently submerge the blanket in the water and lightly agitate it to distribute the detergent. Avoid scrubbing or wringing the blanket, as this can cause the delicate herringbone stitch to become misshapen or stretched.
To rinse the blanket, drain the soapy water and refill the basin with clean water. Gently submerge the blanket again and repeat the process until the water runs clear. Avoid twisting or wringing the blanket to remove excess water, as this can damage the knit stitch. Instead, gently press the blanket against the sides of the basin or roll it between clean towels to absorb moisture.
It’s important to note that some herringbone knit stitch blankets may be machine washable. Always check the care instructions provided with your specific blanket and follow them accordingly.
Drying your herringbone knit stitch blanket properly is crucial to maintaining its shape and texture. Lay the blanket flat on a clean, dry towel, making sure it’s in its original shape. Gently pat the blanket to remove any excess water, being careful not to stretch or distort the herringbone pattern. Allow the blanket to air dry completely in a well-ventilated area, away from direct sunlight or heat sources that could cause shrinking or fading.
To keep your herringbone knit stitch blanket in top condition, avoid hanging it as this could cause stretching. Additionally, keep it away from sharp objects or rough surfaces that could snag the delicate herringbone stitch.
In summary, washing and caring for your herringbone knit stitch blanket involves gentle handwashing, careful drying, and avoiding any actions that could damage the delicate herringbone stitch. Following these guidelines will help ensure that your blanket remains cozy, beautiful, and in perfect condition for years to come.
Alternative Patterns for the Herringbone Stitch
The herringbone knit stitch is a popular choice for creating textured patterns in knitting projects. Its distinct V-shaped pattern adds depth and visual interest to any design. While the herringbone stitch is commonly used to create blankets, there are several alternative patterns that can be incorporated into various knitting projects.
1. Herringbone Cowl
A herringbone stitch cowl is a great accessory for colder months. Knitted in the round, this pattern creates a cozy and stylish neckwarmer that can be easily paired with any outfit. The herringbone stitch adds a touch of elegance to the cowl, making it a versatile piece for both casual and formal occasions.
2. Herringbone Shawl
If you’re looking to create a statement piece, consider knitting a herringbone shawl. The unique pattern of the herringbone stitch will make your shawl stand out and showcase your knitting skills. Whether you opt for a solid color or a gradient yarn, the herringbone pattern will beautifully enhance the drape and texture of the shawl.
3. Herringbone Hat
A herringbone stitch hat is a classic choice for keeping warm while staying stylish. This pattern is perfect for showcasing the herringbone stitch in a smaller project. Whether you choose to knit a beanie or a slouchy hat, the herringbone stitch will add a trendy touch to your headwear.
4. Herringbone Scarf
No winter wardrobe is complete without a cozy scarf, and a herringbone stitch scarf will be a standout piece. Knit in a classic or modern color palette, the herringbone stitch will bring sophistication and texture to your scarf. Wrap it around your neck for extra warmth and style during colder days.
5. Herringbone Baby Blanket
For a precious and unique gift, consider knitting a herringbone baby blanket. The herringbone stitch will create a delightful texture for the little one to enjoy. Whether you use pastel or bold colors, the blanket will be a cherished keepsake for years to come.
Inspiration and Ideas for Using the Herringbone Knit Stitch
The herringbone knit stitch is a versatile and beautiful pattern that can be used in a variety of knitting projects. Whether you’re a beginner or an experienced knitter, there are countless ways you can incorporate this stitch into your designs to add interest and texture. Here are some inspiration and ideas for using the herringbone knit stitch.
1. Sweaters and Cardigans
The herringbone knit stitch is perfect for creating cozy and stylish sweaters and cardigans. You can use the stitch as an all-over pattern for a bold and eye-catching design, or as a subtle detail on cuffs, collars, or hems. The herringbone stitch adds a touch of sophistication to any sweater or cardigan, making it a versatile choice for both casual and formal wear.
2. Scarves and Shawls
Scarves and shawls are great projects for showcasing the herringbone knit stitch. The stitch pattern creates a beautiful drape and texture, making these accessories not only stylish but also warm and cozy. You can experiment with different yarn weights and color combinations to create unique and personalized scarves and shawls using the herringbone stitch.
3. Blankets and Throws
The herringbone knit stitch is also an excellent choice for creating blankets and throws. The stitch pattern adds depth and visual interest to these larger projects, making them perfect for snuggling up with on a chilly day. You can choose to use the herringbone stitch as the main pattern or as an accent detail on a larger expanse of stockinette or garter stitch.
4. Hats and Headbands
Hats and headbands are quick and fun projects that can be enhanced with the herringbone knit stitch. The stitch pattern adds warmth and texture to these accessories, making them both functional and fashionable. You can choose to create a full herringbone pattern or incorporate the stitch as a decorative band or brim.
5. Bags and Purses
The herringbone knit stitch can also be used to create stylish and durable bags and purses. The stitch pattern provides a sturdy and structured fabric that is perfect for holding your belongings. You can experiment with different yarn weights and colors to create unique and personalized bags using the herringbone stitch.
Whether you’re knitting garments, accessories, or home decor items, the herringbone knit stitch is a versatile and beautiful pattern to incorporate into your knitting projects. With endless possibilities for design and customization, you’ll never run out of inspiration when using this stitch.