
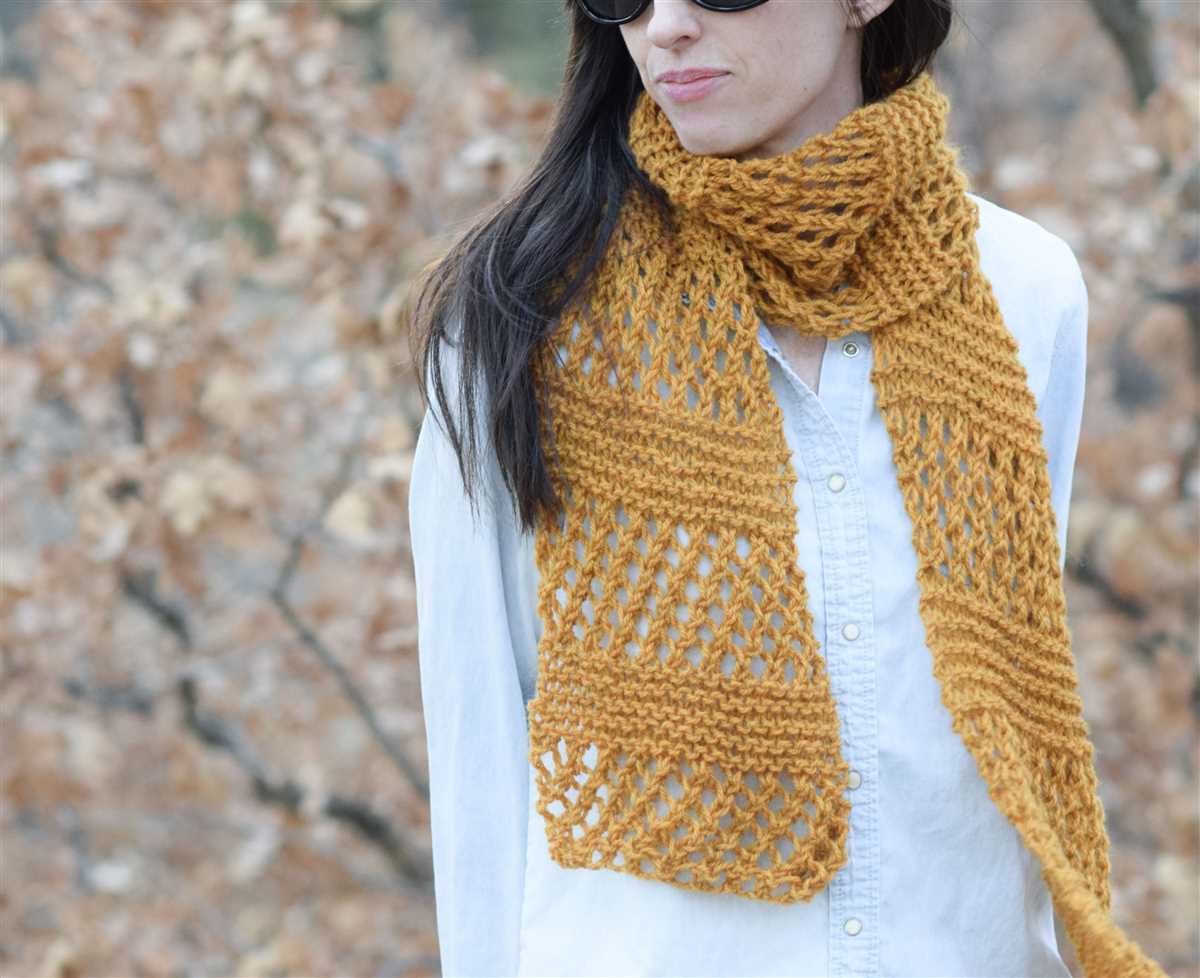
Scarves are the perfect accessory to keep you warm and stylish during the colder months. If you’re looking for a knitting project that will challenge your skills and result in a stunning, textured scarf, then the honeycomb scarf knitting pattern is just what you need.
This pattern features a unique honeycomb stitch that creates a beautiful, intricate pattern that will impress everyone who sees it. With its combination of knit and purl stitches, this scarf is perfect for intermediate knitters looking to expand their knitting repertoire.
To create the honeycomb stitch, you’ll need a pair of knitting needles and a ball of yarn in your preferred color. You’ll start by casting on the desired number of stitches, then follow the pattern instructions to create the honeycomb pattern. The end result is a cozy, warm scarf that is sure to become a staple in your winter wardrobe.
Whether you’re knitting this scarf for yourself or as a gift for a loved one, the honeycomb scarf knitting pattern is a great way to showcase your knitting skills and create a timeless accessory. So grab your needles and yarn, and get ready to create a scarf that you’ll be proud to wear all winter long.
Honeycomb Scarf Knitting Pattern
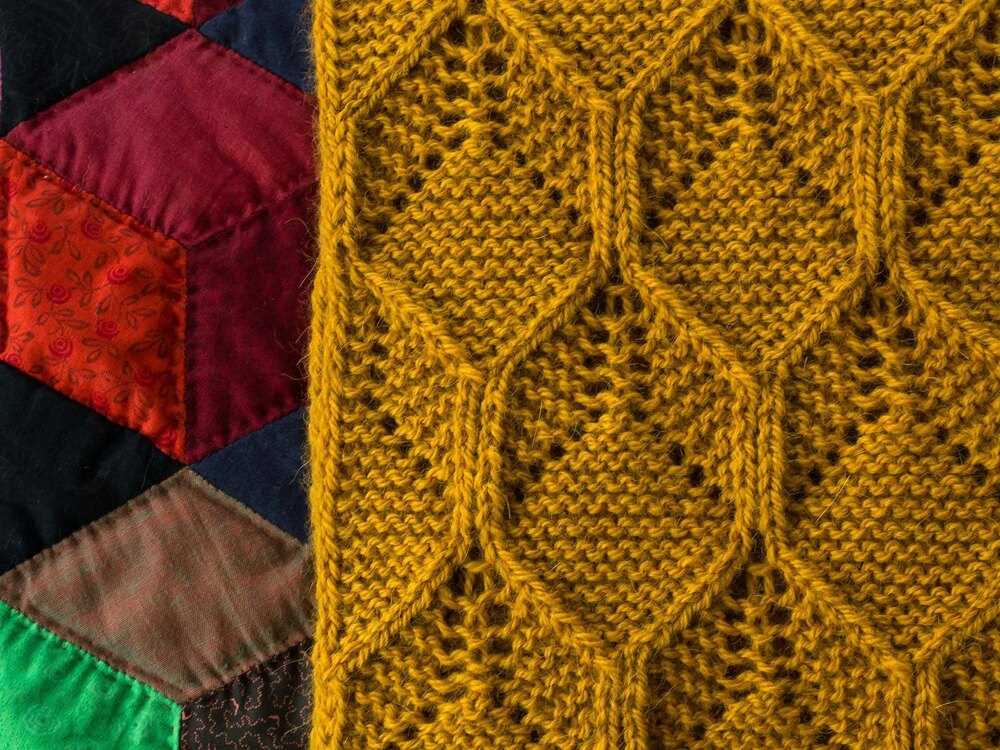
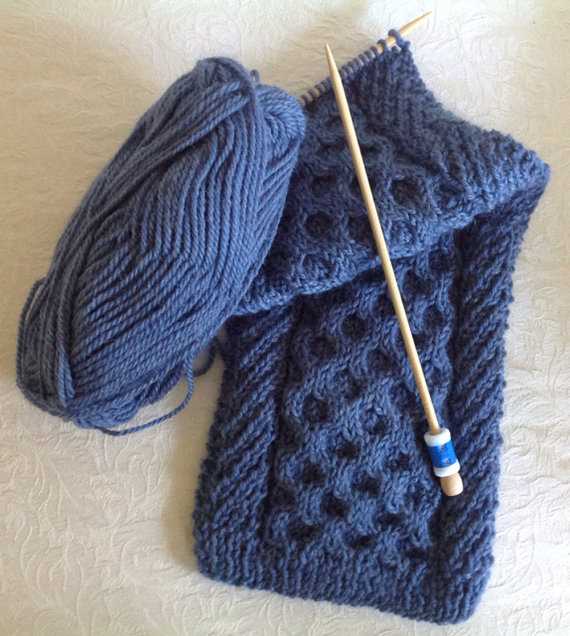
The honeycomb scarf knitting pattern is a classic and timeless design that is perfect for both beginners and experienced knitters. This pattern creates a beautiful textured scarf with a honeycomb stitch pattern that resembles the cells of a beehive.
To create the honeycomb scarf, you will need a set of knitting needles and a ball of yarn in the color of your choice. The pattern uses basic knitting stitches, including knit and purl, so it is a great project for those who are just starting out with knitting.
Materials:
- Knitting needles (size can vary depending on desired gauge)
- Ball of yarn in desired color
Instructions:

- Cast on: Start by casting on an even number of stitches, enough to achieve the desired width of your scarf. For example, you can cast on 30 stitches for a narrower scarf or 50 stitches for a wider scarf.
- Honeycomb stitch pattern: Alternate between knitting and purling stitches for each row. The pattern is as follows:
- Row 1: Knit all stitches
- Row 2: Purl all stitches
- Row 3: *Knit 2, purl 2* – repeat this pattern until the end of the row
- Row 4: *Purl 2, knit 2* – repeat this pattern until the end of the row
- Repeat rows 1-4 until the scarf reaches the desired length. This honeycomb stitch pattern will create the textured design of the scarf.
- Bind off: Once you have reached the desired length, bind off all stitches. Cut the yarn, leaving a long tail to weave in later.
- Finishing: Weave in any loose ends and block the scarf if desired. Blocking can help to even out the stitches and give the finished scarf a polished look.
The honeycomb scarf knitting pattern is a versatile and stylish project that can be customized to fit your own personal style. Whether you choose a soft and cozy yarn for a winter scarf or a lightweight yarn for a summer accessory, this pattern will create a beautiful and unique scarf that you can wear for years to come.
Choosing the Right Yarn for Your Honeycomb Scarf
When knitting a honeycomb scarf, choosing the right yarn is crucial to create a beautiful and functional accessory. The honeycomb stitch pattern is known for its texture and depth, and the yarn you select can make a significant difference in how the pattern comes to life.
Weight: The weight of the yarn will determine the overall look and feel of your honeycomb scarf. For a lightweight and delicate scarf, consider using lace or fingering weight yarn. If you prefer a more substantial and warmer scarf, opt for a worsted or bulky weight yarn. Keep in mind that the weight of the yarn will also affect how quickly or slowly the project progresses.
Fiber: The choice of fiber will impact the drape, warmth, and care instructions of your honeycomb scarf. Natural fibers such as wool, alpaca, and silk are popular choices as they offer excellent insulation and softness. Acrylic and cotton yarns are also suitable options for those with particular fiber preferences or allergies. Consider the season and climate where you plan to wear your scarf and select a fiber that will provide the desired level of comfort.
Color: The color of the yarn can greatly enhance the honeycomb stitch pattern or make it fade into the background. Consider using a solid or semi-solid color for a classic and timeless look. If you want to add more dimension and visual interest, opt for variegated or self-striping yarn. Be mindful of how the color changes in the yarn may affect the honeycomb stitch pattern, and choose a color that complements your wardrobe.
Texture: The texture of the yarn can bring additional depth and dimension to your honeycomb scarf. Yarns with a smooth texture will highlight the stitch pattern, while yarns with a halo or boucle effect can create a softer and more cozy appearance. Experiment with different textures to achieve the desired look and feel of your scarf, keeping in mind how the texture may affect the stitch definition.
Care Instructions: Consider the care instructions of the yarn you choose for your honeycomb scarf. Some yarns may require hand washing, while others are machine washable. Be sure to select a yarn with care instructions that align with your lifestyle and preferences for easy maintenance and longevity of your finished scarf.
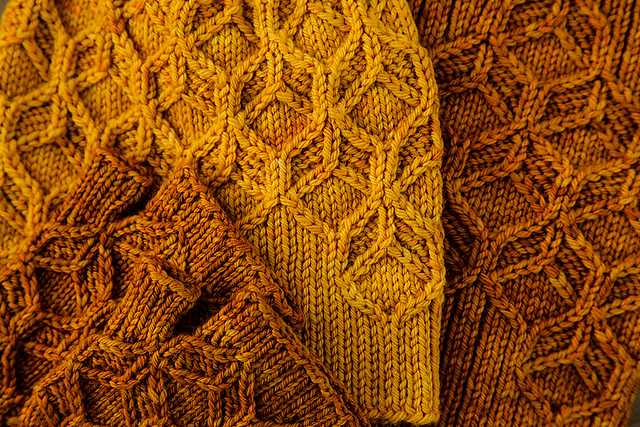
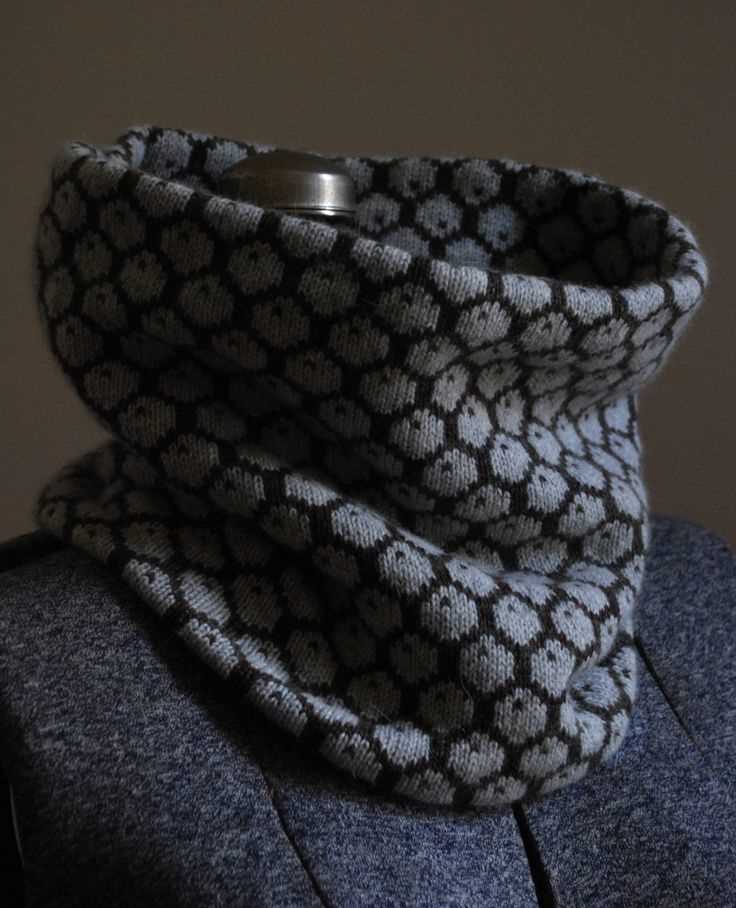
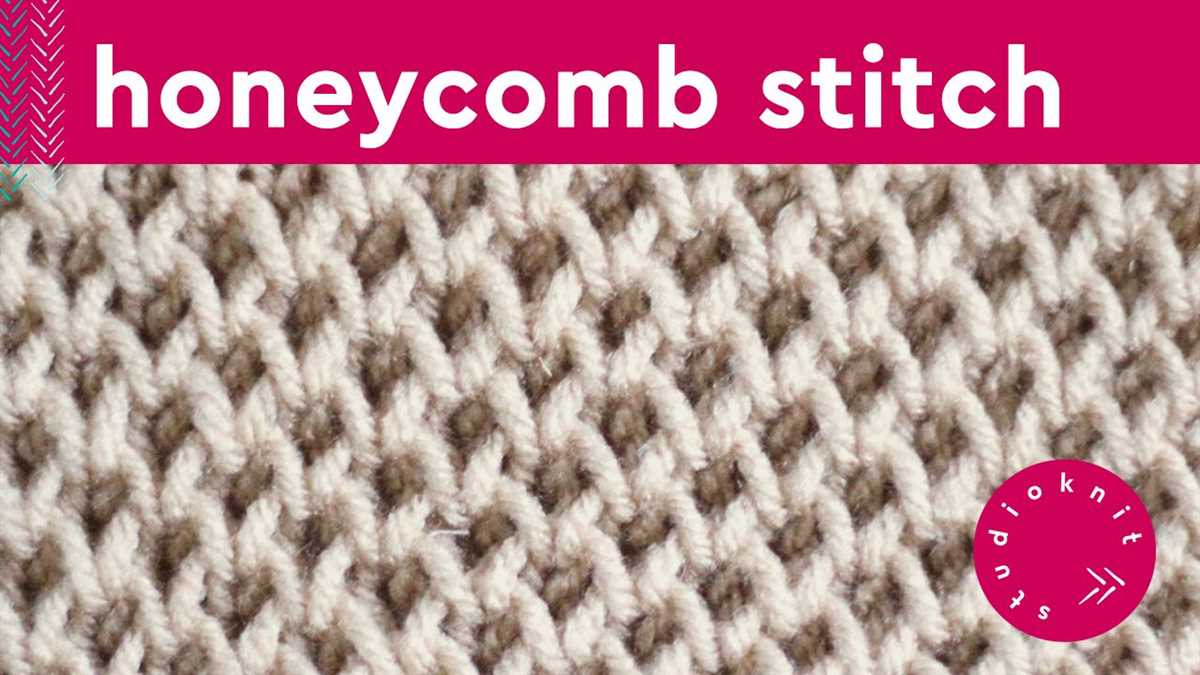
Understanding the Honeycomb Stitch

The honeycomb stitch is a classic knitting pattern that creates a textured fabric resembling a honeycomb or bee’s nest. It is a versatile stitch that can be used for a variety of projects, including scarves, blankets, and sweaters. This stitch pattern is achieved by alternating knit and purl stitches in a specific pattern, creating a three-dimensional look.
To create the honeycomb stitch, you will need to have a basic understanding of knitting techniques such as knit stitches, purl stitches, and yarn overs. The pattern consists of a series of rows that are repeated to create the desired length and width. It can be worked on straight needles or in the round on circular needles, depending on the project.
When working the honeycomb stitch, it is important to maintain an even tension to achieve a consistent texture throughout the fabric. This stitch pattern is also reversible, meaning that both sides of the fabric will have the same textured appearance, making it ideal for projects where both sides are visible.
To help you visualize the honeycomb stitch pattern, here is a simplified version of the pattern:
- Row 1: *k2, p1, k1, p1, k4; repeat from * to end of row.
- Row 2: *p2, k1, p1, k1, p4; repeat from * to end of row.
- Repeat rows 1 and 2 for the desired length.
This pattern can be customized by altering the number of knit and purl stitches in each section, creating a variety of honeycomb designs. Experimenting with different yarns, needle sizes, and stitch combinations can also lead to unique variations of the honeycomb stitch.
Getting Started: Casting on and Setting Up
Before you start knitting the honeycomb scarf, you need to cast on and set up your knitting project. This is an important step that will ensure the success of your scarf.
Casting On
To begin, make sure you have your chosen yarn and knitting needles ready. You will also need a tapestry needle for later steps. The honeycomb scarf pattern usually requires a certain number of stitches to be cast on, so refer to the pattern instructions for the specific number.
There are different methods for casting on, but for this pattern, it is recommended to use the long-tail cast-on method. This method creates a neat and flexible edge for your scarf. To start, leave a long tail of yarn (about 3 times the width of the scarf) and make a slip knot.
Setting Up

After casting on, you will need to set up your knitting by creating the foundation rows. Usually, the pattern will specify which stitches to use and how to arrange them. This initial setup is crucial for establishing the honeycomb pattern.
The setup rows will commonly involve knitting and purling stitches in a specific sequence. Make sure to follow the pattern instructions carefully to achieve the desired honeycomb texture. You may need to repeat the setup rows multiple times, so keep track of your progress by using stitch markers or counting the stitches.
Once you have completed the casting on and setting up steps, you are ready to begin knitting the honeycomb pattern. Take your time to ensure accuracy in these initial stages, as they will lay the foundation for the rest of your scarf. Happy knitting!
Knitting the Main Body of the Scarf
Once you have completed the cast on and the honeycomb border of the scarf, it is time to move on to knitting the main body of the scarf. This is where the bulk of the scarf will be knit, and it is a great opportunity to practice your basic knitting stitches.
To begin, you will continue to knit in the honeycomb stitch pattern for a few more rows. This will help maintain the cohesive look of the scarf and create a smooth transition from the border to the main body. Be sure to follow the pattern instructions carefully, as they will guide you on the stitch count and shaping of the scarf.
As you knit the main body, pay attention to your tension and gauge. The honeycomb stitch pattern is quite stretchy, so it is important to maintain consistent tension throughout your knitting to ensure an even look. If your scarf is turning out too tight or too loose, you may need to adjust your knitting technique or needle size.
Continue knitting the main body of the scarf until you reach the desired length. Remember to periodically check your work against the pattern instructions to ensure you are on track. Once you have reached the end of the main body, you can move on to knitting the final border of the scarf to complete the project.
In summary, knitting the main body of the scarf is an opportunity to practice your basic knitting stitches and maintain consistent tension. Pay attention to the pattern instructions and make any necessary adjustments to achieve the desired look. With patience and practice, you will soon have a beautiful honeycomb scarf ready to wear or give as a gift.
Adding the Honeycomb Stitch Pattern
One of the most popular stitch patterns used for knitting a honeycomb scarf is the honeycomb stitch. This pattern creates a beautiful texture that resembles a series of interconnected honeycombs.
To add the honeycomb stitch pattern to your scarf, you will need to have a basic understanding of knitting and be comfortable with knitting and purling stitches. The honeycomb stitch pattern is created by working a combination of knit and purl stitches in a specific sequence.
To start the honeycomb stitch, you will need to cast on an even number of stitches. Once you have cast on, you will begin by working the first row in a knit 1, purl 1 rib stitch pattern. This will create a nice, stretchy edge for your scarf.
After completing the rib stitch, you will move on to the honeycomb stitch pattern. The pattern is worked over a multiple of 4 stitches, so make sure that your cast on number is divisible by 4. The honeycomb stitch pattern consists of a repetition of 4 rows:
- Knit all stitches
- Purl all stitches
- Knit 2 stitches together, then knit the next stitch, leaving it on the left needle. Insert the right needle into the first stitch of the pair from the back, and knit the stitch again. Slip both stitches off the needle.
- Purl all stitches
Repeat these 4 rows until your scarf reaches the desired length. Remember to end with a row 2 to maintain the rib stitch edge.
Creating a Border for Your Scarf
Adding a border to your honeycomb scarf can give it a polished and finished look. There are several options for creating borders, and you can choose one that complements the overall design of your scarf.
Ribbed Border
A ribbed border is a classic and versatile choice for adding a finishing touch to your scarf. You can create a ribbed border by alternating knit and purl stitches in a regular pattern. This border adds texture and elasticity to your scarf, making it snug and cozy.
Garter Stitch Border

If you prefer a simpler border, you can opt for a garter stitch border. To create a garter stitch border, you need to knit every stitch on every row. This creates a ridge-like texture that adds visual interest to your scarf while still maintaining a clean and straightforward look.
Seed Stitch Border
For a border with a more intricate texture, you can choose a seed stitch pattern. The seed stitch consists of alternating knit and purl stitches in a specific order, creating a bumpy texture that resembles scattered seeds. This border adds a touch of visual complexity to your scarf, making it visually appealing.
Experiment with different border options and see which one suits your honeycomb scarf the best. Remember to consider the yarn you are using and the overall style and theme of your scarf to ensure the border complements the design. With a well-chosen border, your honeycomb scarf will become a stylish and fashionable accessory.
Binding off and Finishing Touches
Once you have finished knitting your honeycomb scarf, it is time to bind off and add some finishing touches. The binding off process is done to secure the stitches and create a neat edge for your scarf.
To bind off, start by knitting two stitches. Then, using your left needle, lift the first stitch over the second stitch and off the right needle. Continue this process, knitting one stitch and lifting the previous stitch over until you have bound off all the stitches except the last one. To finish, cut the yarn, leaving a long enough tail to weave in later, and pull it through the last stitch to secure it.
Once you have bound off, you can take some time to give your scarf a polished look. One way to do this is by blocking your scarf. Blocking involves wetting the scarf and then laying it flat to dry, shaping it to the desired dimensions. This helps to even out any irregularities in the stitch pattern and give the scarf a more professional finish.
If you want to add a decorative touch to your honeycomb scarf, you can consider adding fringe or tassels. Measure out some strands of yarn and cut them to the desired length for your fringe or tassels. Then, attach them to the ends of your scarf by folding each strand in half and pulling the loop through the edge of the scarf with your crochet hook, and then pulling the ends of the strand through the loop to secure it.
With these final touches, your honeycomb scarf will be ready to wear or gift to someone special. Enjoy the cozy warmth and unique texture of your handcrafted creation!
Blocking Your Honeycomb Scarf
Blocking is an essential step in finishing your honeycomb scarf and giving it a professional, polished look. It helps to even out your stitches, open up the honeycomb pattern, and ensure that your scarf lays flat and drapes nicely when worn.
To block your honeycomb scarf, you will need a few basic supplies, including blocking mats or towels, rustproof pins, and a spray bottle filled with water. Start by laying your scarf flat on the blocking mats or towels, making sure that it is in the shape and size you want it to be. Pin the edges of the scarf down, being careful not to stretch it too much or pull it out of shape.
Next, using the spray bottle, mist the entire scarf with water. You want to make sure that the scarf is evenly dampened but not soaking wet. Let the scarf dry completely, which may take a day or two depending on the thickness of your yarn. Once the scarf is dry, carefully remove the pins and enjoy the beautiful drape and stitch definition of your blocked honeycomb scarf.
Blocking your honeycomb scarf not only improves its appearance but also helps to set the stitches and ensures that your hard work will be preserved for years to come. It can be a bit time-consuming, but the results are well worth it. So take the time to block your honeycomb scarf and enjoy the satisfaction of a perfectly finished project.
Styling and Caring for Your Finished Scarf
Once you have finished knitting your honeycomb scarf, it’s time to style it and take care of it properly. Here are some tips to help you make the most of your new accessory:
Styling Tips:
- Wear your honeycomb scarf in a variety of ways to match different outfits and occasions. You can wrap it around your neck for a cozy and warm look, or drape it over your shoulders like a shawl for a more elegant and sophisticated vibe.
- Experiment with different color combinations for a unique and personalized style. The honeycomb stitch pattern adds texture and interest, so don’t be afraid to mix and match colors to make your scarf stand out.
- Accessorize your honeycomb scarf with other winter accessories like gloves, hats, or brooches to create a cohesive and fashionable look.
Care Instructions:
- Hand-wash your honeycomb scarf using a mild detergent and lukewarm water. Avoid using harsh chemicals or bleach that can damage the fibers.
- Gently squeeze out excess water without wringing or twisting the scarf.
- Reshape the scarf while damp and lay it flat on a clean towel to dry. Avoid hanging it to prevent stretching.
- If necessary, you can lightly iron the scarf on a low heat setting to smooth out any wrinkles, but be cautious not to damage the yarn.
- Store your honeycomb scarf in a cool and dry place, preferably folded or rolled to maintain its shape and prevent unnecessary stretching.
By following these styling tips and caring for your honeycomb scarf properly, you can enjoy its warmth and beauty for many winters to come. Whether you wear it casually or for formal occasions, this versatile accessory is sure to add a touch of elegance to your outfits.
Q&A:
What is a honeycomb scarf knitting pattern?
A honeycomb scarf knitting pattern is a specific knitting pattern that creates a texture resembling a honeycomb. It involves using different stitch combinations to create the pattern.
How do I knit a honeycomb scarf?
To knit a honeycomb scarf, you will need to follow a specific knitting pattern. The pattern will typically include instructions for the type of yarn, needle size, and the specific stitch combinations needed to create the honeycomb texture. You will need to cast on the required number of stitches and then follow the pattern instructions to create the scarf.
What stitches are used in a honeycomb scarf knitting pattern?
A honeycomb scarf knitting pattern typically uses a combination of knit, purl, and slip stitches to create the honeycomb texture. The specific stitch combination may vary depending on the pattern, but these are the common stitches used.
Can I modify a honeycomb scarf knitting pattern?
Yes, you can modify a honeycomb scarf knitting pattern to fit your preferences. You can change the yarn, needle size, or even adjust the stitch combinations to create a different look. However, it is important to note that modifying the pattern may affect the final outcome, so it is recommended to make a gauge swatch before making any modifications.