
Knitting a house pattern is a fun and creative way to add a touch of coziness to your home décor. Whether you are a beginner or an experienced knitter, there are countless house knitting patterns available that cater to different skill levels and preferences.
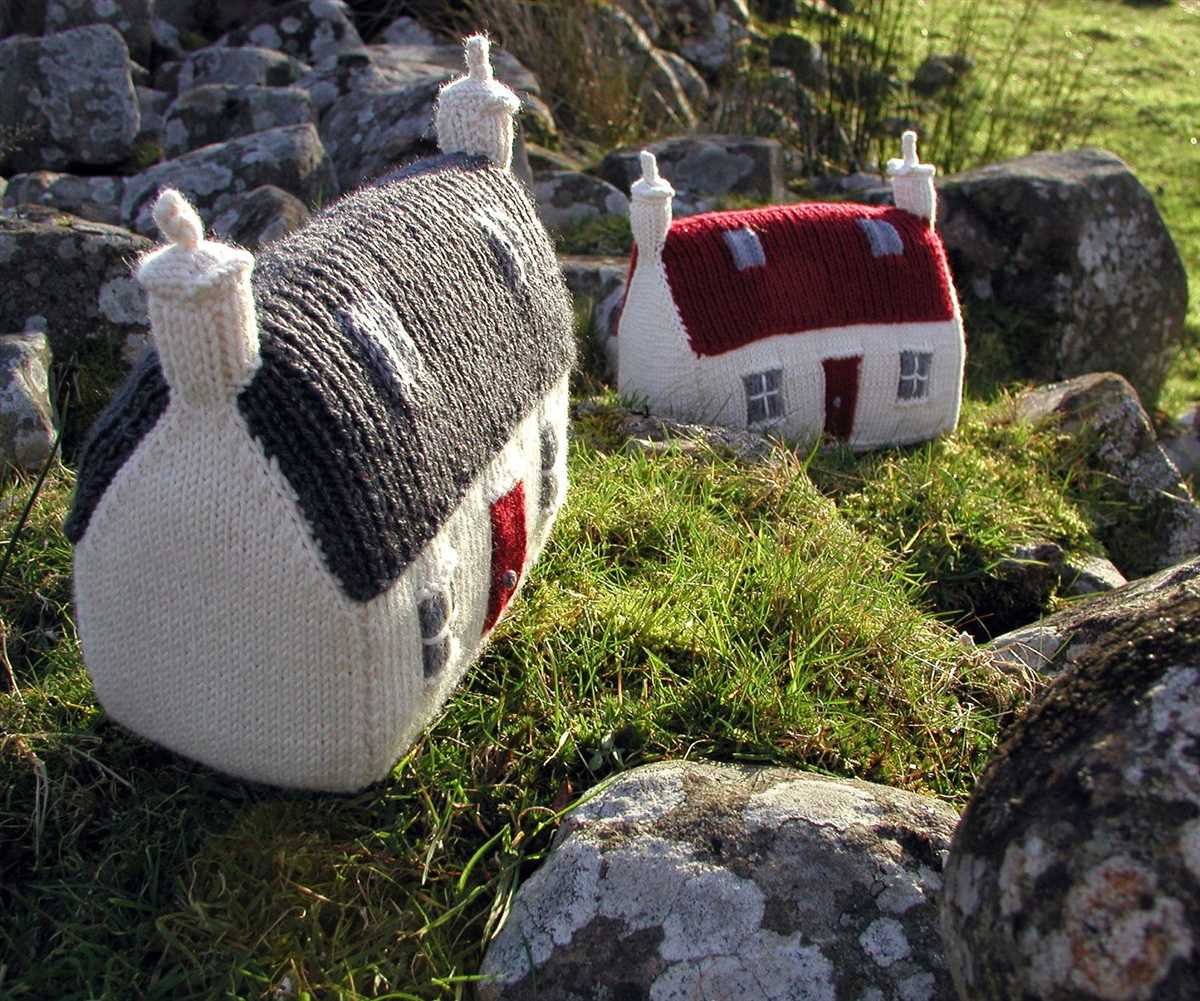
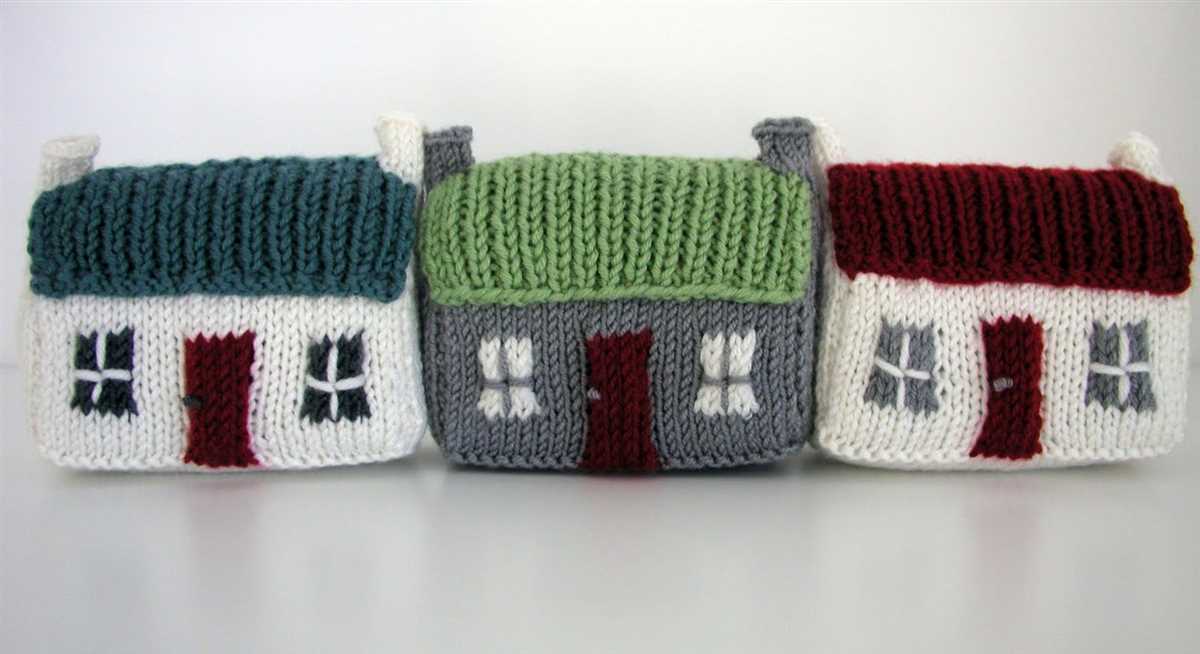
One popular house knitting pattern is the cozy cottage pattern. This pattern features a charming house with windows, a door, and a chimney. It is perfect for creating small decorative items like coasters, ornaments, or even a mini house-shaped pillow. The cozy cottage pattern is relatively simple and is great for knitters who are new to creating three-dimensional items.
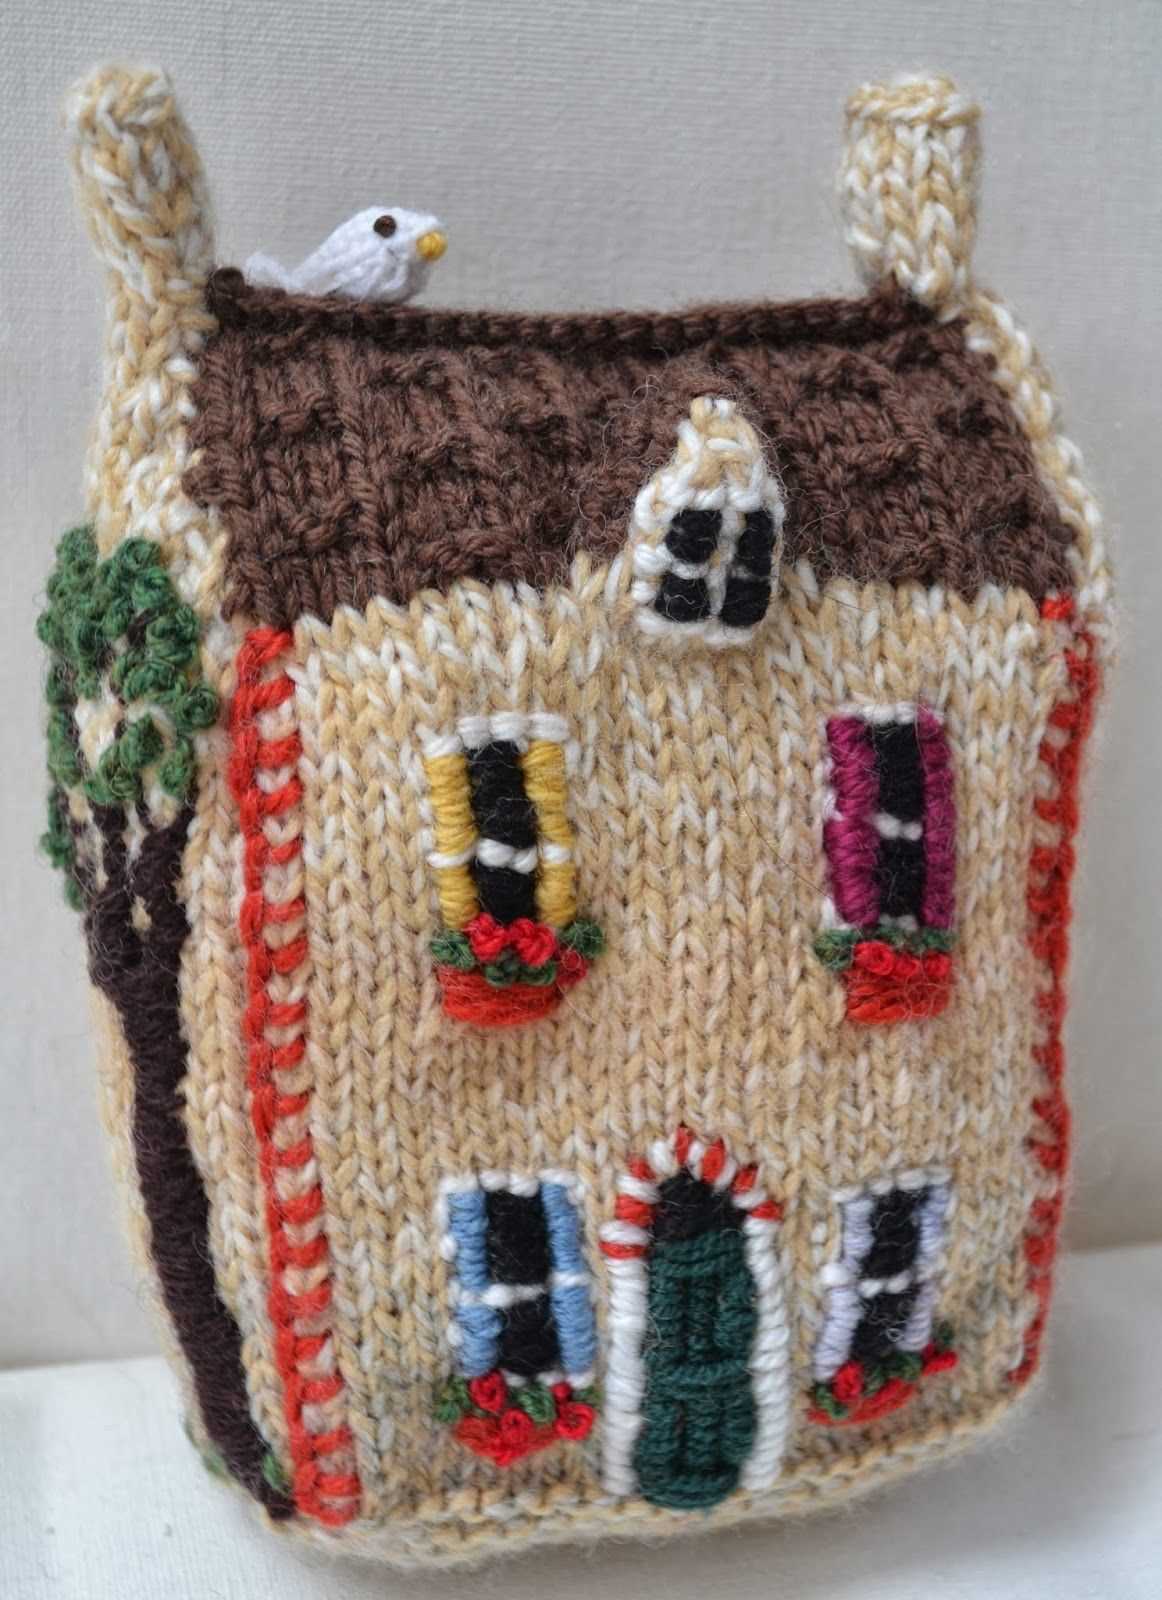
For those who are looking for a more challenging project, the intricate Victorian house pattern might be the perfect choice. This pattern showcases the beautiful details and architecture of Victorian homes, including intricate window frames, ornate doors, and decorative accents. Knitting this pattern requires a higher level of skill and patience, but the end result is a stunning piece that will add an elegant touch to any room.
No matter which house knitting pattern you choose, knitting a house is a wonderful way to unleash your creativity and personalize your living space. Whether you display your knitted houses on a shelf, hang them as ornaments, or use them as functional items, they are sure to bring a warm and homey feel to your home.
House Knitting Pattern

Knitting can be a relaxing and rewarding hobby, and one popular project for knitters is creating a house knitting pattern. Whether you want to make a cute toy for a child or a decorative piece for your home, a house knitting pattern allows you to create a unique and personalized item.
Materials:
- Worsted weight yarn in desired colors
- Knitting needles in the appropriate size for your yarn
- Tapestry needle
- Stuffing
Instructions:
- Begin by casting on the required number of stitches using your main color yarn. This will form the base of the house.
- Knit in the round for a few rows to create the bottom of the house. You can switch to a different color yarn to create a contrasting border if desired.
- Continue knitting in the round, increasing the number of stitches on each row to create the walls of the house. You can change colors to create stripes or add windows and doors using different stitch patterns.
- Once you have reached the desired height for the walls, decrease the number of stitches on each row to create the roof of the house. You can switch back to your main color yarn for the roof or use a different color for added visual interest.
- When you have completed knitting the roof, bind off the stitches and weave in any loose ends.
- Use a tapestry needle to sew the bottom and top of the house together, leaving an opening for stuffing.
- Stuff the house firmly with the desired amount of stuffing, making sure to shape it into a house shape as you go.
- Complete sewing the opening shut with the tapestry needle.
- Your house knitting pattern is now complete! You can add any additional embellishments or decorations, such as yarn tassels or embroidered details, to further customize your creation.
This house knitting pattern allows you to let your creativity shine as you bring a cozy and charming house to life with your knitting skills. Whether you gift it to a loved one or display it proudly in your own home, this handmade creation is sure to be cherished for years to come.
The Basics of House Knitting
If you’re new to knitting and would like to try your hand at creating cozy and adorable house designs, you’ve come to the right place. House knitting patterns are a fun and creative way to add a touch of charm to your home decor or create a thoughtful gift for a loved one. In this guide, we’ll cover the basics of house knitting, including the materials you’ll need, common techniques used, and tips for success.
Materials:
- Yarn: Choose a soft and durable yarn in the color(s) of your choice. Consider using a worsted weight yarn for a sturdier result.
- Knitting needles: Select the appropriate knitting needle size for your chosen yarn. Circular or double-pointed needles are recommended for knitting in the round.
- Tapestry needle: This needle is used for weaving in ends and sewing any necessary seams.
- Stuffing: Use polyester fiberfill or another suitable stuffing material to give your house structure and dimension.
Techniques:

House knitting patterns typically involve a combination of basic knitting stitches, such as knit, purl, and increases or decreases. You may also encounter techniques like knitting in the round, seaming, and colorwork to add visual interest to your house design. Make sure to familiarize yourself with these techniques before starting your project.
Tips for Success:
- Read the pattern thoroughly before beginning to ensure you understand the instructions and have all the necessary supplies.
- Take your time and practice patience. Knitting can be a slow process, especially when working on intricate designs.
- Keep track of your progress by using stitch markers or a row counter.
- Don’t be afraid to make mistakes. Knitting is a learning process, and sometimes the best way to improve is through trial and error.
- Customize your house design by experimenting with different colors, textures, and embellishments. Let your creativity shine!
Now that you have an understanding of the basics, it’s time to grab your knitting needles and start creating your own charming house designs. With a little practice and creativity, you’ll soon have a collection of knitted houses that will bring warmth and joy to any space.
Choosing the Right Yarn for Your House Knitting Project
When it comes to knitting projects for your house, choosing the right yarn is essential. The yarn you select will not only determine the look and feel of the finished piece but also its durability and functionality. Here are some factors to consider when choosing yarn for your house knitting project.
1. Fiber: The type of fiber used in the yarn will greatly impact the characteristics of the knitted item. For house knitting projects, it is important to choose a yarn that is durable and easy to care for. Synthetic fibers such as acrylic or nylon blends are often a good choice as they are machine washable and resistant to wear and tear. Natural fibers like cotton or bamboo can also be suitable, but they may require more care.
2. Weight: The weight of the yarn refers to its thickness. For house knitting projects, a medium or bulky weight yarn is often preferable as it will make the final piece thicker and more substantial. Thin yarns may not provide enough warmth or sturdiness for items such as blankets or cushions. Consider the intended use of the knitted item and choose a yarn weight that matches your desired outcome.
3. Color and Texture: The color and texture of the yarn will play a significant role in the overall aesthetic of your house knitting project. Consider the existing color scheme and style of your home to ensure a cohesive look. Additionally, think about the level of texture you want to incorporate into the design. Variegated or textured yarns can add visual interest to your knitted items.
Remember, the right yarn choice can make all the difference in the success of your house knitting project. Consider the fiber, weight, color, and texture of the yarn to ensure that your finished piece not only looks great but also meets your functional needs.
Tools and Materials You’ll Need for House Knitting
House knitting is a fun and creative way to add a cozy touch to your home decor. Whether you’re a beginner or an experienced knitter, having the right tools and materials is essential to ensure a successful and enjoyable knitting project. Here’s a list of the must-have items you’ll need:
Knitting Needles
The first and most important tool you’ll need is a set of knitting needles. Choose the right size and type of needles based on the yarn weight and the desired stitch size. Circular needles are often preferred for larger projects like blankets, while straight needles are ideal for smaller items like pillows or cushions.
Yarn

When it comes to house knitting, the type of yarn you choose can make a big difference in the final result. Opt for a soft and durable yarn that is easy to work with, such as cotton or acrylic. You’ll also need to consider the color and texture of the yarn, depending on the style and theme of your home.
Tape Measure
A tape measure is an essential tool for measuring your knitting progress and ensuring the correct dimensions for your house knitting project. It will help you determine the length and width of your knitted pieces, as well as any additional measurements needed for shaping or joining.
Stitch Markers
Stitch markers are small, lightweight rings or clips that are used to mark specific stitches or sections in your knitting. They are particularly useful for complex patterns or for keeping track of increases and decreases. Stitch markers come in various shapes and colors, so choose ones that are easy to see and won’t get tangled in your yarn.
Scissors
Every knitter needs a pair of sharp scissors for cutting yarn and trimming any excess threads. Choose a pair that is comfortable to hold and has a fine point for precise cutting. Keep your scissors handy, but make sure to store them safely to avoid accidents.
Tapestry Needle
A tapestry needle, often referred to as a yarn needle, is a large-eyed needle used for weaving in loose ends and joining knitted pieces together. It’s important to have a tapestry needle that is smooth and doesn’t snag or split the yarn. It can also come in handy for other finishing touches, such as adding decorative details or embroidering.
In addition to these essential tools, you may also need other accessories like stitch holders or row counters, depending on the complexity of your house knitting project. Remember to choose high-quality materials that are comfortable to work with, as they will greatly influence the outcome of your knitting. With the right tools and materials, you’ll be well-equipped to embark on your house knitting adventure and create beautiful knitted items that will bring warmth and charm to your home.
Tips for Beginner House Knitters
Knitting a house can be a fun and rewarding project for beginners. If you’re just starting out, here are some tips to help you get started:
1. Choose the Right Materials
Before you begin, make sure you have the right materials for knitting a house. You will need a set of knitting needles, yarn, and a pattern. It’s important to choose a yarn that is suitable for the project and comfortable for you to work with. Consider the thickness and texture of the yarn, as well as the color and pattern.
2. Start with Simple Stitches

As a beginner, it’s best to start with simple stitches and techniques. Practice basic knitting stitches like knit and purl before attempting more complex patterns. Familiarize yourself with knitting terms and techniques, such as casting on, binding off, and increasing and decreasing stitches. Once you feel comfortable with the basics, you can challenge yourself with more intricate patterns.
3. Follow the Pattern Carefully
When knitting a house, it’s important to carefully follow the pattern instructions. Read through the pattern before you start and make sure you understand each step. Take note of any abbreviations or special instructions that may be included. Following the pattern accurately will ensure that your finished house looks the way it’s supposed to.
4. Take Your Time
Knitting a house can be a time-consuming process, especially for beginners. Take your time and don’t rush through each step. Remember to relax and enjoy the process. If you make a mistake, don’t be afraid to undo and redo your stitches. This is all part of the learning experience, and with practice, you will improve.
5. Seek Help and Guidance
If you’re having difficulty or need clarification on any aspect of knitting a house, don’t hesitate to seek help and guidance. Join knitting groups or forums where you can ask questions and share your progress. You can also consider taking knitting classes or watching online tutorials to learn new techniques and get inspiration from experienced knitters.
Knitting a house can be a fun and satisfying project for beginners. By following these tips and practicing regularly, you’ll be able to create beautiful knitted houses in no time.
Advanced Techniques for House Knitting
Knitting a house can be a fun and creative project for experienced knitters looking to challenge themselves. While simple house knitting patterns may only require basic knitting skills, advanced techniques can take your house knitting to the next level.
1. Colorwork: Adding color to your knitted house can create a stunning visual effect. Techniques such as stranded colorwork or intarsia can be used to incorporate different hues and patterns into the walls, roof, and windows of your house. This technique requires careful attention to detail and concentration, as you will need to manage multiple yarn colors throughout your project.
2. Cable Knitting: Adding cables to your knitted house can give it a three-dimensional and textured look. Cable knitting involves crossing stitches over each other, creating a twisted effect. You can incorporate cables into the walls or roof of your house, or even create intricate cable patterns for the windows or doors. This technique requires a cable needle and knowledge of basic cable knitting stitches.
3. Lace Knitting: Lace knitting can bring an intricate and delicate touch to your knitted house. By using yarn overs and decreases, you can create decorative lace patterns that resemble windows or decorative accents. The openwork created by lace knitting adds an elegant and airy feel to the house. This technique requires attention to detail and familiarity with lace knitting stitches.
4. Fair Isle Knitting: Fair Isle knitting is a technique that involves creating patterns using multiple colors in each row. This technique can be used to incorporate various motifs, such as flowers, trees, or geometric shapes, into your knitted house. Fair Isle knitting requires skill in managing multiple yarn colors and maintaining an even tension. The result is a visually striking and detailed house.
5. Embroidery and Appliqué: Embroidery and appliqué techniques can be used to add intricate details and embellishments to your knitted house. You can stitch on small windows, doors, or even flowers using embroidery techniques. Appliqué involves attaching small knitted or fabric pieces to the house, such as a chimney or decorative accents. These techniques allow for creativity and customization in adding unique touches to your house.
By incorporating advanced knitting techniques into your house knitting projects, you can create truly unique and impressive pieces. Whether it’s through colorwork, cables, lace, Fair Isle, or embroidery, each technique adds its own charm and complexity to your knitted house. So, grab your knitting needles and start exploring these advanced techniques to take your house knitting to new heights!
Understanding Knitting Patterns for Houses
Knitting patterns for houses can be a fun and creative way to add a touch of warmth and charm to your home. Whether you’re an experienced knitter or just starting out, understanding these patterns is essential to successfully bring your house knitting project to life.
Choosing the Right Pattern: When selecting a house knitting pattern, it’s important to consider the size and style of the house you want to create. Some patterns may be more intricate and detailed, while others may be simpler and more basic. It’s also important to consider the skill level required for the pattern, as some may be better suited for advanced knitters.
Reading the Instructions: Once you’ve chosen a pattern, it’s crucial to carefully read and understand the instructions before you begin knitting. Knitting patterns for houses often include abbreviations and symbols that may be unfamiliar if you’re new to knitting. Take the time to familiarize yourself with these conventions to avoid any confusion or mistakes during the knitting process.
Using the Right Materials: In addition to understanding the instructions, using the right materials is essential for a successful house knitting project. The pattern should specify the type and weight of yarn, as well as the size of knitting needles needed. Using the recommended materials will ensure that your house turns out as intended and will help you achieve the desired size and shape.
Following the Pattern Steps: Once you have your materials ready, it’s time to start knitting! Follow the pattern steps carefully, making sure to keep track of your progress and any stitch counts or pattern repeats. It’s also helpful to have a notebook or markers handy to keep track of rows or rounds completed. Pay attention to any special instructions or techniques, as these can greatly affect the final result.
Personalizing Your House: While the pattern provides the basic framework for your house knitting project, don’t be afraid to add your own personal touch. Consider using different colors or textures of yarn, or adding embellishments such as buttons or embroidery. This will make your house truly unique and showcase your creativity and style.
Knitting patterns for houses can be a rewarding and enjoyable way to create beautiful and decorative pieces for your home. By understanding the patterns, following the instructions, and adding your personal touch, you can create a knitted house that will add warmth and charm to any space.
Creating Custom Patterns for Your House Knitting Project

Knitting is a versatile and creative craft that allows you to create unique and personalized items, including patterns for your house. By creating custom patterns for your house knitting project, you can add a personal touch to your home decor and showcase your knitting skills.
When creating custom patterns for your house knitting project, it’s important to consider the style and theme of your home. Think about the colors, textures, and patterns that will complement your existing decor and create a cohesive look. You can also draw inspiration from nature, art, or your favorite design trends to help you come up with unique and eye-catching patterns.
Choose the Right Yarn and Needles

Before you start creating your custom patterns, it’s essential to choose the right yarn and needles for your project. Consider the type of yarn that will work best for the item you want to knit, whether it’s a cozy blanket, decorative pillow cover, or even a knitted rug. Different yarn types and weights will create different textures and drapes, so make sure to choose the one that suits your project.
Additionally, the size of your needles will also affect the outcome of your knitting project. Larger needles will create a looser and more open fabric, while smaller needles will produce a tighter and denser fabric. Experiment with different needle sizes to achieve the desired result for your custom patterns.
Be Mindful of Stitch Patterns and Construction
When designing your custom patterns, consider the stitch patterns and construction techniques that will work best for your project. Different stitch patterns, such as cables, lace, or colorwork, can add visual interest and texture to your knitted items. Additionally, think about the construction methods, such as knitting in the round or dividing your work into panels, that will achieve the desired shape and fit for your house knitting project.
Remember to keep track of your custom patterns as you knit, especially if you plan to replicate them in the future. Note down the stitch patterns, yarn type, needle size, and any modifications you make along the way. This information will be valuable when you want to recreate the same patterns or make adjustments to suit different projects in the future.
In conclusion, creating custom patterns for your house knitting project allows you to infuse your personal style and creativity into your home decor. By considering the right yarn and needles, being mindful of stitch patterns and construction techniques, and keeping track of your patterns, you can create unique and beautiful knitted items that will enhance the overall aesthetic of your home.
Finishing and Assembling Your Knitted House
Once you have completed all the knitting sections of your house, it’s time to bring everything together and finish up the project. Here are the steps to follow for finishing and assembling your knitted house:
1. Blocking

Before assembling, it’s important to block your knitted pieces to ensure they are all the same size and shape. Wet blocking is typically the most effective method for this. Soak your pieces in lukewarm water with a gentle soap, then lay them flat on a towel, shaping them to their desired dimensions. Allow them to air dry completely.
2. Seaming
Next, it’s time to seam your house together. Start by aligning the edges of the front and back panels, making sure the windows and door openings are properly lined up. Use a tapestry needle and the same yarn to sew the panels together using mattress stitch or another preferred seaming method. Repeat this process to attach the side panels and the roof.
3. Embellishments
Now that your house is structurally complete, you can add any embellishments or decorative details. This could include stitching on a chimney, adding embroidered flowers or windows, or even attaching small buttons or beads for extra texture. Get creative and make your knitted house truly unique!
4. Finishing Touches
Finally, take some time to neaten up any loose ends and give your house a final once-over. Trim any excess yarn, weave in any remaining loose ends, and check for any areas that may need reinforcement. Take pride in your finished knitted house and display it proudly!
Adding Embellishments to Your Knitted House
Once you have finished knitting your house, you may want to add some embellishments to make it even more special. There are many different ways you can add details and decorations to your knitted house, whether it’s through embroidery, appliqué, or even buttons. These embellishments can give your house a unique and personalized touch, making it stand out from the rest.
Embroidery
Embroidery is a popular way to add intricate details to your knitted house. You can use different stitches and colorful threads to create patterns, designs, or even write words or names on the walls or roof. Embroidery can be done on the exterior or interior of your house, adding a charming and whimsical touch to your knitted creation.
There are various embroidery techniques you can try, such as cross-stitch, satin stitch, or backstitch, depending on the effect you want to achieve. You can also use different colors and textures of threads to create contrasting or complementary designs. Let your creativity guide you as you add beautiful embroidery to your knitted house.
Appliqué
Another way to enhance your knitted house is through appliqué. You can cut out shapes or patterns from different fabrics and sew or glue them onto your knitted house. Whether it’s adding windows, doors, flowers, or any other decorative elements, appliqué can bring a three-dimensional aspect to your house.
When choosing fabrics for appliqué, consider the texture, color, and pattern. You can use cotton, felt, or even lace to add a unique touch to your knitted house. Your appliqué pieces can be sewn or glued onto your knitted house, making it easy to experiment and make changes until you achieve the desired look.
Buttons and Accessories

Buttons and other small accessories can also be used to embellish your knitted house. You can sew buttons onto the walls or roof to represent windows or as decorative elements. In addition to buttons, you can also use small beads, ribbons, or charms to add extra flair to your house. These accessories can add a whimsical or vintage touch, depending on the style you want to achieve.
When adding buttons or accessories, consider the size, color, and theme of your knitted house. You can use contrasting or complementary colors to create eye-catching details. Experiment with different placements and combinations to find the perfect embellishments for your knitted house.
Caring for Your Knitted House
After you have completed your knitted house, it is important to properly care for it to ensure its longevity and keep it looking its best. Here are some tips to help you in caring for your knitted house:
1. Washing: When it is time to clean your knitted house, you can hand wash it using mild soap and cool water. Gently soak the house in the soapy water, then lightly agitate it to remove any dirt or stains. Rinse the soap out thoroughly and press out any excess water. Avoid wringing or twisting the house, as this can cause it to lose its shape.
2. Drying: Once you have washed your knitted house, lay it flat on a clean towel to dry. Avoid hanging or stretching the house while it is wet, as this can also cause it to lose its shape. If desired, you can stuff the house with a clean, dry towel to help it retain its shape as it dries.
3. Storage: When your knitted house is not in use, it is best to store it in a cool, dry place. Avoid exposing it to direct sunlight for extended periods of time, as this can cause the colors to fade. You can also store the house in a sealed plastic bag to protect it from dust and insects.
4. Repairing: If your knitted house gets damaged or starts to unravel, you can easily fix it using a needle and matching yarn. Simply stitch the loose or damaged area back together, making sure to secure it firmly. If necessary, you can also add a small amount of fabric glue to reinforce the repair.
By following these care instructions, you can keep your knitted house looking beautiful for years to come. Remember to take the time to clean and store it properly, and make any necessary repairs as soon as possible to prevent further damage. With proper care, your knitted house will continue to bring warmth and joy to your home.