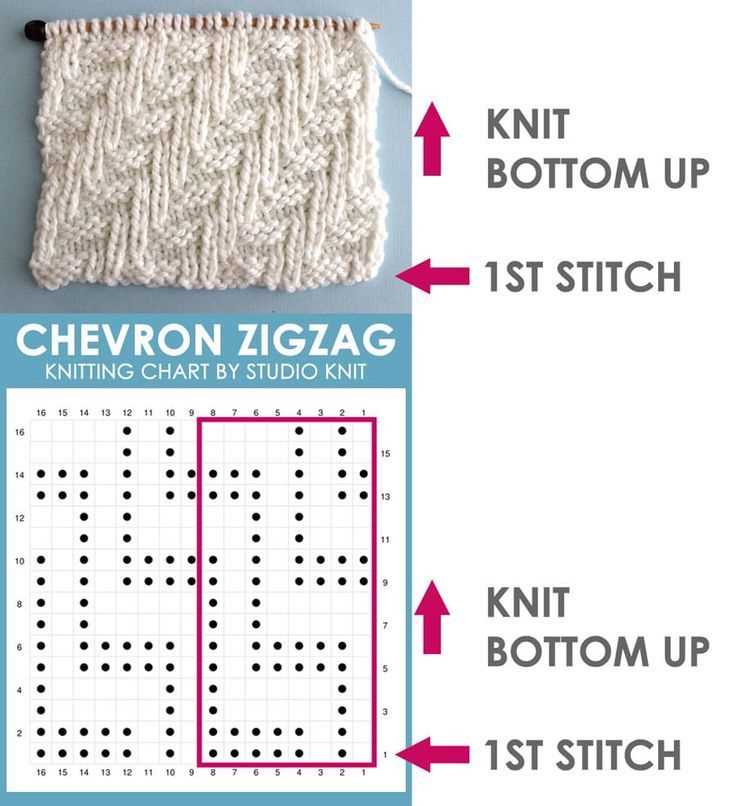
Knitting patterns can look intimidating at first, with their combinations of abbreviations, symbols, and charts. However, once you understand the basics, reading and following a knitting pattern becomes much easier. Whether you’re a beginner or an experienced knitter, knowing how to decipher a pattern is a valuable skill that will open up countless knitting possibilities.
Firstly, it’s important to familiarize yourself with the pattern’s key and abbreviations. This key will explain the different symbols and terms used in the pattern, allowing you to understand the instructions and charts. No two patterns are exactly alike, so it’s crucial to read the key carefully before you begin. It’s also a good idea to keep a knitting dictionary or guide nearby, in case you encounter any unfamiliar terms or symbols.
Next, take a close look at the pattern’s instructions. They will usually start with a list of materials needed, including specific yarn types and needle sizes. It’s essential to have the correct supplies before you start, as different materials can affect the size and appearance of your finished project. After the materials list, the pattern will provide step-by-step instructions for each section of the project, such as casting on, working specific stitches, and shaping the garment. Take your time to read and understand each instruction before you begin, as small mistakes can have a big impact on the final outcome.
Finally, pay close attention to any charts or graphs included in the pattern. These visual representations can be extremely helpful in understanding complex stitch patterns or colorwork. Each symbol or color on the chart corresponds to a specific stitch or color change, so take the time to study and decipher the chart before you start knitting. If you prefer written instructions, the pattern will usually provide a written explanation alongside the chart. Take advantage of both the chart and written instructions to ensure accuracy and clarity in your knitting.
Understanding knitting abbreviations
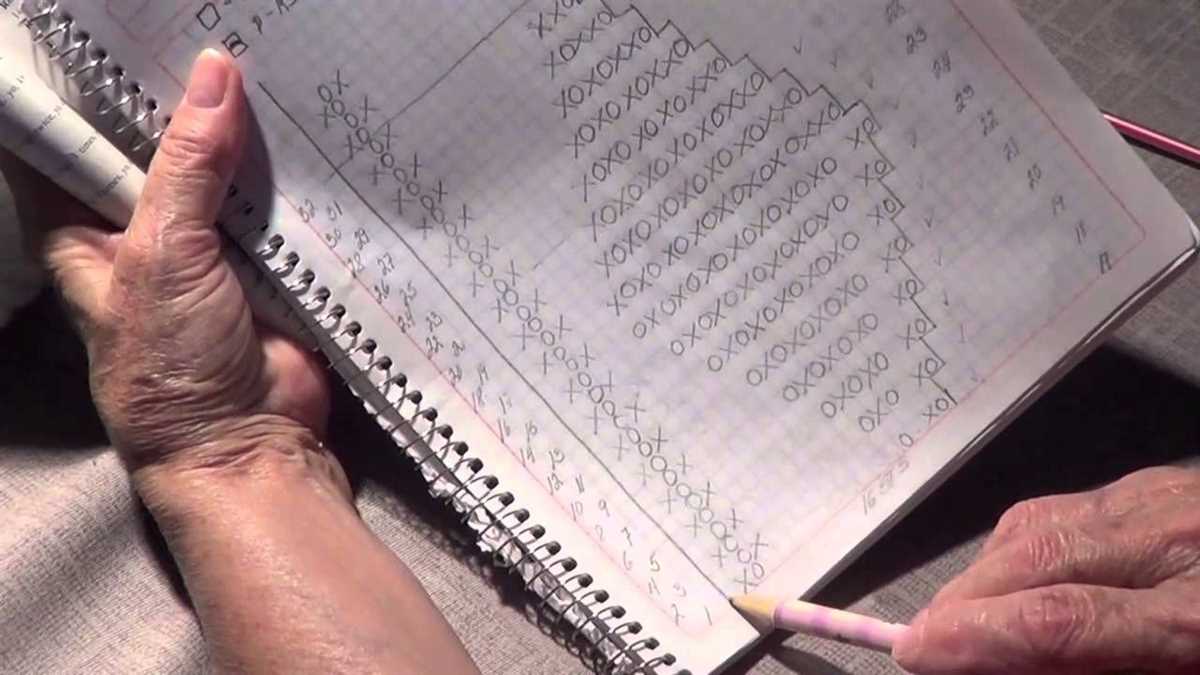
When you start reading a knitting pattern, you may come across various abbreviations that may seem confusing at first. However, understanding these knitting abbreviations is essential for following the pattern correctly and creating your desired project. Here are some common knitting abbreviations:
1. Knit (K)
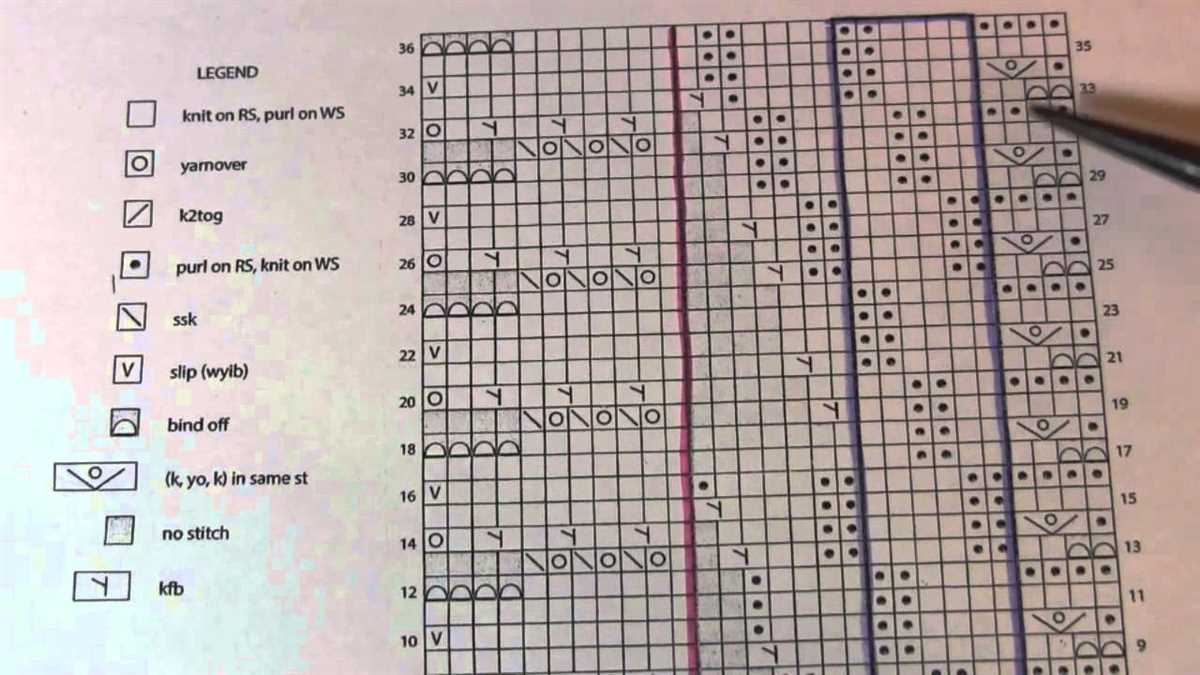
The stitch abbreviation “K” stands for knit, which is a basic stitch in knitting. When you see “K” in a pattern, it means you need to insert the right-hand needle into the front of the stitch on the left-hand needle, wrap the yarn around the right-hand needle, and then pull it through the stitch.
2. Purl (P)

The stitch abbreviation “P” stands for purl, which is another basic stitch. Purling is the opposite of knitting and creates a different texture. To purl, you need to insert the right-hand needle into the front of the stitch on the left-hand needle from right to left, wrap the yarn around the right-hand needle, and then pull it through the stitch.
3. Yarn Over (YO)
The abbreviation “YO” refers to a yarn over, which is an increase in knitting. It creates an extra loop on the needle and is often used for lace and decorative patterns. To do a yarn over, you simply bring the yarn over the right-hand needle from back to front.
4. Decrease

There are various ways to decrease stitches in knitting, and each decrease has its own abbreviation. Some common decrease abbreviations include:
- Knit Two Together (K2tog) – knit two stitches together as one stitch.
- Purl Two Together (P2tog) – purl two stitches together as one stitch.
- Slip, Slip, Knit (SSK) – slip two stitches knitwise, insert the left-hand needle into the front of these stitches, and knit them together.
- Knit Three Together (K3tog) – knit three stitches together as one stitch.
By familiarizing yourself with these common knitting abbreviations, you will be able to understand most knitting patterns and create beautiful projects with ease.
Decoding Pattern Repetitions

When reading a knitting pattern, it is essential to understand how to decode pattern repetitions. Many knitting patterns include repeated sections that create the overall design or structure of the knitted piece. By identifying and understanding these repetitions, you can easily follow the pattern and create beautiful knitted items.
1. Identify the repeat section: To decode pattern repetitions, start by identifying the repeat section in the pattern. Look for keywords or phrases that indicate repetition, such as “repeat Rows 1-6,” “work the following pattern x number of times,” or “continue in pattern stitch until piece measures x inches.”
2. Break it down: Once you have identified the repeat section, break it down into smaller steps. Look for any specific instructions or stitch patterns within the repeat section and make note of them. This will help you understand the structure of the repetition and how each step contributes to the overall design.
3. Follow the repeat instructions: When you reach the repeat section in the pattern, follow the instructions given. If there are multiple repeats, mark your progress after each completed repeat to keep track of where you are in the pattern.
4. Pay attention to stitch counts: Stitch counts are crucial when working with pattern repetitions. Make sure to count your stitches at the end of each repeat to ensure you are on track. If the stitch count is off, go back and double-check your work or make any necessary adjustments.
5. Take notes: While working through the pattern repetitions, it can be helpful to take notes or use stitch markers to highlight important sections or changes in the pattern. This will make it easier to reference later if needed and help you stay organized.
By understanding how to decode pattern repetitions, you will be able to confidently follow knitting patterns and create stunning projects with ease. Remember to take your time, read the instructions carefully, and don’t hesitate to ask for help if you are unsure about any part of the pattern.
Identifying stitch markers and stitch counts
When reading a knitting pattern, it is important to understand the use of stitch markers and stitch counts. Stitch markers are small rings or clips that are placed on the knitting needle to mark specific points in the pattern. They help knitters keep track of the different sections or stitches in their work. Stitch counts, on the other hand, refer to the number of stitches required at a particular point in the pattern.
Identifying stitch markers in a knitting pattern is usually quite straightforward. They are often labeled in the pattern instructions, indicated by phrases such as “place marker” or “PM”. These markers are typically placed between stitches or before/after a specific stitch to indicate a certain action to be taken in the pattern. For example, a pattern may instruct the knitter to place a marker before the center stitch to mark the beginning of a new section.
Stitch counts are also important in understanding a knitting pattern. They provide a guide for how many stitches should be on your needles after completing a specific set of instructions. Stitch counts are often given at the end of a row or a section of the pattern, and they help ensure that you are on track and have not made any errors in your knitting. For example, a pattern may have a stitch count of 50 stitches after completing a certain row, and you can check your work to make sure you have the correct number of stitches.
Keeping track of stitch markers and stitch counts is crucial for following a knitting pattern accurately. By paying attention to the instructions and understanding the purpose of these markers and counts, knitters can navigate their way through a pattern with ease and confidence.
Interpreting gauge and measurements

When reading a knitting pattern, one of the most important things to understand is the gauge. Gauge refers to the number of stitches and rows per inch that the pattern recommends for a specific yarn and needle size. It is crucial to match the gauge in order to achieve the correct measurements and fit of the finished garment.
Before starting a project, it is essential to swatch and measure your gauge. This means knitting a small sample of fabric using the recommended yarn and needle size. Measure the number of stitches and rows in a given measurement to determine if it matches the pattern’s gauge. Adjusting your needle size or yarn weight can help achieve the correct gauge if needed.
Measurement abbreviations:
- st(s) – stitch(es)
- hdc – half double crochet
- dc – double crochet
- flo – front loop only
- blo – back loop only
Understanding measurements in the pattern:
The pattern will often include specific measurements for each size or a range of sizes. These measurements indicate the size of the finished garment and can help you choose the appropriate size to knit or crochet. Common measurements include bust/chest, waist, and hip measurements for tops, as well as lengths for sleeves, body, and overall garment. Make sure to select a size that is closest to your own measurements or the desired fit.
If you are unsure about a particular measurement or abbreviation in the pattern, consult the pattern’s glossary or a reliable knitting/crochet reference book. Knowing how to interpret and adjust for gauge and measurements will ensure that your finished project fits as intended!
Exploring different stitch patterns
When it comes to knitting, there are so many different stitch patterns to explore and try out. Each stitch pattern creates a unique texture and design, allowing you to customize your knitting projects. Whether you’re a beginner knitter looking to expand your skills or an experienced knitter wanting to experiment with new patterns, exploring different stitch patterns is a great way to add variety and creativity to your knitting.
Stockinette stitch: One of the most basic and versatile stitch patterns, the stockinette stitch creates a smooth fabric with visible “V” patterns on the right side and purl bumps on the wrong side. It’s great for creating simple, sleek designs and is commonly used in garments and accessories.
Ribbing: Ribbing is created by alternating knits and purls in a repeat pattern. It’s often used for cuffs, collars, and hems as it creates an elastic and stretchy fabric. Ribbing can vary in width and can be done in different combinations of knits and purls, such as 1×1 ribbing (knit 1, purl 1), 2×2 ribbing (knit 2, purl 2), or even 3×1 ribbing (knit 3, purl 1).
Cable stitch: Cable stitches involve twisting the knit stitches to create a raised, cable-like design. They add depth and texture to your knitting projects and are often used in sweaters, hats, and scarves. Cable stitches can be simple with just a few stitches crossing over each other, or they can be more complex with intricate patterns and designs.
Lace stitch: Lace stitches create delicate and openwork designs that resemble lace. They are made by increasing and decreasing stitches in specific patterns, resulting in a lacy and airy fabric. Lace stitch patterns are commonly used in shawls, scarves, and lightweight garments to add an elegant and feminine touch.
- Moss stitch: Moss stitch, also known as seed stitch, is created by alternating knit and purl stitches in a specific pattern. It creates a textured fabric with a raised, bumpy appearance. Moss stitch is often used for borders, cuffs, and edgings to add interest and dimension to a knitting project.
- Garter stitch: Garter stitch is achieved by knitting every row, creating a fabric with ridges on both sides. It’s the simplest stitch pattern and is often used for scarves, blankets, and dishcloths. Garter stitch is great for showcasing the texture and color of the yarn.
- Slip stitch: Slip stitch patterns involve skipping stitches or inserting the needle into stitches without knitting or purling them. This creates a decorative effect, and slip stitch patterns can range from simple stripes to more intricate designs. Slip stitch patterns are great for adding colorwork and texture to your knitting projects.
Exploring and experimenting with different stitch patterns is a fun and creative way to enhance your knitting skills and create unique and personalized projects. From the basic stockinette stitch to more complex lace and cable patterns, the possibilities for creating beautiful knitted items are endless.
Following written instructions
When it comes to knitting, following written instructions is crucial for creating the desired project. By understanding and accurately interpreting the pattern, you can ensure that your finished piece turns out as intended.
1. Read the pattern carefully: Before starting any knitting project, carefully read through the pattern from beginning to end. Take note of any specific stitches or techniques that may be required, as well as any abbreviations or special instructions. Understanding the pattern as a whole will help you visualize the steps involved.
2. Familiarize yourself with knitting abbreviations: Patterns often use abbreviations to save space and make instructions more concise. Take the time to familiarize yourself with common knitting abbreviations before starting a new pattern. This will make it easier to understand and follow the instructions as you work.
3. Break it down: Once you’ve read through the pattern, break it down into smaller sections or steps. This will help you focus on one part at a time and prevent feeling overwhelmed. You can use a highlighter or sticky notes to mark the sections you’re currently working on, making it easier to follow along.
4. Take note of pattern repeats: Many knitting patterns include repeated sections, such as lace or cable patterns. It’s important to pay attention to these repeats and ensure that you’re following them correctly. Counting the number of stitches or rows in a repeat can help you stay on track and maintain the overall pattern.
5. Keep track of your progress: As you work through the pattern, it’s helpful to keep track of your progress. This can be done by marking off completed rows or using stitch markers to indicate specific sections. Having a visual representation of your progress will make it easier to pick up where you left off if you need to take a break.
6. Don’t hesitate to ask for help: If you come across any confusing or unclear instructions in a pattern, don’t hesitate to ask for help. Online knitting forums, instructional videos, and local knitting groups can be valuable resources for clarifying any questions you may have. It’s better to seek assistance and ensure you’re on the right track than to continue knitting with uncertainty.
By following written instructions carefully and taking the time to understand each step, you can successfully complete any knitting project. With practice, interpreting knitting patterns will become easier, allowing you to take on more complicated and intricate designs.
Reading knitting charts
Knitting charts are a visual representation of a knitting pattern that uses symbols or pictures to indicate the stitches and rows. They are a useful tool for knitters who prefer to work from visuals rather than written instructions. Reading knitting charts may seem intimidating at first, but with a little practice, it becomes easier to understand and follow.
1. Understanding the symbols: Each knitting chart has a key or legend that explains the symbols used in the chart. It is important to familiarize yourself with these symbols before starting the project. Common symbols include squares or circles to represent knit or purl stitches, arrows to indicate the direction of the knitting, and lines to show increases or decreases.
2. Reading from right to left: Knitting charts are typically read from right to left, similar to how knitting is done. Each row of the chart represents one row of knitting. Start at the right edge of the chart and read each symbol or symbol combination to the left. Pay attention to any repeats or pattern instructions specified in the chart.
3. Following the rows: As you work through the knitting chart, follow the rows in the correct order. After completing a row, move onto the next row in the chart. To keep track of your progress, it can be helpful to use a stitch marker or highlighter to mark off each row as you complete it.
4. Checking the key: If you encounter a symbol in the chart that you are unsure of, refer back to the key. The key will provide the necessary information to understand what the symbol represents and how to perform the corresponding stitch.
5. Paying attention to special instructions: Some knitting charts may include special instructions or notes that are important to follow. Read these instructions carefully before starting the project to ensure you understand any specific techniques or stitch patterns that are used.
By becoming familiar with knitting charts and practicing reading them, you can expand your knitting skills and tackle more complex patterns. Remember to take your time and refer back to the key and instructions as needed. Happy knitting!
Understanding symbols and notations

When reading a knitting pattern, it’s important to understand the symbols and notations used. Knitting patterns often use a combination of letters, numbers, and symbols to represent different stitches, techniques, and instructions. By familiarizing yourself with these symbols and notations, you can easily follow the pattern and create the desired result.
Symbols: Knitting patterns use symbols to represent different stitches and techniques. Each symbol corresponds to a specific action or stitch, such as knit, purl, yarn over, decrease, or increase. These symbols are usually provided in a key or legend at the beginning of the pattern, which explains the meaning of each symbol. It’s important to refer to this key and understand what each symbol represents before starting the pattern.
Notations: In addition to symbols, knitting patterns also use various notations to provide instructions and guidance. These notations may include abbreviations, repeats, and specific measurements. Abbreviations are shortened versions of knitting terms and are commonly used throughout the pattern. Repeats indicate that a specific set of instructions or stitches should be repeated a certain number of times. Measurements are often provided for specific sections or rows of the pattern, ensuring that you achieve the correct size and shape.
By understanding the symbols and notations used in knitting patterns, you can easily decipher the instructions and create beautiful projects. Take the time to familiarize yourself with the key or legend provided at the beginning of the pattern, and refer back to it as needed. Practice reading different patterns and gradually you will become more comfortable with the symbols and notations used in knitting. With experience, you’ll be able to confidently tackle any knitting pattern and create stunning pieces of work.
Recognizing increases and decreases
When reading a knitting pattern, it is important to be able to recognize the different types of increases and decreases indicated in the instructions. These techniques are commonly used to shape the fabric and create different patterns and designs.
One common type of increase is the yarn over (YO). This is indicated by a simple “YO” in the pattern. When you come across this instruction, you need to bring the yarn to the front of the work and then knit the next stitch. This creates an extra stitch and a small hole in the fabric.
Another type of increase is the make one (M1). This is often indicated by “M1” or “make 1” in the pattern. There are several ways to make a stitch, but one common method is to pick up the bar between two stitches and knit into it. This creates a new stitch and doesn’t leave a hole in the fabric.
On the other hand, there are also different types of decreases that are used in knitting patterns. The most common decrease is the knit two together (k2tog). This is indicated by “k2tog” in the pattern. To do this decrease, you simply knit the next two stitches together as if they were one stitch. This reduces the number of stitches by one.
Another common decrease is the slip, slip, knit (ssk). This is indicated by “ssk” in the pattern. To do this decrease, you slip the next two stitches knitwise, one at a time, onto the right needle. Then, you insert the left needle into the front loops of these two slipped stitches and knit them together. This also reduces the number of stitches by one.
By understanding and recognizing these different types of increases and decreases, you will be able to follow knitting patterns more easily and create beautiful, well-shaped projects.
Differentiating between right and wrong sides
When reading a knitting pattern, it is important to understand the difference between the right side and wrong side of your work. The right side is the side of the fabric that will be visible when you wear or display your finished project, while the wrong side is the side that is hidden. Differentiating between the two sides is crucial for following pattern instructions correctly.
One way to identify the right side of your work is to look for any pattern elements or stitches that are more prominent or stand out. This could be a lace pattern, cables, or any other design feature that is specifically worked on the right side. These elements will typically be noted in the pattern instructions as “RS” or “right side” to indicate when they should be worked.
It is also helpful to pay attention to any shaping instructions given in the pattern. If the instructions indicate that you should “increase” or “decrease” on the right side, this can be an indication that the right side is facing you. Similarly, if the instructions mention “purl rows” or “knit rows,” this can give you a clue about which side of the fabric you are working on.
Some patterns may have a clear distinction between the right and wrong side, while others may not. In these cases, it can be helpful to place a stitch marker or safety pin on the right side of your work to help you keep track. This can be especially useful if you are working on a complex pattern or if you need to put your project down and come back to it later.
Understanding how to differentiate between the right and wrong sides of your knitting is essential for following pattern instructions accurately and achieving the desired outcome in your projects. By paying attention to pattern elements, shaping instructions, and using markers as needed, you can confidently work through your knitting patterns and create beautiful, professional-looking pieces.
Keeping track of rows and repeats

When reading a knitting pattern, it’s important to keep track of the number of rows and repeats required for each section. This information is usually provided in the pattern instructions, either as a specific number or as a range. It’s essential to carefully read and understand these instructions to ensure that your project turns out as intended.
One common method for keeping track of rows and repeats is to use stitch markers. Stitch markers can be placed at specific points in your work to indicate when a certain number of rows or repeats have been completed. For example, if the pattern calls for repeating a set of instructions for a total of 10 times, you can place a stitch marker after every 10 rows to help you keep count.
Another useful technique is to use a row counter. A row counter is a small device that can be attached to your knitting needles or worn on your finger. With each completed row or repeat, you can simply click the counter to keep track of your progress. This can be particularly helpful if you’re working on a complex pattern that requires frequent counting and tracking.
Some patterns also include a chart or table that visually represents the order and number of rows and repeats required. This can be especially helpful for visual learners or those who prefer a more visual representation of the pattern. It’s important to familiarize yourself with the chart or table and refer to it as needed while working on the project.
- When keeping track of rows and repeats, it’s important to pay attention to any special instructions or variations provided in the pattern. These may include things like altering the pattern for different sizes or adding decorative elements at specific intervals.
- It’s also a good idea to make notes as you work through the pattern. This can help you keep track of any modifications or adjustments you make along the way, as well as any issues or questions that arise during the knitting process.
- Lastly, remember to take breaks and step back from your project from time to time. This can help prevent mistakes and ensure that you’re on track with the pattern instructions.
Finishing techniques and instructions
Completing a knitting project involves more than just the knitting itself. After binding off your last stitch, you will need to finish your project by following these techniques and instructions:
Blocking
Blocking is the process of gently shaping your knitted piece to even out the stitches and make it lay flat. Depending on the fiber content of your yarn, you can wet block or steam block your work. Wet blocking involves soaking your finished piece in water, gently squeezing out the excess water, and pinning it into shape to dry. Steam blocking involves using a steam iron or steamer to lightly moisten the piece and then shaping it with your hands or blocking tools. Blocking is an essential step to achieve a professional finish and ensure that your project looks its best.
Seaming
Seaming is the process of joining individual pieces of a project together. This is commonly done for garments or accessories that are knit in separate panels or sections. You can use various techniques such as mattress stitch, whip stitch, or slip stitch to seam your project. Before seaming, it is important to secure any loose ends and align the edges of the pieces properly. With the right technique and attention to detail, you can create a seamless and polished finish.
Finishing touches
Finishing touches refer to the final steps that give your project its completed look. This includes weaving in any remaining loose ends, adding buttons or other closures, attaching any embellishments, and blocking or steaming the final piece. These details can make a significant difference in the overall appearance and durability of your knitted item. Taking the time to carefully complete these finishing touches will result in a beautifully finished project that you can be proud of.
Summary

Understanding and following the instructions in a knitting pattern is essential for successfully completing a project. By familiarizing yourself with the terminology, abbreviations, and symbols commonly used in knitting patterns, you can easily decipher the instructions and confidently work through each step. Additionally, learning how to read charts and diagrams will expand your knitting skills and open up a world of possibilities. Remember to take your time, be patient with yourself, and practice regularly to improve your knitting abilities. With practice and perseverance, you will become a skilled knitter capable of tackling a wide range of patterns and projects.