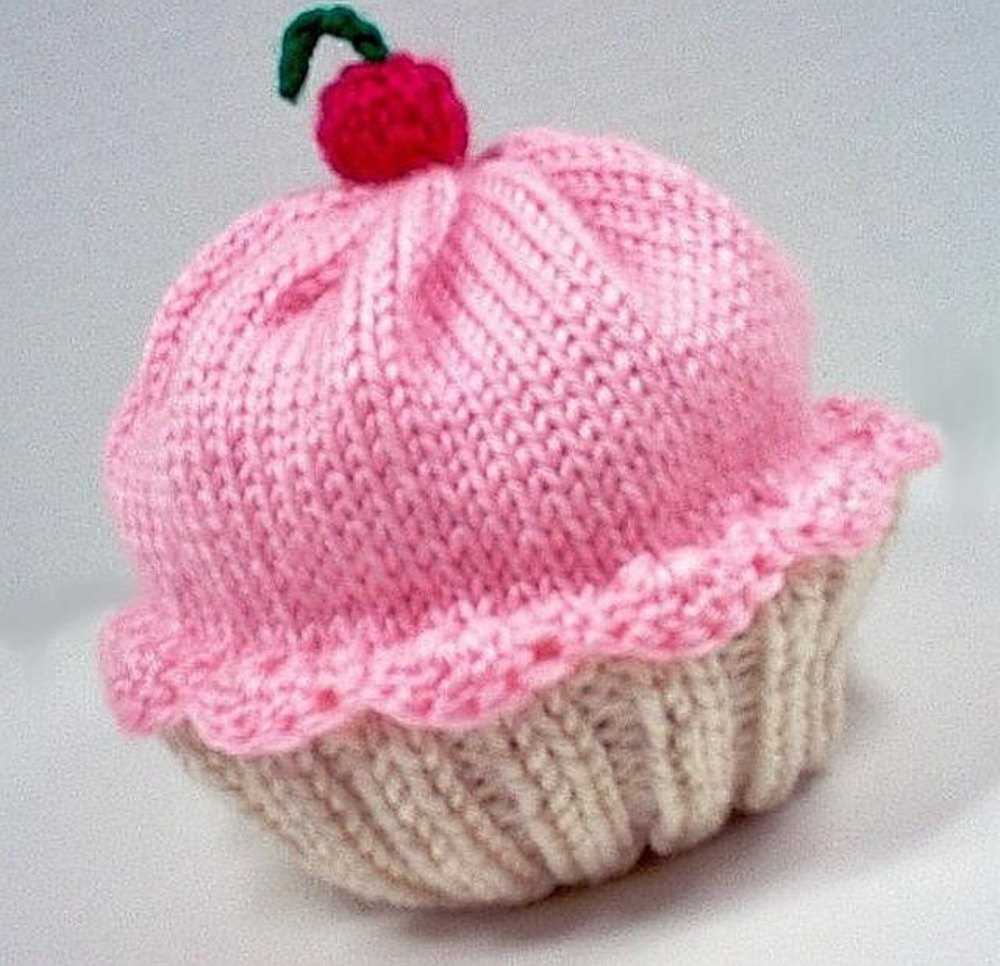
If you’re looking for a fun and adorable knitting project, look no further than the knit cupcake hat pattern! This pattern is not only free, but it’s also easy to follow, making it a great choice for knitters of all skill levels. Whether you’re a beginner knitter or have been knitting for years, you’ll enjoy creating this sweet hat that looks like a delicious cupcake.
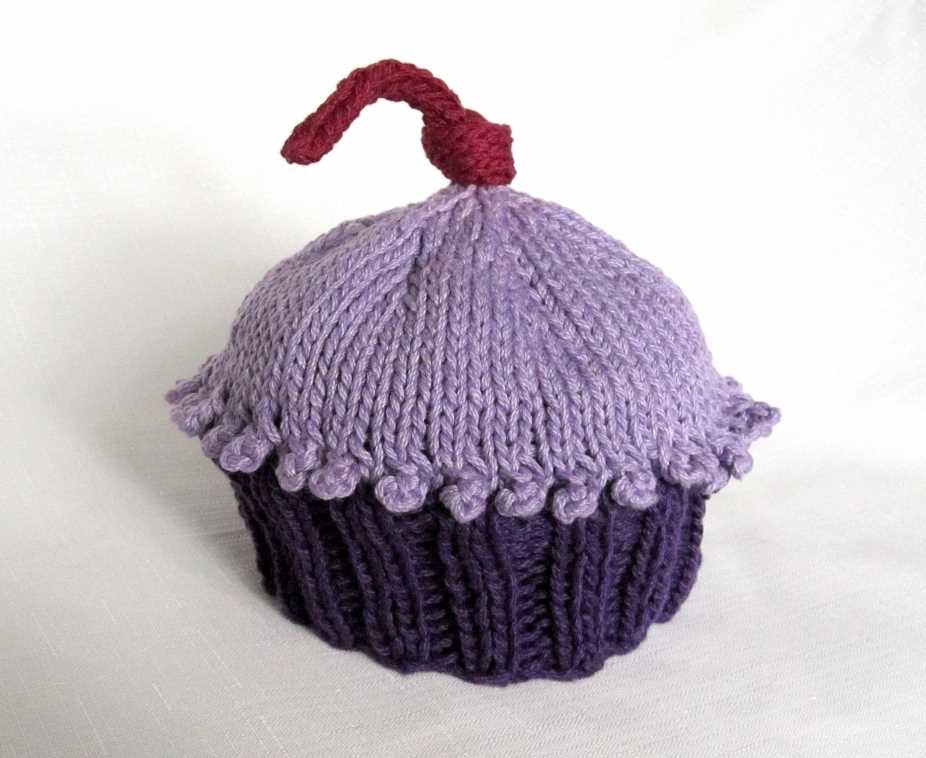
The knit cupcake hat pattern is the perfect project for anyone who loves baking or has a sweet tooth. The hat is designed to resemble a cupcake, complete with frosting and a cherry on top. It’s a whimsical and unique accessory that will add a pop of fun to any winter outfit.
Not only is this hat adorable, but it’s also cozy and warm. The pattern calls for bulky weight yarn, which makes the hat thick and plush, perfect for keeping your head warm on cold winter days. You can also customize the color of the hat to match your style or make it as a gift for someone special.
How to Knit a Cupcake Hat: Free Pattern
If you’re looking for a cute and fun knitting project, why not try making a cupcake hat? This adorable accessory is perfect for keeping little ones warm and stylish during the colder months. Plus, with this free pattern, you can easily create your own cupcake hat without any hassle.
To start knitting your cupcake hat, you’ll need the following materials: a set of double-pointed knitting needles, worsted weight yarn in your desired colors, a tapestry needle, and a pair of scissors. Once you have all your materials, you can begin following the pattern below.
Pattern:
- Cast on 80 stitches with the main color yarn.
- Join in the round, being careful not to twist the stitches.
- Knit in a 2×2 rib pattern (knit 2 stitches, purl 2 stitches) for 3 inches.
- Switch to the cupcake color yarn and knit in stockinette stitch (knit all stitches) for 4 inches.
- Next, decrease 8 stitches evenly across the round by knitting 2 stitches together.
- Continue knitting in stockinette stitch for another 2 inches.
- Now it’s time to shape the cupcake top. Switch to the frosting color yarn and knit 5 rounds.
- On the next round, decrease 8 stitches evenly across by knitting 2 stitches together.
- Knit 1 round even.
- Decrease 8 stitches evenly across the following round.
- Knit 1 round even.
- Repeat the decreasing and knitting even rounds until you have 8 stitches left.
- Break the yarn, leaving a long tail. Thread the tail through the remaining stitches and pull tight.
- Weave in all loose ends with a tapestry needle.
Congratulations! You’ve now completed your adorable cupcake hat. This pattern is perfect for beginners and advanced knitters alike, and you can easily customize it with different colors and embellishments. Whether you’re making it for your child, a friend, or even yourself, this cupcake hat is sure to be a sweet and cozy addition to any winter wardrobe.
Supplies You’ll Need

When knitting a cupcake hat, you’ll need a few supplies to get started. Here is a list of the essential items:
1. Yarn

Choose a soft and durable yarn in colors that resemble the frosting and cupcake wrapper. Look for a worsted weight yarn that is suitable for knitting projects. You’ll need approximately 200 yards of the main color for the cupcake and smaller amounts for the frosting and sprinkles.
2. Knitting Needles

Make sure you have a pair of appropriately sized knitting needles. The recommended size will be specified in the pattern. It is common to use circular needles for the body of the hat and double-pointed needles for the decreasing section at the top.
3. Stitch Markers
Stitch markers are essential for keeping track of stitch patterns and decreases. Use small, flexible markers that can easily be moved along the knitting needles.
4. Yarn Needle
A yarn needle or tapestry needle will be needed for weaving in loose ends and sewing the finishing touches on the hat. Choose a needle with a large eye that can accommodate the yarn thickness.
5. Scissors
Keep a pair of small, sharp scissors nearby for cutting yarn and snipping off any excess strands.
6. Optional Embellishments

If you want to add extra flair to your cupcake hat, consider purchasing or making small decorative items such as buttons, beads, or pom-poms. These can be sewn onto the hat as desired.
With these supplies on hand, you’ll be well-prepared to start knitting your adorable cupcake hat. Happy knitting!
Choosing the Right Yarn
When it comes to knitting, one of the most important decisions you’ll make is choosing the right yarn. The type of yarn you use can greatly affect the outcome of your knitting project, so it’s essential to choose wisely. Here are some key factors to consider when selecting yarn for your next knitting project.
1. Fiber Content
The first thing to consider is the fiber content of the yarn. Different fibers have different qualities and characteristics, so it’s important to choose a fiber that aligns with the requirements of your project. For example, if you’re knitting a hat that needs to be warm and cozy, you may want to choose a wool or alpaca yarn. On the other hand, if you’re knitting a summer top, you might opt for a cotton or linen yarn that is lightweight and breathable.
2. Weight

The weight of the yarn refers to its thickness, and it’s another important factor to consider. The weight of the yarn will affect the drape and structure of your knitted item. Bulky yarn will create a heavier, more chunky fabric, while lace-weight yarn will create a delicate, lightweight fabric. Consider the pattern you’re using and the desired outcome when choosing the weight of your yarn.
3. Color and Texture

The color and texture of the yarn can also greatly impact the final look of your knitting project. Bright, vibrant colors can make a statement, while subtle, neutral tones can create a more timeless and versatile piece. Additionally, the texture of the yarn, such as smooth or textured, can add depth and interest to your project. Consider how the color and texture of the yarn will complement your chosen pattern and personal style.
4. Budget
Lastly, it’s important to consider your budget when choosing yarn. Yarn can vary greatly in price, and it’s important to find a balance between quality and affordability. Consider the yardage of the yarn, as well as any additional cost factors such as dye lots or specialty yarns. While it can be tempting to splurge on luxury yarn, keep in mind that there are many affordable yarn options that still provide excellent quality.
In conclusion, choosing the right yarn is a crucial step in any knitting project. Consider factors such as fiber content, weight, color and texture, and budget to ensure that your yarn selection aligns with your project goals. By taking the time to choose the right yarn, you’ll set yourself up for knitting success and create a finished piece that you’ll be proud to wear or gift.
Selecting the Perfect Needles
When it comes to knitting, selecting the right needles can make all the difference in creating a successful project. The material, size, and length of the needles all play a role in determining the outcome of your work. Understanding these factors will help you choose the perfect needles for your next knitting project.
Material: One of the first decisions you’ll need to make when selecting knitting needles is the material. There are various options available, including bamboo, wood, metal, and plastic. Each material has its own unique characteristics. Bamboo and wood needles are known for their lightweight and smooth texture, making them ideal for beginners. Metal needles are more durable and have a slick surface, resulting in fast and smooth knitting. Plastic needles, on the other hand, are lightweight and affordable, making them a popular choice for knitters on a budget.
Size: The size of the needles will determine the gauge of your knitting. The size is usually indicated by a number ranging from 0 to 50, with smaller numbers indicating smaller needles. The size of the needles you choose will depend on the thickness of the yarn you are using and the tension you want to achieve. It’s important to check the recommended needle size for the yarn you are working with to ensure the best results.
Length: Knitting needles come in various lengths, typically ranging from 9 to 16 inches. The length you choose will depend on the type of project you are working on. Longer needles are ideal for larger projects such as blankets or shawls, as they can hold more stitches. Shorter needles, on the other hand, are better suited for smaller projects like hats or socks. Consider the size of your project and the number of stitches you will be working with when selecting the length of your needles.
In conclusion, selecting the perfect needles involves considering the material, size, and length of the needles. Each factor plays a role in determining the outcome of your knitting project. By understanding these factors and selecting the right needles for your specific project, you can ensure a successful and enjoyable knitting experience.
Understanding the Knitting Gauge
The knitting gauge is an essential element for any knitting project. It refers to the number of stitches and rows per inch achieved with a specific yarn and needle size. By understanding and achieving the correct gauge, you can ensure that your knitted item will have the desired measurements and fit.
Importance of Gauge: The knitting gauge is crucial because it determines the size and fit of your finished project. If your gauge is too loose, meaning you have fewer stitches and rows per inch, your finished item will be larger than intended. On the other hand, if your gauge is too tight, with more stitches and rows per inch, your finished item will be smaller. Achieving the correct gauge is especially important when following a knitting pattern to ensure that the finished item matches the intended measurements.
Measuring Gauge: To measure your knitting gauge, you will need a ruler or tape measure and a swatch of knitting. Begin by knitting a small square or rectangle using the specified yarn and needle size recommended in the pattern. Make sure to follow any stitch patterns or instructions provided in the pattern for the swatch. Once your swatch is complete, lay it flat on a surface and measure the number of stitches and rows within a one-inch section. Compare these measurements to the gauge specified in the pattern to determine if you need to adjust your needle size or tension.
Adjusting Gauge: If your gauge does not match the specified gauge in the pattern, you may need to adjust your needle size or tension. To achieve a looser gauge, you can try using a larger needle size. Conversely, if your gauge is too loose, you can try using a smaller needle size. Additionally, adjusting your tension by knitting more loosely or tightly can also impact your gauge. It may be helpful to create multiple swatches with different needle sizes or tension settings to find the correct gauge for your project.
Final Thoughts: Understanding and achieving the correct knitting gauge is essential for the success of your knitting projects. Taking the time to measure and adjust your gauge will ensure that your finished item matches the intended measurements and fits properly. By mastering the knitting gauge, you can confidently tackle any knitting pattern and create beautiful and well-fitting garments and accessories.
Casting On and Making the Ribbing

Before starting on the main body of the cupcake hat, you’ll need to cast on your stitches. Using a long-tail cast on method, secure one end of the yarn to the needle and create a slipknot. Place the slipknot on the needle and tighten it. Then, hold the needle with the slipknot in your right hand and the other end of the yarn in your left hand.
To make the ribbing for the cupcake hat, you’ll be working in a knit 2, purl 2 rib pattern. This creates a stretchy and textured fabric that will help the hat fit snugly on the head. Begin the ribbing by knitting the first two stitches. Insert the right-hand needle into the first stitch on the left-hand needle, going from left to right. Wrap the yarn around the right-hand needle counterclockwise, and then pull it through the stitch, slipping the stitch off the left-hand needle.
Continue this pattern of knitting two stitches and purling two stitches until you reach the end of the row. When purling, insert the right-hand needle into the next stitch on the left-hand needle, going from right to left. Wrap the yarn counterclockwise around the right-hand needle and pull it through the stitch, slipping the stitch off the left-hand needle. Repeat this process for the next purl stitch.
Repeat the knit 2, purl 2 rib pattern for the specified number of rows, according to the cupcake hat pattern you’re following. This will create the desired ribbed texture for the brim of the hat. After completing the ribbing, you can continue on with the next steps of the pattern to shape the cupcake hat’s main body.
Starting the Cupcake Pattern
Before you start knitting your cupcake hat, make sure you have all the necessary materials. You will need a set of double-pointed knitting needles in the appropriate size for your yarn, as well as a stitch marker to keep track of your rounds. You will also need a skein of yarn in the color of your choice, preferably a soft and cozy yarn that will be comfortable to wear.
To begin the cupcake pattern, cast on the required number of stitches onto your double-pointed needles. The exact number of stitches will depend on the size of hat you are making and the gauge of your yarn. If you are uncertain about the number of stitches to cast on, refer to a pattern or gauge swatch for guidance.
Once your stitches are cast on, join them in the round using the magic loop method or by dividing them evenly onto multiple double-pointed needles. This will create a seamless, circular shape for your hat. Place a stitch marker to mark the beginning of your round.
Round 1:
Knit all stitches in the round.
Round 2:

Purl all stitches in the round.
Rounds 3-5:
Repeat rounds 1 and 2 two more times to create a ribbed band at the bottom of the hat. This ribbing will help the hat snugly fit around the wearer’s head.
Continue knitting the cupcake pattern according to the specific instructions or design you are following. This may involve creating an intricate colorwork pattern, lace stitches, or other decorative elements to resemble the frosting, sprinkles, and other details of a cupcake. Be sure to read and follow the instructions carefully, checking your gauge as you go to ensure the correct fit.
Once you have completed the main cupcake pattern, you may need to decrease the number of stitches to shape the top of the hat. This is typically done by knitting two stitches together at regular intervals, following the instructions provided in your pattern.
Finally, when you have reached the desired length for your hat, bind off all stitches and weave in any loose ends. Your cupcake hat is now ready to be worn or gifted to someone who will appreciate its sweet charm!
Creating the Cupcake Top
Begin by casting on 80 stitches using the main color of yarn. It’s important to choose a yarn that is soft and stretchy, so the hat will be comfortable to wear. You can use a contrasting color for the icing if you prefer.
Next, knit in the round using a circular needle for the body of the hat. Start with a rib stitch pattern, alternating between knit and purl stitches for about an inch to create a stretchy brim. This will ensure a snug fit around the head.
Once the brim is complete, switch to the main stitch pattern for the cupcake top. You can use a simple stockinette stitch for a smooth and even texture, or get more creative with a cable or lace pattern. Knit for about 4 inches, or until you reach the desired length for the cupcake top.
After reaching the desired length, it’s time to shape the top of the cupcake. Begin by decreasing stitches evenly across each round to create a more rounded shape. You can use techniques like knit two together (k2tog) or slip slip knit (ssk) to decrease stitches.
Continue decreasing until you have about 10 stitches left. Cut the yarn, leaving a long tail for sewing up the top of the hat. Thread the tail through the remaining stitches, pull tight to close the top, and secure with a knot.
Knitting the Cupcake Base

When knitting a cupcake hat, the base is an essential part of the design. The base serves as the body of the cupcake and provides a foundation for the decorative frosting and cherry on top. To knit the cupcake base, you will need to follow a simple pattern and use basic stitches.
Materials Needed
- Worsted weight yarn in the color of your choice
- Size 8 (5mm) knitting needles
- Tapestry needle
- Stitch markers
To begin, cast on the required number of stitches for the desired size of the hat. The number of stitches will vary depending on the pattern you are following. Once you have cast on, join the stitches in the round, being careful not to twist them.
Next, you will begin knitting the base of the cupcake in the round. Use a basic knit stitch to create a smooth and even texture. Continue knitting in the round until the base reaches the desired length. This length will depend on the size of the hat and your personal preference.
Once the base is complete, you can either bind off the stitches or leave them on a stitch holder, depending on the pattern instructions. The base is now ready for the next step in knitting the cupcake hat, which is adding the decorative frosting. This will give the hat its signature cupcake shape and make it a fun and whimsical accessory.
Making the Cherry on Top
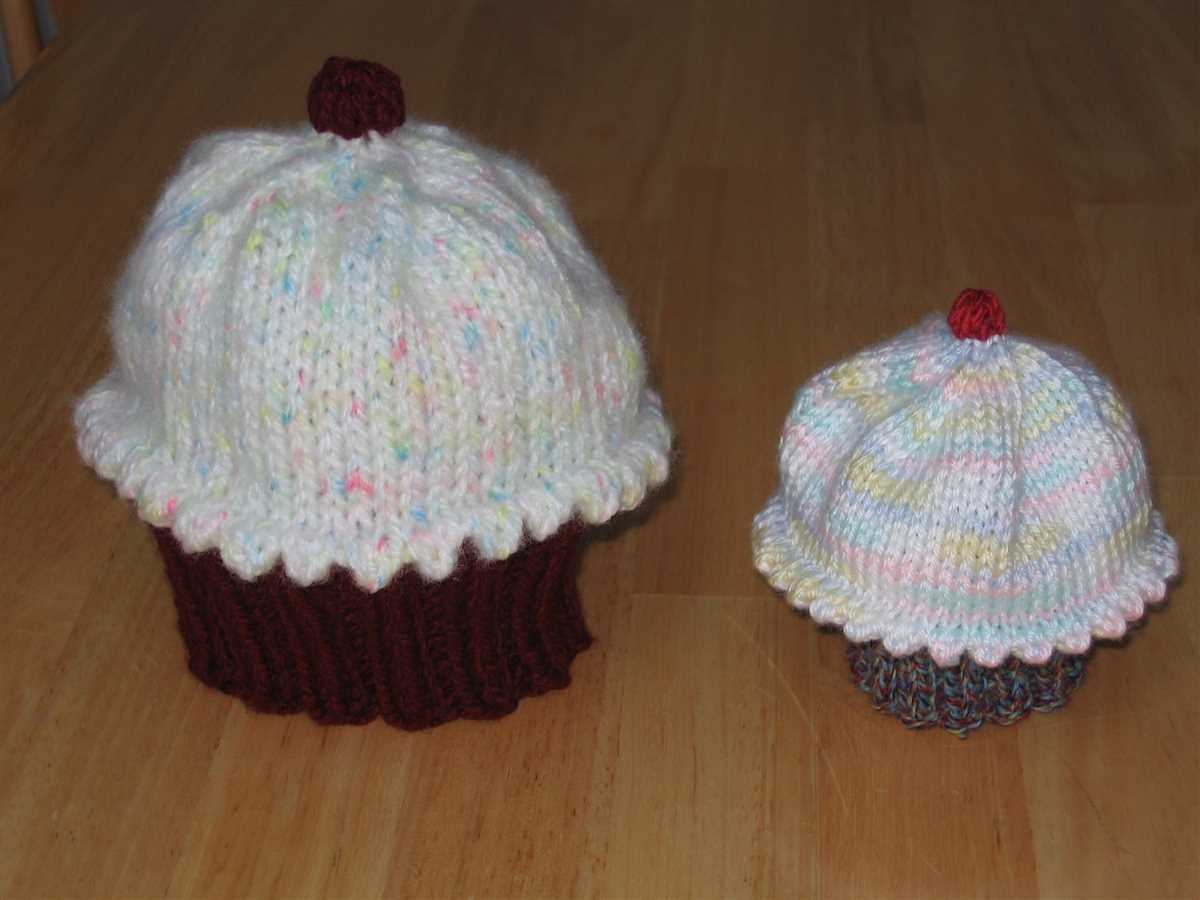
The cherry on top is the finishing touch that takes a cupcake hat from cute to irresistible. It adds a playful and whimsical element to the knit hat, making it perfect for children and adults alike. Plus, it’s an opportunity to get creative and make each hat unique.
To make the cherry on top, you will need red and green yarn, as well as a small amount of brown yarn for the stem. Start by knitting a small circular shape using the red yarn. You can use double-pointed needles or a small circular needle, depending on your preference. Once the circular shape is complete, cinch it closed and stuff it lightly with fiberfill to give it a plump appearance.
Next, create the stem using the brown yarn. You can make it as long or as short as you like, but aim for a length that will make the cherry sit comfortably on top of the hat. Attach the stem to the top of the cherry using a tapestry needle, making sure it is secure.
Finally, add the green leaves to the stem using the green yarn. You can knit or crochet the leaves, or even sew them using felt or fabric. Position the leaves around the stem, arranging them in a way that looks natural and balanced. Secure the leaves in place by sewing them to the stem and the top of the cherry.
Once the cherry on top is complete, attach it to the hat by sewing it securely to the crown. Make sure to position it slightly off-center for a cute and playful look. And there you have it – your knit cupcake hat is now complete with its charming cherry on top!
Materials:
- Red yarn
- Green yarn
- Brown yarn
- Double-pointed needles or small circular needle
- Tapestry needle
- Fiberfill
Instructions:
- Knit a small circular shape with red yarn.
- Cinch the circular shape closed and stuff it with fiberfill.
- Create a stem using brown yarn and attach it to the top of the cherry.
- Add green leaves to the stem using green yarn.
- Sew the cherry on top securely to the crown of the hat.
Shaping the Hat
Creating the shaping for the cupcake hat requires a combination of decreasing stitches and adding short rows to achieve the desired shape. Here are the steps to shape the hat:
1. Start decreasing stitches
Begin by decreasing the number of stitches in each round. This is usually done by knitting two stitches together (k2tog) or purling two stitches together (p2tog) at regular intervals. The exact pattern for decreasing stitches may vary depending on the specific cupcake hat design you are following.
2. Gradually decrease more stitches
As you continue knitting the rounds and decreasing stitches, gradually increase the frequency of the decrease rounds. This will further shape the hat and make it more fitted. Again, the specific pattern will provide instructions on how many stitches to decrease and when.
3. Add short rows for the cupcake icing
To create the rounded shape of the cupcake icing on top of the hat, you will need to add short rows. Short rows involve knitting or purling across a certain number of stitches and then turning the work before completing the entire round. This creates extra rows and adds height to the portion of the hat that will be the icing. Follow the pattern instructions to determine when and how many short rows to add.
- Knit or purl across the specified number of stitches.
- Turn the work, without completing the entire round.
- Continue knitting or purling across the same stitches, working back and forth in this manner for the specified number of short rows.
- Resume knitting in the round once the short rows are complete.
4. Finish shaping and bind off
After completing the required number of decrease rounds and adding the necessary short rows for the icing, you can finish shaping the cupcake hat. Typically, this involves knitting a few more rounds without any decreases until the desired length is reached. Finally, bind off the stitches to secure the top of the hat.
By following these steps and carefully following the pattern instructions, you can successfully shape the cupcake hat to resemble a delicious treat, complete with the icing on top!
Finishing Off and Weaving in Ends
Once you have completed knitting your cupcake hat, it’s time to finish off and weave in the ends. This is an important step that will give your hat a polished and professional look.
To finish off, start by cutting the yarn, leaving a tail that is at least 6 inches long. Thread the tail through a yarn needle and carefully weave it through the remaining stitches on your knitting needle. This will help secure the stitches and prevent them from unraveling.
Next, weave in any remaining ends from changing colors or adding new yarn. Thread the end of the yarn onto a yarn needle and weave it in and out of the stitches on the wrong side of the hat. Make sure to weave in the ends securely so they don’t come undone with wear.
Once all the ends are woven in, trim any excess yarn close to the hat, being careful not to cut any of the stitches. Take a moment to inspect your finished hat and make any final adjustments or corrections.
Now you can proudly wear your adorable cupcake hat or give it as a gift. Remember to share your finished project with others and spread the joy of knitting!
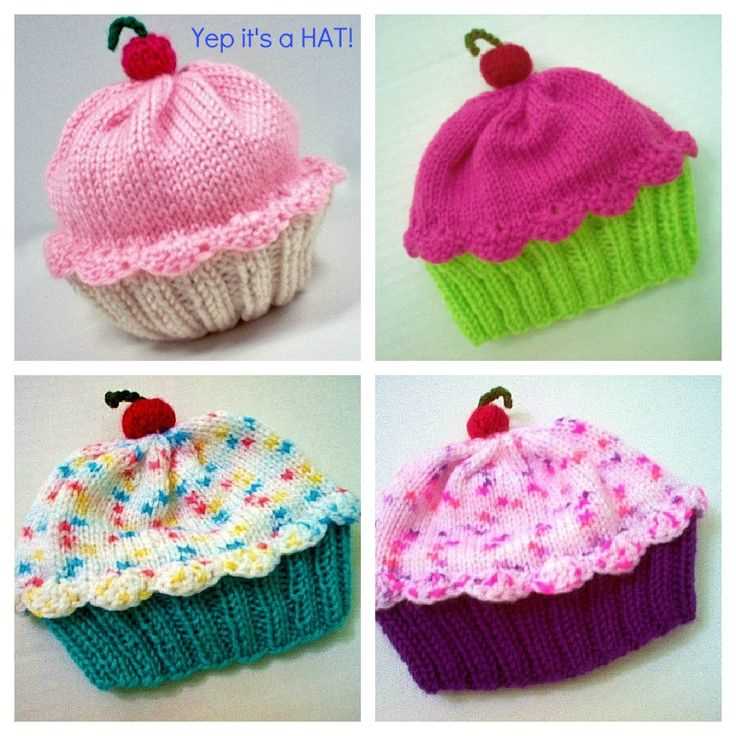
Tips for Customizing Your Cupcake Hat
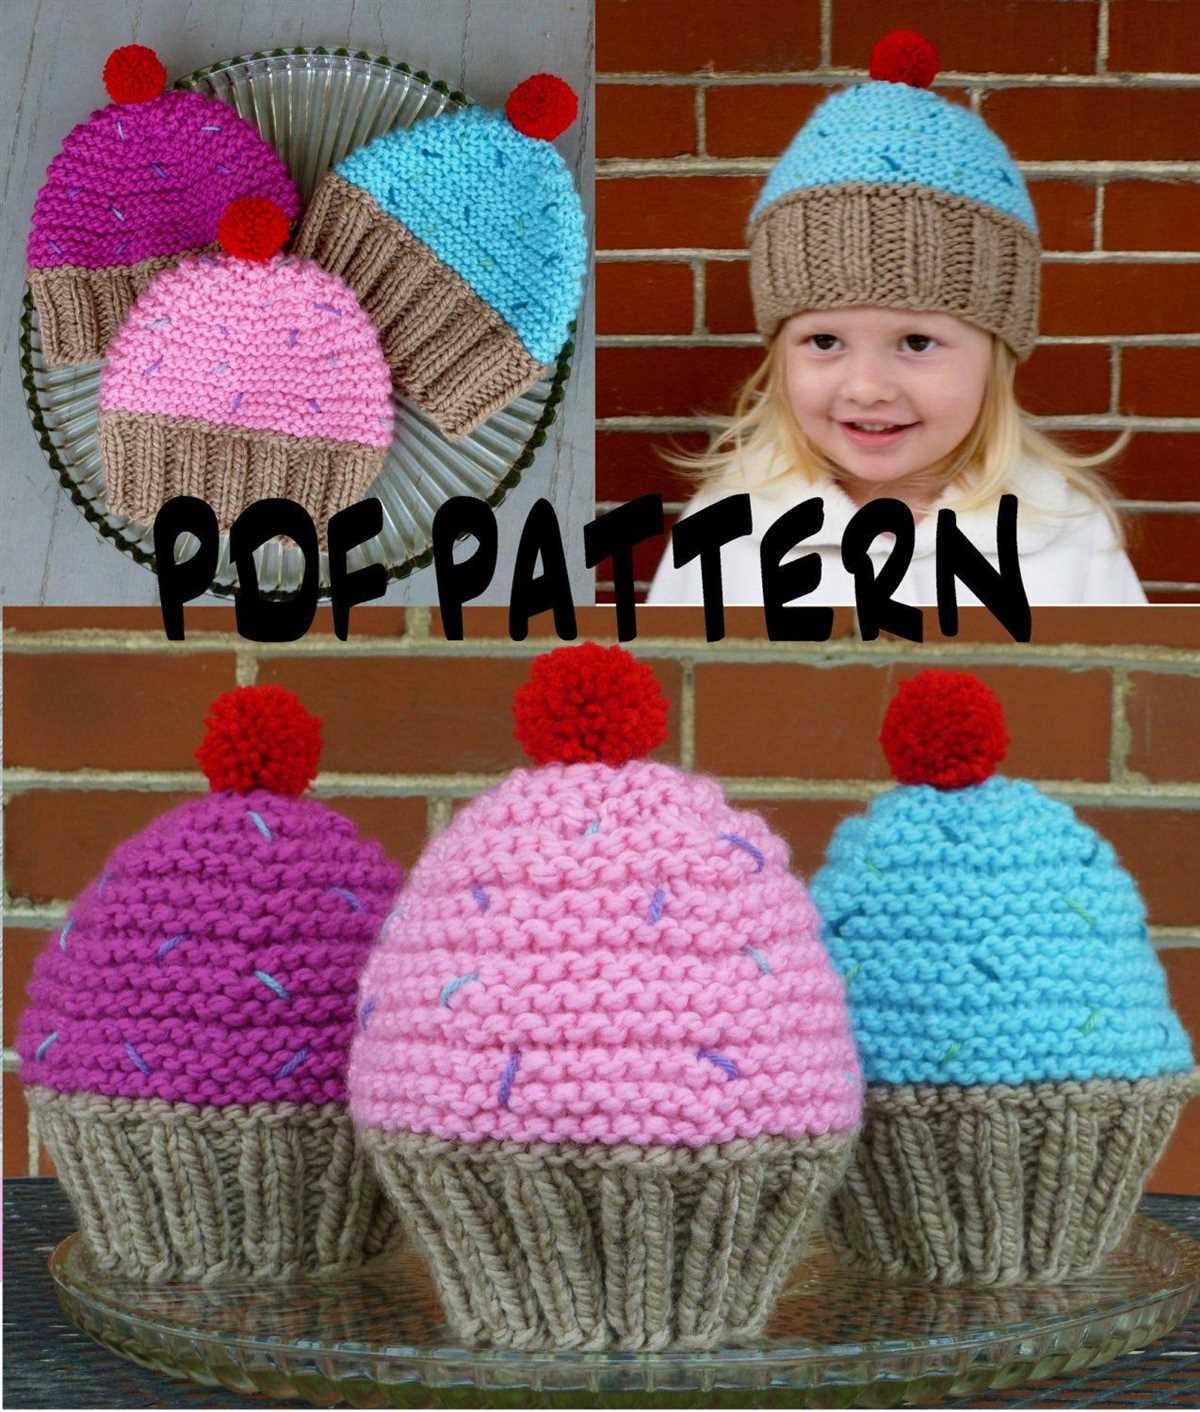
Customizing your cupcake hat is a fun and creative way to make it uniquely yours. Whether you want to change the colors, add embellishments, or modify the shape, there are plenty of options to explore. Here are some tips to help you get started with customizing your cupcake hat:
- Choose your colors: Experiment with different color combinations to find the perfect match for your style. Consider using colors that complement each other or create a bold contrast.
- Add embellishments: Enhance the look of your cupcake hat by adding embellishments such as buttons, beads, or bows. You can sew them on or use hot glue for a no-sew option.
- Try different stitch patterns: Instead of using the basic knit stitch, try experimenting with different stitch patterns to create a unique texture. You can try ribbing, cables, or even lace patterns.
- Customize the shape: If you prefer a different silhouette for your cupcake hat, you can modify the pattern accordingly. You can make it slouchy, fitted, or even add ear flaps for extra warmth.
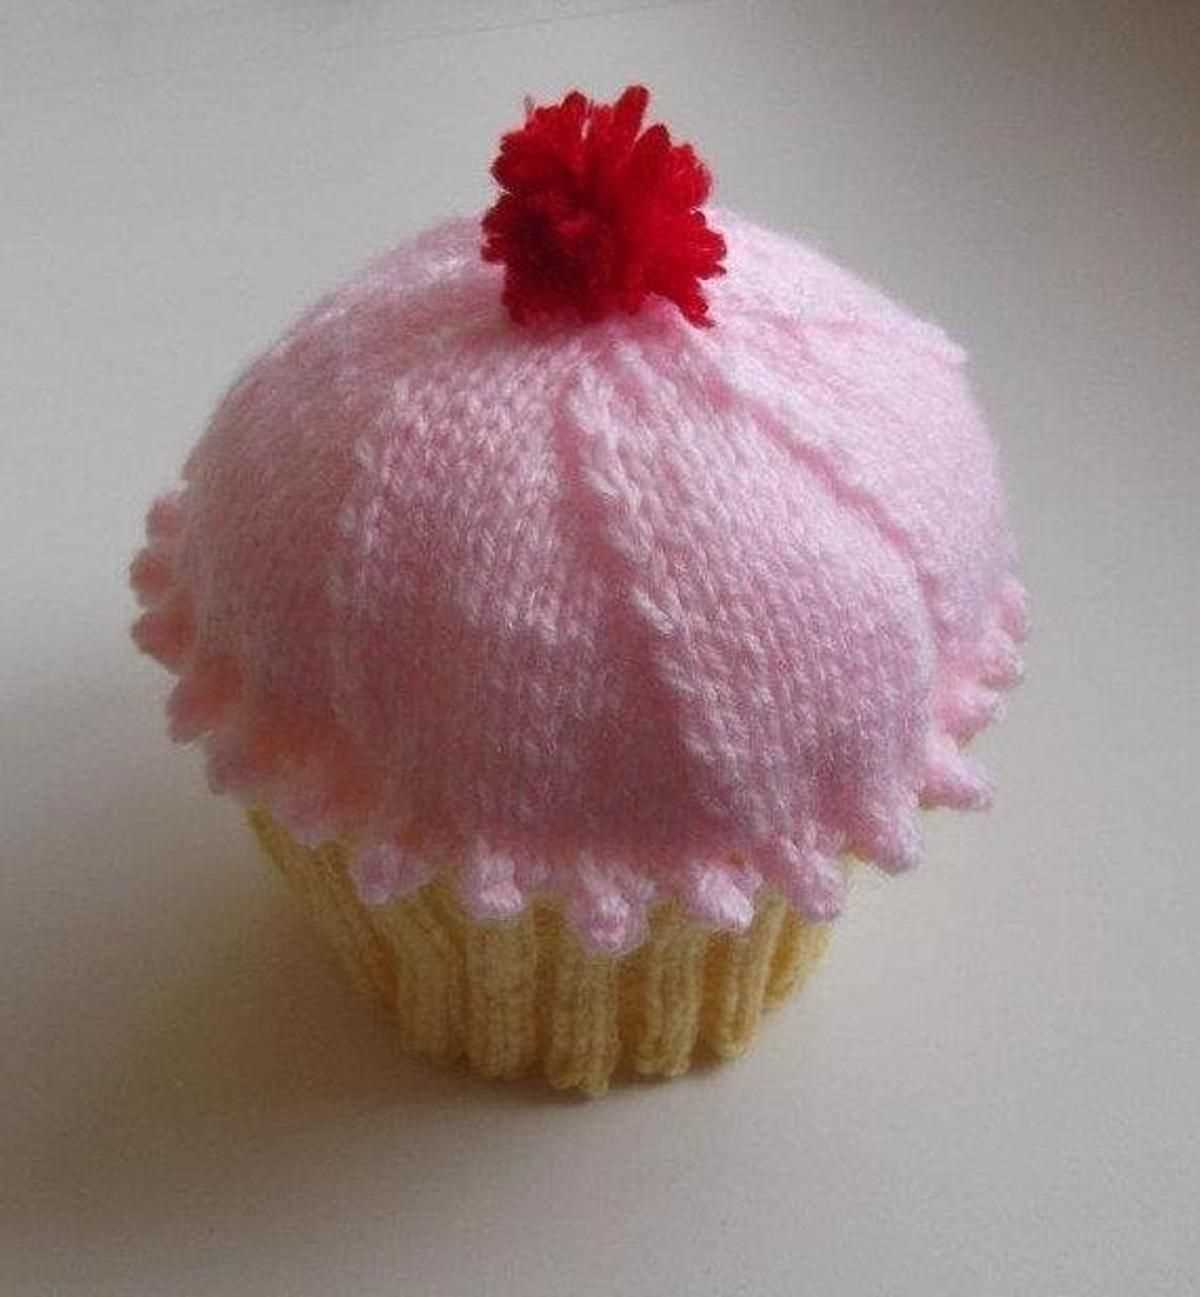
- Add a pom-pom: A colorful pom-pom on top of your cupcake hat adds a playful and fun touch. You can use the same color as the sprinkles or choose a contrasting color for some visual interest.
Remember, the key to customizing your cupcake hat is to have fun and let your creativity take the lead. Don’t be afraid to try new things and make it truly one-of-a-kind. Happy knitting!