
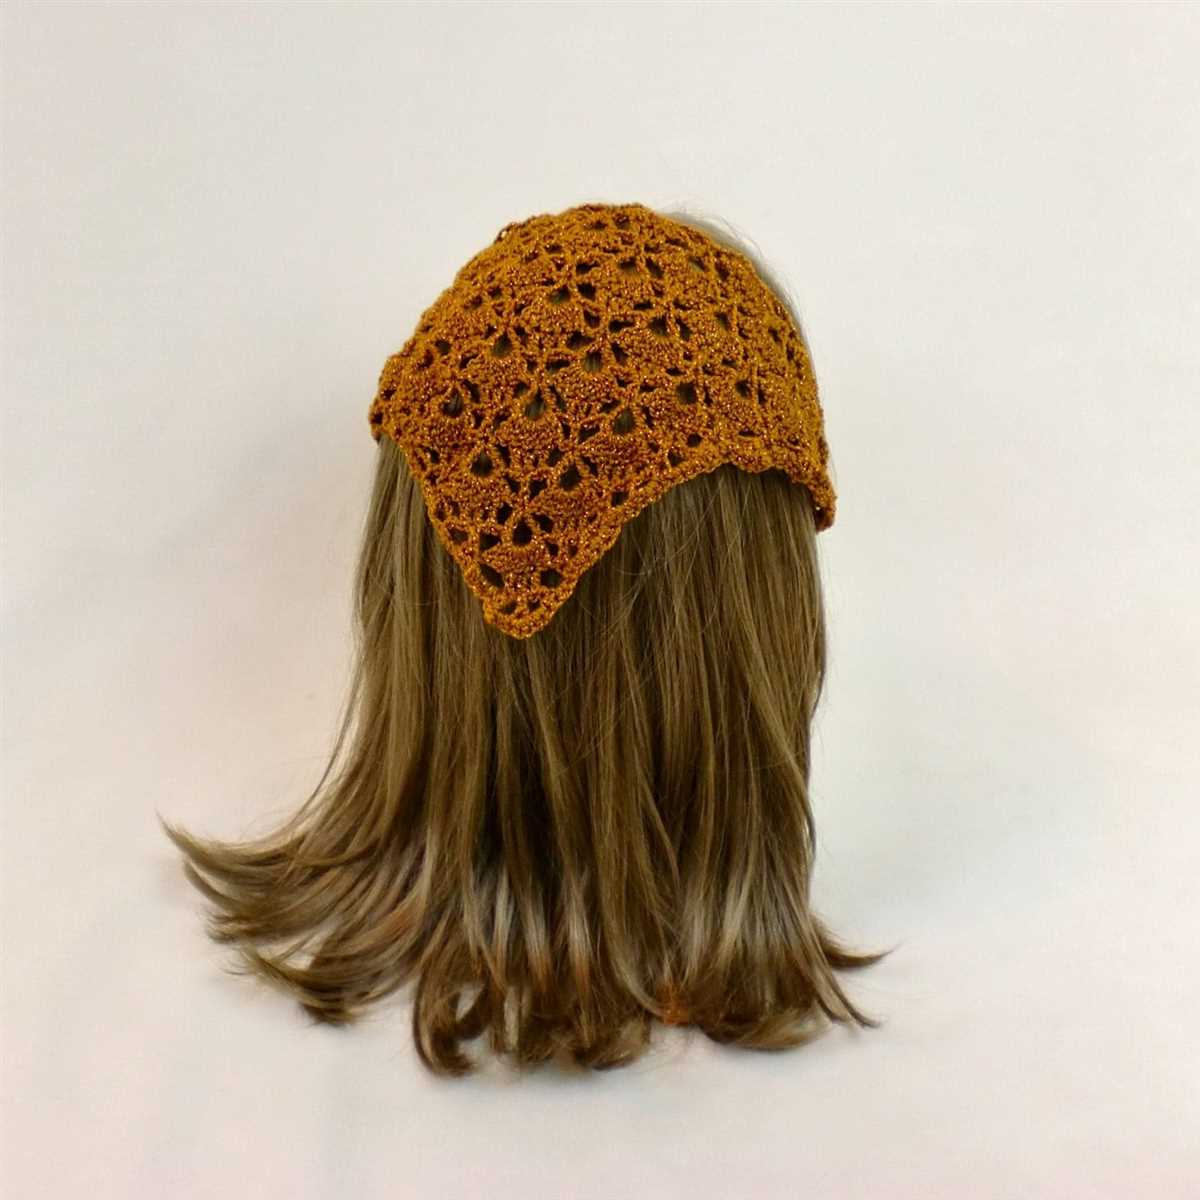
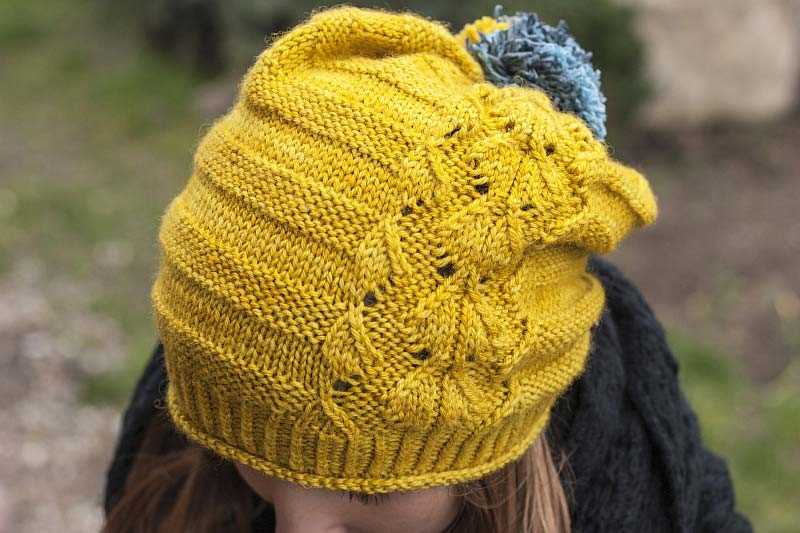
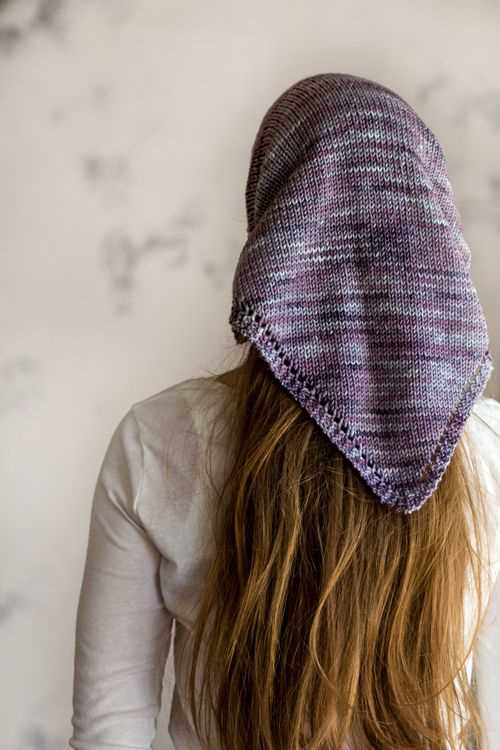
Looking for a stylish accessory to add a pop of color to your outfit? Why not try knitting your own bandana? Bandanas are a versatile accessory that can be worn in many different ways, and by knitting your own, you can customize the colors and patterns to match your personal style. Plus, it’s a great way to practice your knitting skills and create something beautiful!
In this article, we’ll provide you with a free knitted bandana pattern that’s perfect for beginners. The pattern is easy to follow and requires basic knitting stitches, making it a great project for those new to knitting. Whether you’re a seasoned knitter looking for a quick project or a beginner eager to start knitting, this bandana pattern is sure to be a hit.
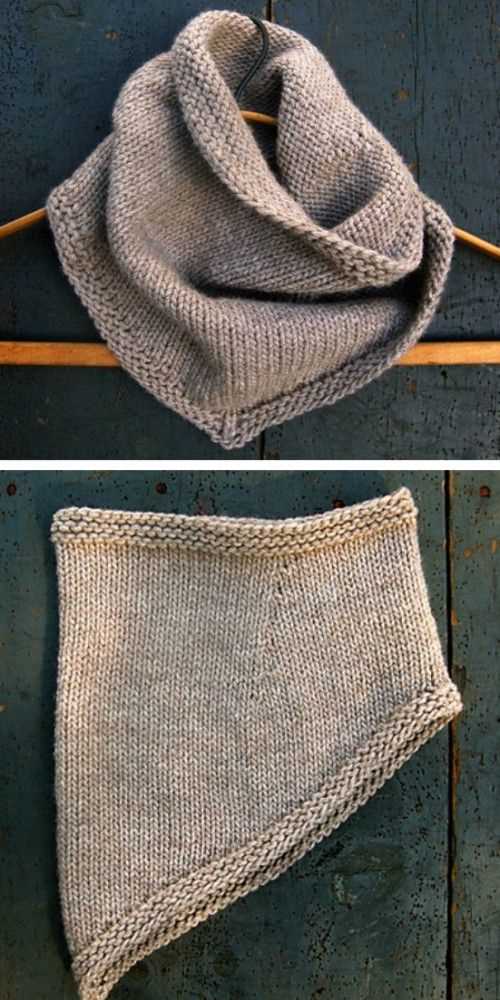
To get started, all you’ll need is a pair of knitting needles and some soft yarn in your desired colors. The pattern uses a simple garter stitch, which is achieved by knitting every row, making it a great project for beginners. The bandana is knitted in a triangle shape, with increases and decreases used to create the shaping. Once you’ve finished knitting the bandana, you can personalize it with buttons, beads, or other embellishments if desired.
Knitted Bandana Pattern Free
Are you looking for a stylish accessory that will keep you warm and fashionable during the colder months? Look no further than a knitted bandana! With our free pattern, you can create your own cozy and trendy bandana that adds a touch of uniqueness to your outfit.
To get started, you’ll need some basic knitting skills and materials. Gather your favorite yarn in a color or texture that matches your style. You’ll also need knitting needles and a tapestry needle for finishing touches.
Materials:
- Worsted weight yarn (about 100 yards)
- Size 8 (5 mm) knitting needles
- Tapestry needle
Instructions:
- Cast on 80 stitches.
- Row 1: Knit all stitches.
- Row 2: Purl all stitches.
- Repeat rows 1 and 2 until the bandana reaches your desired length.
- Bind off all stitches.
- Weave in any loose ends with your tapestry needle.
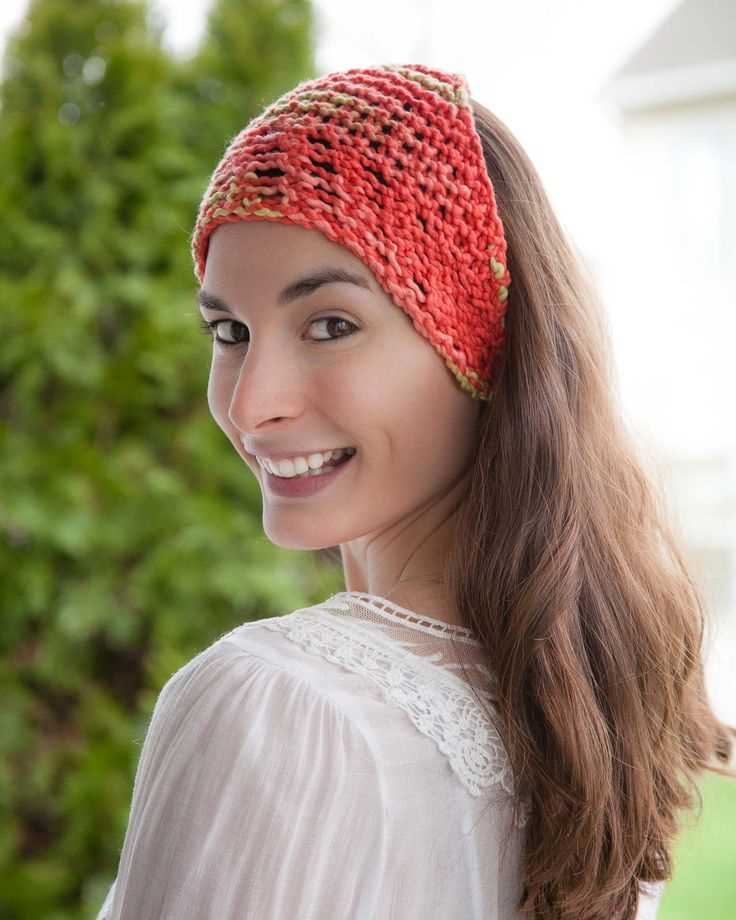
Once you’ve finished knitting your bandana, you can wear it in various ways. Tie it around your neck for a classic look, or wear it as a headband or hair accessory. The possibilities are endless!
Get creative with different yarn colors and patterns to make a collection of bandanas that match your wardrobe. With this free knitted bandana pattern, you can stay cozy and stylish all year round!
Materials Needed
Before you start knitting your own bandana, make sure you have all the necessary materials on hand. Here’s a list of what you’ll need:
- Yarn: Choose a lightweight yarn in your preferred color. It’s best to use a cotton or acrylic blend for a soft and comfortable feel.
- Knitting Needles: You’ll need a pair of knitting needles in the appropriate size for your yarn. Circular needles are also a good option if you prefer working in the round.
- Tapestry Needle: This needle is used for weaving in ends and finishing touches.
- Scissors: A sharp pair of scissors will be needed to cut the yarn.
These are the basic materials you’ll need to get started on your knitted bandana pattern. Once you have everything gathered, you’ll be ready to cast on and begin knitting your bandana.
Gauge and Size
When knitting a bandana, it is important to consider the gauge and size of the finished product. The gauge refers to the number of stitches and rows per inch that is required to create the desired fabric. It is essential to match the gauge specified in the pattern to ensure that the bandana turns out the correct size.
The size of the bandana can vary depending on personal preference. Some may prefer a larger bandana that provides more coverage, while others may prefer a smaller, more compact size. The pattern will typically provide instructions on how to adjust the size of the bandana to suit individual needs.
Before starting the project, it is recommended to make a gauge swatch. This involves knitting a small square using the specified needle size and yarn. By measuring the number of stitches and rows in the swatch, the knitter can determine if their tension matches the pattern and make any necessary adjustments.
- To achieve the correct gauge, it may be necessary to change the needle size. If the swatch has too few stitches and rows, a smaller needle may be required. Conversely, if there are too many stitches and rows, a larger needle may be needed.
- It is also important to choose the right yarn for the project. Yarns with different fiber content and thickness can affect the finished gauge and size. The pattern will typically recommend a specific type and weight of yarn to ensure the desired outcome.
- When adjusting the size of the bandana, it is important to take into account the number of stitches and rows needed to create the fabric pattern. Some patterns may have repeat sections that need to be maintained to achieve the desired look.
By paying attention to gauge and size, knitters can ensure that their bandana turns out the right size and fits properly. It is always a good idea to measure the finished bandana before wearing or gifting it to ensure it meets the intended size specifications.
Casting On
When starting a knitting project, the first thing you need to do is cast on. Casting on is the process of creating the first row of stitches on your knitting needle. There are several methods for casting on, but for this knitted bandana pattern, we will use the long-tail cast on method.
Materials Needed:
- A pair of knitting needles
- Yarn
- A tape measure
- Scissors
To begin, measure out a length of yarn that is approximately three times the width of your desired finished bandana. This will be used for both the tail and working yarn. Make a slip knot at the end of the yarn, leaving a long tail.
Hold the knitting needle in your right hand, with the slip knot on your left hand. Insert the right needle into the slip knot from left to right. Use your thumb and index finger of your left hand to hold the working yarn, with the tail draped over your thumb and the working yarn over your index finger.
Loop the working yarn under the right needle, creating a loop. Bring the right needle down and behind the working yarn, then bring it back up through the loop on the left needle. Drop the loop from the left needle, tightening the stitch as you go. Repeat this process until you have cast on the desired number of stitches for your bandana.
Ribbing
Ribbing is a technique commonly used in knitting to create a stretchy and flexible fabric. It involves a combination of knit and purl stitches, which create alternating columns of raised ribs and recessed valleys.
In ribbing, the knit stitches are worked to create the raised ribs, while the purl stitches are worked to create the recessed valleys. This combination of stitches gives the fabric its characteristic elasticity and texture.
Types of ribbing:
- 1×1 Ribbing: In this type of ribbing, each knit stitch is followed by a purl stitch, creating a pattern of single columns of raised ribs.
- 2×2 Ribbing: In this type of ribbing, two knit stitches are followed by two purl stitches, creating a pattern of double columns of raised ribs.
- 3×1 Ribbing: In this type of ribbing, three knit stitches are followed by one purl stitch, creating a pattern of triple columns of raised ribs.
Ribbing is commonly used for cuffs, collars, and hems in knitting projects, as it provides flexibility and helps the garment to retain its shape. It is also often used as an edging for scarves, hats, and mittens.
In addition to its practical uses, ribbing is also a popular design element in knitting patterns, as it adds texture and visual interest to the fabric. It can be used alone or in combination with other stitch patterns to create unique and beautiful knitted items.
Body of the Bandana
Once you have finished knitting the ribbing section of the bandana, it’s time to move on to the body of the piece. The body is the main part of the bandana and is where you will create the unique design and shape.
To begin the body, you will start by switching to the main stitch pattern. This could be a simple stockinette stitch, a textured pattern, or even a lace motif. The choice is yours! The main stitch pattern will add interest and visual appeal to your bandana.
When working the body, it’s important to maintain the same number of stitches that you cast on in the ribbing section. This ensures that the bandana will fit properly and lay flat when worn. You may need to adjust your tension as you switch from the ribbing to the body section to achieve consistent and even stitches throughout.
As you knit the body, you can customize the length and width of the bandana to your preference. If you want a smaller, more triangular shape, you can decrease stitches gradually on each row or round. If you prefer a larger, more slouchy bandana, you can increase stitches gradually on each row or round. Be sure to keep track of your stitch count and make any necessary adjustments.
Once you are satisfied with the length and shape of the body, you can finish off the bandana by binding off all stitches. This will secure the stitches and prevent them from unraveling. You can then weave in any loose ends and block the bandana to give it a polished and professional finish.
Decreases and Shaping
When knitting a bandana, shaping is an important technique to consider in order to create the desired fit and shape. Decreases help to taper the bandana and give it a more flattering and comfortable fit around the head.
To create decreases, you can use various techniques such as knitting two stitches together (k2tog) or slipping one stitch, knit the next stitch, and then pass the slipped stitch over the knit stitch (ssk). These techniques help to reduce the number of stitches on your needle and create a gradual shaping effect.
When shaping a bandana, it is important to follow the pattern instructions carefully to ensure that the decreases are evenly distributed. Typically, decreases are placed evenly along the edges of the bandana to create a symmetrical shape. However, the specific placement and frequency of decreases will depend on the pattern you are following.
Additionally, when shaping a bandana, it is common to work decreases on both the right and wrong side rows. This helps to create a balanced shaping effect and ensures that the bandana looks the same on both sides.
Overall, decreases and shaping are essential techniques in knitting a bandana to achieve the desired fit and shape. By following the pattern instructions and using the appropriate decrease techniques, you can create a bandana that is both stylish and comfortable.
Finishing the Edges
After completing the main body of the knitted bandana, it is important to give attention to finishing the edges to ensure a clean and polished look. There are several techniques that can be used to finish the edges, depending on the desired effect and the knitter’s skill level.
One of the most common methods for finishing the edges is binding off. This involves knitting the last few stitches of each row, then passing the previous stitch over the current stitch to create a finished edge. This technique can be done using a basic bind off or a stretchy bind off, depending on the desired level of stretch in the finished bandana.
For a more decorative edge, an i-cord bind off can be used. This involves knitting a separate i-cord strip and attaching it to the edge of the bandana as it is being bound off. This creates a clean and rounded edge that adds a professional touch to the finished piece.
Another option for finishing the edges is to use a crochet border. This can be done by picking up stitches along the edge of the bandana and then crocheting a border in the desired pattern. This method allows for a wide variety of decorative options and can add a pop of color or texture to the finished bandana.
Regardless of the method chosen, it is important to take the time to carefully finish the edges of the knitted bandana. This attention to detail will ensure that the finished piece looks polished and professional, and will give the wearer a sense of pride in their handmade creation.
Blocking the Bandana
Blocking is an essential step in the knitting process, especially when it comes to creating bandanas. It helps to give your finished project a polished and professional look, and also ensures that the sizing and shape are consistent.
Before you begin blocking your knitted bandana, you will need to gather a few supplies. These include blocking mats or towels, T-pins or blocking wires, a spray bottle filled with water, and a rust-proof surface to lay your bandana on.
Step 1: Wetting the Bandana
The first step in blocking your bandana is to wet it. You can do this by filling a spray bottle with water and lightly spritzing the bandana until it is damp. Alternatively, you can soak the bandana in a basin of water for a few minutes, making sure it is fully saturated.
Step 2: Shaping and Pinning
Once your bandana is wet, gently squeeze out any excess water. Lay out your blocking mats or towels on a rust-proof surface and place your bandana on top. Use your hands to gently shape the bandana, ensuring that it lies flat and all the stitches are in place.
Next, secure the bandana in place by pinning it to the blocking mats or towels. You can use T-pins or blocking wires for this step. Start by pinning the corners or edges of the bandana, and then work your way around, pinning every few inches to ensure even tension.
Step 3: Allowing the Bandana to Dry
Once your bandana is pinned in place, you will need to leave it to dry completely. This can take anywhere from a few hours to overnight, depending on the humidity and air circulation in your space. Avoid moving or disturbing the bandana while it is drying to maintain its shape.
Once your bandana is dry, carefully remove the pins or wires, and it will be ready to wear or gift to someone special. Blocking not only improves the appearance of your bandana, but it also helps to set the stitches and ensure that the fabric retains its shape over time.
Customization Options
The knitted bandana pattern offers a variety of customization options, allowing you to create a unique and personalized accessory. Here are some ways you can customize your knitted bandana:
Color
One of the easiest ways to customize your knitted bandana is by choosing a color that reflects your personal style and preferences. Whether you prefer bold and vibrant shades or soft and muted tones, there are endless possibilities for creating a bandana that is uniquely yours.
Texture

The texture of your knitted bandana can also be customized to add an interesting visual element. You can choose to incorporate different stitch patterns or experiment with different yarn weights to create a bandana with a unique texture. From simple garter stitch to intricate lace patterns, the options are endless.
Size
The size of your knitted bandana can be customized to fit your individual needs. Whether you prefer a smaller, more compact bandana or a larger, statement piece, you can easily adjust the pattern to achieve the desired size.
Embellishments
To further personalize your knitted bandana, you can add embellishments such as buttons, beads, or embroidery. These little details can make a big difference in the overall look of your bandana and can reflect your personal style and taste.
Pattern Variation
If you’re feeling adventurous, you can even modify the pattern itself to create a completely unique design. You can experiment with different stitch combinations, add or remove sections, or incorporate additional motifs to create a bandana that is truly one-of-a-kind.
With so many customization options available, you can create a knitted bandana that is not only functional but also a reflection of your own personal style and creativity.
Tips and Tricks
Knitting a bandana can be a fun and rewarding project. Whether you are a beginner or an experienced knitter, here are some tips and tricks to help you create the perfect knitted bandana.
Choose the Right Yarn
When selecting yarn for your bandana, consider the texture and weight of the yarn. A cotton or linen blend can be a good choice for warmer weather, while a wool or acrylic yarn can provide more warmth for colder climates. It’s also important to choose a yarn that is easy to care for, so you can enjoy your bandana for years to come.
Use the Right Needle Size

The size of your needles will determine the tightness or looseness of your stitches. If you want a tighter fabric, choose smaller needles, and if you want a looser fabric, choose larger needles. It’s a good idea to check the gauge of your knitting before starting the bandana to ensure that your stitches are consistent.
Consider the Pattern
There are many different patterns available for knitted bandanas, so choose one that suits your skill level and style. Some patterns may involve lace or cable stitches, while others may be simpler and more straightforward. Take the time to read and understand the pattern before you begin, and don’t be afraid to make adjustments or modifications as needed.
Pay Attention to Tension
One of the most important aspects of knitting a bandana is maintaining an even tension throughout your stitches. If your tension is too tight, the bandana may be too small and restrict movement. If your tension is too loose, the bandana may be too large and not stay in place. Practice keeping a consistent tension by knitting a gauge swatch before starting your project.
Block and Finish Properly
After you have finished knitting your bandana, it’s important to block it to give it a polished and professional look. Blocking involves wetting the finished piece, stretching it to the desired shape and size, and allowing it to dry. This can help even out any uneven stitches and give your bandana a finished appearance. Don’t forget to weave in any loose ends and add any desired embellishments before wearing or gifting your bandana.
Frequently Asked Questions (FAQs)
Here are some frequently asked questions about knitted bandanas:
1. How do I get the free knitting pattern for a bandana?
Getting the free knitting pattern for a bandana is easy. You can find a variety of websites and online platforms that offer free knitting patterns for bandanas. Simply search for “free knitting pattern for bandana” on your preferred search engine and browse through the results. You can also check knitting forums, social media groups, and knitting communities for recommendations and links to free patterns.
2. Can I use a different yarn than the one mentioned in the pattern?
Yes, you can use a different yarn than the one mentioned in the pattern. However, it is important to note that using a different yarn may alter the final outcome of the bandana. Different yarns have different weights, textures, and properties, which can impact the size, drape, and overall look of the bandana. It is recommended to choose a yarn that is similar in weight and gauge to the one specified in the pattern for best results.
3. How long does it take to knit a bandana?

The time it takes to knit a bandana can vary depending on several factors, including your knitting speed, the complexity of the pattern, and the size of the bandana. On average, it may take a few hours to a couple of days to complete a knitted bandana. It is advisable to consider your knitting experience and time availability before starting a bandana project.
Conclusion

Knitting a bandana can be a fun and rewarding project. With the availability of free knitting patterns and various yarn options, you can easily create your own unique bandana. Whether you are a beginner or an experienced knitter, a knitted bandana can be a stylish and versatile accessory for any season. So, grab your needles and get started on your next knitting adventure!