
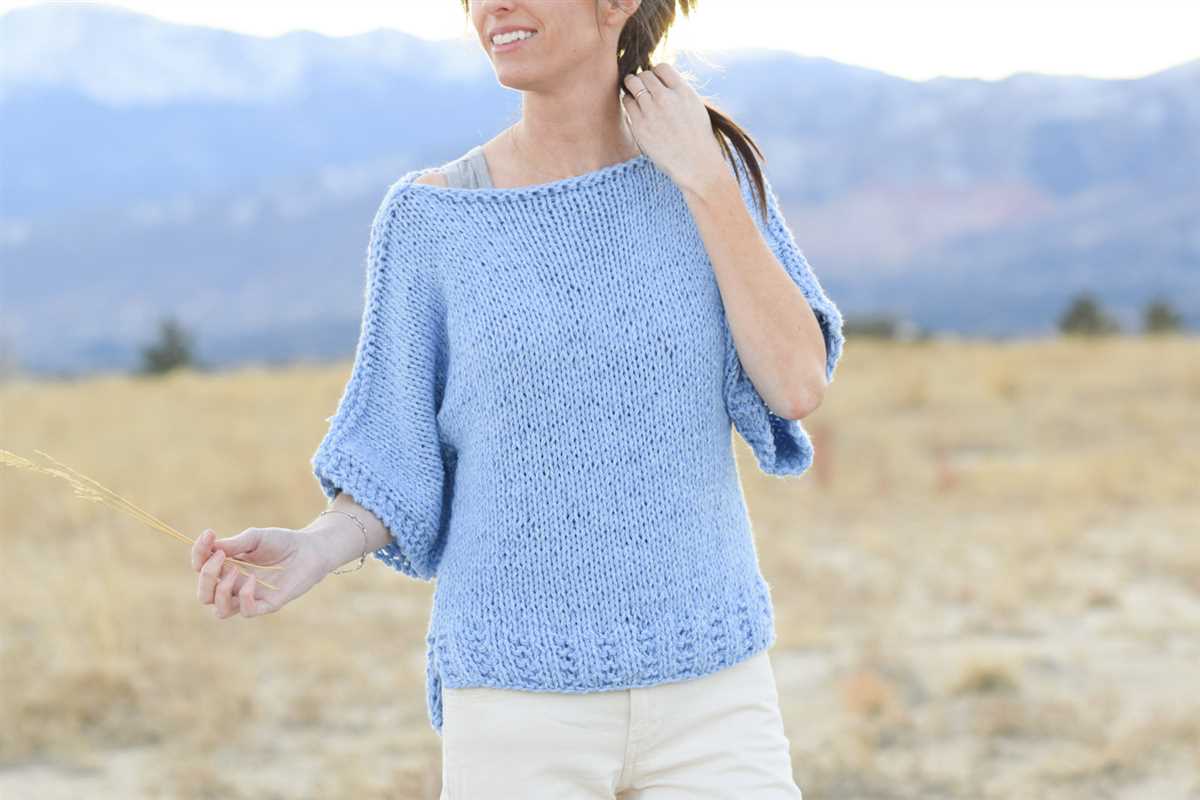
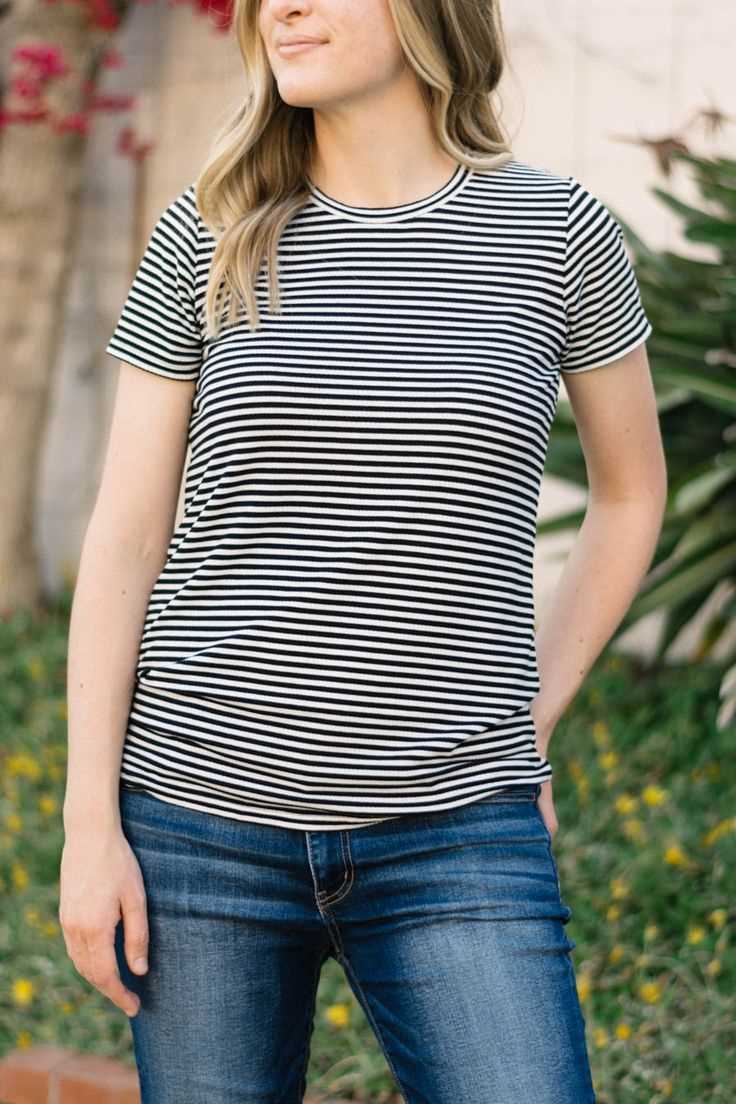
Knitted t-shirts are a versatile and comfortable addition to any wardrobe. Whether you’re an experienced knitter or just starting out, creating your own t-shirt can be a fun and rewarding project. With so many colors, textures, and patterns to choose from, the design possibilities are endless.
A knitted t-shirt is a great way to showcase your creativity and individual style. You can customize the pattern to fit your body shape and size, as well as experiment with different yarns and stitches to create unique textures and designs. Plus, knitting your own t-shirt allows you to have a one-of-a-kind piece that you won’t find in any store.
Knitted t-shirts are also a sustainable and eco-friendly alternative to store-bought versions. By using natural or organic yarns and avoiding synthetic fibers, you can reduce your carbon footprint and support sustainable fashion. Additionally, with proper care, a knitted t-shirt can last for years, making it a durable and long-lasting addition to your wardrobe.
Knitted T Shirt Pattern Article Plan
In this article, we will be discussing a knitted T-shirt pattern that is perfect for both beginners and experienced knitters. We will provide a step-by-step guide on how to create this stylish and comfortable garment, highlighting the key techniques and stitches that will be used throughout the process. Whether you are looking to add to your own wardrobe or create a personalized gift for a loved one, this pattern is versatile and can be customized to suit individual preferences.
Materials Needed:
- Knitting needles (size 5mm)
- Yarn (worsted weight)
- Tapestry needle
- Scissors
Step 1: Cast-On
To begin, cast-on the required number of stitches using the long-tail cast-on method. It is important to measure the circumference of the person’s chest and add a few extra inches for ease and comfort. This will ensure that the T-shirt has a relaxed fit.
Step 2: Ribbing
After casting on, create a ribbed band at the bottom of the T-shirt by knitting in a 1×1 rib pattern. This will add stretch and prevent the fabric from rolling up. Continue the ribbing for the desired length, typically around two inches.
Step 3: Main Body
Once the ribbing is complete, switch to a stockinette stitch for the main body of the T-shirt. This stitch creates a smooth and even fabric, perfect for showcasing any patterns or color changes. Knit in stockinette stitch until the desired length is reached (usually around 12-14 inches).
Step 4: Shaping
To create the armholes and neckline, you will need to shape the T-shirt. This can be done by decreasing stitches gradually on both sides of the work. Be sure to follow the instructions provided in the pattern carefully to ensure correct shaping and a proper fit.
Step 5: Finishing
Once the shaping is complete, bind off all stitches and weave in any loose ends using a tapestry needle. Try on the T-shirt to check for any adjustments that may be needed, such as making the neckline wider or adjusting the length of the sleeves. Wash and block the T-shirt according to the yarn manufacturer’s instructions, and your knitted T-shirt is ready to be worn or gifted!
This knitted T-shirt pattern is a fun and rewarding project that allows you to showcase your knitting skills while creating a practical and stylish garment. With a versatile design and customizable options, you can easily adapt this pattern to suit your personal style and preferences. Whether you are an experienced knitter or just starting out, this pattern is a great choice for anyone looking to create their own handmade wardrobe.
Choosing Yarn for Your Knitted T Shirt
When it comes to knitting a t-shirt, choosing the right yarn is essential to achieving the desired look and feel. The type of yarn you select will greatly affect the drape, breathability, and overall durability of your finished garment. Here are some factors to consider when choosing yarn for your knitted t-shirt.
Fiber Content:
The first thing to consider is the fiber content of the yarn. Different fibers have different properties, so it’s important to choose one that suits your needs. For a lightweight and breathable t-shirt, natural fibers such as cotton, linen, or bamboo are great options. These fibers are known for their softness and moisture-wicking capabilities, making them perfect for warm weather garments. If you’re looking for more warmth and insulation, you might consider using a yarn with a higher percentage of wool or alpaca.
Gauge and Weight:
Another important factor to consider is the gauge and weight of the yarn. The gauge refers to the number of stitches and rows per inch, and it’s crucial to match the recommended gauge in your pattern to ensure the correct sizing of your t-shirt. Additionally, the weight of the yarn will determine the thickness and drape of the fabric. For a t-shirt, you’ll want to choose a yarn that is lightweight and has good drape so that it doesn’t feel bulky or stiff when worn.
Color and Texture:
Lastly, consider the color and texture of the yarn. The color of your yarn will greatly impact the final look of your t-shirt, so choose a color that complements your skin tone and personal style. Additionally, the texture of the yarn can add dimension and interest to your project. You may opt for a smooth and even yarn for a clean and classic look, or choose a yarn with a tweed or boucle texture for a more rustic and textured appearance.
By considering the fiber content, gauge and weight, as well as the color and texture of the yarn, you can choose the perfect yarn for your knitted t-shirt project. Remember to also read the care instructions of the yarn and consider its maintenance requirements to ensure that your t-shirt will last for years to come.
Selecting the Right Needles for Your Knitted T-Shirt
When knitting a t-shirt, it is important to choose the right needles to achieve the desired outcome. The type and size of needles you use can impact the drape, fit, and overall look of the finished garment. Here are some factors to consider when selecting needles for your knitted t-shirt:
Material and Size
The material of the needles can affect how the yarn slides on and off the needles. Common needle materials include metal, bamboo, and plastic. Metal needles have a smooth surface that allows the yarn to glide easily, making them a popular choice for many knitters. Bamboo needles, on the other hand, have a slightly grippy surface that can help control the tension of your stitches. Plastic needles are lightweight and can be a good option if you’re looking for a budget-friendly choice.
The size of the needles determines the gauge or the number of stitches and rows per inch. The recommended needle size for the t-shirt pattern you are using should be specified in the instructions. Using the correct needle size is crucial to ensure your t-shirt fits as intended.
Circular vs. Straight Needles
When knitting a t-shirt, you have the option to use either circular or straight needles. Circular needles are often preferred as they can accommodate a large number of stitches and allow you to work in the round. This eliminates the need for seaming, resulting in a seamless garment. Straight needles, on the other hand, are used for knitting flat pieces and require seaming to join the various sections together.
If you’re new to knitting or prefer simplicity, circular needles may be the better choice for your t-shirt project. However, if you enjoy the traditional method of knitting flat and don’t mind the extra step of seaming, straight needles can work just as well.
Consider the Yarn
The type of yarn you are using for your t-shirt can also influence your needle selection. Thicker yarns generally require larger needles, while thinner yarns work best with smaller needles. It’s important to match the needle size to the yarn weight indicated on the yarn label to ensure the best results.
By considering factors such as material, size, and type of needles, you can make an informed decision and select the right needles for your knitted t-shirt project. Remember to always gauge swatch before starting to ensure you are achieving the correct tension and achieving the desired fit for your garment.
Understanding Knitting Gauge for a Perfect Fit

When it comes to knitting garments, achieving the perfect fit is essential. One key element in achieving this is understanding and maintaining the correct knitting gauge. Knitting gauge refers to the number of stitches and rows per inch in a knitted fabric. By following the recommended gauge for a pattern, you can ensure that your finished garment will match the intended size and proportions.
Before diving into a project, it is crucial to take the time to swatch and measure your gauge. This involves knitting a small sample in the pattern stitch and measuring the number of stitches and rows within a specified measurement. The recommended gauge will typically be given in the pattern instructions, and it is important to follow it closely. Using different yarn, needles, or tension can result in a different gauge and ultimately an ill-fitting garment.
Measuring gauge accurately requires some basic tools, including a ruler or tape measure and stitch markers. To measure stitch gauge, count the number of stitches in one inch horizontally and place stitch markers to keep track. For row gauge, count the number of rows in one inch vertically and use markers to indicate the starting and ending rows. It is important to measure over a larger area rather than just one inch to get a more accurate representation of the gauge.
Once you have determined your gauge, take the time to adjust your knitting techniques if needed. If your gauge is too tight, you may need to switch to larger needles to achieve the correct stitch and row count. Conversely, if your gauge is too loose, using smaller needles can help you achieve the desired measurements.
By understanding and maintaining the correct knitting gauge, you can ensure that your finished project will fit just as intended. It may take some practice and patience to get your gauge just right, but the effort will be worth it when your knitted garments fit perfectly!
Getting Started with the Knitted T Shirt Pattern

Are you ready to embark on a new knitting project? The knitted t-shirt pattern is a great option for both beginners and experienced knitters alike. With its simple yet stylish design, you’ll be able to create a comfortable and versatile garment that can be worn year-round.
Materials: Before you begin, make sure you have all the necessary materials. You will need a set of knitting needles in the appropriate size for your chosen yarn, as well as your preferred yarn in the desired color. Additionally, have a pair of scissors, a tapestry needle, and stitch markers on hand.
Step 1: Gauge Swatch
Gauge swatching is an essential step in any knitting project to ensure that your finished garment will have the correct measurements. Start by knitting a small square with your chosen needles and yarn, following the recommended gauge in the pattern. Measure the gauge using a ruler or measuring tape, and adjust your needle size if necessary to achieve the correct gauge.
Step 2: Casting On
The first step in starting your knitted t-shirt is casting on your stitches. Refer to the pattern for the recommended number of stitches, and cast them onto your knitting needles using your preferred method. Make sure to count your stitches to ensure you have the correct number.
Step 3: Knitting the Body
Once you have cast on, it’s time to start knitting the body of your t-shirt. Follow the pattern instructions for the stitch pattern and shaping, if any. Knit each row or round according to the pattern until the body reaches the desired length.
Step 4: Knitting the Sleeves
After completing the body, you’ll move on to knitting the sleeves. Again, follow the pattern instructions for the stitch pattern and shaping, if any. Knit each row or round as indicated until the sleeves reach the desired length.
Step 5: Finishing

Once you have finished knitting the body and sleeves, it’s time to finish off your knitted t-shirt. Cut the yarn, leaving a long tail for seaming. Use a tapestry needle to sew the underarm seams and the side seams of the body and sleeves. Weave in any loose ends, and your knitted t-shirt is ready to wear!
In conclusion, the knitted t-shirt pattern is a great project for knitters of all skill levels. With the right materials and following the steps outlined in the pattern, you’ll be able to create a comfortable and stylish garment that you can wear with pride.
Knitting the Front and Back Panels of the T Shirt
When knitting a t shirt, one of the first steps is to knit the front and back panels. These panels form the main body of the t shirt and will determine the overall fit and shape. To ensure a comfortable and well-fitting t shirt, it is important to follow the pattern and pay attention to gauge.
The pattern for the front and back panels typically involves a combination of knit and purl stitches, creating a textured or patterned design. The pattern will specify the number of stitches and rows needed to create the desired size and shape of the t shirt.
It is important to cast on the correct number of stitches to match the pattern. This can be done using a long tail cast on or any other preferred method. The first few rows are usually worked in a ribbing pattern, such as knit 2, purl 2, to create a stretchy and snug edge.
As the knitting progresses, you will follow the pattern instructions to create the desired texture or pattern. This may involve working a combination of knit and purl stitches, as well as increases and decreases to shape the panels. It is important to read the pattern carefully and keep track of your progress to ensure an accurate and symmetrical design.
For example, the pattern may instruct you to knit a certain number of rows in stockinette stitch, then switch to a lace pattern for the next section. This will create visual interest and variation in the design of the t shirt.
Once the front and back panels have been completed, they can be joined together at the shoulders using a simple seam or the three-needle bind off method. This will create the basic shape of the t shirt and allow you to move on to knitting the sleeves and neckline.
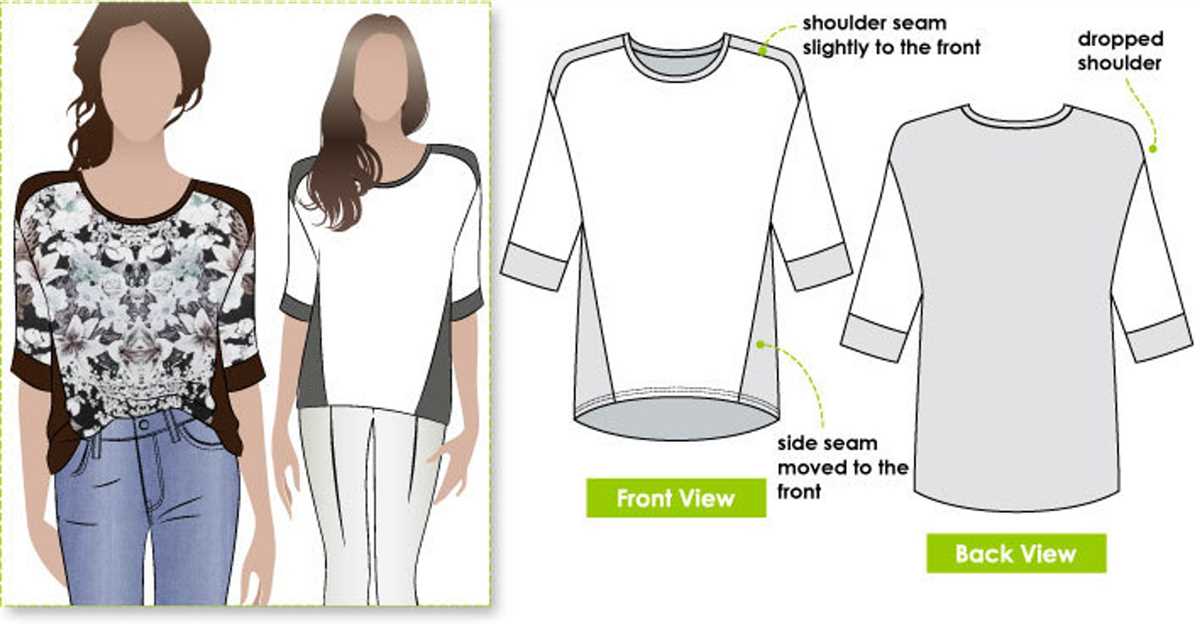
Shaping the Neckline and Shoulders for a Flattering Look
One of the key elements in creating a flattering look for a knitted t-shirt is shaping the neckline and shoulders. These areas play a crucial role in defining the overall silhouette of the garment and can greatly enhance the appearance of the wearer.
Neckline shaping: The neckline of a t-shirt is an important feature that draws attention to the face and neck. By carefully shaping the neckline, you can create a more feminine or flattering look. For a more open and relaxed neckline, you can opt for a wider or deeper scoop neck. On the other hand, a narrower or higher neckline can give a more polished and sophisticated look. Additionally, adding a slight curve or gentle slope to the neckline can soften the overall appearance and create a more elegant silhouette.
Shoulder shaping: The shoulders are another area that can greatly impact the overall look and fit of a knitted t-shirt. Proper shoulder shaping ensures that the garment sits well on the shoulders, creating a flattering and balanced look. To achieve the desired fit, you may need to incorporate shaping techniques such as short rows or decreases. These techniques help to shape the shoulder area and create a seamless transition from the neckline to the sleeves. By paying attention to the shoulder shaping, you can ensure that the t-shirt sits comfortably on the shoulders and avoids any unflattering sagging or bunching.
Overall, when designing a knitted t-shirt pattern, it is important to consider the neckline and shoulder shaping to create a flattering look. By selecting the right neckline shape and incorporating proper shoulder shaping techniques, you can enhance the overall appearance of the garment and create a more flattering silhouette.
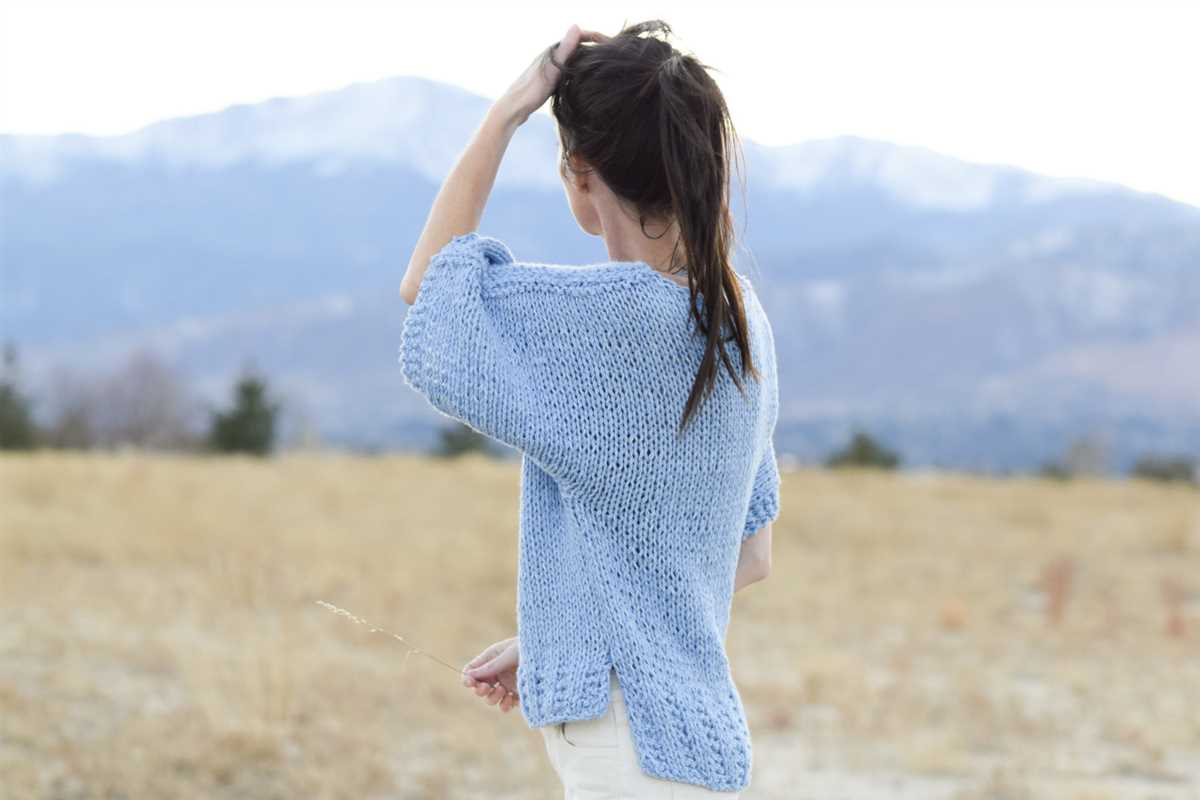
Creating the Sleeves for Your Knitted T Shirt

When it comes to knitting a t-shirt, the sleeves are an important component that can greatly affect the overall fit and style of the garment. To ensure that your knitted t-shirt has the perfect sleeves, it’s essential to follow a well-written sleeve pattern or create your own.
Choosing the Right Sleeve Style: Before you start knitting your sleeves, consider the style you want to achieve. There are different options to choose from, such as short sleeves, three-quarter sleeves, or full-length sleeves. Each style can give your knitted t-shirt a different look and feel, so it’s important to select one that aligns with your vision.
Following a Sleeve Pattern: If you’re not comfortable creating your own sleeve pattern, it’s recommended to find a reliable knitting resource that offers a detailed sleeve pattern for t-shirts. The pattern will typically include instructions for the number of stitches to cast on, the type of stitch to use, and any shaping required. Following the pattern meticulously will ensure that your sleeves turn out as intended.
Creating Your Own Sleeve Pattern: If you prefer to design your own sleeves, start by measuring your arm and determining the desired length and width of the sleeves. Once you have your measurements, you can calculate the number of stitches needed and plan the shape of the sleeve. Common shaping techniques include increasing and decreasing stitches to achieve the desired fit.
Knitting the Sleeves: Once you have your sleeve pattern or design ready, it’s time to start knitting. Work each sleeve separately, following the instructions or your own design. Remember to knit evenly and consistently to ensure that both sleeves match in size and shape. Once the sleeves are complete, you can sew them onto the body of your knitted t-shirt.
Final Adjustments: After attaching the sleeves, it may be necessary to make some final adjustments to ensure a perfect fit. Try on the t-shirt and check the length, width, and overall comfort of the sleeves. If any modifications are needed, take the time to make the necessary changes before finishing off your knitted t-shirt.
By carefully considering the style, following a pattern or creating your own, and paying attention to the details during knitting, you can create sleeves that enhance the look and feel of your knitted t-shirt. With practice and experience, you’ll be able to master sleeve knitting techniques and create beautiful t-shirts with perfectly fitted sleeves.
Joining the Sleeves and Sewing the Side Seams
Once the sleeves for your knitted t-shirt are complete, it’s time to join them to the body and sew the side seams. This step is essential in creating a finished garment that fits well and looks polished.
To begin, lay your knitted body piece flat with the right side facing up. Take one of the sleeves and align it with the armhole edge, ensuring that the right sides are facing each other. Pin the sleeve to the body, making sure to match any stitch markers or pattern details. Repeat this process with the second sleeve on the opposite side.
Once both sleeves are pinned in place, take a length of yarn in a matching color and thread it onto a tapestry needle. Starting at the underarm, begin sewing the side seam using a mattress stitch or your preferred seaming method. Work from the bottom edge of the body up to the underarm, then continue from the underarm down to the seam of the sleeve. Repeat this process on the other side.
It’s important to take your time during this step to ensure that the seams are neat and secure. Use a consistent tension while sewing to maintain an even appearance. Once both side seams are complete, try on the t-shirt to check the fit and make any necessary adjustments.
Finally, weave in any loose ends and give your knitted t-shirt a gentle blocking to help it maintain its shape. This can be done by wetting the garment, gently reshaping it, and laying it flat to dry. With the side seams sewn and the t-shirt blocked, your knitted creation is now ready to be worn and enjoyed!
Adding Finishing Touches to Your Knitted T Shirt
Once you have completed knitting your t-shirt, it’s time to add those final touches that will make it truly stand out. From blocking and seaming to adding buttons and embellishments, these finishing touches can take your knitted t-shirt to the next level.
Blocking and Seaming
One of the most important steps in finishing your knitted t-shirt is blocking. Blocking involves wetting or steaming your finished piece to even out the stitches, relax the fibers, and give it a polished look. This step not only improves the overall appearance of your t-shirt but also ensures that it fits correctly.
After blocking, it’s time to seam your t-shirt. This involves joining the front and back pieces at the shoulders and sides using a method such as mattress stitch or backstitch. Proper seaming is essential for achieving a professional, seamless finish and ensuring the durability of your garment.
Add Buttons

Adding buttons to your knitted t-shirt can be a simple but effective way to give it a unique touch. Choose buttons that complement the color and style of your t-shirt. Sew them onto the front or back placket, or even along the sleeves for a decorative accent. This small detail can make a big difference in the overall look of your garment.
Embellishments
If you want to take your knitted t-shirt to the next level, consider adding some embellishments. This can include embroidery, appliques, or even small beaded accents. Use contrasting colors or textures to create visual interest and make your t-shirt truly one-of-a-kind. Just remember to keep the embellishments in proportion to the size of your garment and to sew them securely in place.
By taking the time to add these finishing touches, you can transform your knitted t-shirt into a stylish and personalized garment. Whether it’s through blocking and seaming or adding buttons and embellishments, these final steps can make all the difference in creating a piece that you’re proud to wear.
Care Instructions for Your Knitted T Shirt
Taking care of your knitted t shirt is essential to ensure its longevity and maintain its quality. Follow these care instructions to keep your knitted t shirt looking its best:
Washing
- Hand wash: It is recommended to hand wash your knitted t shirt to prevent any damage or stretching. Fill a basin with lukewarm water and add a gentle detergent. Gently agitate the shirt in the water, then rinse thoroughly.
- Drying: After washing, carefully squeeze out any excess water from your knitted t shirt. Lay it flat on a clean, dry towel and reshape it to its original size. Allow it to air dry away from direct sunlight and heat sources.
Storing
When storing your knitted t shirt, it is important to take precautions to avoid any stretching or damage:
- Fold: Rather than hanging, fold your knitted t shirt neatly to prevent any stretching or distortion.
- Use moth repellent: To protect your knitted t shirt from moth damage, place cedar chips or mothballs in the storage area.
- Keep away from sharp objects: Store your knitted t shirt in a place where it won’t come into contact with sharp objects that could snag or tear the fabric.
By following these care instructions, you can ensure that your knitted t shirt stays in great condition and remains a staple in your wardrobe for years to come!
Inspiration and Customization Ideas for Your Knitted T Shirt

Knitting your own t shirts not only allows you to express your creativity, but also gives you the opportunity to customize your garments to suit your personal style. Whether you want to add a pop of color, incorporate a unique pattern, or simply make a one-of-a-kind piece, there are endless possibilities for customizing your knitted t shirts. Here are some inspiration and customization ideas to help you get started:
1. Color Block Design:
Color blocking is a popular trend in fashion, and you can easily incorporate this trend into your knitted t shirts. Choose two or three contrasting colors and create blocks of color on your t shirt. This simple technique can instantly transform a plain t shirt into a statement piece.
2. Intarsia or Fair Isle Patterns:
If you’re up for a challenge, try incorporating intarsia or Fair Isle patterns into your knitted t shirt. Intarsia allows you to create intricate designs by knitting different colors onto the fabric, while Fair Isle involves knitting with multiple colors in a row to create beautiful patterns. These techniques can add a unique and eye-catching look to your t shirts.
3. Embellishments and Embroidery:
Add a touch of texture and personalization to your knitted t shirts by adding embellishments or embroidery. Sew on beads, sequins, or buttons for some sparkle, or use embroidery techniques to create intricate designs or personal messages. These details can make your t shirts truly unique and special.
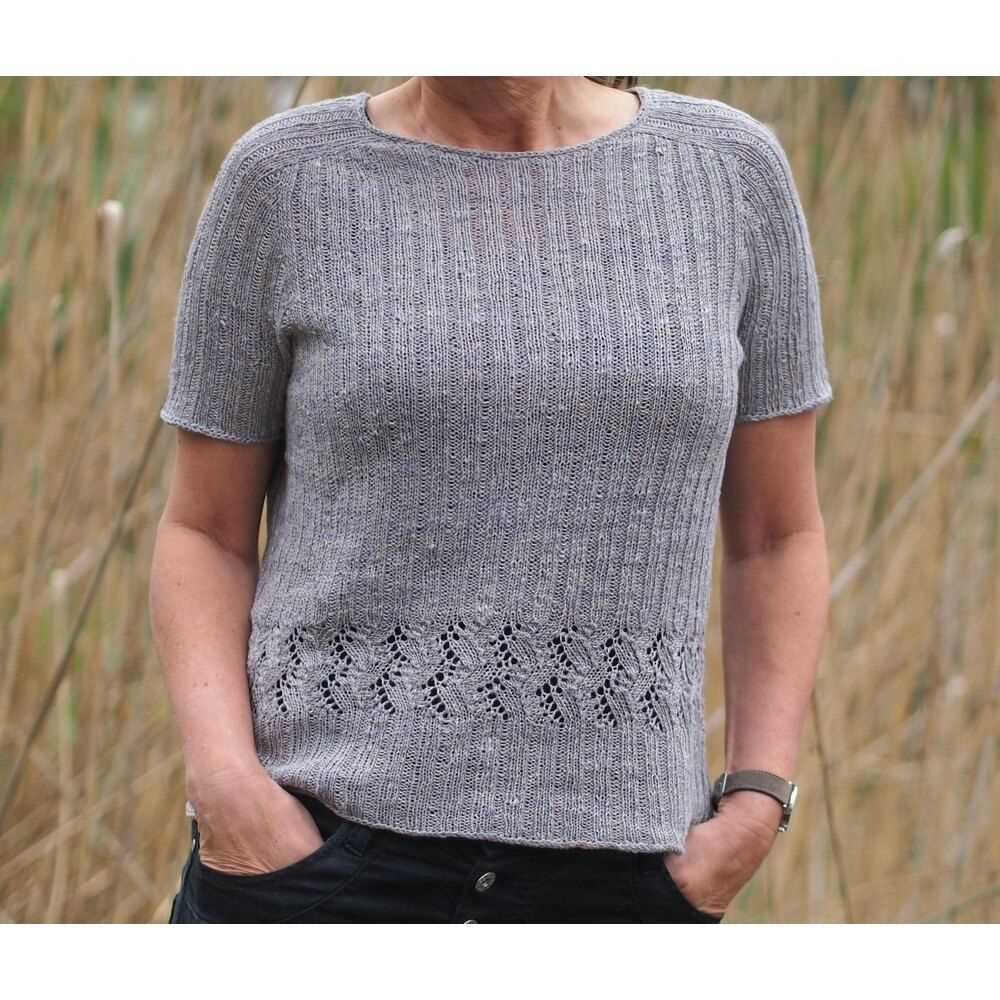
4. Lace or Eyelet Details:
Add a feminine touch to your knitted t shirts by incorporating lace or eyelet details. Knit lace patterns or create small eyelet holes throughout the fabric for a delicate and airy look. These details can elevate your t shirts and make them perfect for both casual and dressy occasions.
5. Custom Fit:
One of the advantages of knitting your own t shirts is being able to customize the fit. Take accurate measurements and adjust the pattern to fit your body shape and preferences. Whether you want a loose and relaxed fit or a more fitted silhouette, you can create a t shirt that flatters your figure and feels comfortable to wear.
With these inspiration and customization ideas, you can create a knitted t shirt that is truly unique and reflects your personal style. Don’t be afraid to experiment and make it your own. Happy knitting!
Q&A:
1. Where can I find a knitted t shirt pattern?
You can find knitted t shirt patterns on various knitting websites, such as Ravelry, LoveKnitting, Knitty, and Pinterest. You can also find patterns in knitting books or magazines.
2. What materials do I need to knit a t shirt?
To knit a t shirt, you will need a specific yarn suitable for t shirts, such as cotton or a cotton blend. You will also need knitting needles in the appropriate size, usually around US size 6 or 7. Additionally, you may need stitch markers, a tapestry needle, and buttons or other closures if the pattern calls for them.
3. Are there different styles of knitted t shirts?
Yes, there are many different styles of knitted t shirts. Some patterns may have a traditional t shirt shape with short sleeves and a crew neck, while others may be more fitted or have a different neckline, such as a V-neck or scoop neck. You can also find patterns for sleeveless or long-sleeved knitted t shirts.
4. Can I customize a knitted t shirt pattern?
Yes, you can definitely customize a knitted t shirt pattern to fit your preferences. You can adjust the length of the body or sleeves, change the neckline shape or depth, add or remove stripes or colorwork, or modify any other details to make the t shirt uniquely yours. Just make sure to check the gauge and make any necessary calculations to ensure a proper fit.
5. Are knitted t shirts suitable for beginners?
Knitting a t shirt can be a bit more challenging than knitting a basic scarf or hat, especially if the pattern includes shaping or other techniques. However, there are beginner-friendly knitted t shirt patterns available that use simple stitches and minimal shaping. Starting with a simpler pattern and gradually progressing to more complex projects can help beginners gain confidence and improve their knitting skills.