
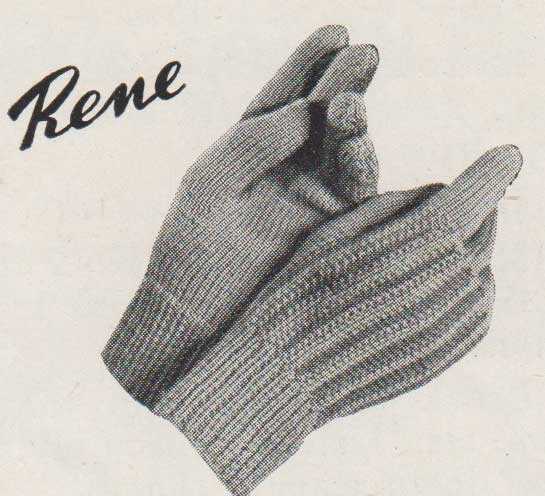
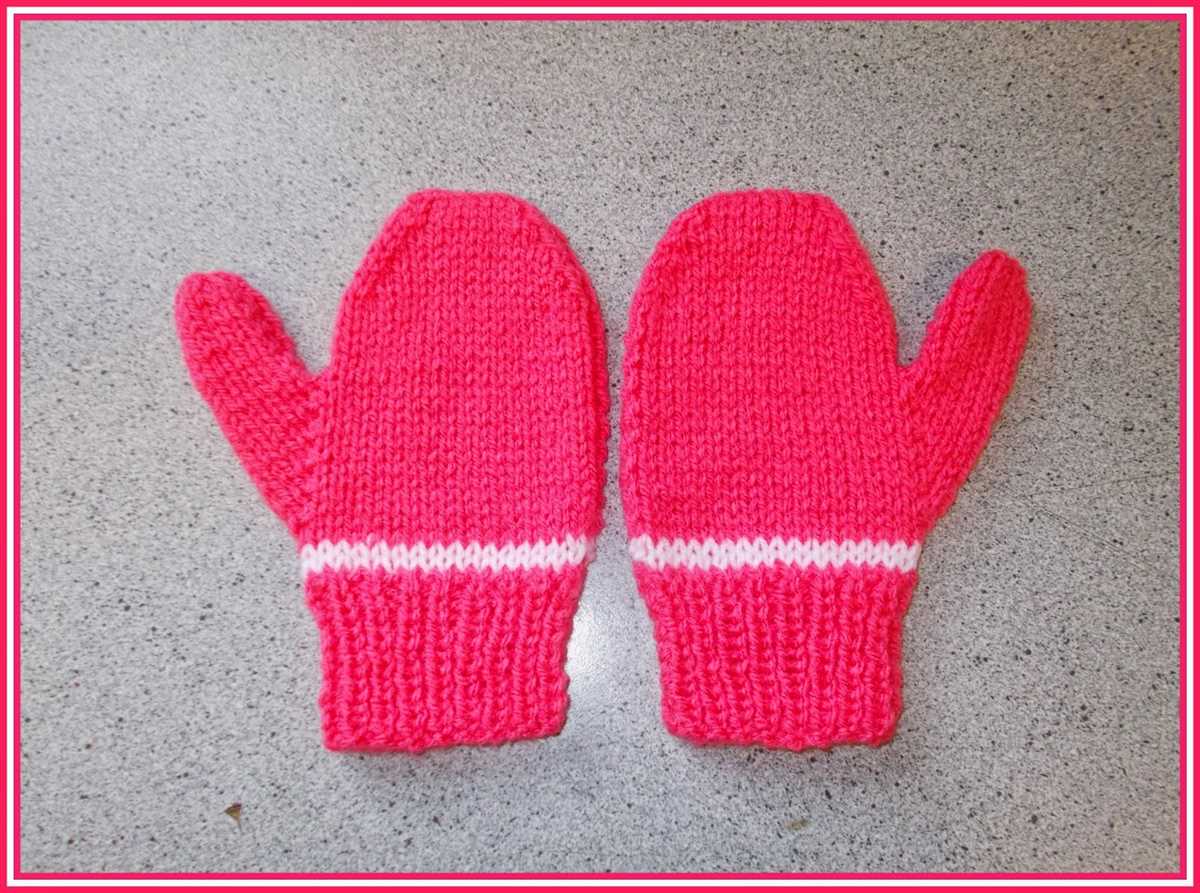
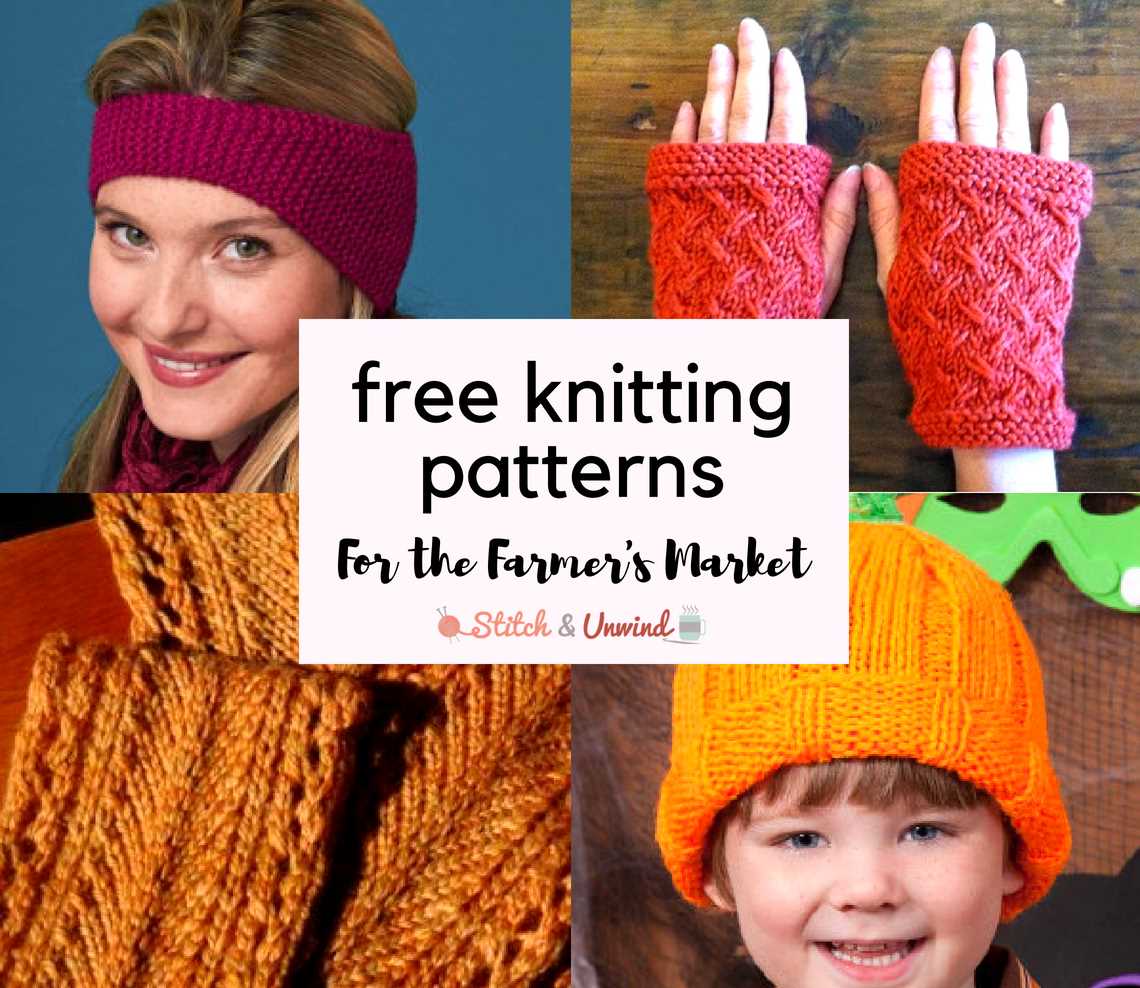
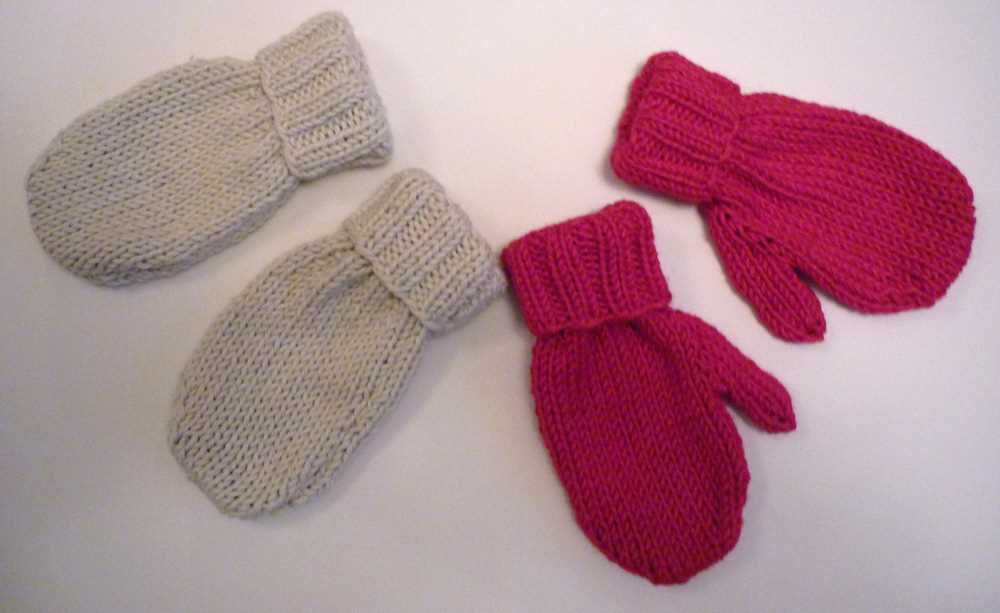
Knitting is a popular hobby that allows you to create beautiful and practical items with just a pair of needles and some yarn. If you’re looking to knit a pair of cozy gloves for a child, this knitting pattern is perfect for you.
This pattern is designed to be knitted on two needles, making it accessible for knitters of all skill levels. Whether you’re a beginner or an experienced knitter, you’ll be able to follow along and create a pair of gloves that are both warm and stylish.
The pattern includes detailed instructions on how to measure the child’s hand to ensure a perfect fit. You’ll also find step-by-step instructions for knitting each part of the glove, from the cuff to the fingers. With clear explanations and helpful diagrams, you’ll have no trouble following along and creating a pair of gloves that your child will love.
Not only will this pattern allow you to create a practical item for your child, but it will also give you an opportunity to showcase your creativity. Choose yarn in your child’s favorite colors or experiment with different stitch patterns to add a unique touch to the gloves. The possibilities are endless!
Knitting pattern for children’s gloves on two needles
If you’re looking for a knitting pattern for children’s gloves that can be made using just two needles, you’re in luck! This pattern is perfect for beginners or those who prefer not to use double-pointed needles. With a few basic stitches and techniques, you’ll have a cozy pair of gloves ready for your little one in no time.
To start, you’ll need a set of size 6 (4mm) knitting needles and a ball of worsted weight yarn. Begin by casting on 32 stitches and dividing them evenly onto two needles. This will create the front and back of the glove.
- Row 1: Knit across all stitches
- Row 2: Purl across all stitches
- Rows 3-24: Repeat rows 1 and 2, alternating between knit and purl stitches
Once you’ve completed the first 24 rows, it’s time to create the thumb opening. On the next row, knit 10 stitches, slip the next 12 stitches onto a stitch holder or piece of scrap yarn, and knit the remaining 10 stitches. These 10 stitches will become the front of the glove, while the 12 stitches on hold will be used for the thumb.
Continue knitting in stockinette stitch (knit one row, purl one row) for another 10 rows, or until the glove reaches the desired length. Then, bind off all stitches and weave in any loose ends.
To finish the glove, you’ll need to create the thumb. Slip the 12 stitches from the stitch holder back onto your knitting needle and pick up 2 additional stitches from the edge of the thumb opening. Knit in stockinette stitch for 12 rows, or until the thumb reaches the desired length. Then, bind off all stitches and weave in any loose ends.
Repeat these steps to create a second glove, and you’ll have a pair of cozy, hand-knit gloves for your little one! Feel free to customize the pattern by adding ribbing at the cuffs or using different colors of yarn. Happy knitting!
Materials needed for knitting children’s gloves
Knitting children’s gloves can be a fun and rewarding project. To get started, you will need a few basic materials. Here is a list of what you will need:
1. Yarn: Choose a soft and durable yarn that is appropriate for children’s gloves. Wool or acrylic yarns are often good choices.
2. Knitting needles: You will need a pair of straight knitting needles in the appropriate size for your yarn. The size will depend on the gauge and the thickness of the yarn you are using.
3. Stitch markers: These small plastic or metal rings are used to mark certain points in your knitting, such as the beginning of a round or the location of a specific stitch pattern.
4. Tapestry needle: This large, blunt needle is used for weaving in the loose ends of your yarn and sewing any small seams that may be required.
5. Scissors: A pair of sharp scissors is essential for cutting your yarn at the end of a project or when changing colors.
6. Measuring tape: A flexible measuring tape is useful for checking your gauge and measuring the length of the gloves.
7. Stitch holders: These small pins or clips are used to hold stitches that are not being worked at the moment. They prevent the stitches from unraveling while you work on other parts of the gloves.
8. Buttons or other embellishments (optional): If you want to add a decorative touch to the gloves, you can choose some buttons or other embellishments to sew onto the finished gloves.
9. Knitting pattern: Lastly, you will need a knitting pattern specifically designed for children’s gloves. This will give you the instructions and measurements needed to create the gloves.
Once you have gathered all of these materials, you will be ready to start knitting your children’s gloves!
Step-by-step instructions for knitting children’s gloves
Knitting gloves for children can be a fun and rewarding project for any knitting enthusiast. By following these step-by-step instructions, you’ll be able to create a cozy pair of gloves that will keep little hands warm during the colder months.
Gather your materials:
Before you begin, make sure you have all the necessary materials. You will need two knitting needles, a set of double-pointed needles, a skein of yarn in the color of your choice, a tapestry needle, and scissors.
Start with the cuff:
Begin by casting on 32 stitches onto your straight needles. This will create the cuff of the gloves. Knit 2, purl 2 in a rib pattern for about 2 inches to create an elastic cuff that will fit snugly around the child’s wrist.
Knit the hand:
Next, switch to your double-pointed needles to begin knitting the hand of the gloves. Divide the stitches evenly onto the four needles, with 8 stitches on each needle. Join in the round, being careful not to twist the stitches. Knit every round until the hand measures approximately 4 inches from the cuff. This will create a comfortable fit for most children.
Create the thumb:
To create the thumb opening, you will need to divide the stitches. Slip the first 8 stitches onto a stitch holder or a piece of scrap yarn. Continue knitting the remaining 24 stitches in the round until the hand measures about 1 inch from the base of the thumb opening.
Finish the fingers:
Finally, it’s time to knit the fingers. Slip the stitches from the stitch holder back onto your double-pointed needles. Divide the stitches evenly onto three needles, with 4 stitches on each needle. Knit each finger until it measures about 2 inches from the base of the thumb opening. Bind off the stitches and weave in any loose ends.
Once you’ve completed knitting both gloves, take a moment to admire your beautiful handiwork. These gloves will not only keep children warm but also showcase your knitting skills. Enjoy the process and have fun creating something special for the little ones in your life!
Choosing the right yarn for children’s gloves
When it comes to knitting children’s gloves, choosing the right yarn is crucial. You want a yarn that is soft, durable, and comfortable against their delicate skin. Here are some factors to consider when selecting yarn for your little one’s gloves.
Fiber content
First and foremost, consider the fiber content of the yarn. Natural fibers like merino wool or cotton are excellent choices for children’s gloves as they are both soft and breathable. These fibers are also less likely to cause irritation or allergies, making them ideal for sensitive skin. Avoid synthetic fibers like acrylic or nylon, as they may not be as comfortable or warm.
Yarn weight
The weight of the yarn is also important when choosing materials for children’s gloves. A lightweight yarn, such as a DK (double knitting) or sport weight, is ideal for gloves as it provides enough warmth without being too bulky. Bulky yarns may restrict movement and make it difficult for children to grasp objects. Choose a yarn that is appropriate for the glove pattern you are using.
Washability
Children can be messy, so it’s important to choose a yarn that is machine washable. Look for yarns that have a care label indicating they can be washed in a machine. This will make it much easier to clean the gloves when they inevitably get dirty. Additionally, a machine-washable yarn will help ensure that the gloves maintain their shape and softness, even after multiple washes.
Color and pattern
Lastly, consider the color and pattern of the yarn. Children love vibrant and fun colors, so opt for bright hues or playful variegated yarns. However, keep in mind that it’s important to choose a color that will not show dirt easily. Patterns can also add interest to the gloves, whether it’s a simple ribbing or a more intricate Fair Isle design. Consider your child’s preferences and choose a yarn that will make them excited to wear their new gloves.
Tips for Sizing Children’s Gloves
When knitting gloves for children, it is important to ensure a proper fit. Ill-fitting gloves can be uncomfortable and may hinder the child’s ability to move their hands freely. Here are some tips to help you determine the correct size for children’s gloves.
1. Measure the Hand
To determine the size of the child’s hand, you can use a tape measure or a piece of string. Measure around the widest part of the hand, typically just below the knuckles. Make sure to measure snugly, but not too tight. Record the measurement in inches or centimeters.
2. Consider Growth
Children’s hands grow quickly, so it’s important to take growth into account when sizing gloves. To ensure the gloves will fit for longer, you can add a small amount of extra length to the hand measurement. However, be careful not to add too much as it may result in a sloppy fit.
3. Check the Recommended Size
Most knitting patterns for children’s gloves include a recommended size based on age or hand circumference. Use this information as a guide, but keep in mind that every child’s hand is different. It is always best to rely on their actual measurements rather than solely on their age.
4. Adjust the Pattern
If the recommended size does not match the child’s measurements exactly, you may need to make adjustments to the knitting pattern. This can be done by increasing or decreasing the number of stitches or rows, or by adjusting the size of the needles used. Keep in mind that making significant changes to the pattern may alter the overall design.
By following these tips and considering the child’s hand measurements, growth, and the knitting pattern, you can ensure that the gloves will fit properly and comfortably. Happy knitting!
Preparing the knitting needles for children’s gloves
Before starting to knit children’s gloves, it is important to prepare the knitting needles. Proper preparation ensures that the gloves will be crafted smoothly and without any issues. It is recommended to use two straight knitting needles for this project, as they provide stability and control during the knitting process.
Selecting the right size: The first step in preparing the knitting needles is to choose the appropriate size for the children’s gloves. The needle size will depend on the desired gauge and the yarn weight. It is important to refer to the knitting pattern for the recommended needle size, as it is specific to the design. Using the correct size ensures that the gloves will match the intended measurements.
Checking the needle length: Once the needle size has been determined, it is important to check the length of the knitting needles. For children’s gloves, shorter needles are generally more comfortable to work with. This allows for greater control and flexibility while knitting. Ensure that the needle length is appropriate for the size of the gloves and the individual knitter’s preference.
Sanding the needles: Before using the knitting needles, it is recommended to lightly sand them with fine-grit sandpaper. This helps smooth out any rough edges or imperfections, preventing them from snagging the yarn and causing knitting errors. Gently run the sandpaper along the length of the needles, applying light pressure. Be sure to remove any wood dust after sanding.
Organizing the needles: To keep the knitting process organized, it is helpful to keep the knitting needles together in a safe and easily accessible place. This can be accomplished by using a needle organizer or simply by securing them with a rubber band or needle holder. By organizing the knitting needles, you can ensure that you always have the necessary tools at hand when working on the children’s gloves project.
Starting the Ribbing for Children’s Gloves
When knitting gloves for children, it’s important to start with a sturdy ribbing that will provide a snug fit around the wrist. The ribbing not only adds elasticity to the gloves, but also adds a decorative touch. Here, we will guide you through the steps to start the ribbing for children’s gloves on two needles.
Materials Needed:
- Yarn of choice (appropriate for the intended recipient)
- Pair of straight knitting needles (appropriate size for the yarn)
Instructions:
- Cast on: To start, cast on an even number of stitches using the long tail cast on method. This will create the foundation for the ribbing. For children’s gloves, a common number of stitches to cast on is around 32-40, depending on the size.
- Work in ribbing: Once the desired number of stitches is cast on, begin working in a 1×1 ribbing pattern. This means you will alternate between knitting one stitch and purling one stitch across each row. This pattern creates the classic ribbed texture.
- Continue the ribbing: Work the ribbing for the desired length. Typically, the ribbing should be about 1-2 inches long, depending on the length of the child’s wrist. Keep in mind that the ribbing will stretch when worn, so it’s better to err on the side of a slightly shorter ribbing.
Congratulations! You have successfully completed the ribbing for children’s gloves on two needles. Now, you can proceed to the next step in the knitting pattern, such as shaping the fingers or adding decorative elements. Remember to follow the pattern instructions carefully to ensure the best results for your children’s gloves.
Creating the Thumb Hole for Children’s Gloves
When knitting gloves for children, it is important to include a thumb hole to ensure a comfortable fit. This thumb hole allows the child to easily move their thumb and grip objects without any restrictions. Here is a step-by-step guide on how to create the thumb hole in children’s gloves.
- Measure the thumb width: Take a measurement of the child’s thumb width. This will help determine the size of the thumb hole. Ensure that the measurement is accurate to ensure a snug fit.
- Place thumb stitches on hold: Once you have determined the thumb width, place the designated number of thumb stitches on hold. This can be done by using stitch holders or a spare piece of yarn.
- Create the thumb hole: Continue knitting the glove, working on the remaining stitches for the hand and fingers. Once you reach the area where the thumb stitches were placed on hold, you will need to create the thumb hole.
- Work the thumb hole: To create the thumb hole, you will need to decrease a few stitches. This can be done by knitting or purling two stitches together. The number of stitches to decrease will depend on the desired size of the thumb hole and the gauge of your knitting.
- Resume knitting: Once the thumb hole has been created, continue knitting the remaining stitches for the hand and fingers. Take care to maintain the correct stitch count and follow the pattern instructions.
- Finish the glove: Once you have completed the desired length for the glove, you can proceed to finish the glove according to the pattern instructions. This may include casting off, sewing seams, or adding any additional finishing touches.
Creating a thumb hole in children’s gloves is essential to ensure a comfortable and well-fitting glove. By following these steps, you can easily incorporate a thumb hole into your knitting pattern and provide a functional and practical glove for children.
Shaping the fingers for children’s gloves
When knitting gloves for children, it is important to pay attention to shaping the fingers. This is what gives the gloves a comfortable fit and allows the child to move their fingers freely. The shaping is typically done by decreasing stitches in a specific pattern to create the shape of the finger.
To begin shaping the fingers, divide the stitches on your needles into sections. Each section will represent one finger. Start with the first finger by decreasing stitches at regular intervals. This can be done by knitting two stitches together or working a slip, slip, knit decrease. Repeat this decrease until the desired number of stitches for the finger is reached.
Next, move on to the second finger and repeat the same decrease pattern. Continue this process for each finger until all fingers have been shaped. It is important to keep track of the number of stitches for each finger to ensure symmetry and a proper fit.
To give the fingers a rounded shape, it is common to work a few rounds without any decrease. This will help create a smooth transition between the fingers and make the gloves more comfortable to wear. After the desired number of rounds, you can bind off the stitches and finish off the gloves.
Remember to follow the specific knitting pattern you are using for any additional instructions or variations in finger shaping. With a little practice and attention to detail, you can create beautiful and well-fitting gloves for children using just two needles.
Adding finishing touches to children’s gloves
Once you have finished knitting the gloves for children, it’s time to add the finishing touches to make them truly special and unique. Here are a few steps to follow:
1. Weaving in ends
Start by weaving in all the loose ends of yarn that are left after you have completed the knitting. Use a darning needle to carefully thread the yarn through the stitches on the wrong side of the gloves. Make sure to secure the ends tightly to prevent them from coming loose.
2. Blocking the gloves

Blocking is an important step in the finishing process as it helps to shape the gloves and even out the stitches. Wet the gloves in lukewarm water and gently squeeze out the excess moisture. Then, lay the gloves flat on a towel and gently stretch them to the desired shape and size. Leave them to dry completely before proceeding.
3. Sewing the seams
If your gloves have seams, carefully sew them using a whipstitch or mattress stitch. This will ensure that the seams are strong and not bulky, providing a comfortable fit for the child. Take your time and sew the seams neatly, making sure that the gloves are symmetrical and aligned properly.
4. Embellishments and personalization
You can make the gloves extra special by adding embellishments or personalizing them. Embroider a child’s name or initials on one of the gloves using a contrasting thread. You can also sew on buttons, bows, or small appliques to add a touch of charm. Be creative and have fun with it!
By following these steps and paying attention to detail, you can complete your children’s gloves and create a beautiful, functional accessory that they will love to wear. Remember to enjoy the process and take pride in the finished product!
Troubleshooting Common Issues when Knitting Children’s Gloves
In the process of knitting children’s gloves, it is not uncommon to encounter certain issues that may hinder progress or affect the final result. Here are some common issues and their corresponding troubleshooting tips:
1. Uneven tension:
Issue: The tension of your stitches may vary, resulting in an uneven appearance in the fabric.
Troubleshooting Tip: Pay attention to your tension while knitting. Try to keep your yarn taut but not overly tight. Practice consistent tension by using a knitting gauge or practicing different knitting techniques.
2. Twisted stitches:
Issue: Twisted stitches occur when you accidentally insert your needle from the wrong direction, resulting in a twisted loop.
Troubleshooting Tip: Make sure to insert your needle correctly into the stitch, ensuring that the right leg of the stitch is in front of the needle. Puncture the stitch on the correct side to prevent twisting.
3. Dropped stitches:
Issue: Dropped stitches can occur when a stitch slips off the needle and unravels down the fabric.
Troubleshooting Tip: As soon as you notice a dropped stitch, place a stitch marker or safety pin below it to prevent further unraveling. Using a crochet hook or the tip of your needle, pick up the dropped stitch and place it back on the needle.
4. Inconsistent sizing:
Issue: Your gloves may turn out too big or too small due to inconsistent knitting tension or incorrect gauge.
Troubleshooting Tip: Check your gauge before starting the project to ensure accurate sizing. If the gloves are turning out too big, try using a smaller needle size. If they are too small, switch to a larger needle size. Pay attention to your tension while knitting to ensure consistent sizing.
5. Uneven fingers:
Issue: The fingers of the gloves may appear uneven or misshapen.
Troubleshooting Tip: Make sure to follow the pattern instructions carefully for shaping the fingers. Count your stitches and rows accurately to ensure symmetry between the fingers. If necessary, use stitch markers to mark the beginning and end of each finger section to keep track of your progress.
In conclusion, knitting children’s gloves on two needles can be a rewarding and enjoyable project. By being aware of common issues and following the troubleshooting tips provided, you can overcome any obstacles that may arise and create beautiful gloves for the little ones in your life. Happy knitting!