
Are you looking to create a beautiful and unique shawl using a knitting machine? This machine knit shawl pattern is the perfect project for you! Whether you are a beginner or an experienced knitter, this pattern will guide you through the process of creating a stunning shawl that you can wear or gift to a loved one.
This pattern is designed for a standard gauge knitting machine and uses a combination of basic stitches to create an intricate lace pattern. The result is a lightweight and airy shawl that has a delicate and feminine look. With the help of this pattern, you will be able to create a shawl that is sure to impress!
In addition to the pattern, you will also find detailed instructions and tips on how to set up and use your knitting machine, as well as how to read and follow the pattern. Even if you are new to using a knitting machine, this pattern is beginner-friendly and will help you build your skills while creating a beautiful finished product.
Machine Knit Shawl Pattern
The machine knit shawl pattern is a versatile and practical accessory that can be created using a knitting machine. With its unique texture and design, this shawl can add a touch of elegance to any outfit. Whether you’re a beginner or an experienced knitter, this pattern provides clear instructions and diagrams to guide you through the process.
To start, gather your materials, including a knitting machine, a suitable yarn, and any additional tools such as stitch markers or a row counter. The pattern typically includes information about the recommended yarn weight and needle size to achieve the desired result. It’s important to gauge your tension and make any necessary adjustments to ensure the final product meets your expectations.
Once you have your materials ready, follow the step-by-step instructions provided in the pattern. This may include casting on stitches, selecting the appropriate stitch pattern, and shaping the shawl through increases and decreases. The machine knit shawl pattern may also include information about finishing techniques, such as binding off and blocking the shawl to achieve the desired drape and shape.
One of the advantages of using a knitting machine for this pattern is the speed and efficiency it offers. Unlike hand-knitting, a machine allows for faster production, making it an ideal choice for those looking to create shawls in larger quantities or for commercial purposes. However, it’s essential to familiarize yourself with the machine’s settings and functions to ensure smooth operation and accurate results.
In conclusion, the machine knit shawl pattern offers an exciting opportunity to create a stylish and functional accessory using a knitting machine. With clear instructions, careful yarn selection, and attention to detail, you can produce stunning shawls that will enhance any wardrobe. Whether you’re knitting for yourself or as a gift, this pattern is sure to impress with its beautiful texture and professional finish.
Choosing the Right Yarn and Needles
When it comes to knitting a machine knit shawl, choosing the right yarn and needles is crucial for achieving the desired results. The yarn you select will determine the overall look and feel of the shawl, while the needles will help you achieve the correct tension and stitch definition.
Yarn: When choosing yarn for a machine knit shawl, consider the drape, weight, and fiber content. A lightweight yarn, such as fingering or lace weight, will create a delicate and airy shawl, while a heavier yarn, like worsted or bulky weight, will result in a warmer and more substantial shawl. Additionally, the fiber content can affect the final outcome – natural fibers like merino wool or alpaca will provide warmth and softness, while synthetic blends can add durability and ease of care.
Needles: The type and size of the needles will depend on the yarn and desired stitch pattern. For finer yarns, such as lace weight, choose smaller needles to create a more intricate stitch pattern. If you prefer a looser and more relaxed fabric, opt for larger needles. Circular needles are often used for shawl knitting, as they provide the flexibility to accommodate a large number of stitches and can also be used for both flat and circular knitting. Don’t forget to check the manufacturer’s recommended needle size for the yarn you have chosen to ensure the best results.
Basic Machine Knitting Techniques
Machine knitting is a versatile technique that allows you to create beautiful and intricate designs with speed and precision. Whether you are a beginner or an experienced knitter, mastering the basic techniques is essential to creating successful machine knitted projects.
Casting On: The first step in machine knitting is to cast on your stitches. There are several methods you can use, such as the e-wrap method or the latch tool method. It’s important to cast on the correct number of stitches to achieve the desired width of your project.
Knitting: Once you have cast on your stitches, you are ready to start knitting. With machine knitting, you use a carriage to move the needles and create the knitted fabric. The carriage is guided by your hands and moves across the bed of the machine, knitting each row of stitches. You can adjust the tension of the yarn to create different effects, from tight and dense stitches to loose and open stitches.
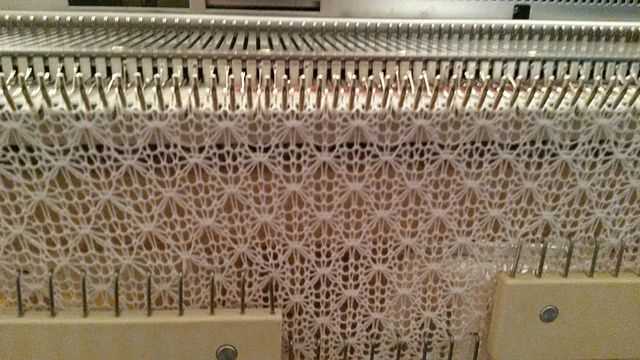
Using the Punchcard: Some machines have punchcard capabilities, allowing you to create intricate patterns and designs. The punchcard is loaded into the machine and determines which needles will be selected and which will be skipped for each row of knitting. This allows you to create complex patterns without having to manually manipulate each individual stitch.
Shaping: In machine knitting, shaping is achieved by increasing or decreasing the number of stitches in specific areas of your project. You can do this by transferring stitches from one needle to another or by using the intarsia technique to change colors and create patterns.
Finishing: Once you have completed your machine knitted project, it’s time to finish off the edges and secure any loose ends. You can use techniques such as binding off or grafting to create a clean and professional-looking finish. Blocking your garment is also important to give it the desired shape and drape.
In conclusion, mastering the basic machine knitting techniques is key to creating beautiful and successful projects. With practice and experimentation, you can create unique and personalized garments and accessories using this versatile knitting technique.
Understanding the Shawl Pattern
When it comes to knitting shawls using a machine, it’s important to have a clear understanding of the pattern before you begin. The shawl pattern will provide you with the instructions on how to create the design, stitch by stitch. It will include details such as the type of yarn to use, the size of the shawl, and any special stitches or techniques required.
Studying the Pattern: Before you start knitting, take some time to carefully read through the shawl pattern. Pay attention to the gauge, which will determine the size of your shawl and how many stitches you need to cast on. The pattern may also include a chart or written instructions for any special stitches or stitch patterns used in the design.
Choosing the Right Yarn: The pattern will specify the type of yarn you should use for the shawl. It may recommend a specific brand or weight, as well as the amount of yarn needed. Consider the fiber content, texture, and color of the yarn to ensure it matches your vision for the finished shawl.
- Machine Set-up: Once you have your pattern and yarn, set up your knitting machine according to the instructions provided. Make sure the needles and tension are adjusted correctly to achieve the desired stitch tension.
- Following the Instructions: As you begin knitting, refer to the pattern frequently to ensure you are following the correct sequence of stitches. Use stitch markers to help keep track of any repeat patterns. If the pattern includes shaping, such as increases or decreases, make sure to follow the instructions carefully to achieve the desired shape and size.
- Finishing the Shawl: Once you have completed all the stitches as directed in the pattern, it’s time to finish the shawl. This may involve binding off, blocking, and adding any desired embellishments such as fringe or edging.
In conclusion, understanding the shawl pattern is a crucial step in successfully machine knitting a shawl. By carefully studying the instructions, choosing the right yarn, and following the steps as directed, you can create a beautifully knitted shawl that matches your vision.
Cast On and Set Up the Machine
Before you can start knitting your shawl on a machine, you’ll need to cast on and set up the machine properly. This process may vary slightly depending on the type of machine you are using, so be sure to consult the instruction manual for your specific model. Here are some general steps to get you started:
Casting on

1. Begin by threading the yarn through the tension mast and through the machine’s needle bed. Make sure the yarn is securely attached to the machine.
2. Adjust the tension dial on the machine to the desired setting. This will vary depending on the type of yarn you are using and the desired tension for your project. It’s a good idea to do a test swatch and adjust the tension as needed before starting your shawl.
3. Position the machine’s carriage at one end of the needle bed.
4. Take the end of the yarn and place it between the first and second needles on the machine. Pass the yarn over the top of the needles and under the needle in the second position.
5. Repeat this process for each needle, threading the yarn between the needles and over the top.
6. Once you have threaded all the needles, gently push the carriage across the bed, which will knit the first row of stitches. The carriage should move smoothly and easily.
7. Check the stitches for uniformity and adjust the tension if necessary. If the stitches are too loose or too tight, you may need to adjust the tension dial on the machine and try again.
Setting up the machine
1. After casting on, you’ll need to set up the machine for the specific pattern you want to knit. This may involve selecting the stitch pattern and adjusting the carriage settings.
2. Consult the pattern instructions to determine the appropriate settings for your shawl. This may include changing the stitch size, selecting a specific pattern disk, or adjusting the carriage settings.
3. Follow the instructions provided with your machine to make the necessary adjustments. This may involve changing the carriage settings, changing or inserting pattern disks, or adjusting the stitch size on the machine.
4. Once you have set up the machine appropriately, you are ready to start knitting your shawl. Refer to the pattern instructions for the specific steps to follow for your desired design.
Working the Body of the Shawl
Once you have completed the border of your machine knit shawl pattern, it’s time to move on to working the body of the shawl. This is where you will create the main section of the shawl that will wrap around your shoulders.
To begin, you will need to continue following the pattern instructions for the body of the shawl. This may include repeating certain stitch patterns or increasing and decreasing stitches to create shaping. Pay close attention to the pattern and make sure to follow any stitch counts and instructions for increases and decreases.
As you work the body of the shawl, you may find it helpful to use stitch markers to keep track of certain sections or stitch patterns. This can help ensure that you maintain the correct stitch count and pattern throughout the shawl.
Remember to take breaks and check your work periodically to make sure everything is looking as it should. If you make any mistakes, it’s generally easier to fix them sooner rather than later.
As you continue knitting the body of the shawl, you will start to see the overall shape of the shawl taking form. This is an exciting part of the process, as you can visualize how the finished shawl will look.
Once you have completed the body of the shawl, you can move on to finishing touches such as binding off and blocking. These final steps will help give your shawl a professional, polished look.
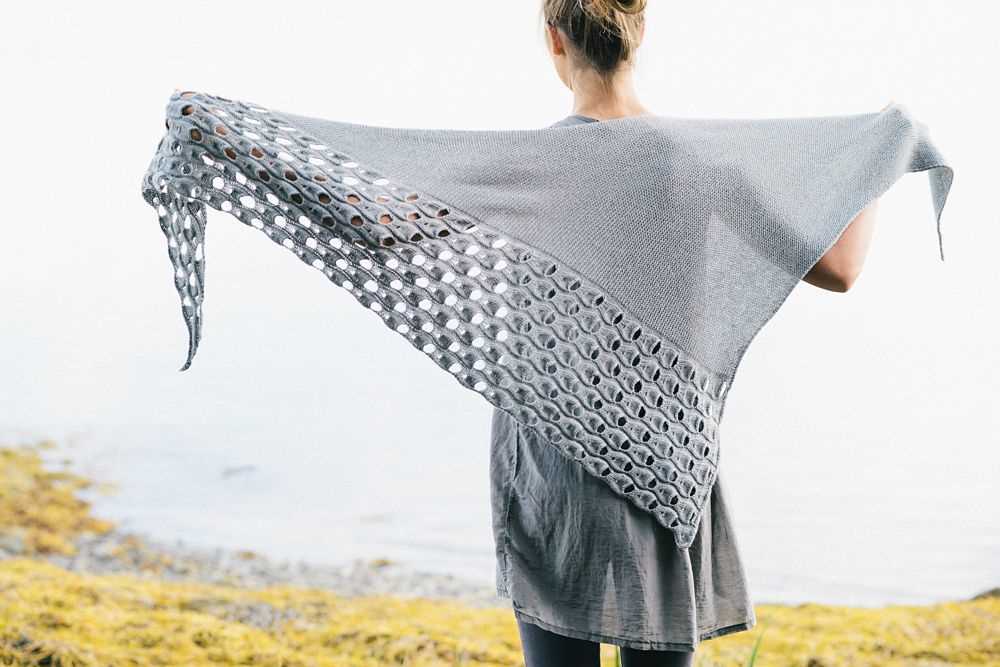
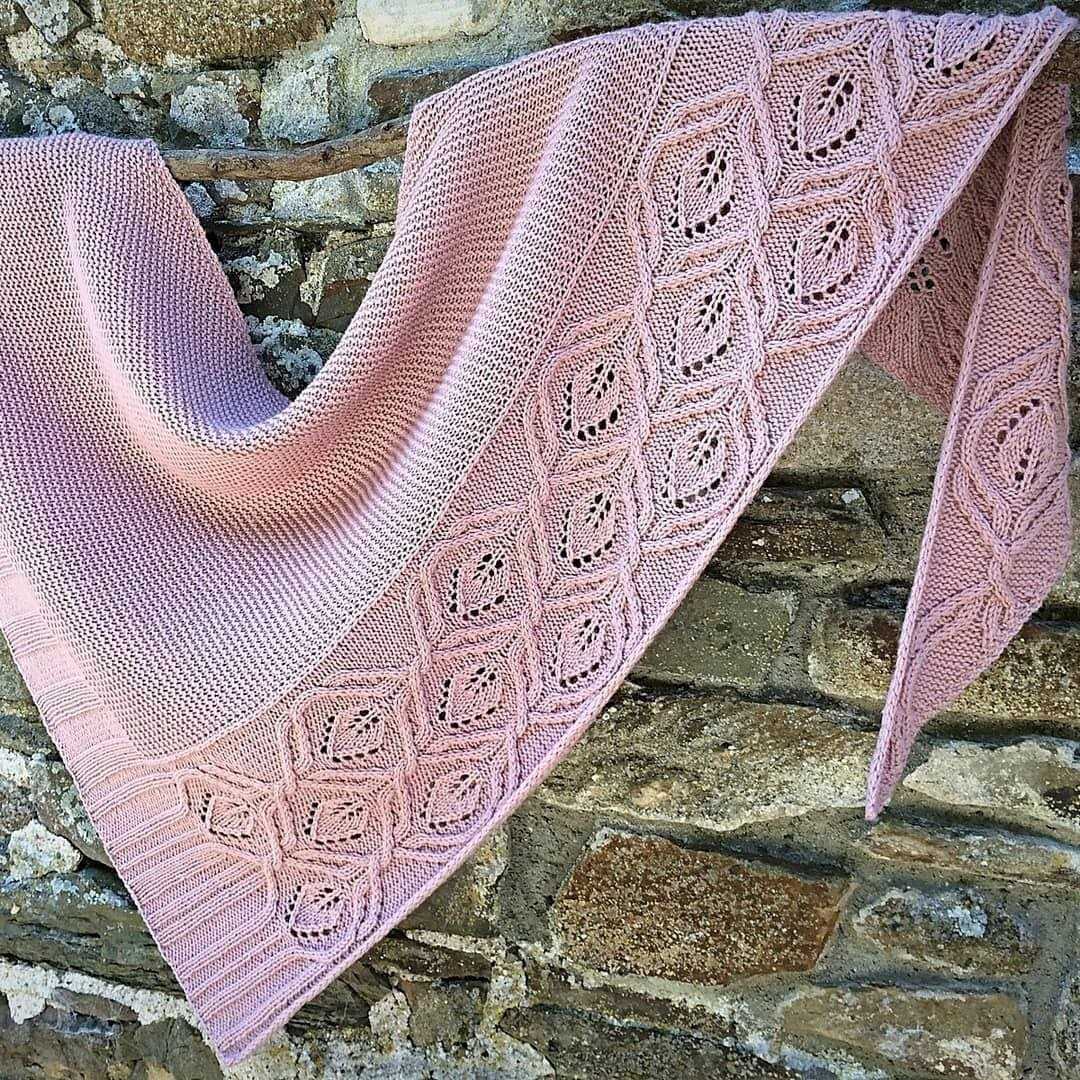
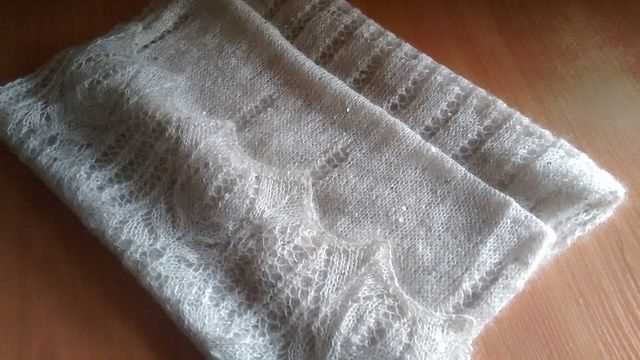
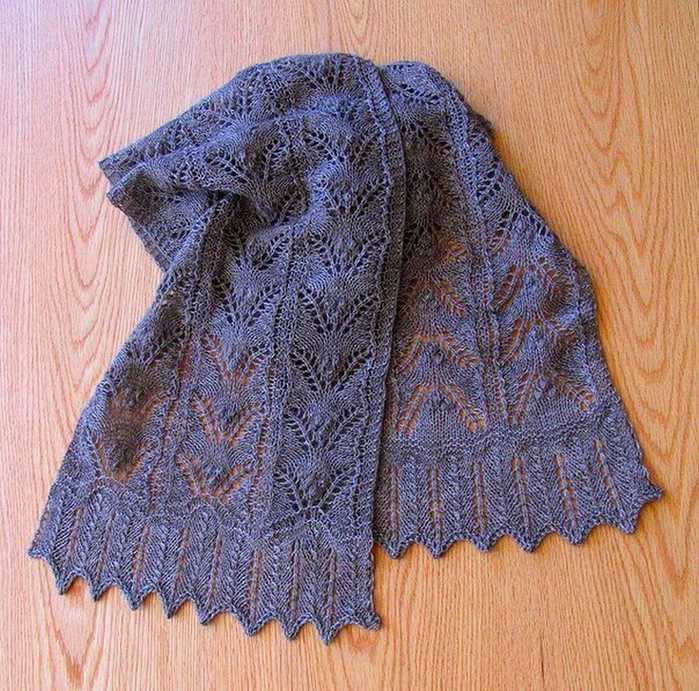
Creating the Lace Pattern
When designing a machine knit shawl pattern, the lace pattern is an important element that adds beauty and intricacy to the finished piece. The lace pattern is created by manipulating the stitches and using various techniques to achieve the desired effect.
One common technique used in creating lace patterns is yarn overs. A yarn over is created by bringing the yarn to the front of the work and then knitting the next stitch. This creates an extra loop on the needle, which is then used in subsequent rows to create decorative holes and eyelets.
Another technique used in lace knitting is decreasing stitches. Decreases are used to shape the lace and create the intricate patterns. The most basic decrease is the knit two together (k2tog) stitch, where two stitches are knit together as one. There are many other decreases, such as slip, slip, knit (ssk) and slip, knit, pass (skp), that can be used to create different effects.
To create a lace pattern, a combination of yarn overs and decreases is used to create the desired design. Different combinations and placements of these stitches can create a wide variety of lace patterns, ranging from simple and delicate to complex and dramatic. It’s important to carefully follow the lace pattern chart or written instructions to ensure the correct placement of yarn overs and decreases.
For machine knitting, lace patterns can be created using punch cards or electronic pattern devices. These tools allow for precise control over the stitch manipulations and make it easier to incorporate intricate lace patterns into the shawl design.
Overall, creating the lace pattern is an important and rewarding part of designing a machine knit shawl. It requires careful attention to detail and an understanding of how different stitch manipulations can create the desired effects. With practice and experimentation, beautiful and unique lace patterns can be created to add a touch of elegance to any shawl design.
Shaping the Shawl
When knitting a machine knit shawl, shaping is an essential step in creating the desired design and fit. Shaping refers to the process of increasing or decreasing stitches to create curves and straight lines within the shawl. By strategically adding or removing stitches, you can achieve different shapes and dimensions, allowing you to customize the shawl to your preference.
There are several methods you can use to shape your shawl. One common technique is to use increases and decreases at the edges of the fabric. For example, you can use a simple knit two together (k2tog) decrease to create a diagonal line that slants towards the center of the shawl. Alternatively, you can use a yarn over (yo) increase to add a decorative eyelet pattern to the edges of the shawl.
Another shaping technique involves creating short rows. Short rows are partial rows of knitting that are used to create curves or asymmetrical shapes. They are often used to create shawl designs with a longer back and shorter front, or to add subtle shaping to the neckline or hem of the shawl. To create short rows, you simply knit a certain number of stitches and then turn the work before completing the row.
When shaping your shawl, it’s important to keep track of your stitch counts and follow the pattern instructions carefully. Mistakes in shaping can result in an uneven or ill-fitting shawl. However, don’t be afraid to experiment and make adjustments as needed to achieve the desired look. With practice, you’ll become more familiar with different shaping techniques and be able to create beautifully customized shawls.
Some common shaping techniques include:
- Increases (such as knit front and back, make one, yarn over).
- Decreases (such as knit two together, slip slip knit, slip slip purl).
- Short rows (such as wrap and turn, German short rows).
- Garter stitch or stockinette stitch for straight edges.
Finishing Techniques
When it comes to finishing a machine knit shawl, there are several techniques that can be used to achieve a professional and polished look. These techniques include blocking, weaving in ends, and adding fringe or other decorative elements.
Blocking
Blocking is an important step in finishing a machine knit shawl. It helps to even out the stitches, open up lace patterns, and give the shawl its final shape and drape. To block a shawl, start by soaking it in cold water with a gentle detergent. Gently squeeze out the excess water and lay the shawl flat on a clean towel. Use rust-proof pins or blocking wires to gradually stretch and shape the shawl to the desired measurements. Allow the shawl to dry completely before unpinning.
Weaving in Ends
After the shawl is blocked and dry, it’s time to weave in any loose ends. Use a tapestry needle to carefully thread the ends through the stitches on the wrong side of the shawl. Make sure to weave in the ends securely and invisibly to prevent them from coming undone during wear or washing.
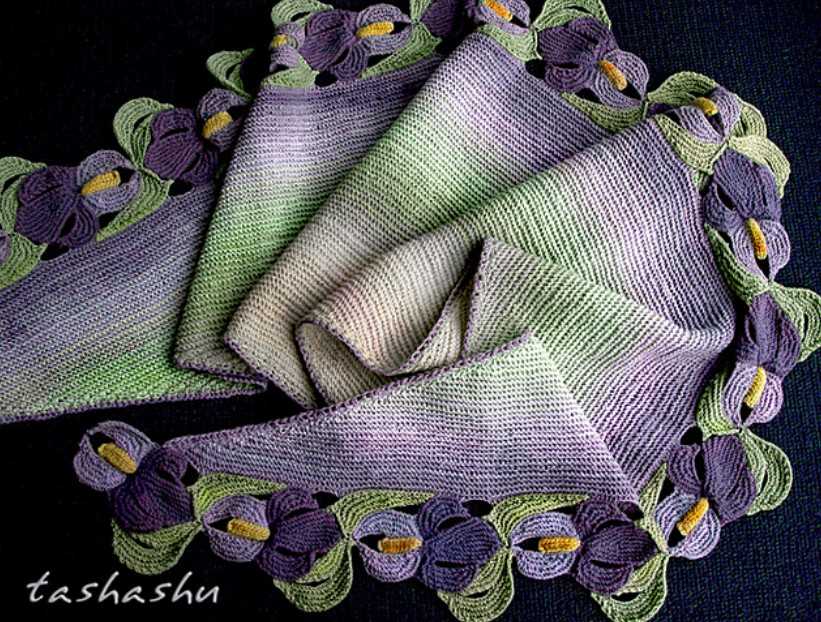
Adding Fringe or Decorative Elements
To add a finishing touch to the shawl, consider adding fringe or other decorative elements. Fringe can be made by cutting lengths of yarn and attaching them to the edge of the shawl using a crochet hook or tapestry needle. Other decorative elements, such as beads or buttons, can be sewn onto the shawl to add texture and visual interest. Experiment with different techniques and designs to create a unique and personal touch to your machine knit shawl.
Blocking and Washing the Shawl
After completing your machine knit shawl, it is important to block and wash it to give it the desired shape and finish. Blocking helps to even out the stitches and relax the fibers, while washing removes any dirt or oils that may have accumulated during the knitting process.
Blocking: To block your shawl, you will need blocking mats or towels, rust-proof pins, and a measuring tape. Lay the shawl flat on the blocking mats, making sure the edges are straight and the corners are square. Use the measuring tape to carefully pin the shawl into shape, stretching it slightly if needed. Pay special attention to any lace or design elements, making sure they are fully open and visible.
Washing: Before washing your shawl, check the care instructions for the yarn you used. Most machine washable yarns can be gently hand washed or machine washed on a delicate cycle. Fill a sink or basin with lukewarm water and a mild wool wash or detergent. Submerge the shawl in the water, gently agitating it to remove any dirt. Rinse the shawl thoroughly with clean water, being careful not to wring or twist the fabric.
Drying: After washing, gently squeeze out any excess water from the shawl. Lay it flat on a clean towel and roll it up to remove more moisture. Unroll the towel and transfer the shawl to a blocking mat or clean, dry towel. Reshape the shawl if necessary, using rust-proof pins to hold it in place. Allow the shawl to air dry completely before removing the pins.
Final Touches: Once the shawl is dry, remove the pins and give it a final inspection. Take the time to smooth out any wrinkles or misshapen areas, and make any necessary adjustments to the blocking. Your machine knit shawl is now ready to be enjoyed or gifted to someone special.
Tips and Tricks for Machine Knitting
In this article, we have covered some useful tips and tricks for machine knitting. Machine knitting can be a fun and efficient way to create garments, but it does require some knowledge and practice to get the best results. By following these tips, you can improve your machine knitting skills and create beautiful shawls and other projects.
- Choose the right yarn: Selecting the right yarn is crucial for machine knitting. Make sure to choose a yarn that is compatible with your machine and will result in the desired drape and texture for your shawl.
- Check your tension: Tension plays a key role in machine knitting. Take the time to set up your machine and adjust the tension correctly before starting your project. This will help prevent any issues with stitches being too loose or too tight.
- Practice with scrap yarn: If you’re new to machine knitting or trying out a new pattern, it’s always a good idea to practice with scrap yarn first. This will allow you to test out different techniques and settings without wasting your precious yarn.
- Keep your machine clean: Regularly clean and maintain your machine to ensure smooth operation. Remove any built-up lint or debris and oil the necessary parts. A clean machine will help prevent any jamming or knitting issues.
- Use tools for finishing: Machine knitting produces a neat and professional finish, but using tools for finishing can elevate your project even further. Consider using crochet hooks, scissors, and other tools to tidy up loose ends and add embellishments if desired.
- Experiment with stitch patterns: Don’t be afraid to experiment with different stitch patterns and techniques to create unique shawls. Your machine can produce a wide variety of stitches and textures, so take advantage of that to create one-of-a-kind designs.
By following these tips and tricks, you can enhance your machine knitting skills and create stunning shawls and other projects. Remember to practice, be patient, and have fun with your machine knitting journey!