
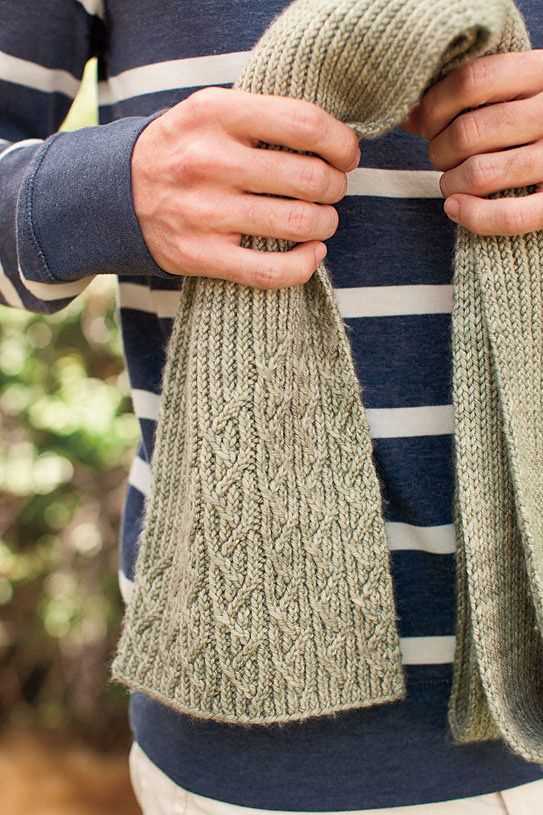
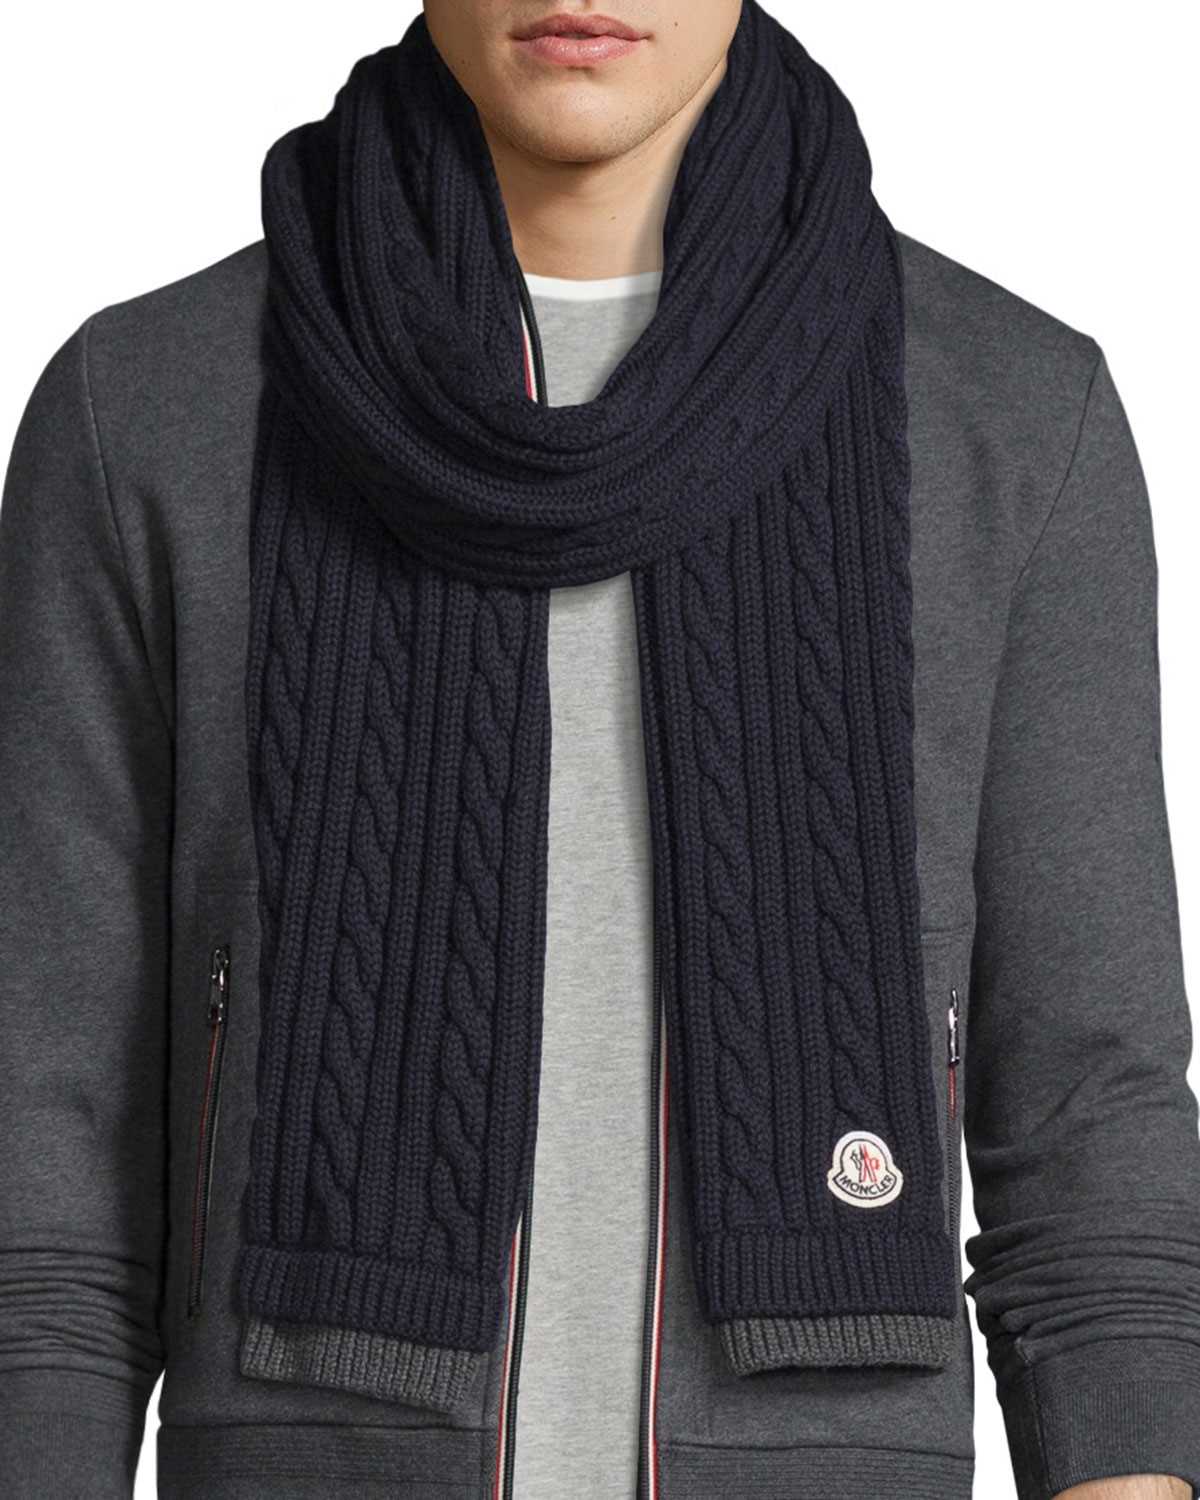
When the temperature drops, one accessory that every man needs is a warm and stylish scarf. A cable knit scarf is the perfect choice for keeping warm and adding a touch of sophistication to any outfit. Whether you are an experienced knitter or just starting out, this pattern is easy to follow and will result in a beautiful scarf that you will be proud to wear or gift.
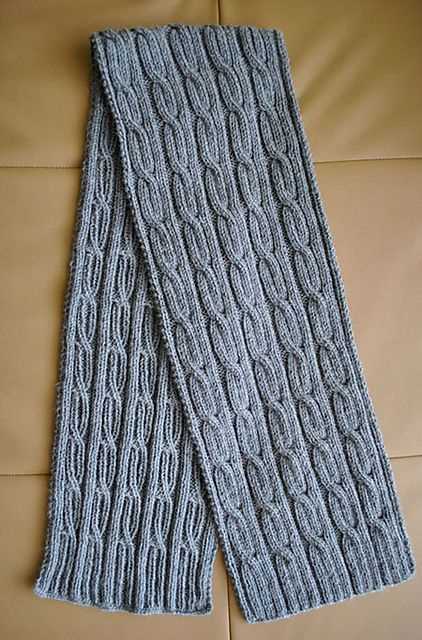
The cable knit pattern is a classic design that adds texture and interest to any knitted item. It is created by crossing stitches over each other, creating a series of interlocking cables. This pattern is often associated with fishermen and sailors, as it was traditionally used in their garments to provide extra warmth and durability.
This mens cable knit scarf pattern is designed to be versatile and timeless. It can be made in any color, making it suitable for any outfit or occasion. Knit it in a neutral color for a classic look, or choose a bold color to make a statement. The pattern can also be easily adjusted to make it longer or wider, depending on your preference.
Mens Cable Knit Scarf Pattern: A Step-by-Step Guide
Knitting a cable knit scarf is a great project for any experienced knitter looking to create a warm and stylish accessory for the colder months. This pattern guide will take you through the steps necessary to create a classic cable knit scarf for men.
Materials Needed:
- 5mm knitting needles
- Approximately 400g of worsted weight yarn
- Cable needle
- Yarn needle
Step 1: Cast On

Begin by casting on an even number of stitches. For a standard width scarf, you can cast on around 40 stitches. Make sure to leave a long tail for later use.
Step 2: Knit Rows 1-6
Knit the first 6 rows in a basic knit stitch pattern, making sure to maintain an even tension.
Step 3: Begin the Cable Pattern
On the 7th row, start the cable pattern. To create a cable, slip the next 6 stitches onto a cable needle and hold it in the front of your work. Knit the next 6 stitches from the left-hand needle, then knit the 6 stitches from the cable needle. Repeat this pattern until you reach the end of the row.
Step 4: Repeat Rows
Continue knitting in the established cable pattern, repeating rows 1-6 until your scarf reaches the desired length. Make sure to always keep track of your stitch count and maintain an even tension.
Step 5: Bind Off
Once you have reached the desired length for your scarf, bind off all stitches and weave in any loose ends using a yarn needle.
With this step-by-step guide, you can easily create a warm and stylish cable knit scarf for men. Experiment with different yarn colors and cable patterns to create a unique accessory that will keep you cozy all winter long.
The History and Popularity of Cable Knit Scarves for Men
Cable knit scarves have a long and rich history in men’s fashion. The technique of cable knitting originated in the Aran Islands of Ireland in the late 19th century. Fishermen used this style of knitting to create thick and warm garments that could withstand the cold and harsh conditions at sea. The intricate patterns and textures of cable knit scarves not only provided added warmth but also served as a form of identification, as each pattern was unique to a particular family or region.
Over time, cable knit scarves became popular in the mainstream fashion world for both men and women. They exude a classic and timeless appeal that is both stylish and functional. The cable knit pattern, characterized by its twisted and interlocking stitches, adds depth and dimension to the scarf, making it a versatile accessory that can be dressed up or down.
Today, cable knit scarves for men are a popular choice for those looking to add a touch of sophistication and coziness to their winter wardrobes. They are available in a variety of materials, from soft merino wool to luxurious cashmere, ensuring both warmth and comfort. The versatility of cable knit scarves for men allows them to be paired with a range of outfits, from formal coats and suits to casual jackets and jeans. Whether worn draped loosely or wrapped snugly around the neck, a cable knit scarf adds an instant touch of style and warmth to any ensemble.
Overall, the history and popularity of cable knit scarves for men are rooted in their practical origins and timeless appeal. From their humble beginnings as functional garments for fishermen to their status as a fashionable accessory, cable knit scarves have stood the test of time and continue to be a favorite choice for men seeking warmth, style, and comfort during the winter months.
Choosing the Right Yarn for Your Cable Knit Scarf
If you’re planning to knit a cable knit scarf, one of the most important decisions you’ll need to make is choosing the right yarn. The yarn you choose will not only affect the overall appearance and texture of your finished scarf, but it will also determine the level of warmth and comfort it provides.
Consider the fiber content: When choosing yarn for your cable knit scarf, consider the fiber content of the yarn. Different fibers have different properties, which will impact the characteristics of your scarf. For instance, wool yarn is known for its warmth and durability, making it a popular choice for cable knit scarves. On the other hand, alpaca yarn is softer and lighter, providing a luxurious feel. There are also synthetic fibers like acrylic, which can be a more affordable option and may offer easier care instructions.
Choose the right weight: Another important factor to consider is the weight of the yarn. The weight of the yarn determines how thick or thin the yarn is, which will affect the appearance and drape of your cable knit scarf. For a chunky and cozy scarf, opt for a bulky or super bulky weight yarn. For a lighter and more delicate scarf, choose a sport or DK weight. Make sure to check the pattern requirements or gauge to ensure you choose a yarn that will result in the desired size and texture of your cable knit scarf.
Consider the color: The color of your yarn will also play a significant role in the overall look of your cable knit scarf. Solid colors can highlight the intricate cable stitch patterns, while variegated or self-striping yarn can add visual interest and dimension. Consider the recipient’s preferences and the intended purpose of the scarf when choosing the color, whether it’s a classic neutral tone or a bold and vibrant shade.
Check for yarn recommendations in the pattern: If you’re following a specific pattern for your cable knit scarf, it may include specific yarn recommendations. These recommendations can be helpful in ensuring you choose a yarn that will work well with the pattern and achieve the desired results. Additionally, some patterns may suggest using a specific type of yarn or blend to achieve certain characteristics, such as extra softness or stitch definition.
Don’t forget about care instructions: Lastly, consider the care instructions for the yarn you choose. Some yarns may require special care, such as hand washing or dry cleaning, while others may be machine washable. Keep in mind the recipient’s lifestyle and preferences when choosing a yarn that is easy to care for and will maintain its quality over time.
Essential Knitting Tools and Materials for Your Project
When starting a knitting project, it is important to have the right tools and materials at hand. Here are some essentials you will need:
Knitting Needles:
- Straight Needles: These are the most common type of knitting needles and are ideal for basic knitting techniques such as garter stitch and stockinette stitch.
- Circular Needles: These needles are connected by a flexible cable, making them perfect for knitting in the round or larger projects like sweaters or blankets.
- Double-pointed Needles: These needles come in sets of four or five and are used for knitting small projects in the round, such as socks or mittens.
Yarn:
Choosing the right yarn is essential for the success of your project. Consider the following factors:
- Fiber: Different yarn fibers have varying characteristics. For example, wool yarn is warm and resilient, while cotton yarn is cool and breathable.
- Weight: Yarn weight determines the thickness of the yarn and can vary from lace weight to super bulky. Make sure to choose a yarn weight that complements your pattern.
- Color: Yarn comes in a wide range of colors, allowing you to showcase your personal style and creativity.
Measuring Tools:
Accurate measurements are crucial for creating well-fitting garments. Include the following tools in your knitting kit:
- Tape Measure: This flexible ruler is used to measure the length and circumference of your knitting.
- Stitch Markers: These small rings or clips are used to mark specific stitches or sections in your knitting pattern.
- Row Counter: A row counter helps you keep track of the number of rows or pattern repeats in your project.
Additional Tools:
There are a few more tools that can make your knitting experience easier and more enjoyable:
- Scissors: A sharp pair of scissors is essential for cutting yarn and trimming loose ends.
- Yarn Needles: These large-eyed needles are used for weaving in yarn ends and stitching pieces together.
- Knitting Gauge Ruler: This tool helps you measure your gauge, which is the number of stitches and rows per inch. It ensures that your finished project matches the pattern’s requirements.
By having these essential knitting tools and materials ready, you will be well-prepared to tackle any knitting project and create beautiful and functional items.
Understanding Cable Knitting Techniques
Cable knitting is a popular technique used in creating textured patterns on garments such as sweaters, hats, and scarves. It involves crossing stitches over each other to create interlocking strands, which give the fabric an intricate and eye-catching look. Cable knitting can be accomplished with just a few simple techniques, but mastering these techniques will allow you to create complex and beautiful designs.
The Basics of Cable Knitting
At its core, cable knitting involves moving a group of stitches out of their normal order and then knitting them in a different sequence. This creates the characteristic twists and braids commonly associated with cable knitting. The cables can be worked with two or more stitches, and the patterns can be simple or intricate, depending on the desired effect.
Creating Cables
To create cables, you will need a cable needle or a double-pointed needle. Begin by knitting a few rows in your desired stitch pattern, then determine how many stitches you want to include in your cable. Slide these stitches onto the cable needle and hold it in either your left or right hand, depending on your knitting style. Next, knit the same number of stitches from the left-hand needle, then bring the cable needle to the front or back of the work, depending on the desired twist direction. Knit the stitches from the cable needle, then continue knitting the remaining stitches from the left-hand needle.
Common Cable Patterns
There are several common cable patterns that you can incorporate into your knitting projects. Some popular examples include the rope cable, honeycomb cable, and lattice cable. Each pattern has its own unique combination of twists and stitches, resulting in different textures and designs. By experimenting with different cable patterns, you can add a touch of sophistication and elegance to your knitted pieces.
Adding Variation
To add variation to your cable knitting, you can incorporate different stitch patterns, such as garter stitch or ribbing, into the sections between the cables. This can create visual interest and add dimension to your finished piece. Additionally, you can experiment with different cable crossings, such as crossing two cables over each other or creating multiple cable panels in one piece. These variations allow you to tailor your knitting project to your personal preferences and create unique and customized designs.
In conclusion,
cable knitting is a versatile and enjoyable technique that allows you to create beautiful textured patterns. By understanding the basics of cable knitting and experimenting with different cable patterns and variations, you can elevate your knitting skills and create stunning garments that are both fashionable and functional.
Getting Started: Casting On and Setting Up Your Stitches

Before you begin knitting a cable knit scarf, it’s important to cast on the required number of stitches to create the foundation of the scarf. The casting on process involves creating loops on your knitting needle that will eventually be worked into stitches. For a mens cable knit scarf, you will need to cast on a multiple of a specific number of stitches, depending on the pattern you are following. Typically, patterns will specify the number of stitches needed for the cable pattern to be repeated.
To cast on, hold the knitting needle in your right hand and the working yarn in your left hand. Make sure to leave a tail of yarn that is long enough to weave in later. Begin by making a slip knot, which will be the first stitch on your needle. Place the slip knot onto the needle and tighten it enough so that it is snug, but not too tight to slide. Insert the right needle into the slip knot and pull the working yarn through, creating a new loop on the right needle.
Continue casting on by repeating this process until you have the required number of stitches on your needle. Make sure to keep your loops loose enough that you can easily slide them along the needle without them being too tight. Once you have cast on all of your stitches, you are ready to begin setting up your stitches for the cable knit pattern.
To set up your stitches, you will need to follow the specific instructions provided in your pattern. This may involve knitting a certain number of rows in a specific stitch pattern, such as ribbing, before starting the cable pattern. Follow the instructions carefully to ensure that your stitches are set up correctly. Once your stitches are set up, you can proceed with knitting the cable pattern according to your pattern’s instructions.
Create Beautiful Cable Patterns for Your Scarf
If you’re looking to create a stunning cable knit scarf, there are a plethora of beautiful patterns to choose from. Cable knitting is a technique that involves twisting and crossing stitches to create intricate designs and texture. With the right pattern and a skilled hand, you can create a scarf that is both stylish and cozy for those chilly winter days.
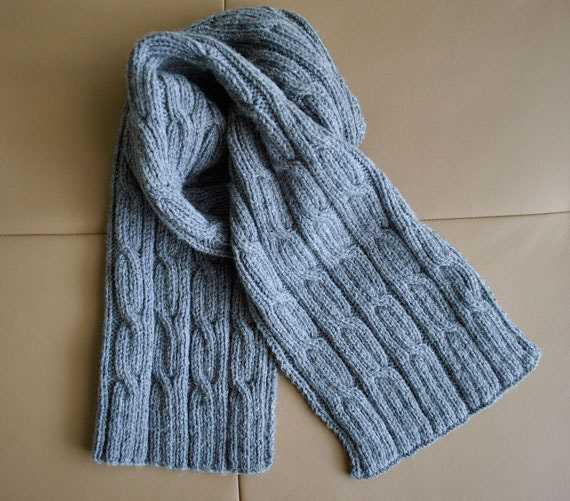
One popular cable pattern for a scarf is the twisted rope cable. This pattern creates a series of long, twisting cables that resemble ropes. To achieve this look, you will need to work with a cable needle to temporarily hold stitches, and then cross them over each other to create the twisted effect. The result is a stunning and visually appealing pattern that adds depth and interest to your scarf.
Another option is the honeycomb cable pattern. This pattern features a series of interconnected cables that create a geometric pattern reminiscent of honeycombs. The honeycomb cable pattern is achieved by crossing multiple stitches over each other in a specific order. The end result is an intricate and textured design that is sure to turn heads.
For a more classic cable pattern, the braided cable is a great option. This pattern creates a central braid that runs the length of the scarf, with smaller cables branching out on either side. The braided cable pattern adds a touch of elegance to your scarf and is a timeless choice that will never go out of style.
When choosing a cable knit scarf pattern, consider the skill level required and the materials needed. Some patterns may be more advanced and require knowledge and experience with cable knitting techniques. Additionally, different sizes and types of needles may be required depending on the pattern. By selecting a pattern that suits your skill level and gathering the necessary materials, you can create a beautiful cable knit scarf that will keep you warm and stylish all winter long.
Adding Length to Your Cable Knit Scarf
If you are looking to add length to your cable knit scarf, there are a few different methods you can use to achieve the desired result. Whether you want to make your scarf longer or just add a few extra inches, these tips will help you customize your scarf to your preferences.
1. Adjusting Your Cast On
One way to add length to your scarf is by adjusting your cast on. When you initially start your project, you can cast on more stitches than the pattern calls for. This will give you additional length, and you can then follow the instructions as usual. Just keep in mind that adding more stitches may also affect the width of your scarf.
2. Repeating Pattern Rows
If you want to add length to your cable knit scarf without changing the width, you can repeat the cable pattern rows more times than instructed in the pattern. For example, if the instructions say to repeat the cable pattern four times, you can repeat it six or eight times to add more length. Be sure to have enough yarn to accommodate the additional repeats.
3. Adding Extra Rows
Another option is to simply add extra rows to your scarf. This can be done by continuing to knit the pattern rows after you have completed the specified number of repeats. You can keep knitting until you have reached your desired length. Just remember to account for any additional yarn you may need.
By using these methods, you can easily customize the length of your cable knit scarf to suit your needs and preferences. Whether you want a longer scarf for extra warmth or just want to make a fashion statement, these tips will help you achieve your desired result.
Finishing Touches: Binding Off and Weaving in Ends
Once you have completed your mens cable knit scarf pattern, it’s time to finish it off with some binding off and weaving in the loose ends. These final steps are essential to give your scarf a polished and professional look.
To bind off, simply knit the first two stitches as usual. Then, insert the left needle into the first stitch on the right needle and pull it over the second stitch and off the needle. Continue this process until you have reached the end of the row, cutting the yarn and pulling it through the last loop to secure it.
Next, it’s time to weave in any loose ends to ensure that your scarf is tidy and secure. Begin by threading a tapestry needle with the loose end of yarn that needs to be woven in.
- Insert the needle under several stitches on the wrong side of the knitting, being careful not to pull too tightly and distort the fabric.
- Then, bring the needle back up through the same stitches, making sure to leave a small loop of yarn on the wrong side of the fabric.
- Gently tug on the yarn to secure the loop and trim off any excess.
- Repeat this process for any other loose ends, making sure to weave them in along different paths to distribute the bulk evenly.
By binding off and weaving in the ends, you not only give your mens cable knit scarf a professional finish, but you also ensure that it will withstand regular wear and tear without unraveling. Take the time to complete these finishing touches, and your scarf will be ready to keep you warm and stylish all winter long.
Blocking and Care Instructions for Your Cable Knit Scarf
Once you have finished knitting your cable knit scarf, it is important to properly block and care for it to ensure it retains its shape and lasts for years to come. Blocking is the process of shaping and setting your knitted item to its final dimensions. Here are some instructions on how to block and care for your cable knit scarf:
Blocking:
1. Start by soaking your scarf in lukewarm water with a mild detergent or wool wash. Gently agitate the water to remove any dirt or residue from the knitting process.
2. After soaking for approximately 15 minutes, carefully remove the scarf from the water and gently squeeze out the excess moisture. Avoid wringing or twisting the scarf, as this can lead to stretching or distorting the cables.
3. Lay the scarf flat on a clean, absorbent towel and gently roll it up, pressing out any remaining water. Unroll the towel and place the scarf on a clean, dry surface.
4. To shape the scarf, gently stretch and pin it into place. Pay special attention to the cables, making sure they are aligned and defined. Use rustproof T-pins to secure the scarf to the blocking surface.
5. Leave the scarf to dry completely, preferably in a well-ventilated area. Avoid direct sunlight, as this can cause the colors to fade.
Care:

1. Hand wash your cable knit scarf in lukewarm water with a mild detergent or wool wash. Do not machine wash or tumble dry, as this can cause felting or damage to the cables.
2. Gently squeeze out the excess water and lay the scarf flat on a clean towel to dry. Do not wring or twist the scarf.
3. To prevent stretching, fold the scarf or roll it up loosely for storage. Avoid hanging the scarf, as this can cause it to lose its shape over time.
4. If your scarf gets wrinkled, you can gently steam it using a garment steamer or by holding it over a steaming kettle. Do not iron directly on the cables or use high heat, as this can damage the yarn.
Follow these blocking and care instructions to ensure your cable knit scarf remains beautiful and cozy for years to come!
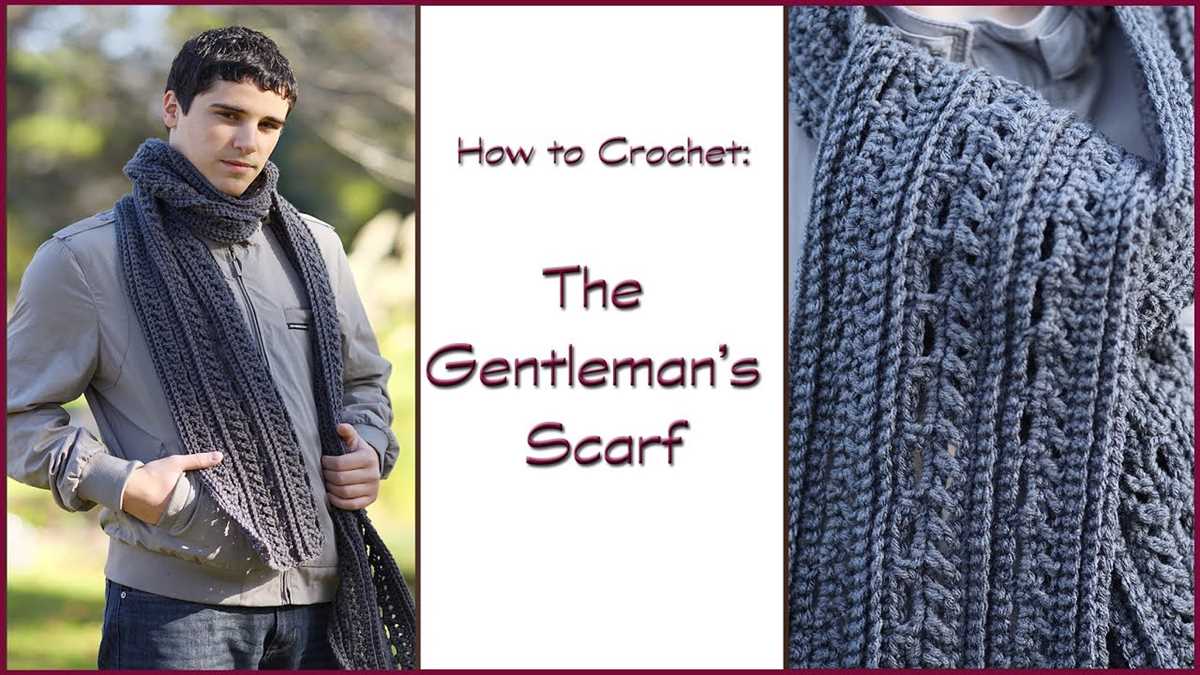
Style Inspiration: How to Wear Your Cable Knit Scarf
When it comes to winter accessories, the cable knit scarf is a timeless and stylish choice. Its classic texture and versatility make it a must-have item for any wardrobe. Not only does it offer warmth and comfort, but it also adds a touch of sophistication to any outfit. Whether you’re heading to the office or going out for a casual weekend brunch, here are some style inspiration ideas on how to wear your cable knit scarf.
1. Classic and Chic
For a polished and elegant look, pair your cable knit scarf with a tailored coat, a white button-down shirt, and a pair of slim-fit trousers. The scarf adds an extra layer of coziness to the ensemble while making a fashion statement. Opt for a neutral color like beige or gray to keep the look sophisticated and timeless.
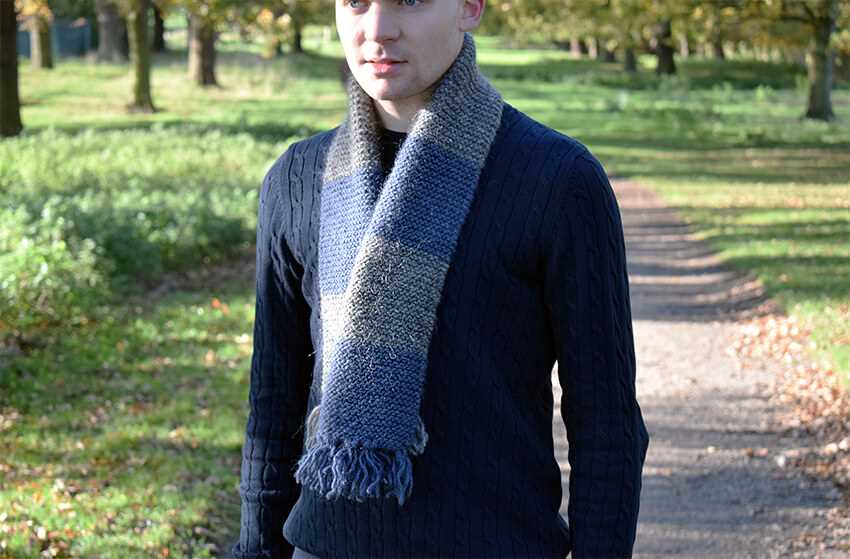
2. Casual and Cozy
On those lazy winter weekends, embrace a relaxed and cozy style by pairing your cable knit scarf with a chunky sweater, jeans, and ankle boots. The scarf adds texture and dimension to the outfit, making it perfect for a casual brunch or a shopping trip. Choose a bold color like burgundy or navy blue to add a pop of color to your look.
3. Edgy and Effortless
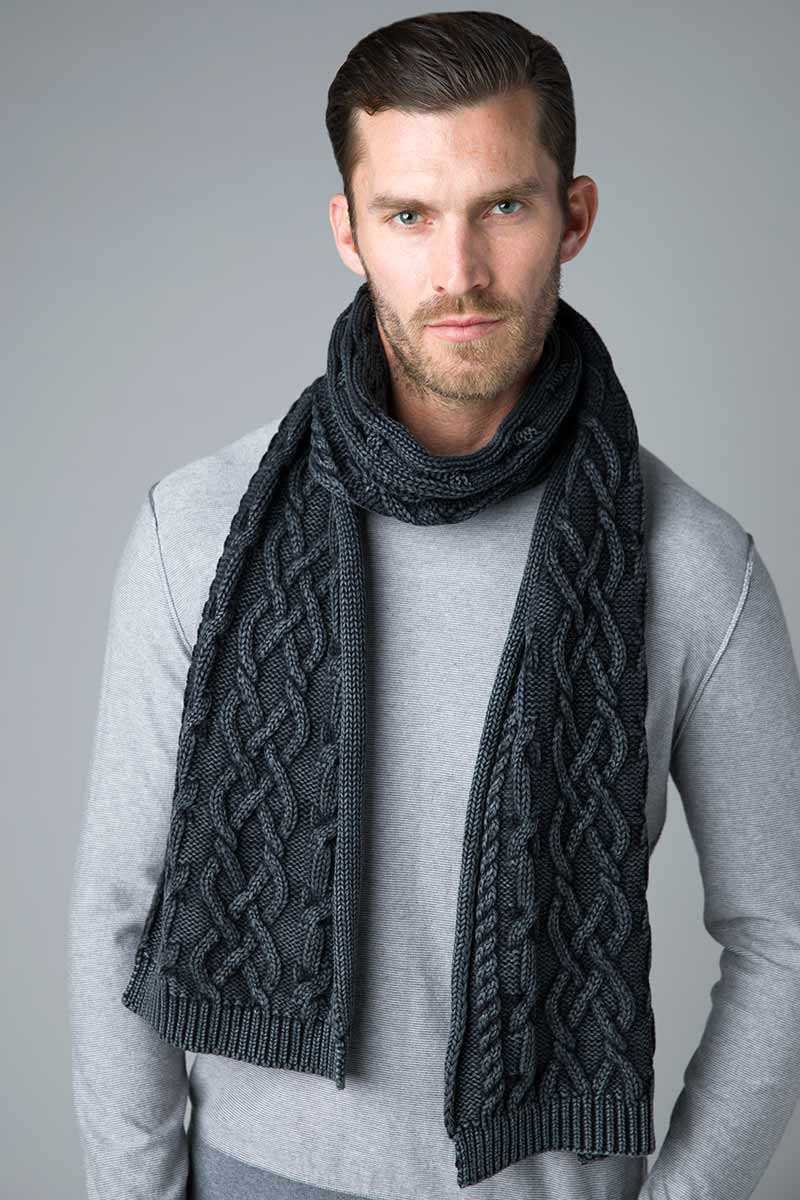
Add a touch of edge to your outfit by layering your cable knit scarf with a leather jacket, a graphic t-shirt, and ripped jeans. This combination creates a cool and effortless look that is perfect for a night out with friends or a concert. Wrap the scarf loosely around your neck for a laid-back vibe, and choose a darker shade like black or charcoal gray to complement the edgy style.
4. Professional and Polished
For a sophisticated office look, pair your cable knit scarf with a tailored blazer, a button-down shirt, and dress pants. The scarf adds warmth to your outfit while keeping it professional and polished. Opt for a monochromatic color scheme or choose a scarf with subtle patterns to add visual interest without being overpowering.
With these style inspiration ideas, you can confidently rock your cable knit scarf in various ways. Whether you prefer a classic and chic look or want to experiment with a more edgy style, the cable knit scarf is a versatile accessory that can elevate any outfit and keep you warm during the cold winter months.
Tips and Troubleshooting for Cable Knitting Success
Knitting a cable knit scarf can be a fun and rewarding project, but it can also come with its fair share of challenges. Here are some tips and troubleshooting suggestions to help you achieve cable knitting success:
Tips:
- Make sure to choose the right yarn and needle size for your desired cable knit pattern. The size of your needles will affect the size and tension of your cables.
- Use a cable needle to help hold your stitches when creating the twists and crosses of the cable patterns. This will make it easier to manipulate your stitches and keep track of the pattern.
- Count your stitches regularly to ensure you’re staying on track with the cable pattern. Mistakes can easily happen, so it’s important to catch them early on.
- Take your time when working on cable stitches, especially if you’re new to cable knitting. It’s better to work slowly and accurately than to rush and make mistakes.
- Block your finished scarf to help even out the stitches and create a polished look. Blocking can also help to relax any tight cables and give them a more defined appearance.
Troubleshooting:
If you run into any issues while knitting your cable scarf, here are some common problems and their solutions:
- Twisted or crossed stitches: If your cables are not crossing correctly, double-check that you are knitting or purling the stitches in the correct order. Refer to your cable knitting pattern for guidance.
- Uneven tension: Uneven tension can cause a finished cable knit scarf to look lumpy or uneven. Practice keeping a consistent tension throughout your knitting, and consider using a different needle size to achieve a more even result.
- Dropped stitches: If you accidentally drop a stitch, use a crochet hook or a smaller-sized needle to pick up the dropped stitch and place it back on your knitting needle. Be careful not to twist the stitch in the process.
- Inconsistent stitch size: If your cable knit scarf has areas where the stitches look larger or smaller, it may be due to inconsistent tension or gauge. Pay attention to your tension and work on maintaining a consistent stitch size throughout.
With these tips and troubleshooting suggestions, you’re now equipped with the knowledge to tackle cable knitting projects with confidence. Remember to practice, be patient, and enjoy the process as you create your very own cable knit scarf!