
If you’re a fan of knitting, you’re probably no stranger to the joy of creating beautiful and cozy blankets. They make the perfect addition to any home, and can also be incredibly satisfying to make. If you’re looking for a new knitting project to take on, why not try your hand at a mitered square blanket?
A mitered square blanket is a unique and visually stunning pattern that uses a combination of decreases and increases to create a series of diagonally knit squares. The squares are then joined together to form a larger blanket, creating a beautiful geometric design.
This pattern is perfect for knitters of all skill levels. If you’re a beginner, it’s a great way to practice basic knitting stitches and techniques, such as knit and purl. If you’re more advanced, you can experiment with different stitch patterns and color combinations to make a truly one-of-a-kind blanket.
Not only is a mitered square blanket a beautiful addition to any home, but it’s also incredibly versatile. It can be made in any size, from a small baby blanket to a large throw, and can be knit using any weight of yarn. So whether you prefer a cozy, chunky blanket or a lightweight, airy one, this pattern is perfect for you.
Mitered Square Blanket Knit Pattern

If you’re looking for a fun and challenging knitting project, then the mitered square blanket pattern is the perfect choice. This pattern involves knitting individual squares on the bias and then joining them together to create a beautiful blanket. The mitered square blanket is not only a great way to practice your knitting skills, but it also makes a cozy and stylish addition to your home decor.
To get started with the mitered square blanket pattern, you’ll need to gather your materials. You’ll need a set of knitting needles in the appropriate size for your yarn, as well as your chosen yarn in the color or colors of your choice. Once you have your materials, you can begin knitting the mitered squares.
To knit a mitered square, you’ll start by casting on a small number of stitches. Then, you’ll work increases at the edges of the square to create a diagonal line that forms the mitered shape. After you’ve knit the first square, you can continue knitting additional squares in the same manner until you have enough to create the desired size of your blanket.
Once you’ve finished knitting all of the squares, it’s time to join them together. There are a few different methods you can use to join the squares, such as whipstitching or mattress stitching. Choose the method that you prefer and carefully sew the squares together to create the finished blanket.
The mitered square blanket pattern is a versatile design that can be customized in many ways. You can use different colors or types of yarn to create a unique color scheme for your blanket. Additionally, you can experiment with different stitch patterns or textures to add even more interest to your project. No matter how you choose to customize your mitered square blanket, you’re sure to end up with a stunning and cozy finished product.
Overview

Mitered square blanket knit pattern is a popular knitting project that involves creating individual squares and then joining them together to form a cozy and stylish blanket. The pattern is characterized by its unique construction technique, where each square is knit diagonally from one corner to the other, resulting in a beautiful geometric design. This pattern is suitable for both beginners and experienced knitters, as it provides a great opportunity to practice basic knitting skills, such as knit, purl, and decreasing stitches.
To create a mitered square, you will need to cast on a specific number of stitches, depending on your desired square size. Usually, a multiple of four stitches is used, allowing for a symmetrical design. The square is worked in garter stitch, which means every row is knit, creating a textured fabric with ridges on both sides. As you progress, you will gradually decrease the number of stitches in each row by knitting two stitches together at certain points. This creates the diagonal shape of the square.
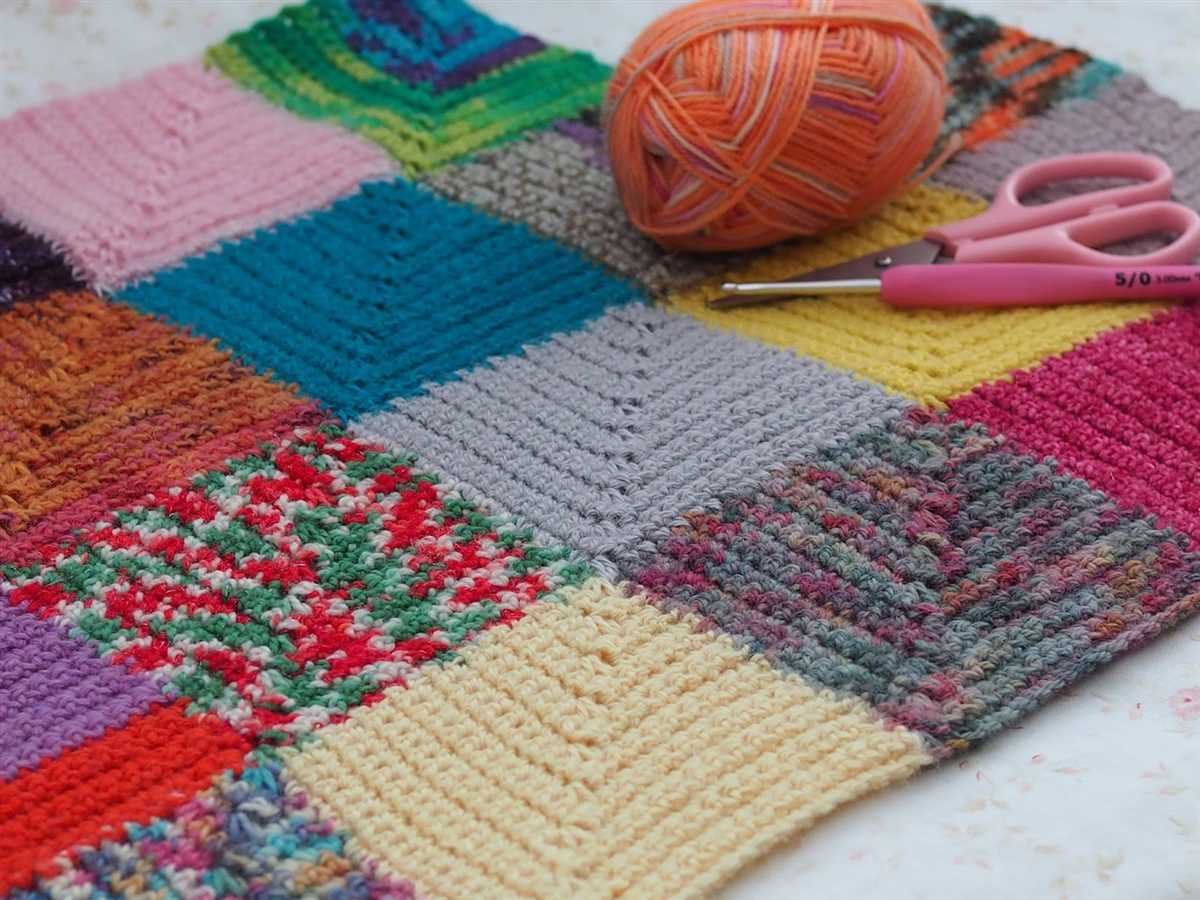
Materials:
- Chunky weight yarn in various colors
- Knitting needles in the appropriate size for your yarn
- Tapestry needle for weaving in ends
- Scissors
Instructions:
1. Cast on the desired number of stitches.
2. Knit every row in garter stitch until you have completed half of your desired square size.
3. Begin decreasing stitches by knitting two stitches together at the beginning and end of every row. Continue this decrease until you have completed the last row and only a few stitches remain.
4. Bind off the remaining stitches and cut the yarn, leaving a tail for weaving in.
5. Repeat these steps to create multiple squares in different colors.
6. Once all the squares are complete, arrange them in the desired pattern and use the tapestry needle to join them together using the mattress stitch or any other desired method.
This mitered square blanket knit pattern allows for endless customization options, as you can choose different colors and sizes for your squares. It’s a great way to use up leftover yarn and create a unique and personalized blanket that will be cherished for years to come.
Materials Needed

Before starting your mitered square blanket knit pattern, it’s important to gather all the necessary materials. Here is a list of items you will need:
- Yarn: Choose a yarn that is soft and warm, suitable for a blanket. You will need several colors to create the mitered squares in different shades.
- Knitting Needles: Select knitting needles in a size appropriate for the yarn you have chosen. Make sure you have a comfortable grip and that the needles are long enough to accommodate the number of stitches.
- Tapestry Needle: A tapestry needle is essential for weaving in loose ends and sewing the squares together.
- Scissors: Keep a pair of sharp scissors handy for cutting yarn and trimming excess.
- Stitch Markers: Stitch markers can be helpful for keeping track of your stitches and making sure the pattern is followed correctly.
- Measuring Tape: A measuring tape will be useful for checking the size of your squares and ensuring they are consistent.
- Blocking Materials: While not necessary, blocking your squares can help to ensure they are the same size and shape before assembling the blanket. You may need blocking mats, pins, and a spray bottle for this process.
Once you have gathered all these materials, you will be ready to start knitting your mitered square blanket. Make sure you have enough yarn in each color to complete the desired size of the blanket and that your knitting needles are comfortable to work with for extended periods. Happy knitting!
Cast On
The first step in knitting the mitered square blanket is to cast on. Casting on is the process of creating the first row of stitches on your knitting needle. There are different methods of casting on, but for this pattern, we will be using the long-tail cast on method. This method creates a stretchy and even edge, which is ideal for the blanket.
To begin the long-tail cast on, you will need to estimate the length of yarn needed for your cast on stitches. Start by making a slipknot at the end of your yarn and leaving a long tail. Place the slipknot on the knitting needle and hold the needle with the slipknot in your right hand. Use your left hand to hold the working yarn.
Next, insert the needle into the slipknot from front to back, and use your left hand to hold the slipknot and yarn in place. With your right hand, bring the yarn over and under the needle, creating a loop. This loop will be your first cast on stitch. Bring the needle through the loop, creating a new stitch on the needle. Continue this process, creating stitches until you have the required number of cast on stitches for your pattern.
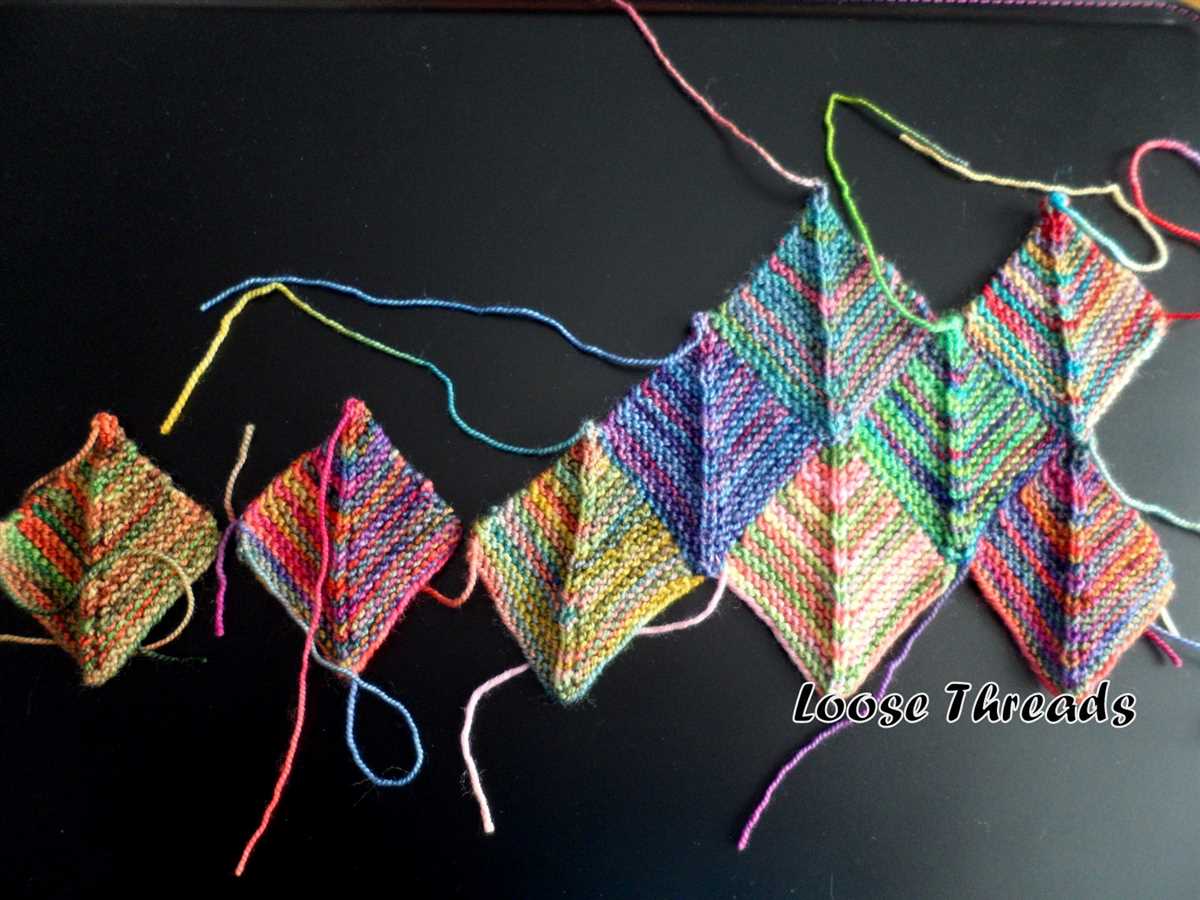
Knitting the Mitered Squares
If you’re a fan of knitting and looking for a new project, why not try making a mitered square blanket? This pattern is not only visually interesting, but it’s also a great way to use up leftover yarn from other projects. The mitered square design involves knitting squares on the diagonal, resulting in an eye-catching pattern that is both modern and classic.
To start knitting the mitered squares, you’ll need to cast on an odd number of stitches. The exact number will depend on the size of the blanket you want to make. It’s best to choose a yarn and needle size that will result in a tight and durable fabric. From there, you’ll follow a simple repeat pattern to create each square.
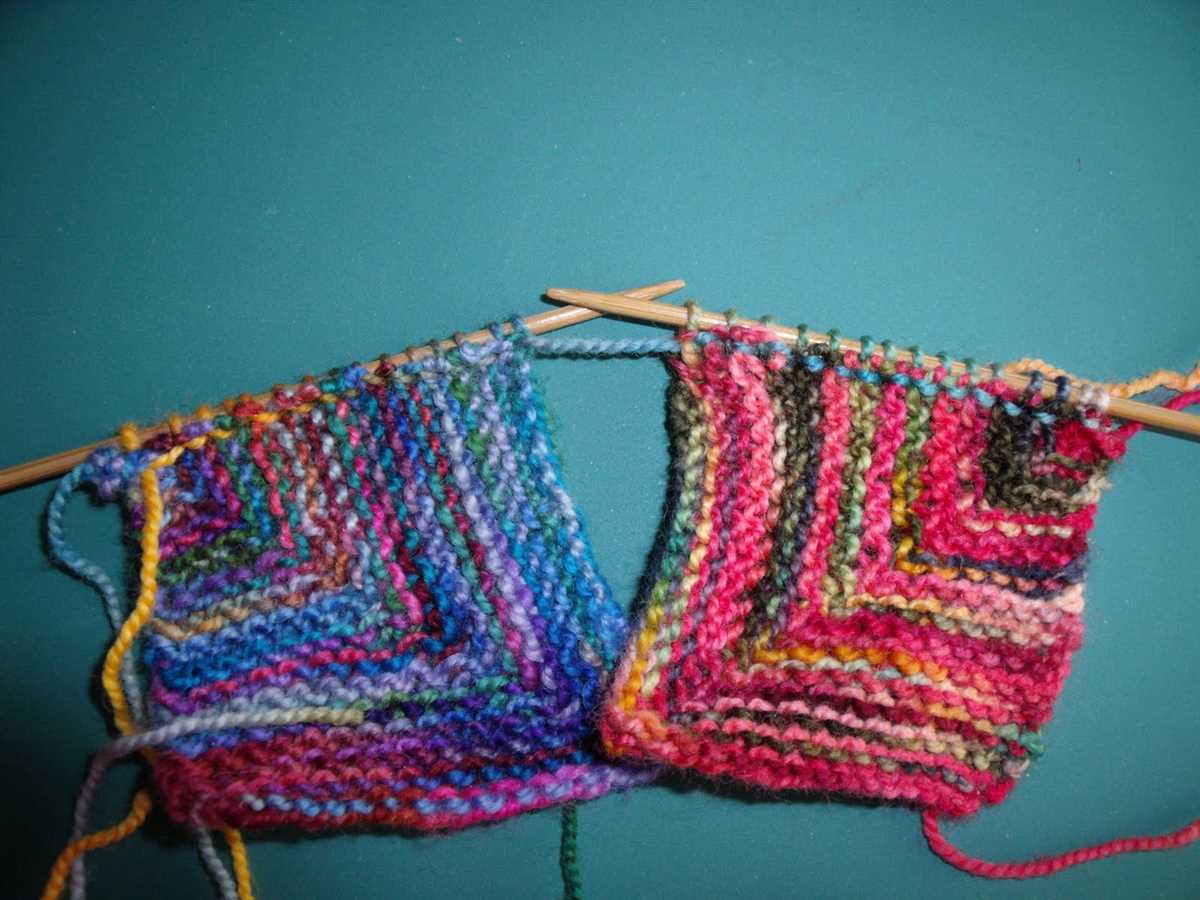
Making the Mitered Square
To make a mitered square, you’ll begin by knitting across the first row. On the second row, you’ll reach a point where you’ll need to decrease. This is where the mitered effect comes in. By decreasing at specific intervals, you’ll create the diagonal lines that make up the square.
As you continue knitting, you’ll notice the squares starting to take shape. Each square will be knit in garter stitch, which means you’ll knit every stitch on every row. This stitch choice not only provides a nice texture, but it also ensures that the square lays flat and retains its shape.
Once you’ve completed all the squares, the next step is to join them together to create the blanket. There are several methods you can use to join the squares, including sewing them together using a mattress stitch, or knitting them together as you go. Whichever method you choose, make sure to join the squares with a similar tension to ensure a professional finish.
Overall, knitting a mitered square blanket can be a fun and rewarding project. It’s a great way to explore different color combinations and use up yarn scraps. Plus, the end result is sure to be a cozy and unique blanket that you can enjoy for years to come.
Joining the Squares
Once you have completed all of your mitered squares, the next step is to join them together to create your blanket. There are a few different methods you can use to join your squares, depending on the look you want to achieve and your knitting skills.
One common method is to sew the squares together using a yarn needle and the mattress stitch. This creates an invisible seam that blends the squares together seamlessly. To do this, lay your squares out in the desired pattern and then line them up edge to edge. Thread your yarn needle with a long length of yarn and begin sewing the squares together from the right side, working through the stitches along the edges of each square. Repeat this process for each row or column, depending on your desired layout.
If you prefer a more decorative join, you can use the slip stitch join method. This involves working slip stitches through both loops of the stitches along the edges of each square, creating a visible seam. To do this, hold two squares with their right sides facing each other and line up the edges you wish to join. Insert your crochet hook through the first two stitches on each square and yarn over. Pull the yarn through all loops on the hook, creating a slip stitch. Repeat this process for each stitch along the edge, working your way across the entire row or column.
Another option is to use the three-needle bind off method to join your squares. This method creates a strong and neat join by binding off the stitches on the edges of each square together. To do this, hold two squares with their right sides facing each other and line up the edges you wish to join. Insert a third needle into the first stitch on each square and knit these two stitches together. Continue knitting these stitches together until you have reached the end of the row or column. Repeat this process for each row or column, binding off the stitches as you go.
Adding a Border

Adding a border to your mitered square blanket can give it a finished and polished look. It can also help to stabilize the edges and prevent them from stretching or becoming misshapen over time. There are several different ways to add a border to your blanket, depending on your personal preferences and knitting skills.
If you prefer a simple and clean look, you can add a garter stitch border. Simply knit every stitch on every row for a few rows, and then bind off. This will create a border that matches the texture of the mitered squares and provides a cohesive look. Another option is to use a ribbed border, such as a 1×1 or 2×2 rib. This can add a bit of stretch and flexibility to the edges of the blanket.
If you want to add a decorative touch to your blanket, you can experiment with different stitch patterns for the border. For example, you could try a seed stitch border, which alternates between knit and purl stitches, or a lace border that features intricate patterns and eyelets. You can also add color to the border by using a contrasting yarn or incorporating stripes.
Before adding the border, it’s a good idea to block your blanket to ensure that the squares are all the same size and the edges are straight. This will make it easier to add the border evenly and ensure that the final result is symmetrical. You can use blocking pins and a blocking mat to gently stretch and shape the blanket, and then allow it to dry completely before proceeding with the border.
Blocking the Blanket
Once you have finished knitting the mitered square blanket, it is important to block it to ensure that the squares are even and the blanket maintains its shape. Blocking is the process of shaping your knitted piece by wetting it, stretching it, and allowing it to dry in the desired shape.
1. Wet the blanket: Fill a basin or sink with lukewarm water and add a small amount of gentle soap. Place the blanket in the water, making sure it is fully submerged. Let it soak for about 15-20 minutes, or until it is fully saturated.
2. Remove excess water: Gently squeeze the blanket to remove the excess water. Do not twist or wring it, as this can stretch out the fibers or damage the stitches. You can also place the blanket between two towels and press down to absorb the water.
3. Stretch and shape the squares: Lay the blanket flat on a clean towel or blocking mat. Gently stretch each square, making sure the edges are straight and the corners are square. Use measuring tools, such as a ruler or tape measure, to ensure the squares are the desired size.
4. Pin the squares: Once the squares are stretched and shaped, use rust-proof T-pins or blocking wires to secure the edges and corners in place. Place the pins or wires along the edges of each square, making sure they are evenly spaced. This will help the squares maintain their shape while drying.
5. Let it dry: Allow the blanket to dry completely in a well-ventilated area, away from direct sunlight or heat sources. This may take a day or two, depending on the humidity and thickness of the yarn. Avoid handling or moving the blanket while it is drying to prevent distortion.
6. Remove the pins: Once the blanket is completely dry, carefully remove the pins or blocking wires. The squares should now be set in their desired shape, and the blanket should be ready to use or gift to someone special.
Following these steps to block your mitered square blanket will give it a professional finish and ensure that the squares are evenly sized and shaped. It may seem like an extra step, but it is well worth the effort to achieve a beautifully finished blanket.
Pattern Variations
The mitered square blanket knit pattern is incredibly versatile and lends itself well to various modifications and variations. With just a few tweaks, you can create a unique and personalized blanket that suits your preferences and style.
Here are some pattern variations you can try:
Color Variations

One of the simplest ways to add variety to your mitered square blanket is by playing around with different color combinations. You can use a gradient of shades within the same color family, create a bold contrasting pattern with complementary colors, or even experiment with variegated yarns for a more whimsical effect.
Consider using multiple skeins of yarn in different colors and alternating them for each square or row to achieve a more randomized and eclectic look.
Stripe Patterns

You can introduce stripes into your mitered square blanket by knitting alternating squares in different colors. This can create a visually striking pattern and adds an extra dimension to your blanket’s design. You can vary the width of the stripes, use a different number of rows for each color, or even incorporate multiple colors within a single stripe.
Experimenting with stripe patterns allows you to create unique geometric designs and play with different color combinations.
Texture and Stitch Patterns
Instead of using a simple stockinette stitch for your mitered squares, you can incorporate various texture and stitch patterns to add more interest and depth to your blanket. Consider using ribbing, cables, lace, or any other textured stitches to create unique squares that stand out.
Playing with different stitch patterns allows you to add extra dimension and complexity to your blanket, making it visually appealing and engaging.
Size and Shape Variations
While the traditional mitered square pattern creates a square-shaped blanket, you can modify the size and shape to suit your needs. You can make smaller squares for a baby blanket or larger squares for a cozy throw. Additionally, you can experiment with rectangular or triangular shapes by increasing or decreasing the number of stitches at certain sections.
Customizing the size and shape of your mitered squares offers endless possibilities for creating blankets of different proportions and designs.
Finishing Touches
Once you have completed your mitered square blanket, you can add finishing touches to further personalize it. This can include adding a border in a contrasting color, incorporating decorative edging stitches, or even embellishing with buttons, tassels, or appliques.
These finishing touches bring the entire blanket together and can make it truly one-of-a-kind.
Tips and Tricks
When working on a mitered square blanket knit pattern, there are a few tips and tricks that can help you along the way. Whether you’re a beginner or an experienced knitter, these suggestions can make the process easier and more enjoyable.
1. Use stitch markers: To keep track of your progress and make it easier to count stitches, consider using stitch markers. These small circular markers can be placed on your needles to mark specific points in your knitting. This can be especially helpful when working on the mitered square pattern, as it involves increasing and decreasing stitches.
2. Choose the right yarn: When selecting yarn for your mitered square blanket, consider the weight and fiber content. Depending on your preference and the intended use of the blanket, you may want to choose a bulky yarn for a thicker and warmer blanket, or a lighter weight yarn for a more lightweight and breathable blanket. Additionally, consider the fiber content of the yarn, as some fibers may be more suitable for certain climates or individuals with allergies.
3. Practice proper tension: Maintaining consistent tension is key to creating even and neat knitting. To ensure proper tension, make sure you’re not pulling your yarn too tightly or too loosely as you work. This can be particularly important when knitting mitered squares, as any variation in tension can affect the size and shape of each square.
4. Block your squares: Blocking is a process of wetting or steaming your knitting to shape and set it. It can help to even out the stitches, open up lace patterns, and make your finished squares look more polished. After completing each mitered square, consider blocking it before moving on to the next one. This can make it easier to seam the squares together later on.
5. Keep a knitting journal: While working on a large project like a mitered square blanket, it can be helpful to keep a knitting journal. This can serve as a record of your progress, the yarns and needles you used, and any customization or modifications you made to the pattern. It can also be a space to jot down notes and ideas for future projects.
6. Have fun with color: One of the great things about the mitered square blanket pattern is the opportunity to play with color. Consider using different colors for each square, or creating a gradient effect by gradually transitioning between shades. This can add visual interest to your blanket and showcase your creativity.
7. Take breaks and stretch: Knitting can be an immersive and addictive activity, but it’s important to take breaks and give your hands and body a rest. Knitting for extended periods of time can lead to hand and wrist pain, so remember to stretch your fingers, wrists, and arms regularly. This can help prevent strain and ensure that you can continue knitting without discomfort.
- Use stitch markers
- Choose the right yarn
- Practice proper tension
- Block your squares
- Keep a knitting journal
- Have fun with color
- Take breaks and stretch
Finished Blanket
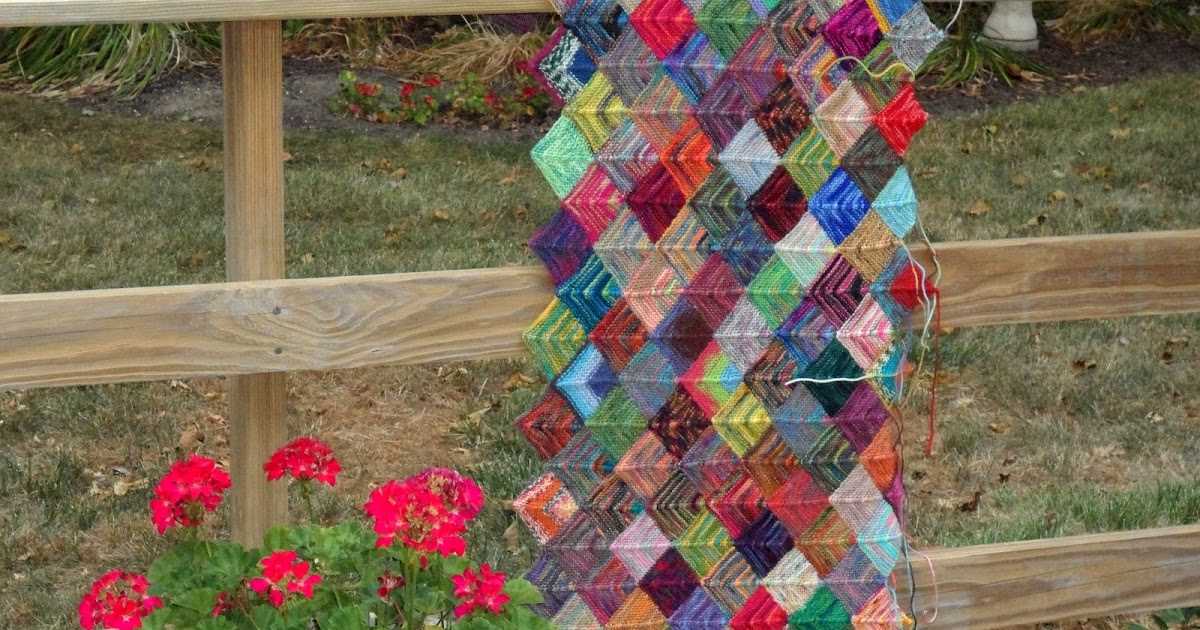
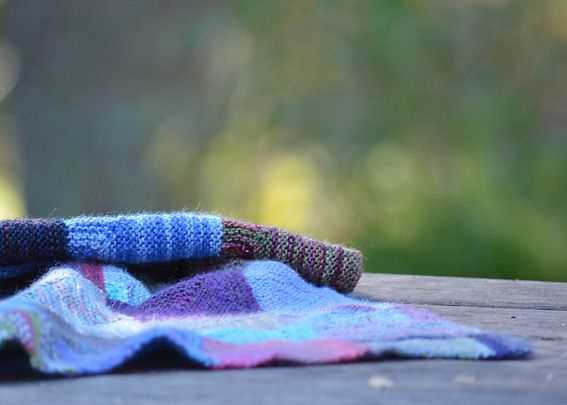
After many hours of knitting, your mitered square blanket is finally complete! This unique and eye-catching pattern has resulted in a beautiful and cozy blanket that you can cherish for years to come.
The mitered square design creates a stunning geometric effect, with each square seamlessly flowing into the next. The combination of different colors and textures adds dimension and visual interest to the blanket, making it a truly special piece.
This blanket is not only visually appealing, but it is also incredibly warm and comfortable. The thickness of the knit fabric provides excellent insulation, making it perfect for curling up on chilly evenings. The softness of the yarn adds an extra layer of comfort, ensuring that you’ll never want to leave its snuggly embrace.
Whether you choose to make this blanket for yourself or as a gift, the finished result will surely impress. The mitered square pattern offers endless possibilities for customization, allowing you to create a unique and personalized blanket that reflects your own style and personality. You can experiment with different color combinations, vary the size of the squares, or even add embellishments such as tassels or pom-poms. The choice is yours!
So grab your knitting needles and get ready to create a one-of-a-kind masterpiece. The mitered square blanket knit pattern is the perfect project for beginner and experienced knitters alike, and the finished blanket will undoubtedly become a cherished heirloom in your home. Happy knitting!