
The newsboy cap is a classic and timeless accessory that adds a touch of vintage charm to any outfit. Known for its unique shape with a small brim and eight-panel construction, this cap has been a staple in men’s and women’s fashion for decades. While you can easily find a newsboy cap in stores, knitting your own allows for customization and the satisfaction of creating something with your own hands.
This article will provide you with a knitting pattern to make your very own newsboy cap. Whether you’re a beginner or an experienced knitter looking for a new project, this pattern will guide you through the steps to create a stylish and cozy cap.
Before diving into the pattern, gather your materials: a set of double-pointed knitting needles, a circular knitting needle, worsted-weight yarn, a tapestry needle, and a stitch marker. It’s also helpful to have a measuring tape or ruler to ensure proper sizing.
What is a newsboy cap?
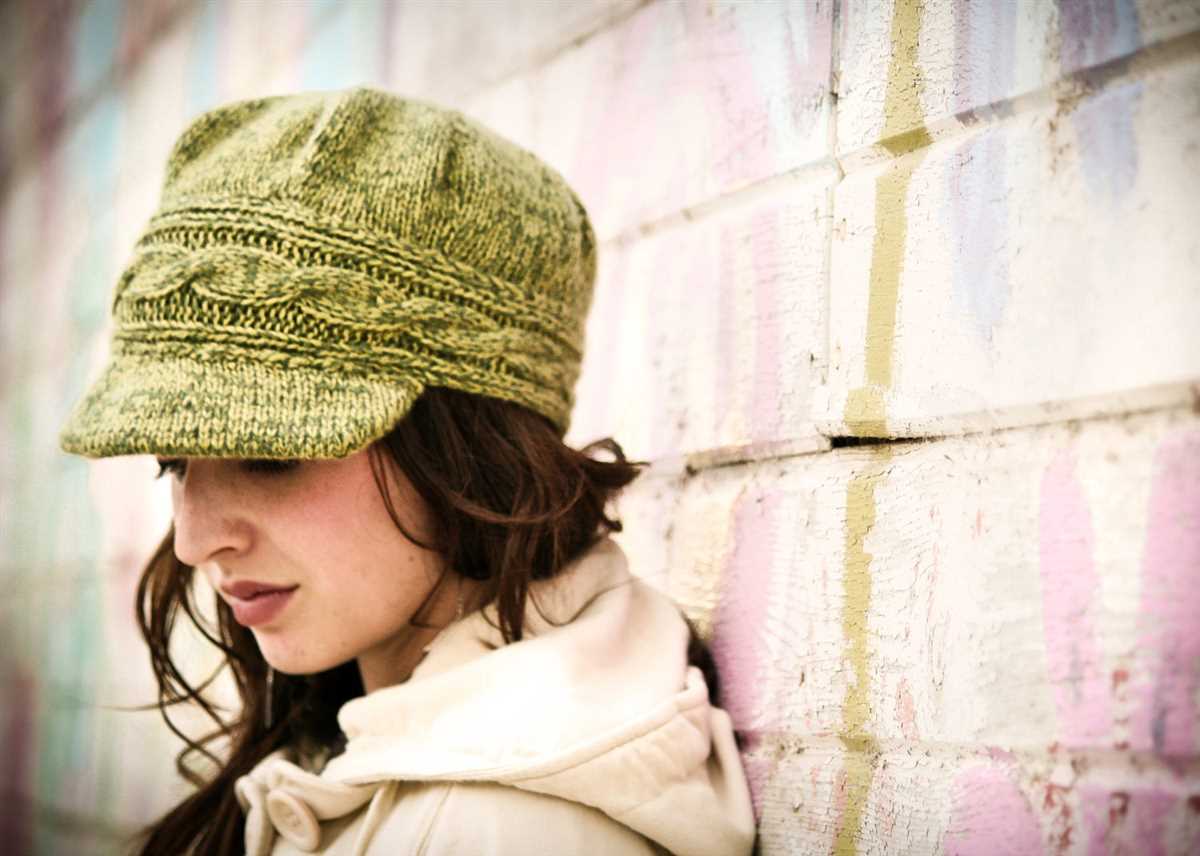
A newsboy cap, also known as a baker boy or an eight-panel cap, is a type of hat that has a round and flat crown with a stiff brim. It is typically made of wool or tweed fabric and is commonly associated with early 20th-century workers and newspaper boys. The cap is characterized by its unique shape, with a button on the top and a peak extending outwards.
The newsboy cap originated in Europe in the late 19th century and was initially worn by working-class men for practical purposes. Its distinctive design allowed for easy folding and storage, making it a convenient accessory for workers who needed to keep their hands free. Over time, the newsboy cap became a popular fashion item and began to be associated with a trendy and sophisticated urban style.
Features of a newsboy cap:
- Rounded crown: The crown of a newsboy cap is rounded and sits comfortably on top of the head.
- Stiff brim: The brim of a newsboy cap is flat and stiff, providing shade and protection from the elements.
- Button: A decorative button is typically located at the center of the crown, adding a touch of style to the cap.
- Eight panels: The cap is constructed with eight panels sewn together, creating its signature shape.
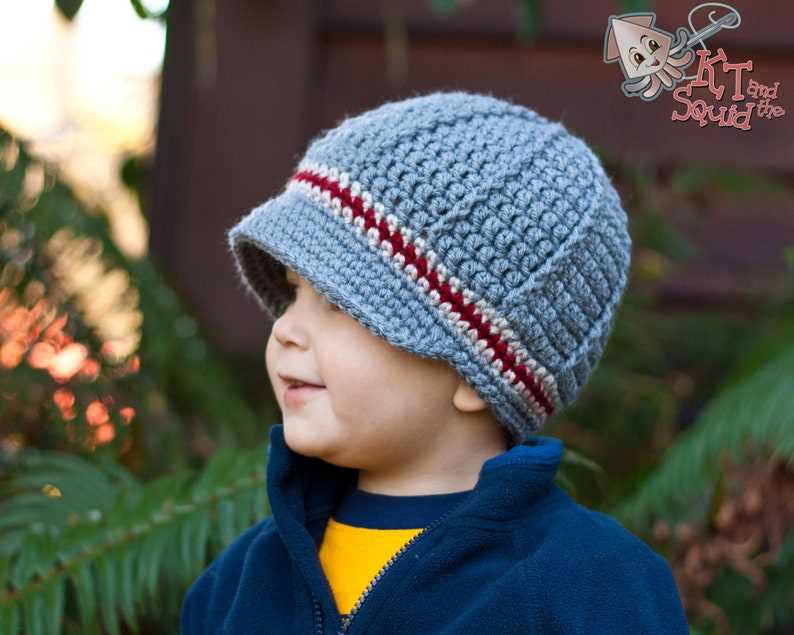
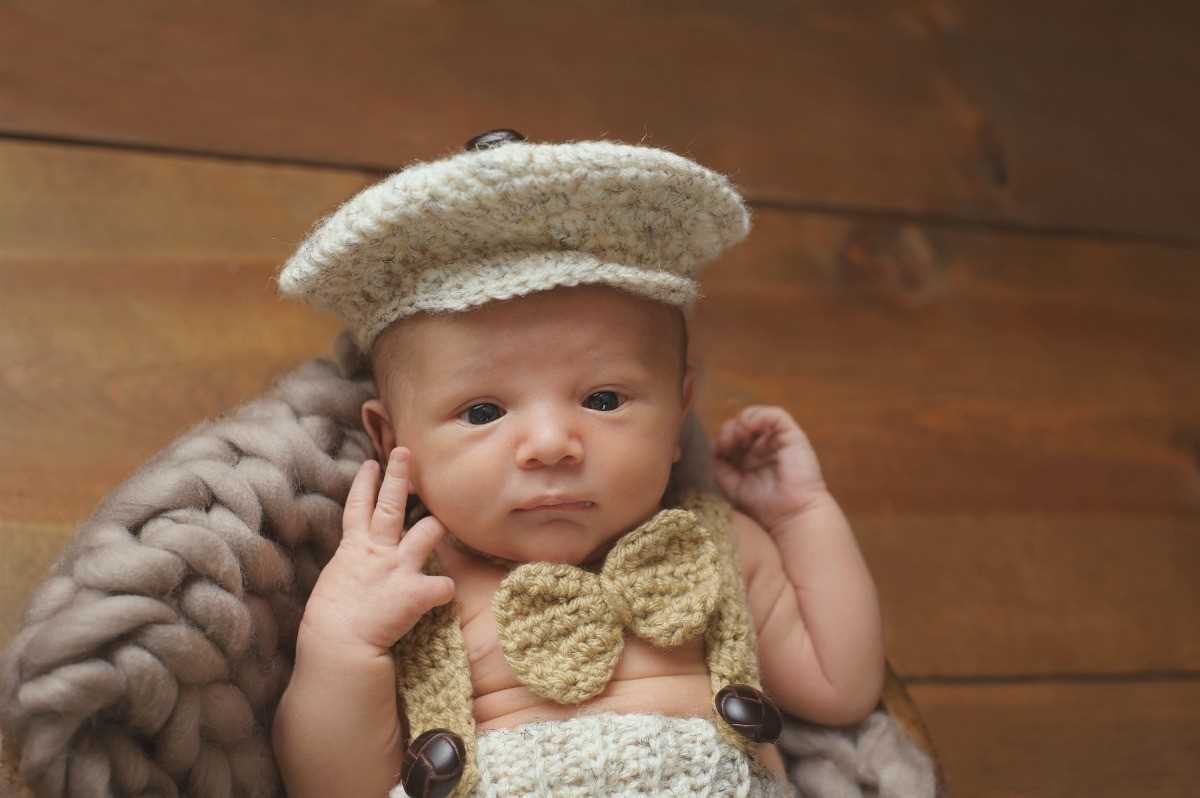
- Versatility: Newsboy caps can be worn by both men and women and can be dressed up or down depending on the occasion.
Today, the newsboy cap remains a popular accessory in fashion, adding a classic and vintage touch to any outfit. It can be paired with casual or formal attire, making it a versatile choice for individuals who want to add a stylish flair to their wardrobe.
Materials needed for this knitting pattern
In order to create a newsboy cap using this knitting pattern, you will need the following materials:
- Yarn: Choose a yarn that is appropriate for your desired level of warmth and comfort. You can select a wool or acrylic yarn in a color of your choice. Approximately 200-250 yards of yarn should be sufficient for this project.
- Knitting Needles: You will need a pair of straight knitting needles, size US 7 (4.5mm), and a set of double-pointed needles in the same size for working the crown shaping.
- Stitch Markers: It is helpful to have stitch markers to mark important points in the pattern, such as the beginning of the round or sections of the cap.
- Tapestry Needle: A tapestry needle with a large eye will be needed for weaving in ends and finishing the cap.
- Scissors: A pair of scissors will be necessary for cutting the yarn.
These basic materials will provide you with everything you need to start knitting your newsboy cap. Make sure to have all the necessary supplies before beginning, as it can be frustrating to pause in the middle of a project to gather missing items. Once you have everything ready, you can follow the knitting pattern instructions and create a stylish and comfortable newsboy cap to wear.
Choosing the Right Yarn

When it comes to knitting a newsboy cap, choosing the right yarn is essential to create a beautiful and functional hat. The yarn you select will determine the overall look, feel, and durability of the finished product. There are a few factors to consider when choosing yarn for your newsboy cap knitting project.
1. Fiber Content
The fiber content of the yarn will greatly impact the characteristics of the knitted fabric. Different fibers have different levels of warmth, breathability, and stretch. For a newsboy cap, it is important to choose a yarn that is soft, comfortable, and suitable for wearing against the skin. Some popular options include merino wool, alpaca, and cotton. Consider the season and climate in which the hat will be worn to choose the appropriate fiber content.
2. Weight
The weight of the yarn refers to its thickness and determines the final look and feel of the hat. A lightweight yarn will create a more delicate and airy fabric, while a heavier yarn will result in a warmer and sturdier cap. It is important to select a yarn weight that matches the pattern’s recommended gauge to ensure the correct fit and shape of the newsboy cap. Consult the pattern for guidance on which yarn weight to use.
3. Color and Texture
The color and texture of the yarn can greatly enhance the overall design of the newsboy cap. Consider the desired aesthetic and style of the hat when selecting the yarn. Solid colors can create a classic and timeless look, while variegated or self-striping yarns can add a fun and playful element. Additionally, consider the texture of the yarn, whether it is smooth, tweedy, or textured, as it can add visual interest to the hat.
4. Durability

A newsboy cap is an accessory that is often worn regularly and subjected to wear and tear. Therefore, it is important to choose a yarn that is durable and able to withstand frequent use. Look for yarns that have a good twist and are less prone to pilling. Additionally, consider whether the yarn is machine washable, as this can make care and maintenance easier.
By considering these factors when choosing your yarn, you can ensure that your newsboy cap is not only stylish but also comfortable and long-lasting.
Selecting the Appropriate Knitting Needles
When it comes to knitting, one of the most important elements to consider is the selection of appropriate knitting needles. The choice of needles can significantly impact the overall outcome of your project, as well as your knitting experience. There are several factors to consider when selecting the right needles for your knitting project.
Needle Material: Knitting needles come in various materials, each with its own unique characteristics. Common materials include metal, bamboo, wood, and plastic. Metal needles, such as aluminum or stainless steel, are durable and provide smooth stitches. Bamboo and wood needles are lightweight, have a warm feel, and are ideal for working with slippery or delicate yarns. Plastic needles, on the other hand, are affordable and great for beginners.
Needle Size:
The appropriate needle size depends on the yarn weight and the desired gauge of your project. The needle size is usually measured in millimeters or US sizes. Thicker yarns require larger needles, while thinner yarns require smaller needles. The pattern you are following will often specify the recommended needle size to achieve the desired gauge. It’s essential to check the gauge swatch and make any necessary adjustments to ensure your project turns out the way you intend.
- Tip: It’s always a good idea to have a variety of needle sizes in your knitting kit, so you can easily switch between them depending on the project you are working on.
Needle Type:
There are different types of knitting needles available, including straight needles, circular needles, and double-pointed needles. Straight needles are the most common type and are perfect for flat knitting, such as scarves or blankets. Circular needles have two pointed ends connected by a flexible cable and are ideal for knitting in the round, such as hats or sweaters. Double-pointed needles are used for small, curved projects, such as socks or gloves. Choose the needle type that suits your project and knitting style.
Additional Features:

Some knitting needles come with additional features that can enhance your knitting experience. For example, some needles have a pointier tip, which is great for intricate stitch patterns, while others have a more rounded tip, which is ideal for smooth and even stitches. Some needles have a built-in grip or ergonomic design, providing comfort for those who knit for extended periods. Consider these additional features based on your preference and knitting needs.
In conclusion, selecting the appropriate knitting needles is crucial for a successful knitting project. Consider factors like needle material, size, type, and additional features when making your selection. Having a wide range of needles in your kit will allow you to tackle various projects with ease and create beautiful knitted items.
Getting started with the brim
When it comes to knitting a newsboy cap, the brim is an important element that adds structure and style to the hat. In this section, we will guide you through the process of getting started with the brim.
To begin, you will need to cast on the required number of stitches for the brim. The specific number of stitches will depend on the size of the hat and the desired width of the brim. It is recommended to use a circular needle for this part to accommodate the growing number of stitches.
- Measurements:Â Before casting on the stitches, it is important to measure the circumference of the wearer’s head and determine the desired length of the brim. This will help you calculate the number of stitches needed for a snug fit.
- Casting on:Â Using the long tail cast on method, cast on the calculated number of stitches onto your circular needle. Make sure to leave a long tail for later finishing.
- Working in rib stitch:Â The brim of a newsboy cap is typically worked in a rib stitch pattern, such as K2, P2 or K1, P1. This creates a stretchy fabric that comfortably hugs the head. Follow the pattern instructions to work the rib stitch pattern for the required length.
Once you have completed the brim, you can continue with the main body of the newsboy cap. The brim adds structure and shape to the hat, providing a stylish and functional element to the design. It is important to take accurate measurements and work the rib stitch pattern consistently to achieve the desired fit and look.
Knitting the body of the cap
Once you have completed the brim of the newsboy cap, it’s time to move on to knitting the body of the cap. This is the part where you will create the main portion of the cap that covers the head.
To start knitting the body, you will continue using your chosen yarn and knitting needles. If you are following a specific pattern, make sure to read and follow the instructions provided. Otherwise, you can create your own design by using your preferred knitting stitches and techniques.
Row 1: Begin by casting on the desired number of stitches onto your knitting needles. This will depend on the size of the cap and the stitch pattern you are using. For a basic stockinette stitch, you can cast on an even number of stitches.
Row 2: Once you have cast on, you can start knitting the body of the cap. For a stockinette stitch, you will knit every stitch in this row.
Continue knitting the body: For the following rows, you will need to follow your chosen stitch pattern. This could include knit stitches, purl stitches, ribbing, or any other stitch combination you prefer. Remember to knit in the round if you want a seamless cap, or use circular knitting needles if you are working on a flat piece.
Continue the desired length: Knit the body of the cap to the desired length. This will depend on the style and fit you want to achieve. You can try the cap on as you go to ensure it’s the right length for you or the intended recipient. Remember to leave enough room for the crown shaping, which will be worked later on.
Finish off: Once you have reached the desired length, you can finish off by binding off all the stitches. This will secure your knitting and create a clean edge. Cut the yarn, leaving a tail for weaving in later.
With the body of the cap knitted, you are one step closer to completing your newsboy cap. Next, you will move on to shaping the crown, which will give the cap its distinctive shape. Stay tuned for the next step in the pattern or tutorial you are following.
Creating the crown of the cap
Once you have finished knitting the brim of your newsboy cap, it’s time to move on to the crown. The crown is the rounded top part of the cap that gives it its shape and depth. To create the crown, you will need to continue knitting in the pattern you have chosen, following the instructions for increases and decreases as necessary.
The crown of the cap typically begins with a certain number of stitches, which will vary depending on the size of the cap and the desired fit. You can refer to the knitting pattern you are using for the specific number of stitches to cast on for the crown. Once you have cast on the required number of stitches, you can begin working in the pattern.
Increases: In order to shape the crown and create the rounded top of the cap, you will need to gradually increase the number of stitches. This can be done using different types of increases, such as knitting into the front and back of a stitch or using a yarn over increase. The specific increase method will depend on the pattern you are following.
Decreases: As you move further up the crown, you will eventually need to decrease the number of stitches to bring the cap to a point. This can be achieved using various decrease methods, such as knitting two stitches together or slipping stitches. Again, the specific decrease method will depend on the pattern you are using.
Continue working in the pattern, increasing and decreasing as necessary, until you have reached the desired length for the crown of the cap. This length will also be specified in the knitting pattern you are following. Once you have completed the crown, you can then move on to finishing the hat by following the instructions for the remaining sections, such as the top button or the lining.
Assembling the cap
Once you have finished knitting all the pieces of the newsboy cap pattern, it’s time to assemble them together to create the final product. The assembling process involves attaching the brim to the body of the cap and sewing the side seams. Here is a step-by-step guide on how to assemble the cap:
Attaching the brim

Start by folding the brim in half lengthwise and lining up the edges. Place the brim on the bottom edge of the body of the cap, aligning the stitches. Use a tapestry needle and yarn that matches the color of your cap to sew the brim in place. Start by securing the corners of the brim and then continue sewing along the edge, making sure to catch both layers of the brim and the cap body. This will create a neat and secure attachment.
Sewing the side seams

To sew the side seams of the cap, line up the edges of the cap body, with right sides facing each other. Use a tapestry needle and yarn to sew the side seams together, using a mattress stitch or any other preferred seaming technique. Make sure to sew from the bottom edge of the cap body up to the top, joining the front and back panels of the cap. This will create a seamless look and a comfortable fit.
Once you have finished sewing the side seams, weave in any loose yarn ends to give the cap a polished finish. You can also choose to add any desired embellishments or decorations to personalize your newsboy cap. With these simple steps, you will have successfully assembled your knitted newsboy cap and can now enjoy wearing it with style and confidence.
Adding Finishing Touches
Once you have completed knitting your Newsboy cap, it’s time to add those final touches that will give your cap a polished and professional look. These finishing touches can make all the difference in elevating your knitted piece from homemade to high-quality.
Blocking: Before adding any finishing touches, it is essential to block your knitted cap. Blocking helps to even out the stitches and shape the cap to the desired size and fit. To block your cap, gently wash it in lukewarm water using a mild detergent, and then lay it flat on a towel to dry. You can use pins to stretch and shape the cap if needed.
Seaming: Once your cap is completely dry, it’s time to seam any open edges. Using a yarn needle and matching yarn, sew the back seam of the cap together, ensuring that the stitches are neat and even. This will give your cap a seamless and professional finish.
Interior Finishing: To add a polished touch to the interior of your cap, consider adding a lining or a sweatband. A lining can provide added warmth and durability, while a sweatband can help absorb moisture and make the cap more comfortable to wear. You can sew the lining or sweatband directly onto the inside of the cap using a needle and thread.
Embellishments: To personalize your Newsboy cap, you can add embellishments such as buttons, patches, or decorative stitches. Sewing buttons on the front or sides of the cap can give it a vintage or quirky look. Adding patches or embroidery can make the cap unique and reflect your personal style.
Care Instructions: Finally, don’t forget to include care instructions for your Newsboy cap. Attach a small tag or label with instructions on how to safely wash and store the cap to ensure its longevity. This will also give your finished piece a professional touch.
Tips and Tricks for Successful Knitting
Knitting can be a relaxing and rewarding hobby, but it can also be frustrating if you encounter difficulties along the way. To help you achieve success in your knitting projects, here are some tips and tricks to keep in mind:
1. Choose the Right Yarn and Needles
When starting a knitting project, it’s important to select the right yarn and needles for the desired outcome. Consider the recommended yarn weight and needle size mentioned in the pattern, and make sure to match them. Using the wrong yarn weight or needle size can affect the gauge and overall look of the finished piece.
2. Practice Proper Tension
Tension refers to the tightness or looseness of your knitting. Consistent tension plays a crucial role in determining the size and appearance of your project. Take the time to practice and find a comfortable tension that works for you. If you find your stitches are too tight or too loose, try adjusting your grip or needle size accordingly.
3. Count Your Stitches
Counting your stitches regularly can help you catch mistakes early on and prevent major issues later in the project. Use stitch markers or place a yarn loop on every tenth stitch as a visual aid. This will allow you to keep track of your stitch count and ensure consistency throughout your work.
4. Read and Follow Patterns Carefully
When working on a knitting project, it’s essential to read and understand the pattern instructions thoroughly. Pay close attention to the abbreviations, stitch patterns, and special instructions. Take your time to ensure you are following the pattern correctly, and don’t hesitate to seek clarification if something is unclear.
5. Take Breaks and Relax

Knitting should be an enjoyable and relaxing activity. If you find yourself getting frustrated or tired, it’s important to take breaks and rest your hands and mind. Giving yourself time to relax and recharge will ultimately result in a better knitting experience and a higher-quality finished product.
By keeping these tips in mind, you’ll be well on your way to successful knitting projects. Remember to be patient with yourself, as knitting is a skill that improves with practice. Happy knitting!