
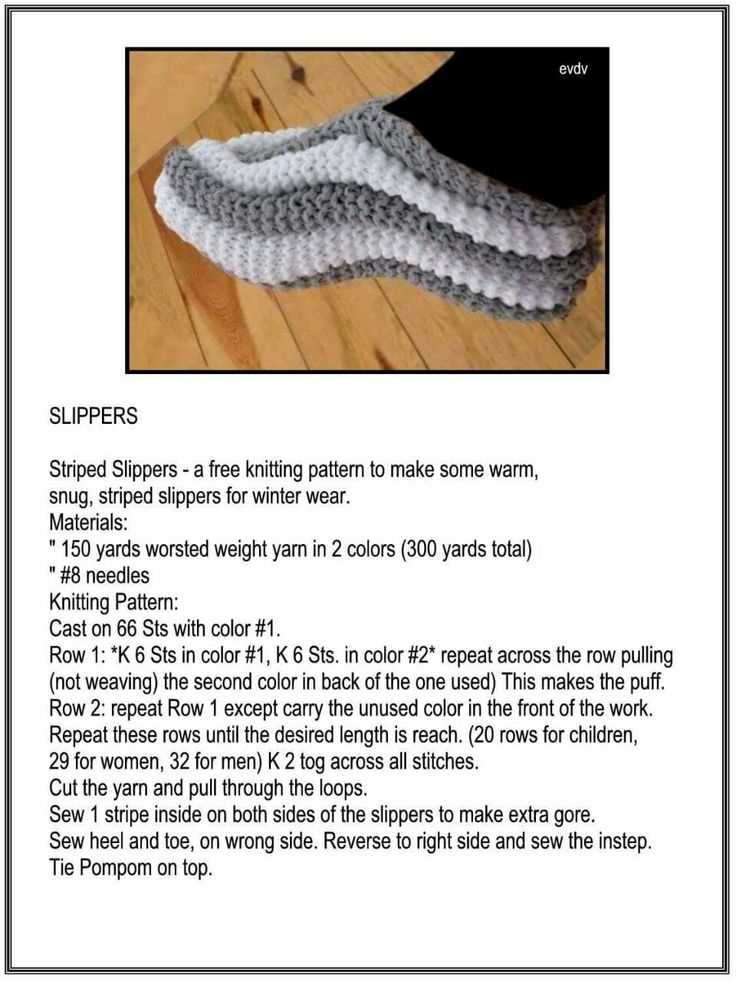
Knitting is a popular craft that allows individuals to create beautiful, functional items using just a pair of knitting needles and some yarn. One of the most popular knitting projects is creating slippers, as they are cozy and practical. Phentex slippers, in particular, are a favorite among knitters due to their comfort and durability.
The Phentex slippers knitting pattern is easy to follow, making it suitable for both beginner and experienced knitters. The pattern typically calls for Phentex yarn, a synthetic blend that is known for its softness and warmth. This yarn is available in a wide range of colors, allowing knitters to create slippers that match their personal style.
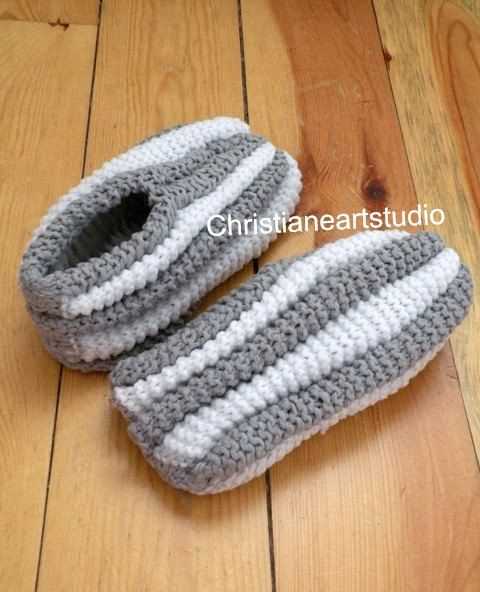
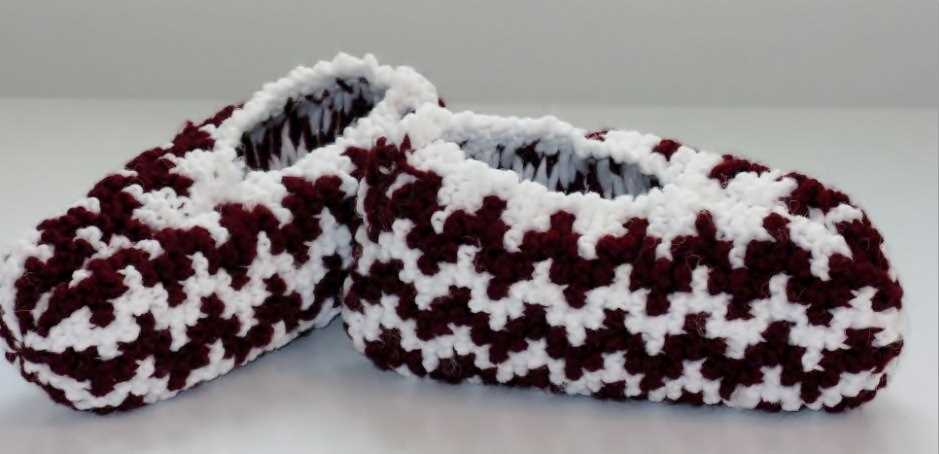
When knitting Phentex slippers, the pattern includes instructions for different sizes, ensuring that everyone can find a pair that fits them perfectly. The finished slippers are designed to be thick and cozy, with a ribbed cuff to keep them securely on the feet. They are ideal for wearing around the house during colder months or giving as gifts to friends and family.
Phentex Slippers Knitting Pattern

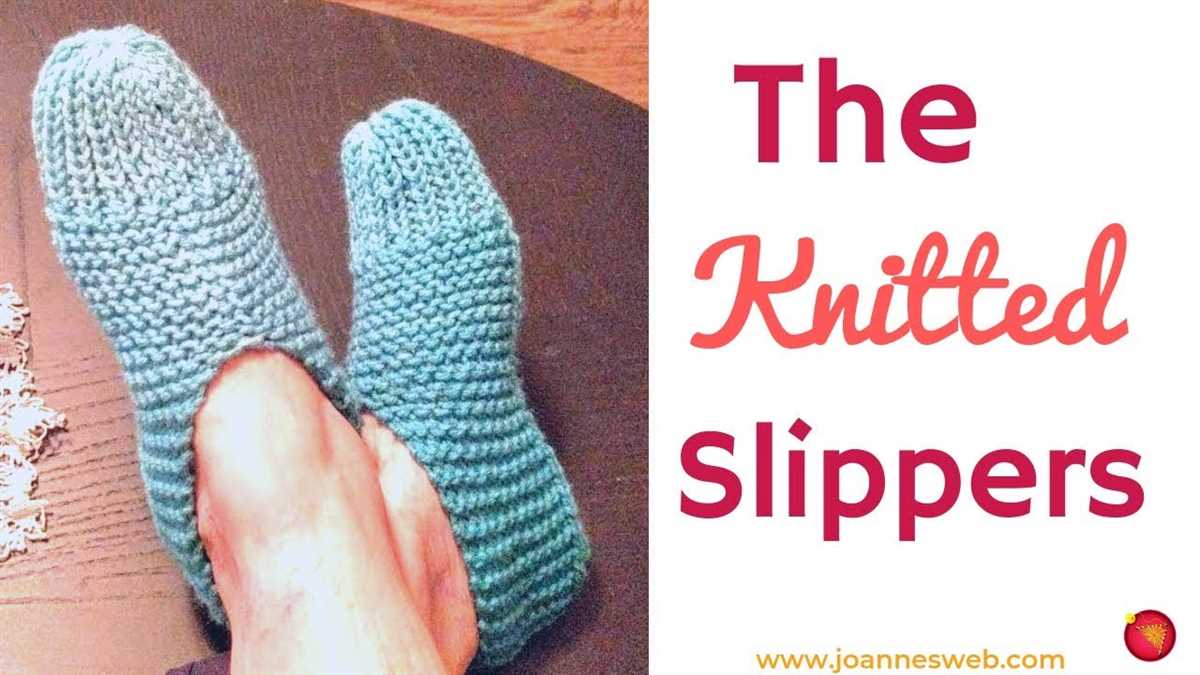
Looking for a cozy and stylish pair of slippers to knit? The Phentex slippers knitting pattern is the perfect choice! Made with durable Phentex yarn, these slippers will keep your feet warm and comfortable all year round.
This knitting pattern features a simple yet elegant design, making it suitable for both beginners and experienced knitters. The pattern includes instructions for all sizes, so you can easily customize the slippers to fit your feet perfectly.
Materials:
- Phentex yarn (color of your choice)
- Knitting needles size 5mm
- Yarn needle
Instructions:
- Using the size 5mm knitting needles, cast on the desired number of stitches for your size.
- Knit in garter stitch for the desired length, making sure to leave enough room for your toes.
- Next, divide the stitches evenly onto two needles for the sides of the slippers.
- Work in stockinette stitch until the sides measure the desired length, then bind off all stitches.
- Using the yarn needle, sew the sides of the slippers together. Make sure to leave an opening for your foot to slip in.
- Finally, weave in any loose ends and trim the excess yarn.
With the Phentex slippers knitting pattern, you can create a cozy and stylish pair of slippers that will keep your feet warm and comfortable. Whether you’re a beginner or an experienced knitter, this pattern is perfect for anyone looking to knit their own slippers. So grab your needles and yarn, and start knitting your new favorite pair of slippers today!
Materials Needed for Phentex Slippers
When it comes to knitting your own Phentex slippers, there are several materials you will need in order to complete the project. These include:
- Phentex Slipper and Craft Yarn: This is the main material you will need to create the slippers. The Phentex Slipper and Craft Yarn is a bulky weight yarn that is known for its durability and warmth.
- Knitting Needles: A pair of knitting needles is essential for working with the yarn. Choose a size that is appropriate for the yarn you are using and comfortable for you to work with.
- Tapestry Needle: A tapestry needle is used for weaving in ends and sewing up any seams in the slippers.
- Scissors: A pair of scissors is necessary for cutting the yarn and trimming any excess.
- Stitch Markers: Stitch markers are helpful for marking certain points in the pattern or keeping track of your progress.
These are the basic materials you will need to get started on your Phentex slipper knitting project. It’s always a good idea to gather all of your materials before you begin, so you have everything you need on hand. Once you have your materials ready, you can follow the knitting pattern and begin creating your cozy and comfortable Phentex slippers.
Choosing the Right Size for Phentex Slippers

When knitting Phentex slippers, it is important to choose the right size to ensure a comfortable and snug fit. The size you choose will depend on the foot measurements of the person you are knitting for.
Measuring the foot: Before starting your project, it is recommended to measure the foot for which the slippers are intended. Use a measuring tape to measure the length of the foot from the heel to the longest toe. This measurement will help you determine the appropriate size to knit.
Phentex Slippers Size Chart:

| Size | Foot Length (in cm) | Yarn Requirements |
|---|---|---|
| Small | 22 – 23 | 1 ball of Phentex Slipper & Craft |
| Medium | 24 – 25 | 1 ball of Phentex Slipper & Craft |
| Large | 26 – 27 | 1 ball of Phentex Slipper & Craft |
Selecting the size: Once you have measured the foot length, refer to the size chart above to determine the appropriate size of the Phentex slippers. If the foot measurement falls between two sizes, it is recommended to choose the larger size for a more comfortable fit.
Adjusting the size: If none of the sizes in the chart perfectly match the foot measurement, you can adjust the size by knitting with a different weight of yarn or changing the needle size. Keep in mind that altering the yarn or needle size may affect the overall gauge and fit of the slippers, so it is important to make a gauge swatch before making any modifications.
In conclusion, by accurately measuring the foot and referring to the provided size chart, you can choose the right size for Phentex slippers that will ensure a cozy and well-fitting finished product.
Cast on and Knit the Toe of the Phentex Slippers
Before you can start knitting the Phentex slippers, you will need to cast on the required number of stitches for the toe. The pattern usually specifies the number of stitches you should cast on based on the size of the slipper you are making. To cast on, hold the end of the yarn in your right hand, leaving a tail of about 6 inches. Make a slipknot by crossing the tail over the working yarn and pulling it through the loop. Slide the slipknot onto the knitting needle and tighten it slightly.
With the slipknot on your needle, you can begin casting on the remaining stitches. The most common method used for casting on in knitting is the long-tail cast on. To do this, hold the needle with the slipknot in your right hand and the working yarn in your left hand. Insert the needle under the center of the slipknot, bringing the working yarn over the needle from back to front. Use your thumb and index finger to pinch the working yarn against the needle and bring it down through the slipknot, creating a new loop on the needle. Repeat this process for the remaining stitches, making sure to keep the tension even.
Once you have cast on the required number of stitches, you can start knitting the toe of the Phentex slippers. Begin by knitting the first row in a simple knit stitch. Insert the right needle through the first stitch on the left needle from left to right, bringing the working yarn over the right needle and through the stitch. Slide the stitch off the left needle and onto the right needle. Repeat this process for each stitch until you have knit all the way across the row. Turn your work and knit the next row in the same manner, continuing until the toe reaches the desired length.
Knitting the Phentex Slipper Sole

When knitting the Phentex slipper sole, it is important to select the appropriate Phentex yarn and knitting needles to achieve the desired size and durability. Phentex yarn is known for its durability and is ideal for creating sturdy slipper soles that can withstand regular use. It is recommended to use a thicker weight yarn, such as Phentex Super Value, to ensure the slipper soles are thick enough to provide comfort and insulation.
Before starting the knitting process, it is crucial to measure the foot size for which the slippers are being made. This will help in determining the number of stitches and rows needed to create the perfect fit. A well-fitting slipper sole is essential for comfort and to prevent any slipping or sliding while walking.
Once the appropriate yarn and needles are chosen and the foot size is measured, it is time to cast on and start knitting the slipper sole. The pattern usually begins with casting on a certain number of stitches, such as 20 or 30, depending on the desired width of the slipper sole.
After casting on, the knitting pattern typically consists of working in knit stitches back and forth in rows to create a flat piece of fabric. It is important to refer to the specific Phentex slipper sole pattern for the exact instructions on the number of rows and stitches required.
As the slipper sole is being knit, it is essential to maintain an even tension and check the gauge periodically to ensure the correct size is being achieved. Adjustments may need to be made by adding or removing stitches or changing needle sizes to obtain the proper gauge.
Once the desired number of rows and stitches have been completed, the slipper sole can be finished off by binding off the stitches. This creates a neat edge and prevents any unraveling.
In conclusion, knitting the Phentex slipper sole requires selecting the appropriate yarn and needles, measuring foot size, casting on, knitting in rows, maintaining tension, checking gauge, and finally binding off. Following these steps and referring to the specific slipper sole pattern will result in a comfortable and sturdy foundation for your Phentex slippers.
Creating the Phentex Slipper Upper
When knitting the Phentex slippers, the first step is to create the upper part of the slipper, which will cover the foot. To start, you will need a set of double-pointed knitting needles and the Phentex slipper knitting pattern.
Casting on and knitting the ribbing
Begin by casting on the required number of stitches, as specified in the pattern. This is typically done using the long-tail cast on method, or any other preferred cast on method. Once the stitches are cast on, join in the round, being careful not to twist the stitches. Now, you can begin knitting the ribbing.
Ribbing is commonly used for the cuff of the slipper, as it adds elasticity and helps keep the slipper in place. The most common ribbing pattern is K1, P1 (knit one, purl one) or K2, P2 (knit two, purl two). Continue knitting in the ribbing pattern for the specified number of rounds or until the desired length is reached.
Knitting the main body
After completing the ribbing, it’s time to knit the main body of the slipper. This is where the slipper starts to take shape. Follow the instructions in the pattern to transition from the ribbing pattern to the main body pattern.
The main body of the slipper is often knitted in stockinette stitch or a combination of knit and purl stitches to create various textures or patterns. Continue knitting in the main body pattern until the specified number of rounds or until the desired length of slipper is achieved.
Remember to keep track of your stitches and rows as you progress through the pattern to ensure accuracy and consistency in your knitting. Once you have completed the upper part of the slipper, you can move on to knitting the sole and finishing the slipper.
Joining the Sole and Upper of Phentex Slippers
Once you have completed knitting the sole and upper of your Phentex slippers, it’s time to join them together to create a cozy and comfortable slipper. The joining process may vary depending on the specific pattern you are following, but here are some general steps to help guide you through the process.
1. Prepare the Sole and Upper
Before joining the sole and upper, make sure to weave in any loose ends and trim them neatly. This will give your slippers a clean and finished look. Lay the sole flat on a table or surface, with the right side facing up. Place the upper on top of the sole, aligning the edges. Ensure that the right sides of the sole and upper are facing each other.
2. Attach the Upper to the Sole
Starting at the center back of the slipper, align the stitches of the upper with the stitches of the sole. Use a tapestry needle and the same yarn used for knitting to sew the upper to the sole. Working from back to front, insert the needle into the corresponding stitch of the upper and then into the corresponding stitch of the sole. Continue sewing, matching the stitches one by one, until you reach the center front of the slipper.
After completing one side of the slipper, repeat the process on the other side. Make sure to work evenly and neatly, maintaining consistent tension throughout the joining process. This will help ensure that the slipper retains its shape and provides a comfortable fit. Once you reach the center front of the slipper on the second side, secure the yarn, weave in any remaining ends, and trim them.
Once the sole and upper are securely joined, you can try on the slipper to check the fit and make any necessary adjustments. You can also add any desired embellishments or finishing touches to personalize your slippers. Now, your Phentex slippers are ready to be worn and enjoyed!
Knitting the Phentex Slipper Heel
When knitting the Phentex slipper heel, it is important to follow the pattern instructions carefully to achieve the desired result. The slipper heel is an essential component of the slipper, providing support and comfort to the wearer.
To begin, you will need to cast on the required number of stitches as specified in the pattern. This is typically done using the long tail cast on method, ensuring that the stitches are evenly distributed across the knitting needle.
The pattern may then instruct you to work a certain number of rows in a specific stitch pattern, such as garter stitch or stockinette stitch. It is important to maintain an even tension while knitting these rows to ensure that the slipper heel is consistent in size and appearance.
After completing the required number of rows, the pattern may instruct you to shape the slipper heel by decreasing or increasing stitches. This shaping helps to create a snug fit and allows the slipper to hug the foot comfortably.
Once the slipper heel shaping is complete, the pattern may instruct you to continue knitting in the specified stitch pattern until the desired length is reached. This length will vary depending on the size of the slipper and personal preference.
Finally, the pattern may instruct you to bind off the stitches to finish the slipper heel. This is typically done using a basic bind off method, ensuring that the edge is neat and secure.
Overall, knitting the Phentex slipper heel requires attention to detail and careful execution of the pattern instructions. By following the steps outlined in the pattern, you can create a comfortable and well-fitting slipper heel for your project.
Finishing Touches: Sewing and Styling the Phentex Slippers

Completing your Phentex slippers involves a few final steps to ensure that they fit comfortably and look stylish. These finishing touches can elevate your handmade slippers and make them even more enjoyable to wear.
Sewing: After knitting the main pieces of the slippers, it’s time to sew them together. Using a tapestry needle and the same yarn you used for knitting, carefully stitch the front and back pieces together along the sides. You can choose to use whip stitch or mattress stitch, depending on the desired appearance and your personal preference. Make sure to secure the beginning and end of each seam to prevent unraveling.
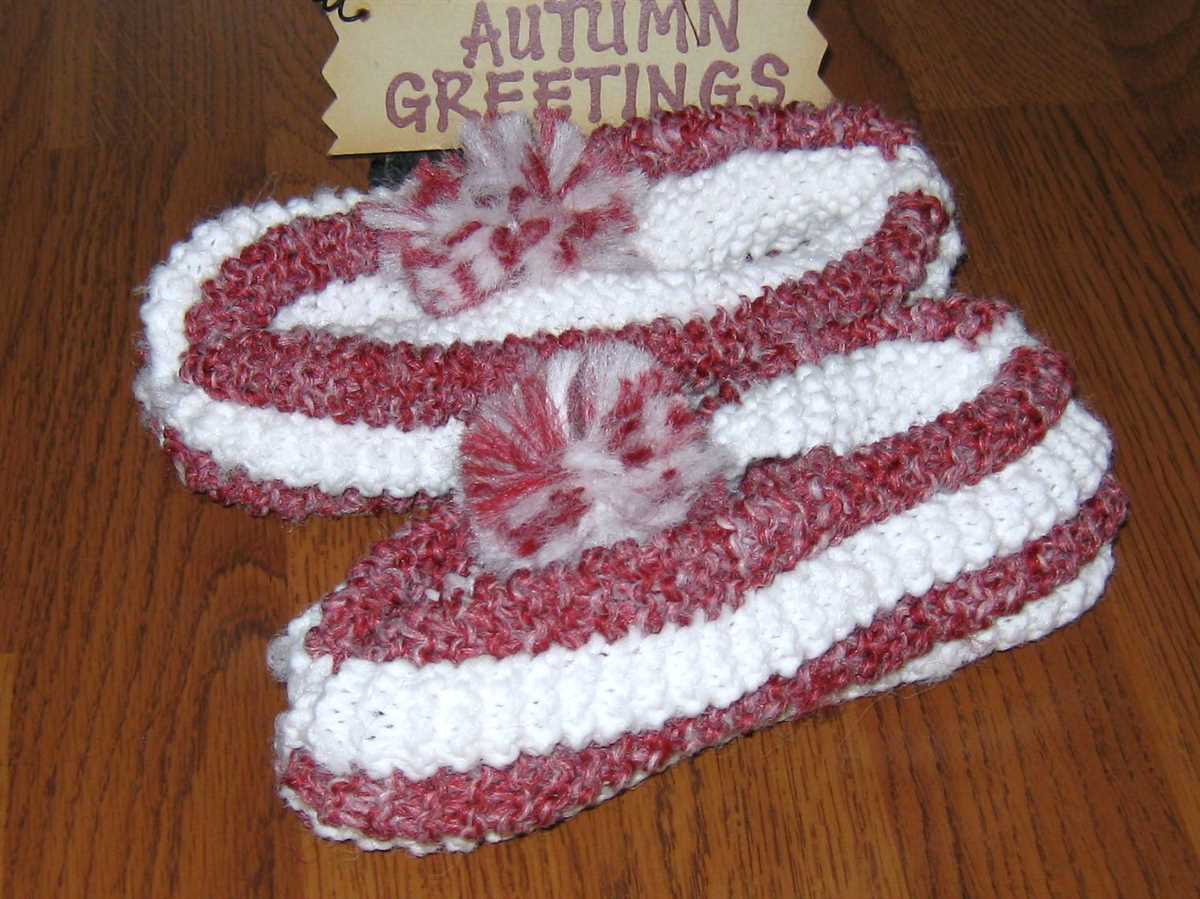
Styling: Once your slippers are sewn together, you can add some personal touches to make them unique. Consider embellishing the slippers with buttons, bows, or pom-poms. You can attach these decorations using the same yarn or sewing thread. Play around with different placement options and customize the look to match your style.
Another way to add flair to your Phentex slippers is by adding a decorative edge or trim. You can use a contrasting color of yarn or a fun textured stitch to create a border for your slippers. Experiment with different stitch patterns, such as picot or ribbing, to give them a finished and polished look.
Finally, don’t forget to give your slippers a final blocking. This step helps to shape the slippers and improve their overall fit. Wet the slippers with cold water, gently stretch them into shape, and let them dry flat. This will ensure that they maintain their shape and provide a comfortable fit each time you wear them.
By sewing your Phentex slippers together with care and adding personalized styling and finishing touches, you can create a pair of cozy and fashionable slippers that will keep your feet warm and make a statement. Enjoy the process of making these slippers your own and relish in the satisfaction of wearing handmade footwear.
Customizing the Phentex Slipper Pattern
When it comes to knitting slippers, the Phentex Slipper pattern is a popular choice for many. However, if you’re looking to put your own personal touch on your slippers, customizing the pattern can be a fun and creative way to do so. Here are some ideas on how you can customize the Phentex Slipper pattern to make it uniquely yours.
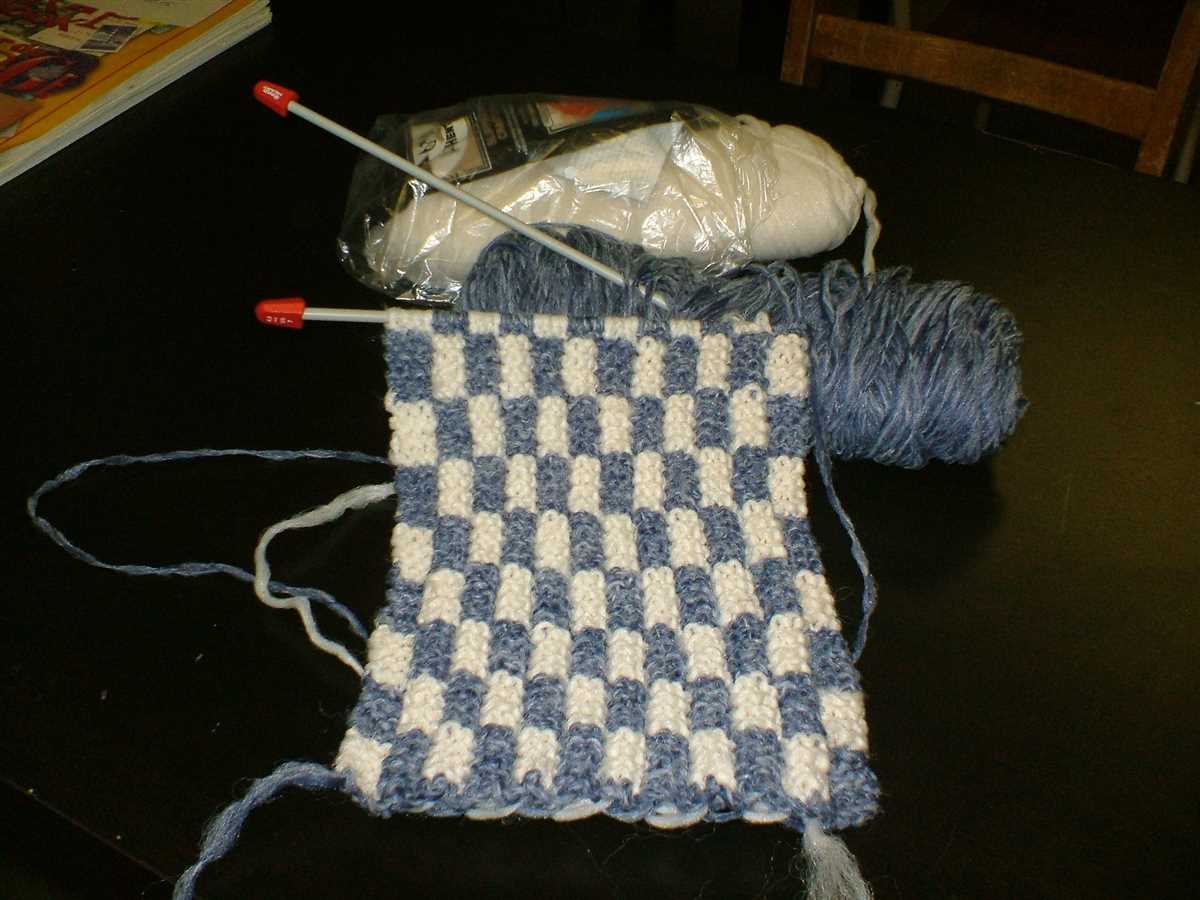
1. Choosing different colors
One of the easiest ways to customize the Phentex Slipper pattern is by choosing different colors for your yarn. You can opt for a solid color for a classic look, or experiment with different color combinations to create a more vibrant and unique design. Consider using contrasting colors for the sole, cuff, and upper part of the slippers to add visual interest.
2. Adding embellishments
If you want to take your customizations to the next level, consider adding embellishments to your slippers. You can use embroidery or appliques to add decorative details like flowers, hearts, or initials. Beads, buttons, or ribbons can also be used to add a touch of glamour or whimsy to your slippers.
3. Adjusting the sizing
The Phentex Slipper pattern provides instructions for various sizes, but if you have particularly small or large feet, you may need to make some adjustments. You can easily modify the pattern by adding or subtracting stitches to achieve the desired size. Just make sure to check your gauge to ensure a proper fit.
4. Trying different stitch patterns
Another way to customize the Phentex Slipper pattern is by experimenting with different stitch patterns. You can incorporate different types of stitches like cables, lace, or textured patterns to create a unique and interesting design. Just make sure to adjust your stitch count accordingly to maintain the correct sizing.
By customizing the Phentex Slipper pattern, you can make your slippers truly one-of-a-kind. Whether you choose to play with colors, add embellishments, adjust the sizing, or try different stitch patterns, the possibilities are endless. Have fun and let your creativity shine!
Tips and Tricks for Successful Phentex Slipper Knitting
Knitting a pair of Phentex slippers can be a fun and rewarding project. However, it’s important to keep a few tips and tricks in mind to ensure successful results. Here are some suggestions that will help you with your Phentex slipper knitting:
- Choose the right yarn: Using Phentex yarn specifically designed for slippers will ensure that your finished product is durable and long-lasting. The yarn’s unique composition and construction make it ideal for creating cozy and comfortable slippers.
- Select the appropriate needle size: Depending on your knitting style and tension, you may need to adjust your needle size to achieve the desired gauge. Experiment with different needle sizes to find the right one that works best for you.
- Take accurate measurements: To ensure a perfect fit, it’s important to take accurate measurements of your foot or the recipient’s foot. This will help you determine the right size to knit and make any necessary adjustments to the pattern.
- Pay attention to tension: Maintaining consistent tension throughout your knitting is crucial for achieving even stitches and a professional-looking finish. Practice keeping your tension even by knitting swatches before starting on the actual slipper project.
- Use stitch markers: Stitch markers can be helpful for keeping track of important sections or increases and decreases in the pattern. They can help you avoid mistakes and make it easier to follow the instructions.
- Block your slippers: Blocking your finished slippers can help improve their fit and appearance. Follow the proper blocking techniques for your chosen yarn to ensure the best results.
- Personalize your slippers: Once you have mastered the basic Phentex slipper pattern, don’t be afraid to add your own personal touches. You can incorporate different colors, stitch patterns, or even embellishments to make your slippers unique and stylish.
By following these tips and tricks, you can enhance your Phentex slipper knitting skills and create beautiful and comfortable slippers. Whether you’re making them for yourself or as a gift, these cozy footwear items are sure to be appreciated and enjoyed.
Q&A:
What is a Phentex slippers knitting pattern?
A Phentex slippers knitting pattern is a set of instructions and diagrams that guide you through the process of knitting slippers using Phentex yarn. It includes step-by-step instructions on how to cast on, knit, purl, and shape the slippers to create the desired design.
Where can I find a Phentex slippers knitting pattern?
You can find Phentex slippers knitting patterns in various places, including knitting books, online knitting communities and forums, and knitting pattern websites. Some craft stores may also have printed patterns available for purchase.
Is it easy to knit Phentex slippers?
Knitting Phentex slippers can vary in difficulty depending on the specific pattern you choose and your level of knitting experience. However, many patterns are designed with beginners in mind and provide detailed instructions to help you along the way. With practice and patience, you can achieve great results!
What materials do I need to knit Phentex slippers?
To knit Phentex slippers, you will need Phentex yarn in the desired color, knitting needles in the recommended size for the chosen pattern, a yarn needle for sewing any seams or finishing touches, and scissors to cut the yarn. Some patterns may also require additional materials like stitch markers or buttons for embellishments.