
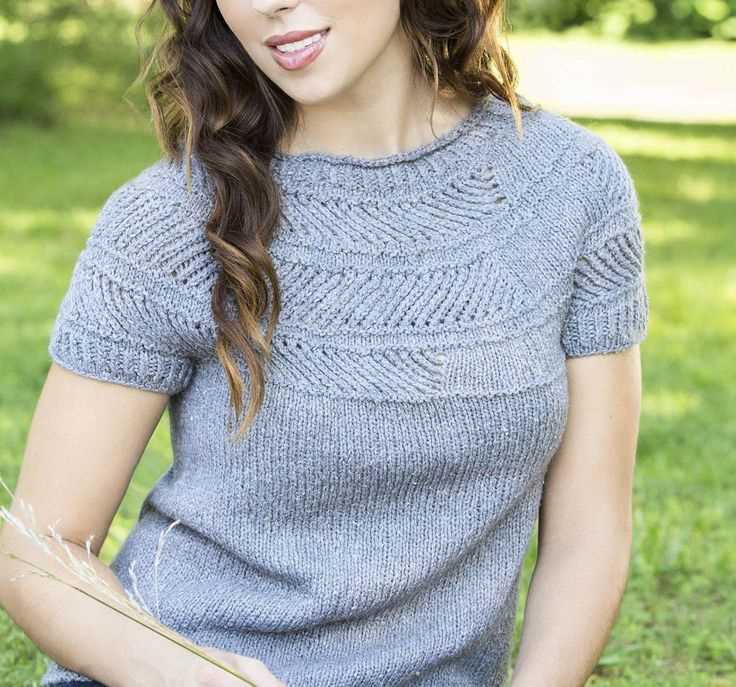
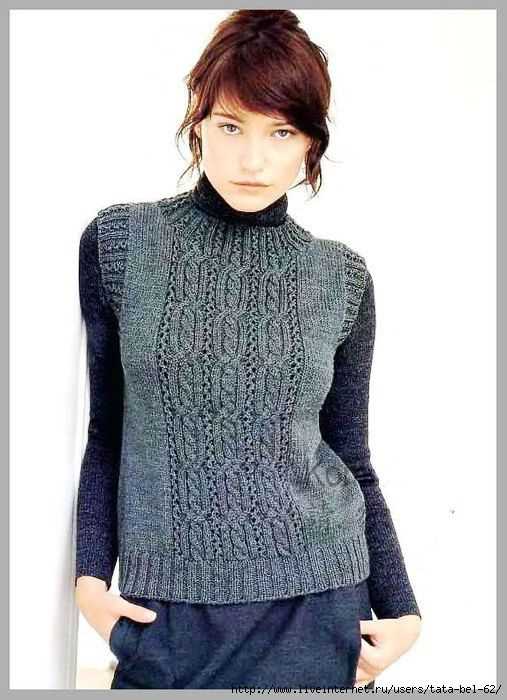
If you’re looking for a stylish and versatile addition to your wardrobe, a sleeveless pullover is a perfect choice. Whether you wear it alone or layer it over a long-sleeve shirt, this garment is sure to keep you warm and fashionable. Plus, knitting your own sleeveless pullover allows you to customize the color, pattern, and fit to your exact preferences. With a few basic knitting techniques, you’ll be able to create a beautiful garment that will be a staple in your wardrobe for years to come.
When choosing a knitting pattern for sleeveless pullover, it’s important to consider your skill level and the type of yarn you want to use. Beginners may want to start with a simple pattern that uses a basic stitch, while more advanced knitters can experiment with different stitches and patterns to create a unique design.
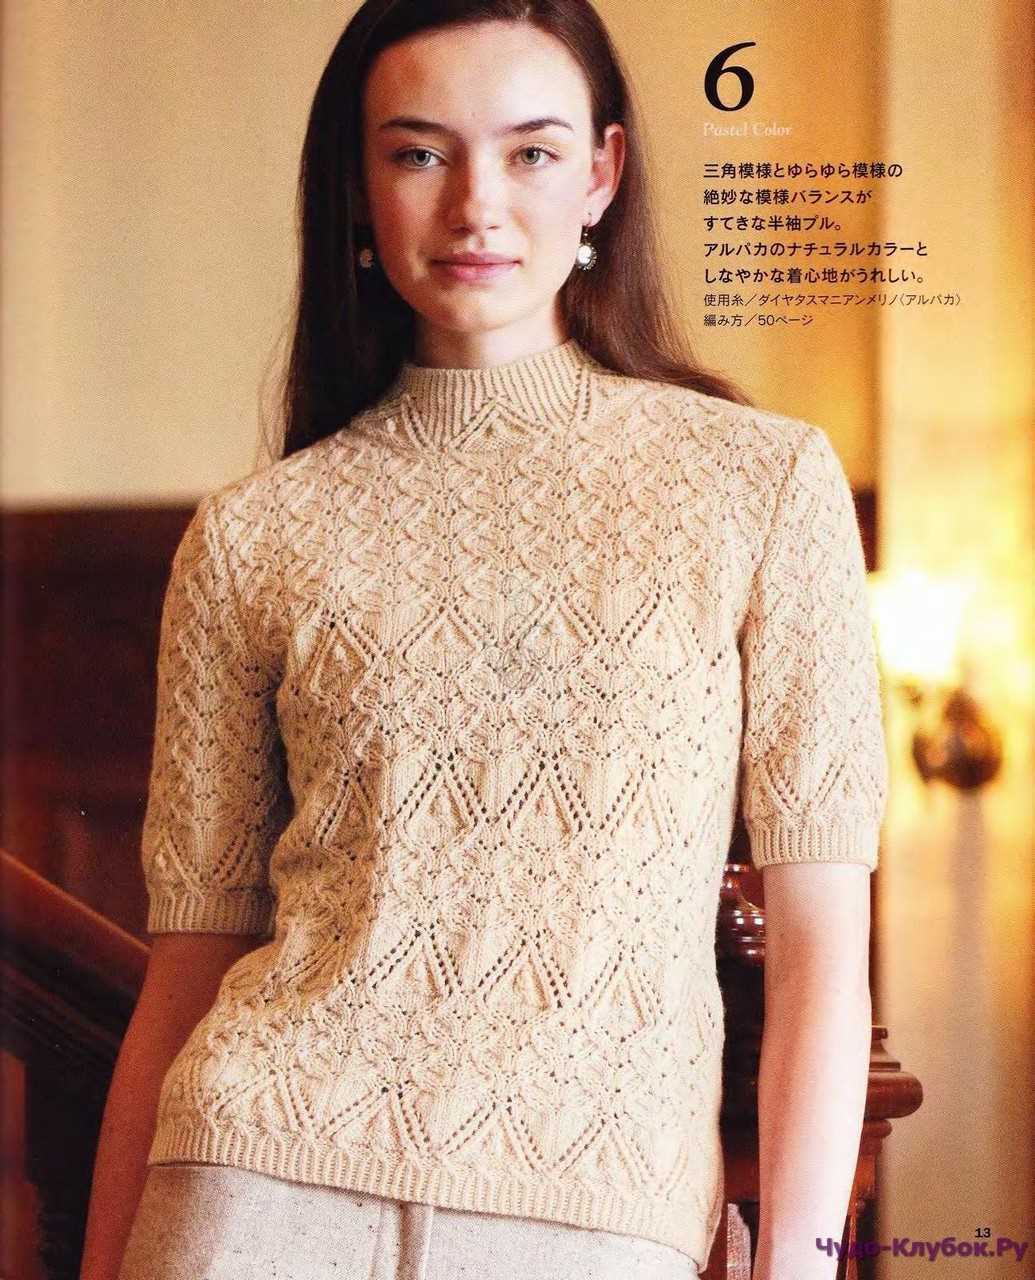
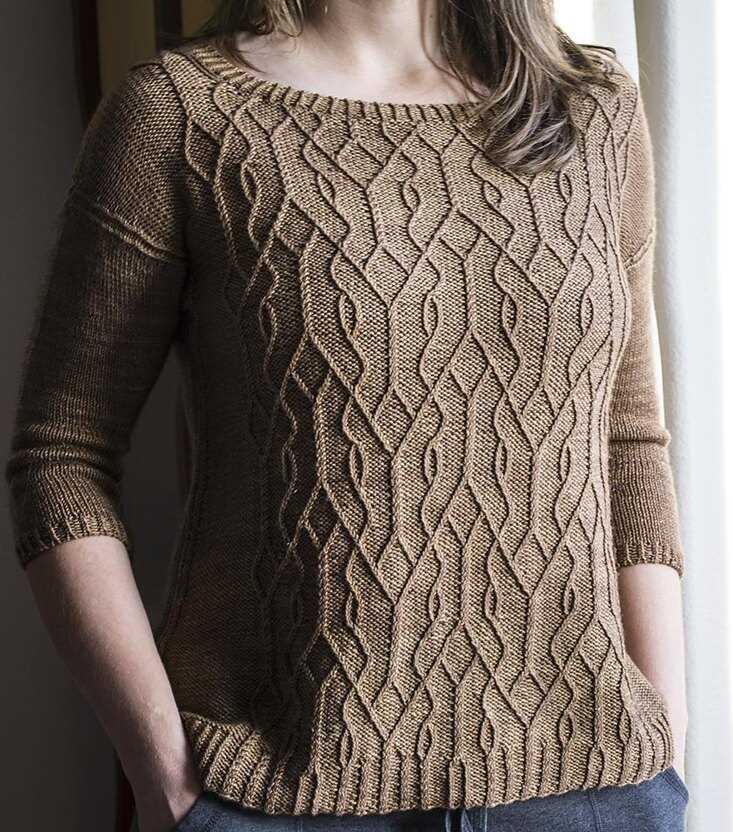
Whether you prefer a loose and flowy style or a more fitted silhouette, there are countless sleeveless pullover patterns available to suit your taste. From cable-knit designs to lace patterns, you can find a pattern that matches your personal style. So grab your knitting needles and get started on your next stylish project – a sleeveless pullover that you’ll love to wear!
Sleeveless Pullover Knitting Pattern

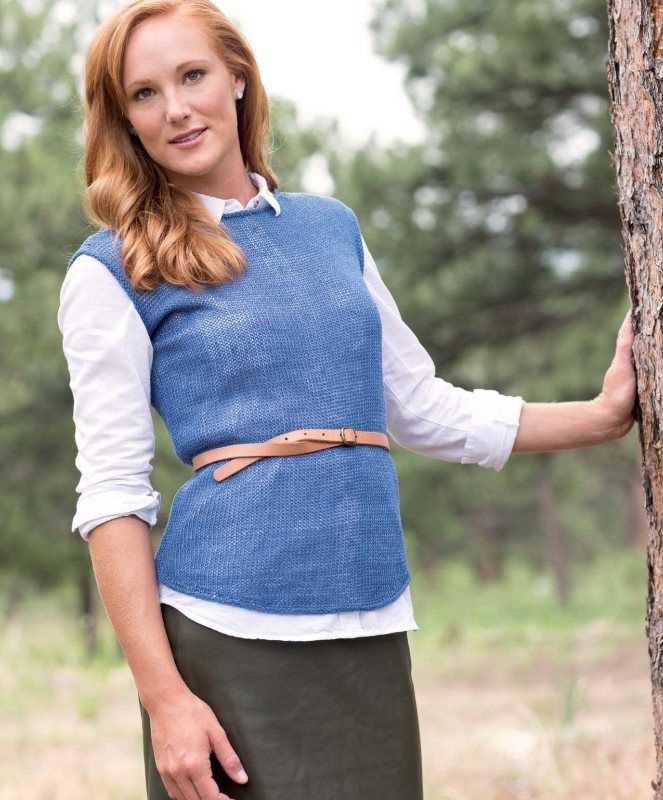
A sleeveless pullover is a versatile and timeless garment that can be worn throughout the year. Whether you’re looking to stay warm on a chilly day or add a stylish layer to your outfit, a sleeveless pullover is a perfect choice. With a knitting machine pattern, you can easily create your own sleeveless pullover in a variety of colors and designs.
This knitting pattern is suitable for intermediate knitters who are familiar with basic knitting techniques such as casting on, knitting, purling, and binding off. By following the step-by-step instructions, you will be able to create a sleeveless pullover that fits perfectly and suits your style.
To start, gather your materials including knitting needles, yarn, and a tape measure. Choose a soft and comfortable yarn that will keep you cozy and provide a smooth finish to your pullover. Measure your bust, waist, and hip circumference to determine the size that will best fit you.
Once you have your materials ready, cast on the required number of stitches for your size. Follow the pattern’s instructions for the ribbing, body, and neckline. You can customize the length and width of the pullover to suit your preferences. Feel free to experiment with different stitch patterns or add embellishments such as buttons or pockets.
After you finish knitting the body, you will move on to shaping the armholes and neckline. Pay attention to the instructions and use markers to indicate where you need to decrease or create neck shaping. Make sure to try on your pullover as you go to ensure a perfect fit.
Once you have completed the shaping, bind off all the stitches and weave in any loose ends. Give your sleeveless pullover a gentle block to even out the stitches and enhance its shape. Finally, add any finishing touches such as sewing on buttons or blocking the neckline to make it lay flat.
Now you have a beautiful sleeveless pullover that you can wear with pride. Experiment with different yarns and colors to create a unique wardrobe staple that will keep you stylish and warm throughout the seasons.
Choosing the Right Yarn
When it comes to knitting a sleeveless pullover, choosing the right yarn is crucial. The yarn you select will determine the overall look, feel, and fit of your project. Here are some factors to consider when making your yarn choice:
Fiber Content
One of the first things to consider is the fiber content of the yarn. Different fibers have different characteristics, and each will lend a unique look and feel to your sleeveless pullover. For example, wool yarns are known for their warmth and elasticity, while cotton yarns are lightweight and breathable. Consider the climate and season in which you plan to wear the pullover and choose a fiber that suits your needs.
Weight
The weight of the yarn is another important factor to consider. Yarns come in various weights, from lace to super bulky. The weight of the yarn will determine how thick or thin your finished pullover will be. If you want a lightweight and airy pullover, opt for a lace or fingering weight yarn. On the other hand, if you want a warm and cozy pullover, a bulky or super bulky weight yarn may be more suitable.
Color and Texture
The color and texture of the yarn can also play a role in the overall look of your sleeveless pullover. Consider the design and pattern of the pullover and choose a yarn color that complements or enhances the design. Additionally, the yarn’s texture, such as smooth, fluffy, or slubby, can add visual interest to your project.
Care Instructions
Lastly, consider the care instructions for the yarn. Some yarns require special care, such as hand washing or dry cleaning, while others can be machine washed and dried. Choose a yarn that aligns with your preferred level of maintenance and care.
By carefully considering these factors, you can choose the right yarn for your sleeveless pullover knitting project. Remember, the yarn you choose will have a significant impact on the final result, so take your time and choose wisely.
Selecting Needle Size
Choosing the right needle size is crucial when knitting a sleeveless pullover. The size of the needle will affect the overall gauge and tension of the finished garment. It is important to consider the pattern’s recommendations for needle size, as well as your own personal knitting style and the type of yarn being used.
The pattern should indicate the recommended needle size to achieve the desired gauge. This gauge is important to ensure that the finished garment will fit properly. If your gauge does not match the pattern’s gauge, you may need to adjust your needle size accordingly. It is recommended to make a gauge swatch before starting the project to ensure the correct needle size is being used.
Factors to consider when selecting the needle size:
- Pattern Recommendations: The pattern should provide a recommended needle size. This recommendation is usually based on the designer’s intended gauge for the pattern.
- Yarn type: Different yarns may require different needle sizes to achieve the desired gauge. Thicker yarns typically require larger needles, while thinner yarns may require smaller needles.
- Knitting Style: Your individual knitting style may affect your tension and gauge. Some knitters naturally knit tighter or looser than others. If you consistently knit tighter or looser, you may need to adjust your needle size to achieve the pattern’s gauge.
- Personal Preference: Ultimately, the needle size you choose may also depend on your personal preferences. If you prefer a tighter or looser fabric, you may choose to go up or down a needle size to achieve the desired result.
Overall, selecting the correct needle size is important to ensure the success of your sleeveless pullover. By considering the pattern’s recommendations, the type of yarn, your knitting style, and your personal preferences, you can choose the right needle size to achieve the desired gauge and create a beautiful garment.
Getting Started with the Pattern
If you’re looking to create a stylish sleeveless pullover, this knitting pattern is perfect for you. Whether you’re an experienced knitter or just starting out, this pattern provides clear instructions to help you create a beautiful garment.
Materials:
- Yarn: Choose a soft and comfortable yarn in the color of your choice. Make sure to check the recommended gauge for the pattern.
- Knitting Needles: Select the appropriate size of knitting needles based on the recommended gauge. Straight or circular needles can be used, depending on your preference.
- Stitch Markers: These will help you keep track of your progress and mark important points in the pattern.
- Tapestry Needle: Use this needle to weave in loose yarn ends and finish off your project.
- Scissors: Always handy for cutting yarn and trimming any excess.
Gauge:
Before you start knitting, it’s important to check your gauge. This ensures that your finished garment will fit correctly. Follow the gauge instructions provided in the pattern and use the recommended size of needles. If your gauge does not match, you may need to adjust your needle size to achieve the correct tension.
Instructions:
Once you have gathered all your materials and checked your gauge, it’s time to start knitting. The pattern will provide step-by-step instructions for each section of the sleeveless pullover. Make sure to read the pattern carefully and familiarize yourself with any special stitches or techniques.
Casting On Stitches
Casting on stitches is the first step in starting your sleeveless pullover knitting project. It is a simple technique that allows you to add the required number of stitches to your knitting needle before you begin working on your pattern. There are several methods you can use to cast on stitches, including the long-tail cast on, the knit cast on, and the cable cast on.
Long-Tail Cast On
The long-tail cast on is a popular method that creates a neat and elastic edge. To cast on using this method, you will need to estimate the amount of yarn you need to create the desired number of stitches. Hold the working yarn and the tail of the yarn in your hand, with the tail over your thumb and the working yarn over your index finger. Insert the needle between your thumb and your index finger, and use the needle to grab the working yarn and pull it through the yarn loop on your thumb. Repeat this process for each stitch until you have cast on the required number of stitches.
Knit Cast On

The knit cast on, also known as the backwards loop cast on, is a simple and quick method. To use this technique, simply create a slipknot and place it on the needle. Insert the needle into the slipknot from front to back, yarn over with the working yarn, and pull the loop through the slipknot. Repeat this process for each stitch until you have cast on the desired number of stitches. The knit cast on creates a stretchy edge but can be less neat than other methods.
Cable Cast On
The cable cast on is another method that creates a firm and neat edge. To cast on using this method, create a slipknot and place it on the needle. Insert the needle into the slipknot from front to back, yarn over with the working yarn, and pull the loop through the slipknot. Place this loop onto the left needle, and repeat the process for each additional stitch. The cable cast on is often used when a neat and tidy edge is required, such as for a ribbed border or a structured garment.
Once you have cast on the required number of stitches, you can begin working on your sleeveless pullover knitting pattern. Follow the instructions provided in your pattern to continue creating your garment, and enjoy the process of bringing your design to life with each stitch.
Knitting the Body
Once you have completed the neckline and armhole shaping, it’s time to knit the body of your sleeveless pullover. The body is worked in the round from the bottom up, using circular knitting needles.
Step 1: Before you begin knitting the body, make sure to count your stitches to ensure you have the correct number. This will help to avoid any mistakes and ensure that your pullover fits properly. If necessary, adjust your stitch count by increasing or decreasing stitches evenly across the row.
Working the Body
Now that you have the correct number of stitches, you can begin working the body of the pullover. Start by joining your yarn and knitting in the round. You can use a marker to indicate the beginning of the round.
Step 2: Continue knitting in the round until the body reaches your desired length. You can try on the pullover as you go to check the fit. Remember that the body will stretch slightly when worn, so keep that in mind when determining the length.
Step 3: Once you have reached the desired length, it’s time to bind off. You can use a standard bind off method or a stretchy bind off, depending on your preference. Make sure to bind off loosely to ensure a comfortable fit.
- Tip: If you want to add some shaping to the body, you can do so by working increases or decreases evenly spaced throughout the round.
- Tip: If you want to add some texture or pattern to the body, you can incorporate different stitch patterns, such as ribbing or cables.
Congratulations! You have now completed the body of your sleeveless pullover. The next step is to knit the shoulders and finish the neckline. Stay tuned for the next section of our knitting tutorial!
Shaping the Neckline
When knitting a sleeveless pullover, one of the important steps is shaping the neckline. The neckline can greatly affect the overall fit and style of the garment. There are several different techniques that can be used to shape the neckline, including bind offs, decreases, and short rows.
1. Bind Offs: One common method for shaping the neckline is to use bind offs. This involves binding off a certain number of stitches at the beginning of each row to create a gradual slope. The number of stitches bound off will depend on the size and desired shape of the neckline.
2. Decreases: Another method for shaping the neckline is to use decreases. Decreases can be done either on the edges of the neckline or within the body of the work. This creates a more angular shape to the neckline, and can be used to create a V-neck or other desired neckline shape.
3. Short Rows: Short rows are another technique that can be used to shape the neckline. Short rows involve knitting or purling partway across a row, then turning the work and working back in the opposite direction. This creates extra fabric in certain areas, which can be used to shape the neckline.
There are many different ways to shape a neckline, and the specific method used will depend on the individual knitting pattern and the desired outcome. By carefully following the instructions and using the appropriate shaping techniques, knitters can create a beautifully shaped neckline for their sleeveless pullover.
Decreasing Stitches
Decreasing stitches is an essential skill in knitting, as it allows you to shape your garment or project. There are different methods for decreasing stitches, and the one you choose will depend on the specific pattern you are following. Here are some common methods:
1. Knit 2 Together (K2TOG)
The knit 2 together (K2TOG) decrease is a simple and commonly used method. To work this decrease, insert your right needle into the next two stitches on your left needle as if to knit them together, then knit them together as one stitch. This creates a single stitch where two stitches used to be.
2. Slip, Slip, Knit (SSK)
The slip, slip, knit (SSK) decrease is another frequently used method. To work this decrease, slip the next two stitches individually from your left needle to your right needle as if to knit, then slip them back onto your left needle in the same order. Insert your right needle into the front loops of these two stitches and knit them together as one stitch. This also creates a single stitch where two stitches used to be.
Note: In some patterns, the SSK decrease is used in combination with the K2TOG decrease to create a symmetrical effect.
3. Purl 2 Together (P2TOG)
When working in a pattern that includes purl stitches, you may need to decrease using the purl 2 together (P2TOG) method. To work this decrease, insert your right needle into the next two stitches on your left needle as if to purl them together, then purl them together as one stitch. This creates a single stitch where two stitches used to be.
4. Slip, Slip, Purl (SSP)
The slip, slip, purl (SSP) decrease is a variation of the SSK decrease, but used when working with purl stitches. To work this decrease, slip the next two stitches individually from your left needle to your right needle as if to purl, then slip them back onto your left needle in the same order. Insert your right needle into the back loops of these two stitches and purl them together as one stitch. This also creates a single stitch where two stitches used to be.
Remember, when decreasing stitches, it’s important to follow the instructions provided in your pattern to ensure that you are achieving the desired shaping and maintaining the correct stitch count. Practice these different methods, and soon you’ll be able to confidently decrease stitches and create beautifully shaped projects!
Finishing the Edges
In order to complete the sleeveless pullover, it is important to pay attention to the finishing of the edges. This step adds a polished and professional touch to the final product. There are several techniques that can be employed to finish the edges, depending on the desired outcome and the knitter’s skill level.
1. Ribbing
Ribbing is a popular finishing technique that creates a stretchy and decorative edge. It is often used for cuffs, collars, and hemlines. To achieve ribbing, the knitter alternates between knit and purl stitches in a specific pattern. This creates vertical columns of knit stitches that give the fabric elasticity. Ribbing can be done in various widths, depending on the desired look.
2. Garter Stitch Border
A garter stitch border is another option for finishing the edges of a sleeveless pullover. This technique involves knitting every row, resulting in a textured, squishy fabric. A garter stitch border can be added to the neckline, armholes, and bottom hem to provide a clean and durable edge. It is a simple and beginner-friendly technique that adds visual interest to the garment.
3. Picot Edging
For a more decorative and delicate finish, a picot edging can be used. This technique creates small, decorative loops along the edge of the fabric. To achieve a picot edging, the knitter will knit a small number of stitches, then create a loop by casting on a few extra stitches, and finally bind off those extra stitches. This creates an eye-catching edge that adds a feminine touch to the sleeveless pullover.
These are just a few examples of the techniques that can be used to finish the edges of a sleeveless pullover. The choice of finishing method will depend on the desired look, the knitter’s skill level, and personal preference. It is important to take the time to carefully finish the edges, as this step will greatly contribute to the overall appearance and durability of the finished garment.
Blocking and Care Instructions
Once you have finished knitting your sleeveless pullover, it is important to block your piece to ensure that it retains its shape and the stitches are even. Blocking involves gently wetting the garment, shaping it to the desired dimensions, and allowing it to dry flat. Here are some care instructions to follow:
- Hand wash: To ensure the longevity of your sleeveless pullover, it is recommended to hand wash it using a mild detergent. Avoid using harsh chemicals or bleach as they can damage the fibers.
- Warm water: Use lukewarm water to wash your pullover. Hot water can cause the fibers to shrink or lose their shape.
- Gently squeeze: After soaking your pullover in water, gently squeeze out the excess water. Do not twist or wring the garment, as this can stretch or distort the stitches.
- Dry flat: Lay your pullover on a clean towel or a drying rack to dry. Avoid hanging it, as this can cause it to stretch. Reshape the garment as needed to ensure it dries in its intended shape.
- Store carefully: When storing your sleeveless pullover, make sure it is clean and dry. Fold it neatly and place it in a drawer or closet away from direct sunlight or heat sources.
In summary, blocking your sleeveless pullover is an important step to ensure its shape and even stitches. By following the care instructions, you can extend the life of your garment and enjoy it for years to come.
Q&A:
What is a sleeveless pullover?
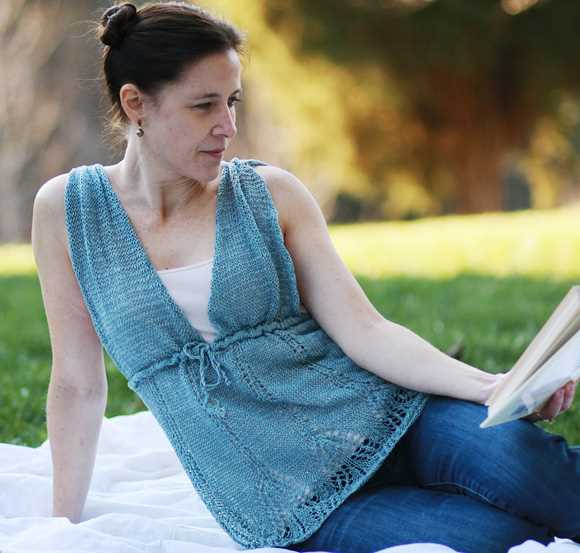
A sleeveless pullover, also known as a vest, is a type of knitted garment that is worn over a shirt or a blouse. It is designed to provide warmth to the upper body while leaving the arms free.
Can I knit a sleeveless pullover myself?
Yes, you can knit a sleeveless pullover yourself. There are many knitting patterns available that provide step-by-step instructions on how to create a sleeveless pullover. Whether you are a beginner or an experienced knitter, you can find a pattern that suits your skill level.
What materials do I need to knit a sleeveless pullover?
To knit a sleeveless pullover, you will need yarn suitable for the desired thickness and drape of the garment. You will also need knitting needles in the appropriate size for your chosen yarn, stitch markers, and a yarn needle for finishing. Additionally, you may need buttons or other closures if you choose to add them to your design.
Where can I find sleeveless pullover knitting patterns?
You can find sleeveless pullover knitting patterns in various places. Online knitting websites and forums often have a wide selection of patterns available for free or for purchase. You can also find knitting pattern books or magazines at your local craft store or library. Additionally, many knitting designers and bloggers offer their patterns for sale on their personal websites.
What are some tips for knitting a sleeveless pullover?
When knitting a sleeveless pullover, it’s important to pay attention to your gauge to ensure that the finished garment will fit properly. Make sure to knit a swatch and measure it to determine your stitches per inch. Additionally, consider the type and thickness of yarn you are using, as this can affect the drape and overall look of the pullover. Lastly, take your time and follow the pattern instructions carefully, ensuring that you understand each step before moving on to the next.
What is a sleeveless pullover knitting pattern?
A sleeveless pullover knitting pattern is a set of instructions that guide the knitter in creating a pullover or sweater without sleeves. It typically includes information on the required materials, gauge, stitch pattern, and step-by-step instructions for knitting the garment.
How do you knit a sleeveless pullover?
To knit a sleeveless pullover, you will first need to choose a suitable pattern and gather the necessary materials. Then, follow the instructions provided in the pattern, which typically include information on the stitch pattern, gauge, and shaping the front and back pieces. Once the front and back pieces are complete, you will join them together at the shoulders and side seams, and add any necessary finishing touches.