
Knitting your own stocking cap is a rewarding and enjoyable project that allows you to create a unique and personalized accessory. Whether you’re a beginner or an experienced knitter, this pattern is perfect for all skill levels. With just a few basic stitches and a cozy yarn, you’ll have a stylish and warm hat in no time!
One of the great things about this stocking cap pattern is its versatility. You can customize it to suit your own style and preferences. Choose a vibrant color for a bold statement piece, or go with a neutral shade for a classic look. You can also experiment with different stitch patterns to add texture to your hat.
Not only is knitting your own hat a fun and creative activity, but it also allows you to stay warm and cozy during the colder months. The chunky yarn used in this pattern provides extra insulation, making it perfect for chilly days. Plus, the snug fit of the stocking cap ensures that your head stays protected from the elements.
Whether you’re knitting this for yourself or as a gift for a loved one, this stocking cap pattern is sure to impress. Follow the step-by-step instructions to create a beautiful and functional hat that will last for years to come. Get your knitting needles ready and unleash your creativity with this delightful project!
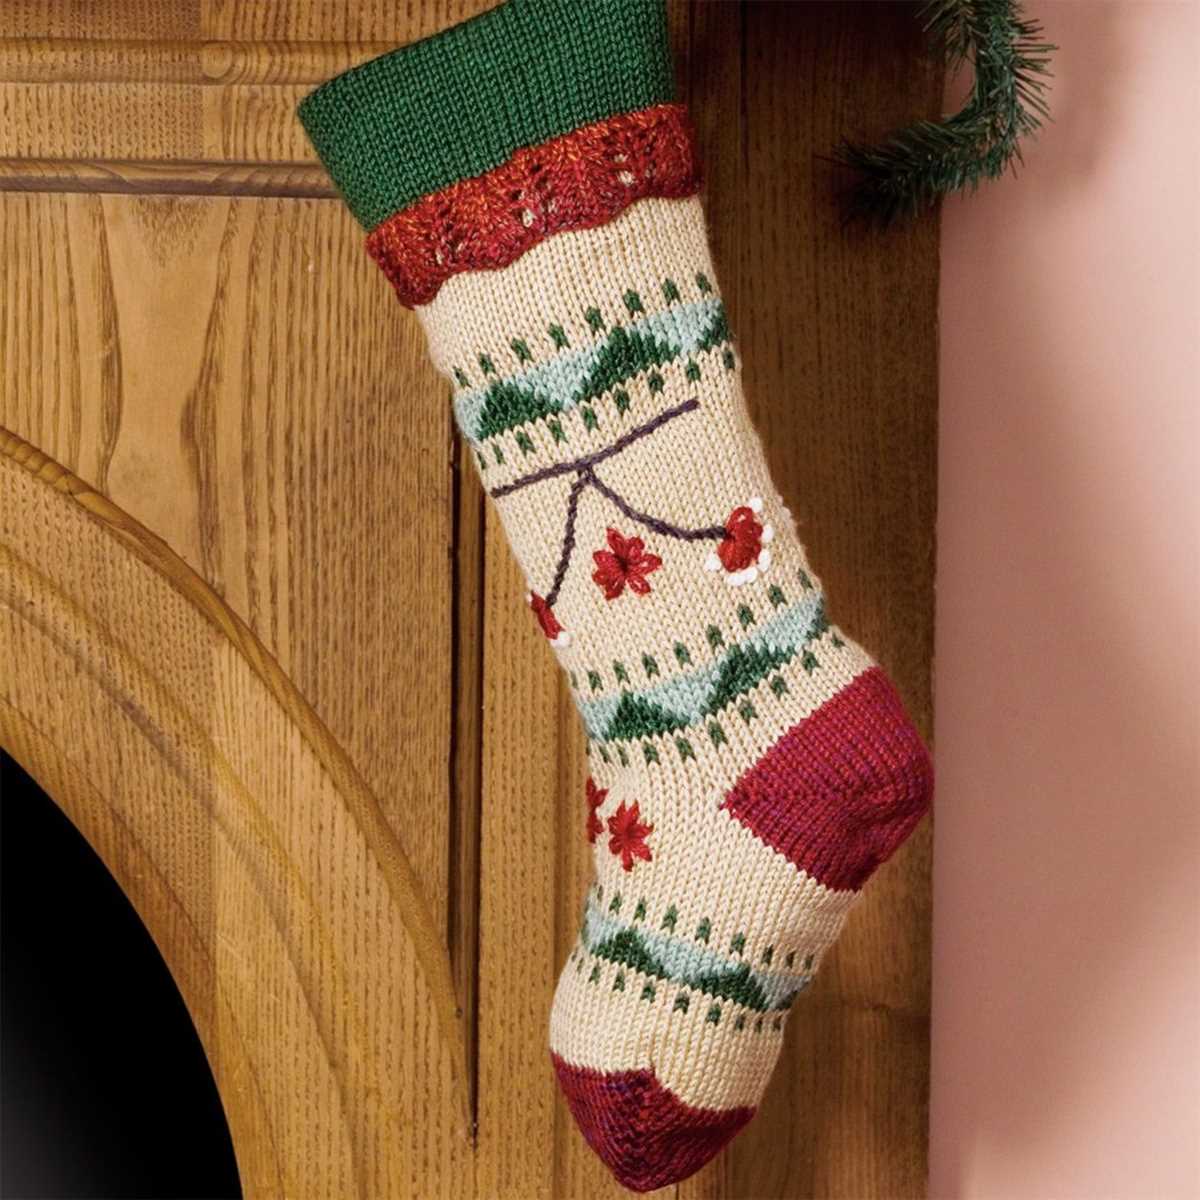
Stocking Cap Knit Pattern
Looking for a cozy and stylish accessory to keep you warm during the winter months? Look no further than a stocking cap! With its classic design and endless customization options, a stocking cap is an essential item for anyone’s cold weather wardrobe.
When it comes to knitting your own stocking cap, the possibilities are endless. Whether you prefer a simple and straightforward pattern or want to experiment with different stitches and patterns, there are countless options to choose from. You can easily find free patterns online or purchase a knitting book that includes stocking cap patterns.
If you’re a beginner knitter, don’t worry! Knitting a stocking cap is a great project to practice your skills and learn new techniques. Many patterns are designed with beginners in mind and include detailed instructions and helpful tips. You’ll be amazed at what you can create with just a few basic knitting techniques.
To get started, you’ll need some basic knitting supplies including knitting needles, yarn, and a tape measure. Be sure to choose a yarn that is soft and warm for maximum comfort. You can also add in fun details like pom poms, tassels, or patterns to make your stocking cap truly unique.
Once you have your supplies ready, it’s time to start knitting! Follow the pattern instructions carefully, taking note of any special stitches or techniques required. Don’t be afraid to ask for help if you’re unsure about anything – the knitting community is always willing to offer guidance and support.
With a little time and patience, you’ll have a beautiful stocking cap to keep you cozy all winter long. Whether you give it as a gift or keep it for yourself, your handmade stocking cap will be a cherished and practical accessory that will keep you warm and stylish for years to come.
Why Knit a Stocking Cap
Knitting a stocking cap is a popular choice for many reasons. Whether you are a beginner or an experienced knitter, this project offers a satisfying and rewarding experience. The rhythmic and soothing process of knitting allows you to relax and unwind while creating a functional and stylish accessory.
One of the main benefits of knitting a stocking cap is that it allows you to customize the design and fit. By choosing your own yarn, colors, and stitch pattern, you can create a unique cap that matches your personal style. Additionally, you can adjust the size and shape of the cap to ensure a perfect fit, providing warmth and comfort during the colder months.
Knitting a stocking cap also offers a practical solution for gifting. Handmade items are always cherished and appreciated, and a stocking cap is a thoughtful and functional gift that can be enjoyed by the recipient for years to come. The time and effort put into creating a hand-knitted cap shows that you care, making it a meaningful and heartfelt present.
Moreover, knitting a stocking cap allows you to explore different knitting techniques and patterns. From simple ribbing to intricate cables or colorwork, there are endless possibilities to challenge and expand your knitting skills. The repetitive nature of knitting a cap provides an excellent opportunity to practice and master various stitches and techniques.
If you are looking for a creative and relaxing project, consider knitting a stocking cap. It not only provides you with a practical and stylish accessory but also allows you to express your creativity and share your love for knitting with others.
Choosing the Right Yarn
When it comes to knitting a stocking cap, choosing the right yarn is essential for a successful project. The yarn you choose will greatly affect the final look, feel, and drape of the finished cap.
Fiber Content: One of the first factors to consider when selecting yarn is the fiber content. Different fibers have different characteristics and can create varying effects in your knitting. For a stocking cap, it is important to choose a yarn that is warm and soft. Wool is a popular choice as it provides excellent insulation and has a cozy feel. Alpaca is another option that offers warmth and a luxurious texture. Acrylic yarns can also be a good choice as they are often affordable, durable, and soft.
Weight and Gauge:
Weight: The weight of the yarn refers to its thickness. Stocking caps are typically knit using medium to bulky weight yarns to ensure warmth. However, your choice may also depend on the desired look and drape of the cap. A lighter weight yarn will create a more delicate and lightweight cap, while a bulkier yarn will result in a thicker and warmer cap.
Gauge: The gauge of the yarn refers to how many stitches and rows are needed to create a square inch of fabric. It is important to match the gauge specified in the knitting pattern to ensure that the cap will fit properly. If the yarn you choose has a different gauge, you may need to adjust your needle size to achieve the correct gauge.
Color and Texture:
Color: The color of the yarn is also an important consideration when knitting a stocking cap. You can choose a solid color for a classic and versatile look, or opt for a variegated yarn for a more playful and unique cap. Consider the recipient’s preferences and the intended use of the cap when selecting the color.
Texture: The texture of the yarn can also add interest to the stocking cap. You can choose a smooth and even yarn for a clean and polished look, or opt for a yarn with texture, such as a boucle or a yarn with a halo effect, for a more textured and cozy cap.
Essential Knitting Tools
Knitting is a craft that requires a few essential tools to create beautiful and cozy garments. Whether you are a beginner or an experienced knitter, having the right tools can make all the difference in your knitting projects. Here are some of the essential knitting tools that every knitter should have:
Knitting Needles
One of the most important knitting tools is a set of knitting needles. These come in various sizes, lengths, and materials such as metal, wood, or plastic. The size of the needles you need will depend on the thickness of the yarn you are using and the type of project you are working on. It is recommended to have a variety of needle sizes in your collection to accommodate different knitting projects.
Yarn
Yarn is the main material used in knitting, so it is vital to have a good selection of yarn in your knitting supplies. Yarn comes in various fibers, thicknesses, and colors, allowing you to create a wide range of knitted items. From wool to cotton to acrylic, there are yarn options available for every type of project. Having a variety of yarn in your stash will give you more flexibility in your knitting projects.
Stitch Markers
Stitch markers are small rings or clips that are used to mark specific stitches in your knitting. They can be helpful in keeping track of pattern repeats or identifying the beginning of a round in circular knitting. Stitch markers come in various shapes and sizes, and they can be either removable or fixed. Having a few stitch markers on hand will make your knitting projects more organized and efficient.
Tape Measure
A tape measure is an essential tool for measuring your knitting projects. It allows you to check your gauge, measure the length of your work, and ensure that your finished garment will fit properly. A flexible tape measure is recommended as it can easily wrap around curves and odd-shaped objects. A tape measure with both inches and centimeters markings will give you more flexibility in following patterns from different sources.
Scissors
Scissors are indispensable for any knitter. They are needed for cutting yarn, snipping off loose ends, and even correcting minor mistakes. It is a good idea to have a pair of small, sharp scissors that are dedicated solely to your knitting projects. This way, you will always have them on hand when you need them without having to search through your regular scissors.
These are just a few of the essential knitting tools that every knitter should have. Investing in quality tools can enhance your knitting experience and help you create beautiful and professional-looking garments. So gather your tools, pick up your knitting needles, and start creating your next knitting masterpiece!
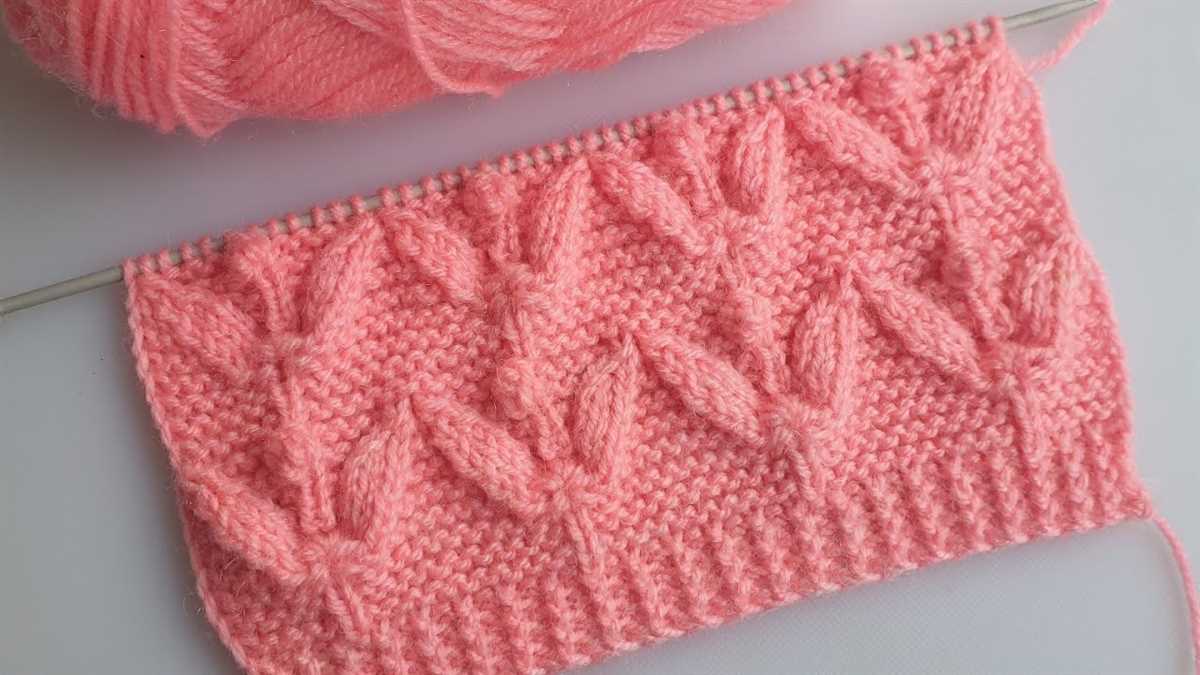
Understanding the Basic Stitches
When it comes to knitting a stocking cap, it’s crucial to have a solid understanding of the basic stitches used in the pattern. These stitches form the foundation of the cap and determine its texture and stretchiness. By mastering these stitches, you’ll be able to create a beautifully knit cap that is both comfortable and stylish.
The knit stitch: The knit stitch is the most basic stitch in knitting. It creates a smooth and tight texture, perfect for the body of the stocking cap. To knit, insert the right needle into the front of the first stitch on the left needle, from left to right. Wrap the yarn counterclockwise around the right needle and pull it through the stitch, slipping the old stitch off the left needle. Repeat this process for each stitch in the row.
The purl stitch: The purl stitch is the reverse of the knit stitch and adds a bumpy texture to the cap. To purl, insert the right needle into the front of the first stitch on the left needle, from right to left. Wrap the yarn counterclockwise around the right needle and pull it through the stitch, slipping the old stitch off the left needle. Repeat this process for each stitch in the row.
The rib stitch: The rib stitch is a combination of the knit and purl stitches and creates a stretchy and textured fabric. It is often used for the brim of the stocking cap. To create a rib stitch, alternate between knitting and purling stitches in a specific pattern. A common pattern is knit 2, purl 2, repeating this sequence until the end of the row.
The decreasing stitch: The decreasing stitch is essential for shaping the top of the stocking cap. By decreasing the number of stitches in each row, you create a smaller circumference and a pointed top. The most common decrease stitch is the knit 2 together (k2tog) stitch. To perform this stitch, insert the right needle into the front of the first two stitches on the left needle, from left to right. Wrap the yarn counterclockwise around the right needle and pull it through the two stitches, slipping the old stitches off the left needle.
The yarn over stitch: The yarn over stitch is used to create decorative holes or eyelets in the stocking cap. To perform this stitch, simply bring the yarn over the right needle from the back to the front and continue with the next stitch. These eyelets can be used for adding embellishments or attaching pom-poms to the cap.
Getting Started with the Knitting Pattern
If you’re ready to tackle your first stocking cap knitting project, you’ve come to the right place. Knitting a stocking cap is a fun and rewarding project, and with the right pattern, you’ll be able to create a cozy hat in no time. Whether you’re a beginner knitter or have some experience under your belt, this pattern is suitable for all skill levels.
Before you start knitting, gather all the necessary materials. You’ll need a pair of knitting needles, preferably in a size that corresponds with the gauge specified in the pattern. Additionally, you’ll need a skein of yarn in your desired color, and a tapestry needle for weaving in ends. Once you have all your supplies ready, it’s time to cast on and get started!
Casting On
To cast on, secure your yarn and make a slipknot. Slide the slipknot onto one of your knitting needles, leaving a tail of about 6 inches. With your other hand, hold the knitting needle with the slipknot in your right hand.
Insert the point of the empty knitting needle in your left hand into the slipknot, from front to back. With your right hand, hold the yarn that is attached to the skein and use it to form a loop over the tip of the left knitting needle. Pull the loop through the slipknot, creating a new stitch on the empty knitting needle. Repeat this process until you have the required number of stitches specified in the pattern.
With the cast-on stitches in place, you’re ready to begin working the pattern. Follow the instructions step-by-step, making sure to keep track of your stitches and rows. As you work, remember to check your gauge periodically to ensure that your hat will be the right size. Knit each row with care and precision, and before you know it, you’ll have a beautiful stocking cap to keep you warm during the colder months.
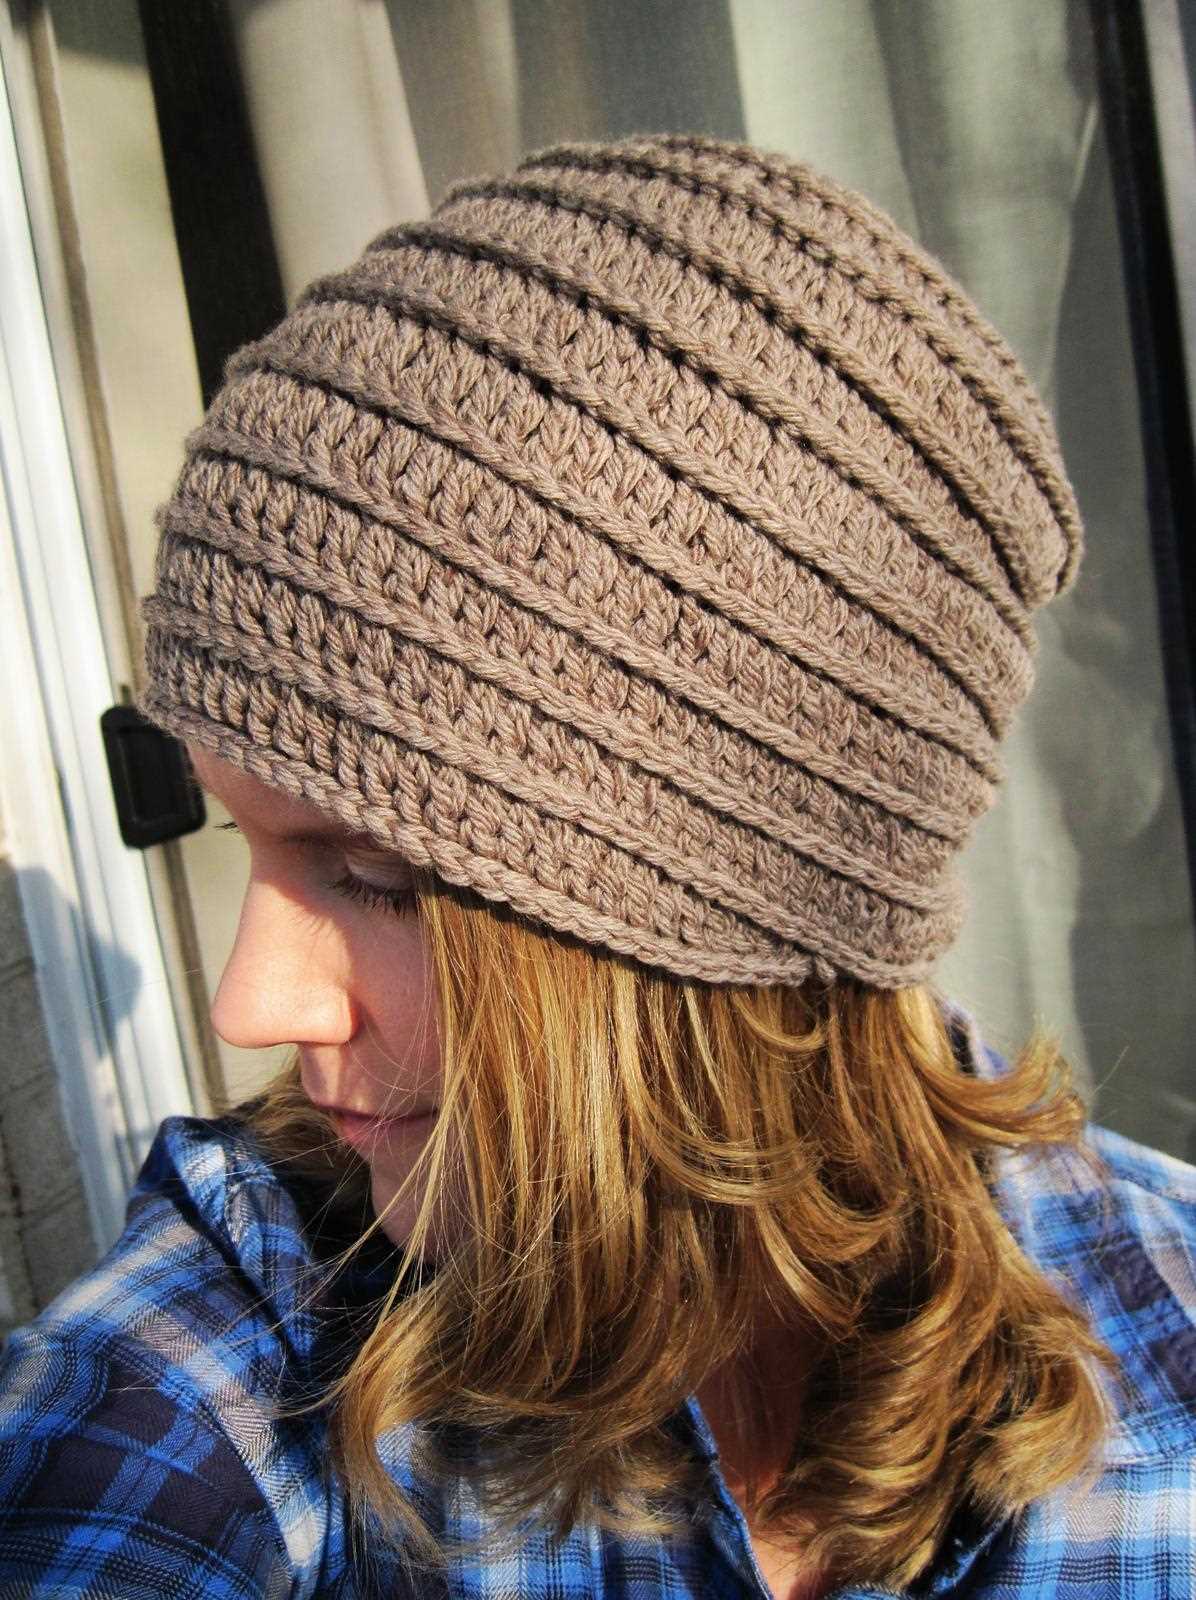
Working the Ribbing
When knitting a stocking cap, one of the first steps is to work the ribbing. The ribbing creates a stretchy and snug band that fits around the wearer’s head. It is typically knit in a combination of knit and purl stitches, creating a textured fabric that can easily expand and contract.
To start the ribbing, you will need to cast on the desired number of stitches onto your knitting needles. The number of stitches will depend on the size of the cap and the desired width of the ribbing. It is recommended to use a smaller needle size for the ribbing than for the main body of the cap, as this will help create a tighter fabric.
Once you have cast on, you can begin working the ribbing pattern. The most common ribbing pattern is the 1×1 rib, which alternates between knit and purl stitches. This pattern creates a nice, alternating texture that is easy to work and gives the ribbing a lot of stretch. To work the 1×1 rib, you simply start by knitting one stitch, then purling one stitch, and repeat this sequence until you reach the end of the row. Repeat this pattern for the desired number of rows, depending on the length of the ribbing you want.
There are other ribbing patterns you can try as well, such as the 2×2 rib or the 3×1 rib. The 2×2 rib alternates between two knit stitches and two purl stitches, creating a slightly wider and more textured ribbing. The 3×1 rib alternates between three knit stitches and one purl stitch, creating a ribbing with a wider knit section and a narrower purl section. These patterns can add variety and interest to your stocking cap, giving it a unique look.
Remember to keep your tension even and consistent as you work the ribbing. This will ensure that the ribbing is stretchy and snug, but not too tight. You can also try using a stretchy cast-on method, such as the long tail cast-on, to give your ribbing even more elasticity. Once you have completed the ribbing, you can continue on to the main body of the stocking cap, following the pattern instructions for shaping and decreasing as necessary.
Creating the Body of the Cap
Once you have completed the ribbed brim of your stocking cap, it’s time to move on to creating the body. This is where you will begin to see your cap take shape and start to resemble a cozy winter accessory.
Start by continuing the pattern that you established in the ribbed brim. If you were using a specific stitch pattern, such as a knit 2, purl 2 rib, continue this pattern for the body of the cap. Alternatively, you can switch to a different stitch pattern or even create your own unique design. The body of the cap is the perfect opportunity to get creative and experiment with different textures and patterns.
If you’re using a traditional stocking cap pattern, you will typically start by knitting several rows in the main stitch pattern. This is usually a simple knit stitch, but again, you can customize this to suit your preferences. These initial rows will set the foundation for the body of the cap and establish its overall length.
Depending on the style and fit you prefer, you can continue knitting in the same stitch pattern for the entire body of the cap, or you can introduce additional stitch patterns or colorwork techniques. For example, you could create stripes using different color yarns or incorporate a cable pattern for added visual interest.
As you progress with the body of the cap, remember to check your gauge periodically to ensure that it remains consistent with the ribbed brim. This will help ensure a proper fit and prevent any unwanted stretching or shrinking.
Continue working on the body of the cap until it reaches the desired length, usually around 6-8 inches for an average adult-sized cap. You can also try on the cap as you go to determine if it’s the right length for your head. Once you’re satisfied with the length, you can proceed to the next step, which is usually shaping the crown of the cap.
Shaping the Crown
When knitting a stocking cap, one of the most important steps is shaping the crown. This is the part of the cap that goes over the top of the head and gives it its rounded shape. Shaping the crown is typically done by decreasing the number of stitches in a gradual and controlled manner.
To shape the crown, the knitter will often start by knitting a few rounds even, maintaining the same number of stitches. Then, they will begin the decrease rounds. Decreases are usually made by knitting two stitches together, either knitwise or purlwise, depending on the stitch pattern being used.
There are many ways to shape the crown of a stocking cap, and the choice of method will depend on the desired look and fit. Some popular methods include using evenly spaced decrease rounds, shaping the crown with a specific pattern or motif, or using short rows to create a more tailored fit.
It is important to carefully follow the pattern instructions for shaping the crown, as this will ensure that the cap fits properly and looks as intended. Proper shaping will prevent the top of the cap from being too loose or too tight and will create a sleek and polished finished product.
In summary, shaping the crown of a stocking cap is an essential step in the knitting process. Careful attention to detail and following the pattern instructions will result in a well-fitting and stylish cap. Whether using basic decrease rounds or more advanced techniques, the crown shaping will add the finishing touch to the cap and make it a cozy and fashionable accessory.
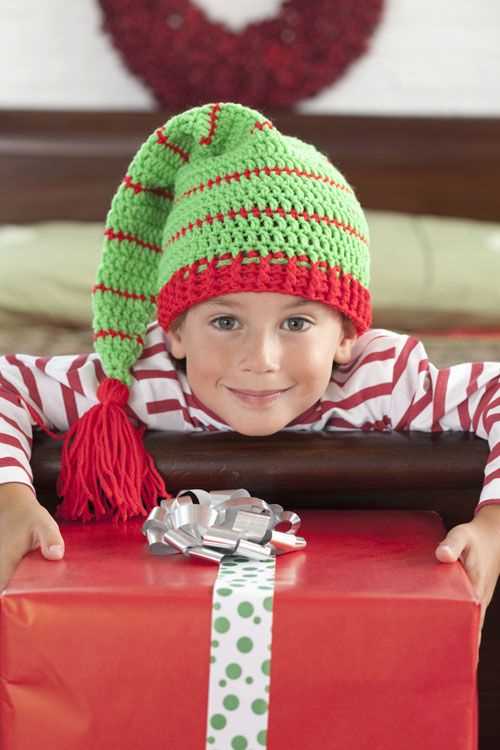
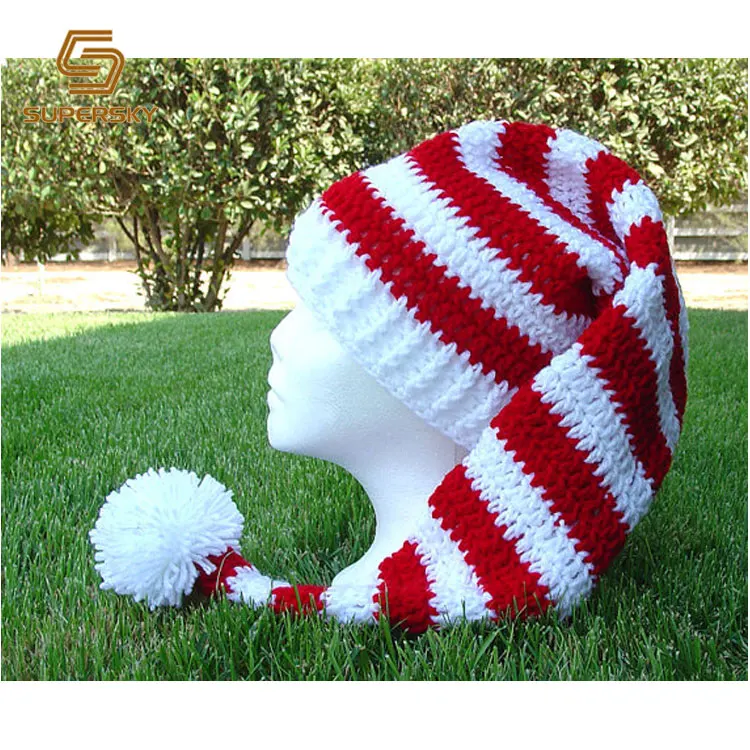
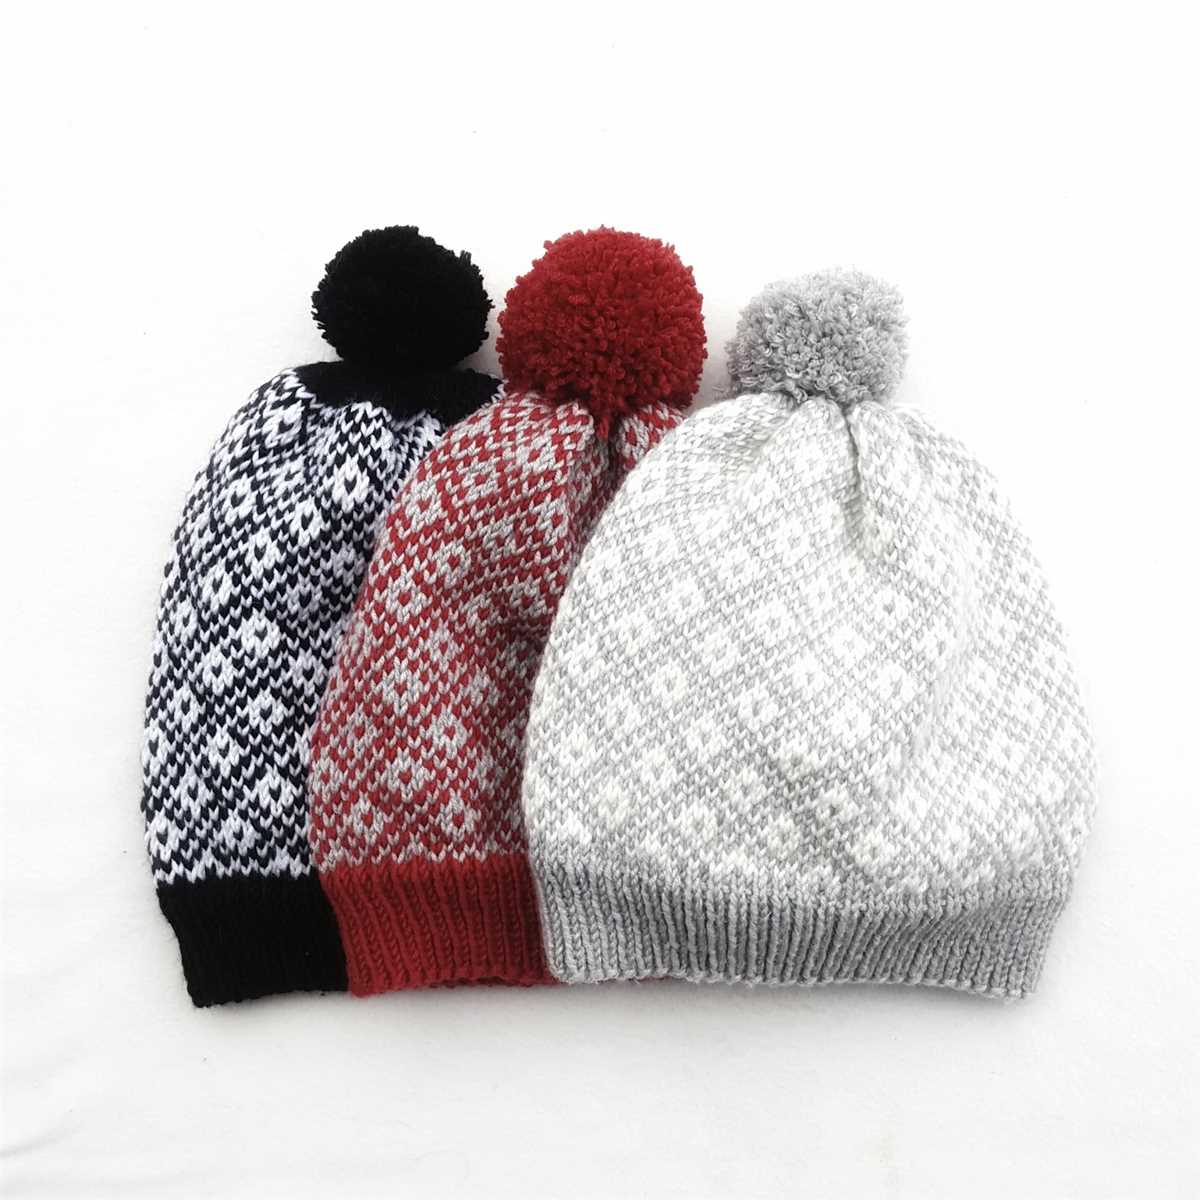
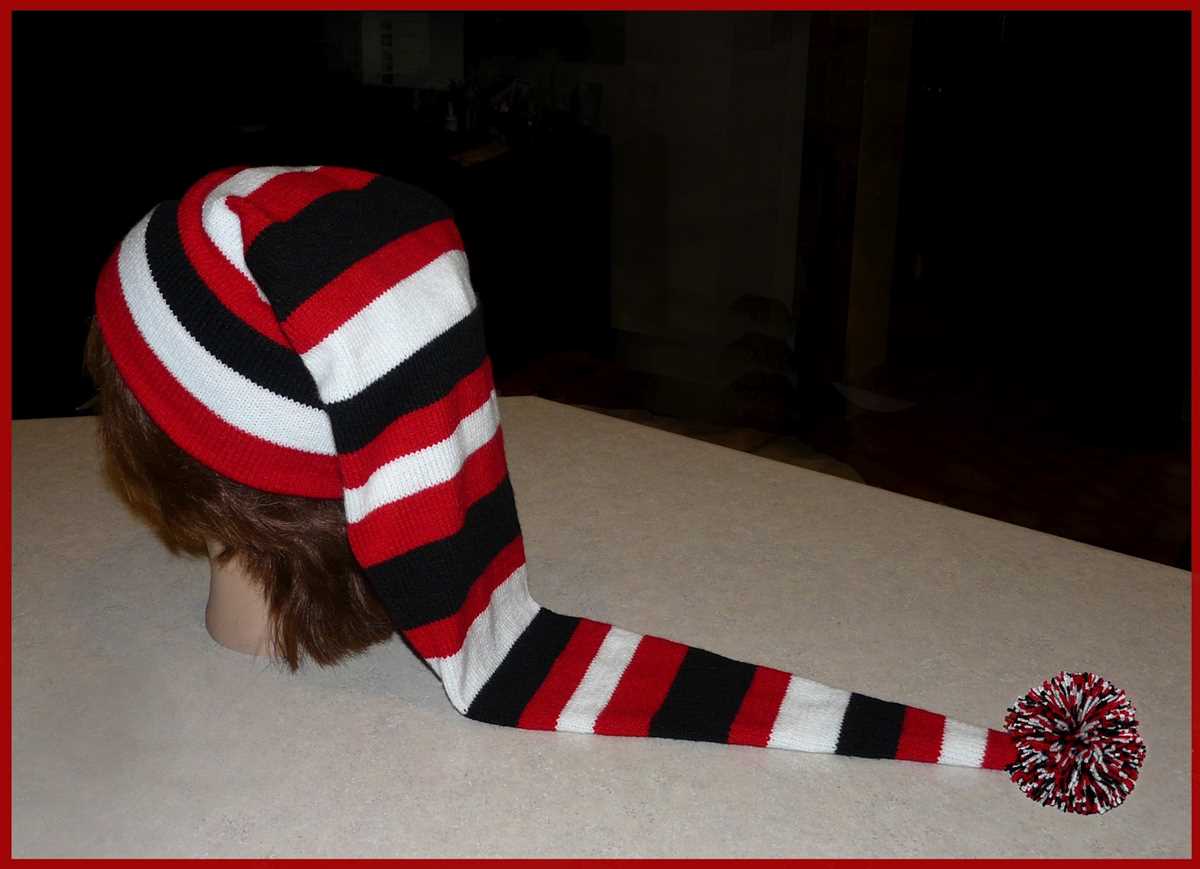
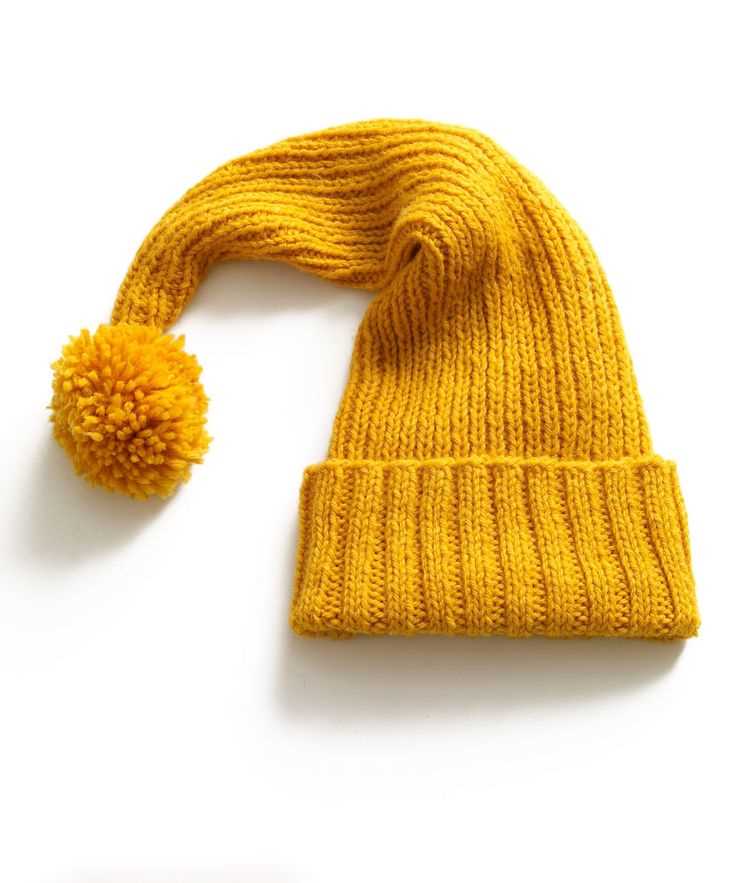
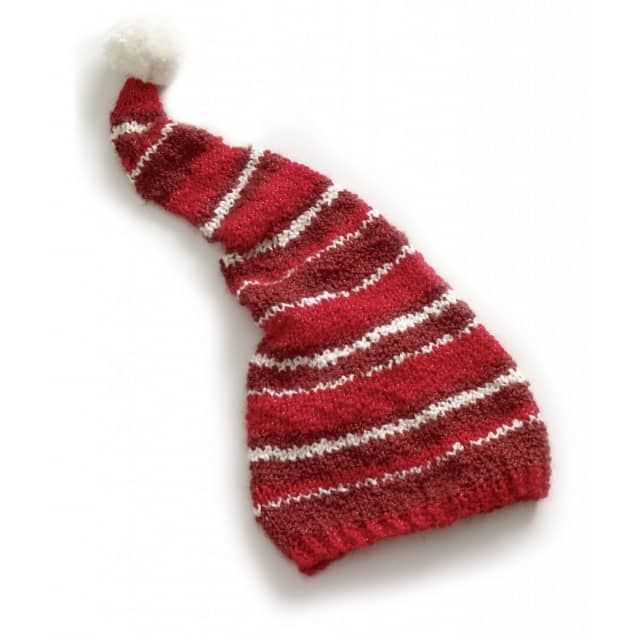
Adding a Pom Pom
Adding a pom pom to your stocking cap knit pattern is a fun way to add a pop of color and playfulness to your finished hat. Whether you choose to make the pom pom yourself or purchase one from a craft store, it can be easily attached to the top of your hat to give it a distinctive look.
If you want to make your own pom pom, there are several methods you can try. One popular method is using a pom pom maker, which is a tool specifically designed for creating fluffy and even pom poms. Simply wrap yarn around the pom pom maker, tie it tightly in the middle, and then cut through the loops to create the pom pom. Another method is using a cardboard template, where you cut out two identical circles of cardboard, wrap yarn around them, and then cut through the yarn to make the pom pom.
Once you have your pom pom ready, you can attach it to your stocking cap knit pattern. The easiest method is to sew it on using a needle and thread. Simply sew through the center of the pom pom and then through the top of the hat, making sure it is securely fastened. Alternatively, you can also use a hot glue gun to attach the pom pom, especially if you are using a store-bought one with a built-in attachment. Just apply a small amount of hot glue to the top of the hat and press the pom pom firmly onto it.
Adding a pom pom is a fun and customizable way to personalize your stocking cap knit pattern. Whether you choose a bold and vibrant pom pom or a more subtle one, it will undoubtedly add a touch of whimsy and style to your finished hat. So go ahead and give it a try!
Blocking and Finishing
Once you have finished knitting your stocking cap, the next step is to block and finish it to give it a polished and professional look. Blocking is the process of shaping your knitted piece and allowing it to relax into its final form. This is especially important for stocking caps, as it helps them retain their shape and fit properly on the head. To block your stocking cap, you will need a blocking mat or towel, pins, and a spray bottle filled with water.
First, lay your stocking cap flat on the blocking mat or towel. Gently stretch it into shape, making sure the ribbing is even and the crown is centered. Use pins to hold the cap in place, pinning along the edges and corners. If there are any lace or cable patterns on your cap, make sure to pin them out to show their full effect.
Next, lightly mist the cap with water using the spray bottle. Be careful not to soak the cap, as this can cause it to lose its shape. Allow the cap to dry completely in this stretched state, which could take several hours or overnight. Avoid touching or moving the cap while it is drying to ensure that it retains its shape.
Once the cap is dry, carefully remove the pins. Your stocking cap is now blocked and ready to be finished. Depending on the pattern and your personal preference, you may need to weave in any loose ends, sew on a pom-pom or other decorative element, or add a ribbed or folded brim. Take the time to carefully finish these details to give your cap a polished look.
Overall, blocking and finishing are essential steps in the knitting process. They not only ensure that your stocking cap looks its best, but they also help to improve the overall fit and durability of the finished piece. So don’t skip these important steps and take the time to give your stocking cap the finishing touches it deserves.
Extending the Pattern
Once you have mastered the basic stocking cap knit pattern, the possibilities for customization are endless. Here are a few ideas to help you extend the pattern and create unique and personalized hats:
1. Colorwork
Add a pop of color to your stocking cap by incorporating colorwork techniques. You can create stripes, geometric patterns, or even intricate Fair Isle designs. Experiment with different color combinations to make your hat stand out.
2. Embellishments
Add a touch of whimsy to your stocking cap by attaching embellishments such as pom-poms, buttons, or fabric flowers. These small details can take your hat from simple to stylish in no time.
3. Texture
Add some texture to your hat by incorporating different stitch patterns. You can use ribbing, cables, or lace stitches to create interesting and unique textures. Not only will this add visual interest to your hat, but it will also provide extra warmth and insulation.
4. Custom Fit
Adjust the pattern to create a custom fit hat. You can modify the number of stitches or rows to make the hat larger or smaller. Additionally, you can experiment with different needle sizes to achieve the desired fit and gauge.
5. Embroidery
Take your hat to the next level by adding intricate embroidery. You can use simple stitches to create patterns, motifs, or even personalized messages. Embroidery not only adds an element of creativity, but it also adds a touch of elegance to your hat.
- Colorwork
- Embellishments
- Texture
- Custom Fit
- Embroidery
Troubleshooting Tips
If you are experiencing any issues while knitting the stocking cap, here are some troubleshooting tips that may help:
- Tangled Yarn: If your yarn becomes tangled or knotted, take a few minutes to untangle it before continuing. This will prevent any further issues when working with the yarn.
- Uneven Stitches: If you notice that your stitches are uneven or loose, try adjusting your tension. Make sure you are consistently pulling the yarn tight to create even stitches throughout your knitting.
- Dropped Stitches: If you accidentally drop a stitch, don’t panic. Use a crochet hook or a spare knitting needle to pick up the dropped stitch and place it back onto the knitting needle. Be careful not to split the yarn or create additional dropped stitches.
- Wrong Stitch Count: If you find that the number of stitches you have is not aligning with the pattern instructions, double-check your work. Count your stitches carefully and make sure you are following the pattern correctly. It’s possible that you may have missed a decrease or increase row.
- Twisted Stitches: Sometimes, stitches can become twisted when knitting in the round. To prevent this, make sure the first stitch of each round is knitted tightly. This will help keep your stitches aligned and prevent any twisting.
- Difficulty with Colorwork: If you are having trouble with the colorwork sections of the pattern, take your time and work slowly. It may be helpful to use stitch markers to distinguish between different sections of the chart. Practice with smaller colorwork projects before attempting more complex designs.
Remember, knitting takes practice and patience. Don’t get discouraged if you encounter any difficulties along the way. With these troubleshooting tips and some perseverance, you’ll be able to successfully knit a beautiful stocking cap.