
If you’re looking for a unique and stylish accessory to add to your winter wardrobe, look no further than a top hat. Not only do top hats add a touch of elegance to any outfit, they also provide warmth and protection from the cold weather. Plus, making your own top hat is a fun and rewarding knitting project that allows you to customize the style and design to match your personal taste.
In this article, we will take you through the process of knitting your own top hat from start to finish. From selecting the right yarn and needles, to casting on and shaping the crown, to adding the finishing touches, we’ll cover everything you need to know to create a one-of-a-kind top hat that will turn heads wherever you go.
One of the first things to consider when knitting a top hat is the choice of yarn. While you can use any type of yarn, it’s important to select something that will hold its shape and provide the necessary structure for the hat. A worsted weight yarn is a popular choice as it is sturdy yet still soft and comfortable to wear. You may also want to consider using a yarn with a slight sheen or texture to add a touch of elegance to your hat.
Top Hat Knitting Pattern
A top hat is a classic and elegant accessory that can add a touch of style to any outfit. Whether you’re attending a formal event or wanting to make a fashion statement, knitting your own top hat can be a fun and rewarding project. With the right knitting pattern, you can create a unique and personalized hat that fits your style and personality.
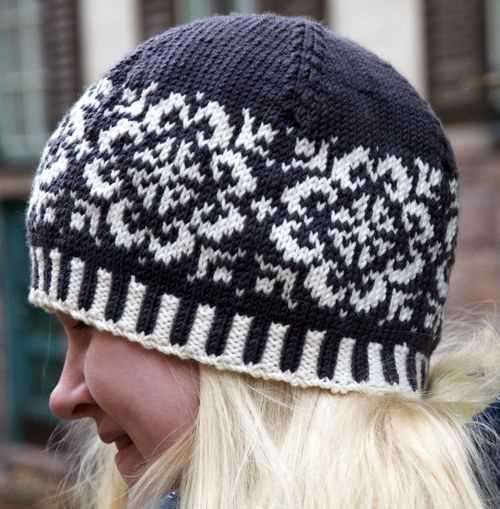
When choosing a top hat knitting pattern, it’s important to consider the level of difficulty and the type of yarn you want to use. Some patterns may require advanced knitting techniques, such as stranded colorwork or lace patterns, while others may be more suitable for beginners. The type of yarn you choose can also affect the final look and feel of the hat, so be sure to select a yarn that matches your desired outcome.
Basic Top Hat Knitting Pattern:
- Materials needed: circular knitting needles, double-pointed knitting needles, yarn, tapestry needle, stitch markers
- Cast on the desired number of stitches, depending on your head size and the desired fit of the hat.
- Join the round, being careful not to twist the stitches.
- Begin knitting in the round, using a stitch marker to mark the beginning of the round.
- Knit the brim of the hat in a ribbing pattern for the desired length.
- Switch to stockinette stitch for the body of the hat, knitting until the desired height is reached.
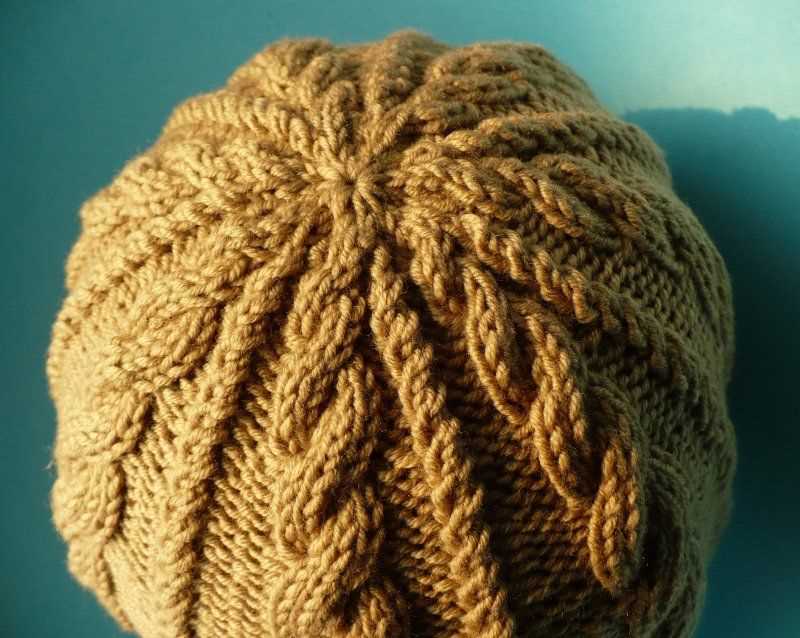
- Shape the crown of the hat by decreasing the number of stitches gradually.
- Switch to double-pointed needles when necessary to accommodate the decreasing number of stitches.
- Continue decreasing until only a few stitches remain.
- Cut the yarn, leaving a long tail, and thread it through the tapestry needle.
- Thread the needle through the remaining stitches, pull tight to close the top of the hat, and secure the yarn.
- Weave in any loose ends and block the hat to shape.
- Enjoy your handmade top hat!
With this basic top hat knitting pattern, you can customize and embellish your hat to your liking. Add a decorative hat band, a bow, or even some unique buttons to make it uniquely yours. Knitting a top hat can be a fun and challenging project that allows you to showcase your knitting skills and create a one-of-a-kind accessory.
Materials Needed for the Top Hat
Making a top hat requires a few specific materials to ensure the best results. Here is a list of the materials you will need:
1. Yarn:
To knit the top hat, you will need a sturdy and smooth yarn that will hold its shape well. It is recommended to use a medium or worsted weight yarn in a color of your choice.
2. Knitting Needles:
You will need a pair of circular knitting needles in the recommended size for your chosen yarn. The length of the needles will depend on the circumference of the hat you want to make.
3. Double Pointed Needles:
In addition to the circular needles, you will also need a set of double pointed needles in the same size. These will be used for knitting the crown of the hat.
4. Stitch Markers:
Stitch markers are essential for keeping track of your stitches and dividing the hat into sections. You will need at least two stitch markers for this project.
5. Tapestry Needle:
A tapestry needle, also known as a yarn needle, will be used to weave in the loose ends of yarn and sew any small seams.
6. Scissors:
A good pair of scissors is necessary for cutting the yarn and trimming any excess.
7. Measuring Tape:
A measuring tape will come in handy for measuring the circumference of your head and determining the size of the hat you want to make.
With these materials on hand, you will be well-prepared to start knitting your very own top hat.
Casting On Stitches
Before you can start knitting a top hat, you need to cast on stitches. Casting on is the process of creating the foundation row of stitches on your knitting needle. This is the starting point of your project and determines the width of your knitting. There are several methods for casting on stitches, but the long-tail cast on method is commonly used for top hat knitting patterns.
To begin the long-tail cast on, first, you need to estimate the length of yarn needed. Measure the yarn by wrapping it around the knitting needle for each stitch and then adding a bit of extra length. This extra length is necessary for the tail that will be used to create the stitches.
Next, make a slipknot by creating a loop with the yarn, bringing the end through the loop, and pulling it tight. Slip this knot onto one of the knitting needles, leaving a long tail of yarn hanging down. Hold the needle with the slipknot in your right hand and the other needle in your left hand.
Insert the tip of the right-hand needle into the slipknot from front to back, then wrap the yarn around the right-hand needle once in a counter-clockwise direction. Use your right thumb to hold the yarn in place on the needle.
With your left hand, bring the left-hand needle under the yarn that is wrapped around the right-hand needle, then poke it through the loop on the right-hand needle. Grab the yarn with the left-hand needle and pull it through the loop, creating a new stitch on the right-hand needle.
Continue this process of wrapping the yarn, inserting the left-hand needle, and pulling the yarn through the loop until you have cast on the desired number of stitches. Make sure to keep the tension even as you work, not too tight or too loose. Once all the stitches are cast on, you can then begin knitting the top hat pattern.
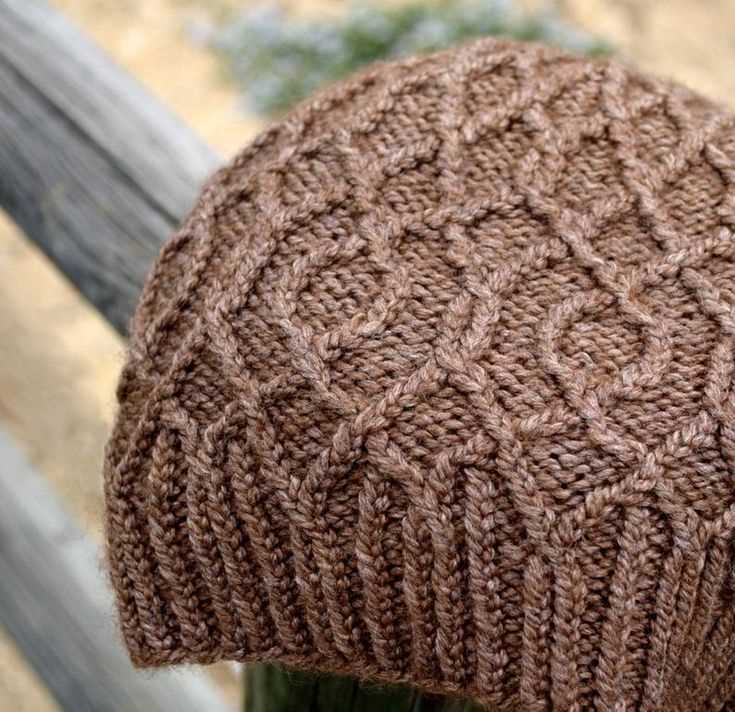
Ribbing Pattern for the Brim
When knitting a top hat, the ribbing pattern for the brim is an important element to consider. Ribbing is a technique that creates a stretchy and flexible fabric, which is ideal for hat brims as it allows for a comfortable and snug fit.
To create the ribbing pattern for the brim, you will need to alternate between knit stitches and purl stitches. This pattern is commonly known as 1×1 ribbing, as it consists of one knit stitch followed by one purl stitch. The 1×1 ribbing pattern creates columns of raised knit stitches separated by recessed purl stitches.
To start the ribbing pattern, cast on an appropriate number of stitches for the brim. Then, work the first row by knitting the first stitch and purling the second stitch. Continue this pattern until the end of the row. For the following rows, continue to alternate between knitting and purling stitches to create the ribbing effect.
It is important to maintain tension while knitting the ribbing pattern to ensure an even and consistent fabric. This can be achieved by using the appropriate needle size and adjusting your tension as needed. Additionally, make sure to follow the pattern consistently throughout the brim to create an aesthetically pleasing design.
The ribbing pattern for the brim not only adds a decorative element to the top hat but also serves a functional purpose. The stretchy nature of ribbing allows the hat to fit comfortably on the wearer’s head while providing warmth and insulation. Experiment with different ribbing patterns, such as 2×2 or twisted ribbing, to create unique designs and textures for your top hat.
Knitting the Main Body of the Hat
Once you have completed the brim of your top hat, it’s time to move on to knitting the main body. This part of the hat will determine its overall shape and size, so it’s important to follow the pattern carefully.
Begin by casting on the required number of stitches as specified in the pattern. Make sure to use the appropriate size of knitting needles to achieve the desired gauge. It may be helpful to use stitch markers to keep track of your progress and mark any important sections.
As you knit the main body of the hat, you will likely encounter different stitch patterns or techniques. The pattern will guide you through these steps, providing instructions for any necessary increases or decreases. Pay close attention to any specific stitch counts or pattern repeats.
If the pattern includes shaping for the crown of the hat, such as decreases to create a tapered top, be sure to carefully follow the instructions. This will give your hat its distinctive shape and allow it to fit properly on the head.
Continue knitting until you have reached the desired length for the main body of the hat. Remember to periodically try it on to check the fit and adjust accordingly. Once you are satisfied with the length, you can proceed to the next steps in the pattern, such as the final decreases or the finishing details.
Decreasing for Crown Shaping
When knitting a top hat, decreasing for crown shaping is an essential step. This process creates the tapered shape at the top of the hat, giving it a more fitted and stylish look. There are several different methods for decreasing, but the most common ones include knit two together (k2tog) and slip, slip, knit (ssk).
To begin decreasing for the crown, you will typically start with a certain number of stitches on your needles. The specific number will depend on the size of the hat and the desired fit. Once you have determined the number of stitches, you can follow a decreasing pattern to gradually reduce the stitch count.
Decreasing Methods
- K2tog: This method involves knitting two stitches together as if they were one. Insert your right needle into the next two stitches on the left needle, knit them together, and then slide the original stitches off the left needle.
- Ssk: Slip, slip, knit is another commonly used decrease. Slip the next two stitches, one at a time, from the left needle to the right needle without knitting them. Then, insert the left needle into the front loops of the slipped stitches and knit them together.
When following a decreasing pattern, you will typically alternate between these two methods to create evenly spaced decreases around the crown of the hat. The pattern will provide specific instructions on when and where to perform each decrease.
It is important to note that decreasing for crown shaping may result in a tighter fabric, so it’s essential to adjust your tension and gauge accordingly. Additionally, when you have decreased to a certain point, the pattern may instruct you to cut the yarn and use a needle to thread it through the remaining stitches, creating a gathered closure at the top of the hat.
Finishing the Top Hat
After completing the knitting pattern for the top hat, you will need to finish it off to give it a polished look. This involves several steps to ensure the hat is sturdy, clean, and ready to be worn.
Blocking: Begin by blocking the knitted hat to help it maintain its shape and allow the stitches to relax. Wet the hat and gently stretch it to the desired size, making sure to maintain the shape of the crown and brim. Use blocking pins to hold the hat in place, and leave it to dry completely.
Lining: To add comfort and stability to the top hat, consider adding a lining. Cut a piece of fabric that is slightly larger than the inside circumference of the hat. Fold the edges under and stitch them in place by hand or using a sewing machine. Attach the lining to the inside of the hat using small whip stitches.
Finishing touches: Once the hat is blocked and lined, it’s time to add any additional details or embellishments. This could include sewing on a ribbon or band around the brim, attaching a decorative button or brooch, or even adding feathers or flowers for a special touch. Use needle and thread to securely attach these embellishments to the hat.
Cleaning and care: To keep your top hat looking its best, it’s important to properly clean and care for it. Follow the care instructions for the type of yarn used in the knitting pattern. If the hat is made of wool, it may need to be hand washed and reshaped while damp before drying. Store the hat in a cool, dry place to prevent any damage or distortion.
Adding Embellishments
When knitting a top hat, adding embellishments can take it from plain to stylish in no time. There are several ways to incorporate embellishments into your design, depending on your personal preference and skill level.
1. Ribbons and Bows: One simple way to enhance your top hat is by attaching ribbons or bows. Choose a ribbon in a color that complements your hat and sew it around the base or create a bow and attach it as a decorative element on the side.
2. Buttons: Buttons can add a touch of charm to your top hat. You can sew them onto the brim or use them to create a unique pattern on the crown. Choose buttons in various sizes and colors to create a whimsical and eye-catching design.
3. Embroidery: For those who enjoy more intricate work, embroidery can be a beautiful way to embellish your top hat. You can embroider flowers, patterns, or even small images onto the hat. This method requires more time and skill, but the results can be truly stunning.
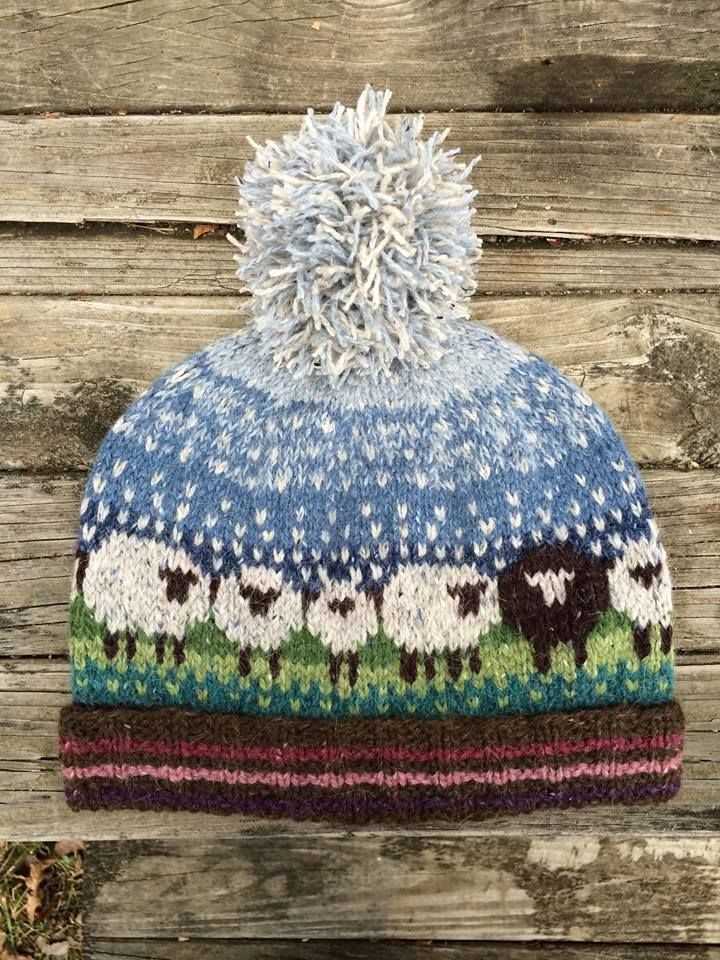
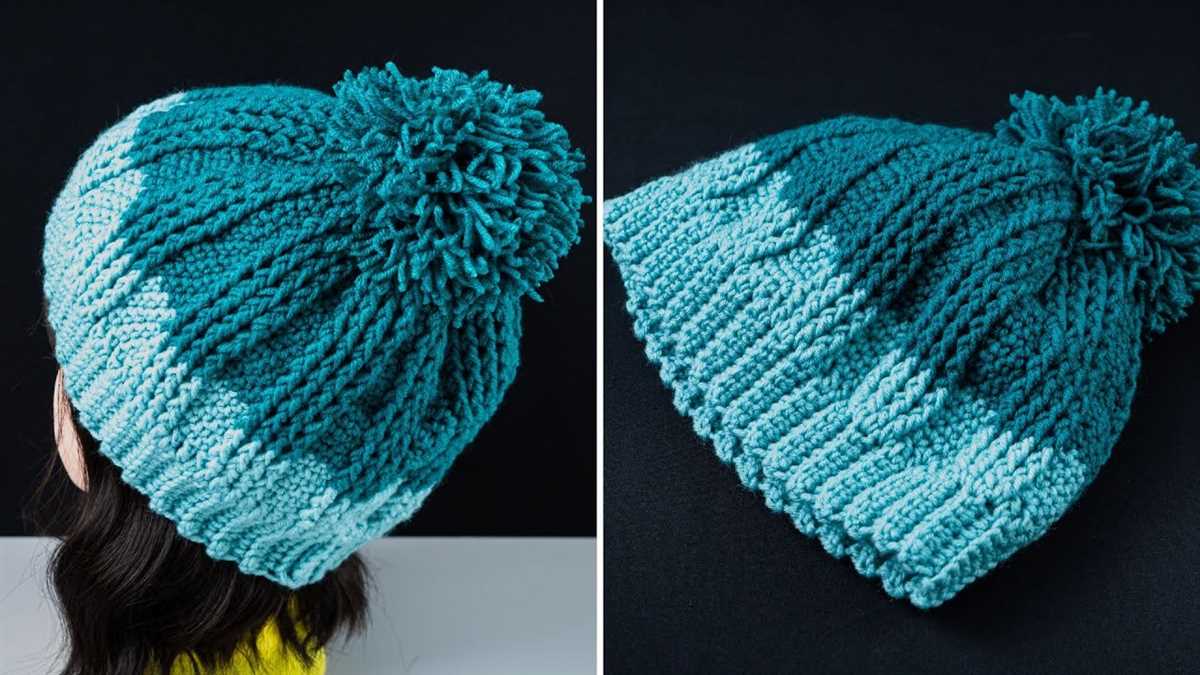
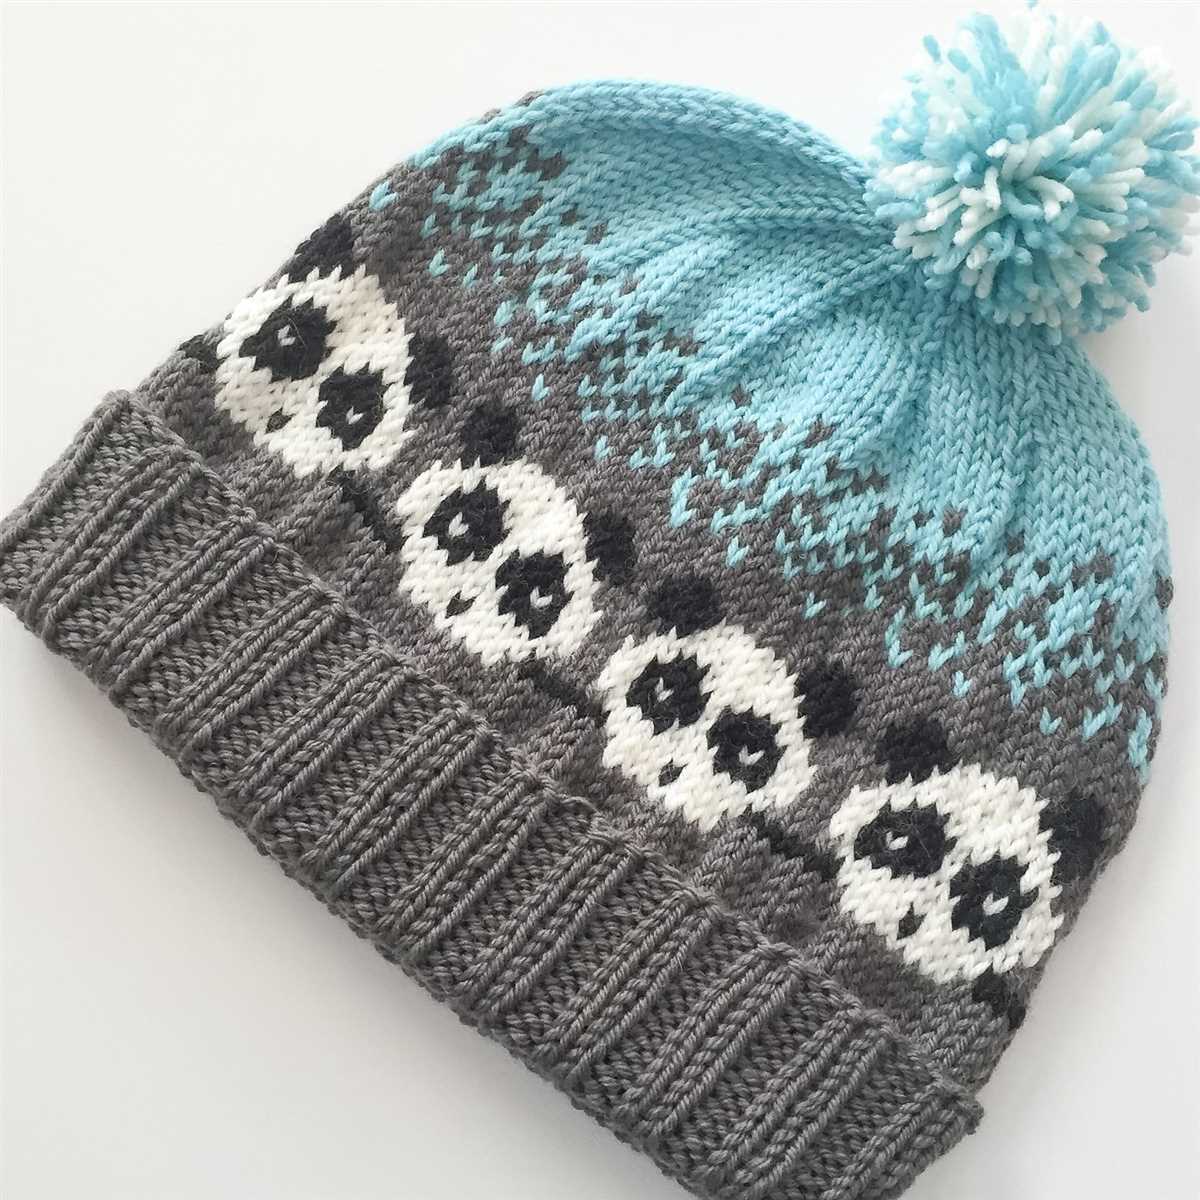
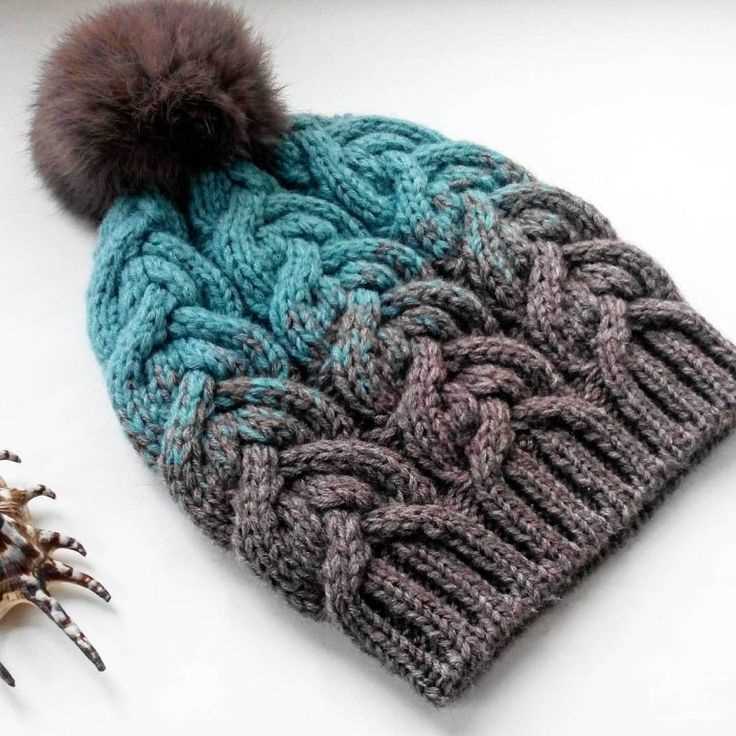
4. Pom-pom: Adding a pom-pom to the top of the hat can instantly make it more playful and fun. You can choose a contrasting color for the pom-pom, or match it to the rest of the hat for a cohesive look. It’s a great way to add a touch of whimsy to your top hat.
- 5. Feathers: Another popular embellishment for top hats is feathers. You can attach one or several feathers to the side or back of the hat. Choose feathers in different colors and sizes to create a unique and elegant design.
- 6. Beads and Sequins: If you want to add some sparkle to your top hat, beads and sequins are the way to go. You can sew them onto the brim, create a pattern on the crown, or scatter them randomly for a more whimsical effect. Experiment with different colors and sizes to create a dazzling design.
No matter which embellishments you choose, make sure they are securely attached to the hat. You don’t want them falling off during wear. Take your time and carefully sew or glue them in place for a finished look that will last. Remember, embellishments are a great way to express your personal style and make your top hat truly unique.
Blocking and Shaping the Hat
Blocking and shaping your knitted top hat is an important step in achieving the desired look and fit. Proper blocking helps to smooth out any uneven stitches and gives the hat its final shape.
Start by soaking your knitted hat in lukewarm water with a gentle detergent. Gently squeeze out the excess water and lay the hat flat on a clean towel. Roll up the towel and press down to remove more water. Be careful not to wring or twist the hat, as this can distort the shape.
Shaping the crown: To shape the crown, you can use a balloon or a head mannequin. Inflate the balloon to the desired size or use the mannequin head to mimic the shape of a head. Place the wet hat over the balloon or head, making sure the brim is flat and even.
Adjusting the brim: To adjust the brim, you can use pins or a hat block. Gently pin the brim in the desired shape, making sure it is symmetrical on all sides. If using a hat block, secure the hat onto the block using pins or elastic bands. Allow the hat to dry completely in this shape.
Final touches: Once the hat is dry, remove any pins or elastic bands and gently remove it from the balloon or head. Check for any uneven areas or loose stitches and make any necessary adjustments. If desired, you can add decorative elements such as feathers or ribbons to enhance the hat’s appearance.
By taking the time to properly block and shape your knitted top hat, you can ensure a professional-looking finished product that fits comfortably and looks stylish.
Adjusting the Size of the Top Hat
When knitting a top hat, it is crucial to ensure that the hat fits well on the wearer’s head. Adjusting the size of the hat can be done through various methods, such as altering the gauge, using a different yarn weight, or modifying the pattern.
1. Altering the Gauge: One of the simplest ways to adjust the size of the top hat is by changing the gauge. This can be done by using larger or smaller needles, depending on whether you want to make the hat bigger or smaller. Be sure to check the pattern for the recommended gauge and adjust accordingly to achieve the desired size. Remember that changing the gauge may also affect the overall look and texture of the hat.
2. Using a Different Yarn Weight: Another method to adjust the size of the top hat is by using a different yarn weight. If the hat is turning out too small, consider using a bulkier yarn to make it larger. On the other hand, if the hat is too big, using a lighter yarn will help decrease the size. Be mindful of the pattern’s yarn requirements and make sure to choose a yarn that is suitable for your desired adjustments.
3. Modifying the Pattern: If the hat needs significant adjustments, it may be necessary to modify the pattern itself. This can be done by adding or removing stitches in the crown or brim sections of the hat. Carefully measure the head circumference of the wearer and make the necessary calculations to determine how many stitches to add or omit. Keep in mind that modifying the pattern may require adjusting other aspects, such as the decrease rounds or the length of the hat.
4. Trying on the Hat: As you work on the hat, make sure to try it on periodically to ensure a proper fit. This is especially important when making modifications to the pattern or altering the gauge. It is better to catch any sizing issues early on and make adjustments as you go. If the hat is too tight or too loose, you can easily make changes before finishing the project.
By using these methods, you can easily adjust the size of the top hat to fit perfectly on the wearer’s head. Whether it’s through altering the gauge, changing the yarn weight, or modifying the pattern, making the necessary adjustments will result in a hat that is both stylish and comfortable.
Tips and Tricks for Knitting the Top Hat
Knitting a top hat can be a fun and unique project for knitters of all skill levels. Whether you’re making the hat for yourself or as a gift, here are some tips and tricks to help you along the way.
Choose the Right Yarn
When knitting a top hat, it’s important to choose a yarn that is sturdy and has good stitch definition. A wool or wool-blend yarn is a good choice as it will have enough structure to hold the shape of the hat. Avoid yarns that are too soft or have too much drape, as they may not give you the desired look. Consider the weight of the yarn as well, as a lighter weight yarn will create a more delicate hat, while a heavier weight yarn will create a more substantial hat.
Use Circular Needles and Double Pointed Needles
To knit the top hat, you’ll need to use both circular needles and double pointed needles. The circular needles are used for the brim and the main body of the hat, while the double pointed needles are used for the crown. Make sure you have the correct sizes of needles for your chosen yarn and follow the pattern instructions for needle changes. Using the right needles will ensure a smooth and seamless knitting process.
Pay Attention to Gauge
Gauge is crucial when knitting any project, and the top hat is no exception. Take the time to make a gauge swatch and measure it accurately. Adjust your needle size if necessary to match the pattern’s gauge. This will ensure that your hat turns out the correct size and fits well. Keep in mind that a hat that is too tight may be uncomfortable to wear, while a hat that is too loose may not stay on properly.
Add Embellishments
Once you’ve finished knitting the top hat, you can add embellishments to customize it and make it your own. Consider adding a decorative band, a pom pom, or even some embroidery. This is a great way to personalize the hat and give it a unique touch. Just make sure that any embellishments are securely attached so they don’t come off during wear.
With these tips and tricks in mind, you’ll be well-equipped to knit your own top hat. Enjoy the process and have fun creating a stylish and statement-making accessory!
Troubleshooting Common Issues
Knitting a top hat can be a rewarding and enjoyable project, but like any knitting project, it can sometimes come with its fair share of challenges. Here are some common issues that you may encounter while knitting a top hat, along with troubleshooting tips to help you overcome them.
Problem: Uneven stitches
If you notice that your stitches are coming out uneven, it could be due to a few different factors. One common cause is inconsistent tension. To address this, try to maintain a consistent tension throughout your knitting by keeping a steady rhythm and applying the same amount of pressure to each stitch. Paying attention to your tension as you work can help ensure even stitches.
Another cause of uneven stitches could be using the wrong size needle for your yarn. If your stitches are too tight or too loose, consider switching to a different needle size to achieve the desired gauge. Additionally, practicing good blocking techniques after you finish knitting can also help even out your stitches.
Problem: Holes or gaps in your work
If you find holes or gaps in your top hat, it could be due to accidentally dropping or skipping stitches. When working on intricate patterns or decreases, it’s important to double-check your work to ensure you haven’t missed any stitches. If you do find a dropped stitch, you can use a crochet hook or a needle to fix it by picking up the dropped stitch and working it back into the pattern.
In some cases, holes or gaps can also be caused by unintentional yarn overs. Pay close attention to your yarn placement and the direction of your knitting to avoid accidental yarn overs. If you do make a yarn over when you didn’t mean to, you can simply drop the extra stitch and continue knitting as usual.
Problem: Hat is too small or too big
If you find that your finished top hat is too small or too big for the intended recipient, it could be due to an issue with gauge. Gauge refers to the number of stitches and rows per inch in your knitting. To achieve the correct gauge, it’s important to follow the pattern instructions and use the recommended needle size and yarn weight.
If your hat is too small, try using a larger needle size or switching to a bulkier yarn. Conversely, if your hat is too big, you can try using a smaller needle size or switching to a lighter weight yarn. Swatching and measuring your gauge before starting the project can also help you avoid sizing issues.
Problem: Twisted stitches
Twisted stitches can happen when you accidentally twist the stitch on the needle while knitting. To avoid this, make sure to insert your needle correctly into the stitch and maintain the proper orientation as you work. If you do notice twisted stitches, you can either leave them as is for a decorative effect or fix them by working the stitch correctly on the next row.
If twisted stitches are a recurring issue for you, you may want to try using circular needles instead of straight needles. Circular needles can help prevent stitches from twisting and make it easier to maintain the correct orientation while knitting.
Frequently Asked Questions (FAQs)
Here are some commonly asked questions about knitting top hats:
1. Can I knit a top hat without using double-pointed needles?
Yes, it is possible to knit a top hat without using double-pointed needles. You can use circular needles and the magic loop method, or you can use a long circular needle and the traveling loop method. These techniques allow you to knit in the round without the need for double-pointed needles.
2. How do I make the brim of the top hat stay stiff?
To make the brim of the top hat stay stiff, you can add a wire or a plastic reinforcement to the brim. You can sew the wire or reinforcement to the inside of the brim or sandwich it between two layers of fabric if you’re lining the hat. This will give the brim structure and help it maintain its shape.
3. Can I make a top hat bigger or smaller?
Yes, you can adjust the size of a top hat by changing the number of stitches and rows in the pattern. If you want to make the hat bigger, you can cast on more stitches and knit more rows. If you want to make the hat smaller, you can cast on fewer stitches and knit fewer rows. Just make sure to adjust the decreases accordingly to maintain the shape of the hat.
4. How can I customize the design of the top hat?

There are many ways to customize the design of a top hat. You can add stripes or colorwork to the body of the hat, or you can embellish it with buttons, ribbons, or other decorative elements. You can also experiment with different stitch patterns or textures to give the hat a unique look. Don’t be afraid to get creative and make the hat your own!
5. How long does it take to knit a top hat?
The time it takes to knit a top hat will depend on your knitting speed, the complexity of the pattern, and the size of the hat. On average, it could take anywhere from a few days to a few weeks to complete a top hat. However, with practice and experience, you may be able to knit a top hat more quickly.
Summary:
Knitting a top hat can be a fun and rewarding project. Whether you’re a beginner or an experienced knitter, you can create a stylish and unique hat using a top hat knitting pattern. By following the instructions, adjusting the size if needed, and adding your own personal touches, you can create a top hat that suits your style. So grab your knitting needles and get ready to make a fashionable accessory that will surely turn heads!