
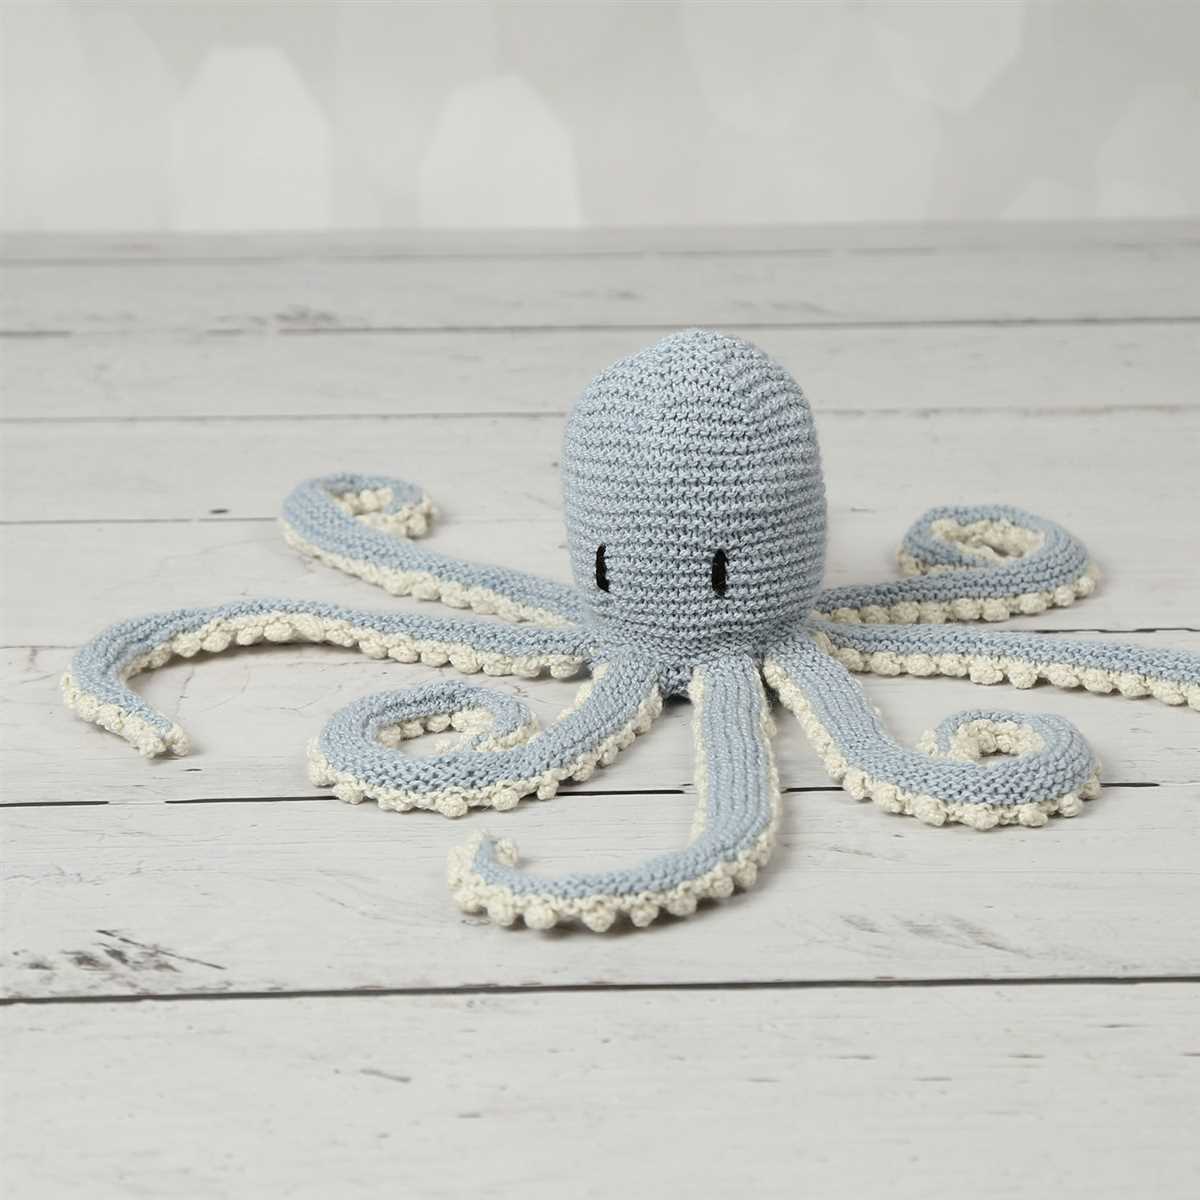
Did you know that knitting can also be used to create cute and cuddly toys? If you enjoy knitting and want to try something new, why not give the knitted octopus pattern a go? Knitted octopuses have gained popularity as comfort toys for premature babies, as their tentacles provide a comforting sensation similar to the umbilical cord. But even if you’re not knitting for a baby, a knitted octopus can still be a delightful addition to your home decor or as a gift for a loved one.
Knitting your own octopus toy is also a great way to unleash your creativity and experiment with different colors and patterns. Whether you prefer a vibrant rainbow octopus or a more subtle monochromatic design, the choice is yours. The knitted octopus pattern can be easily customized to suit your preferences, making each creation unique and special.
Despite their intricate design, knitted octopuses are surprisingly simple to make. With just a few basic knitting techniques, such as casting on, knitting in the round, and decreasing stitches, you’ll be able to create an adorable octopus in no time. The pattern typically calls for soft, durable yarn and stuffing material, ensuring that your knitted octopus is both huggable and long-lasting.
So, grab your knitting needles, choose your favorite yarn, and let’s get started on creating your very own knitted octopus!
Knitted Octopus Pattern: How to Create Your Own Adorable Toy
Are you looking for a fun and creative project to make your own knitted toy? Look no further than a knitted octopus! These cute and cuddly creatures make for a perfect gift or decoration, and with a few simple steps, you can create your very own adorable octopus.
To start your knitted octopus project, you will need a few materials. Gather your knitting needles, yarn in the colors of your choice, stuffing, and a darning needle. Once you have everything ready, you can begin creating the body of your octopus.
1. Cast on: Start by casting on the desired number of stitches to create the body of the octopus. You can use circular or double-pointed needles, depending on your preference.
2. Knit the body: Work in the round using a simple knit stitch to create the body of the octopus. You can choose to add stripes or other decorative elements to make it unique.
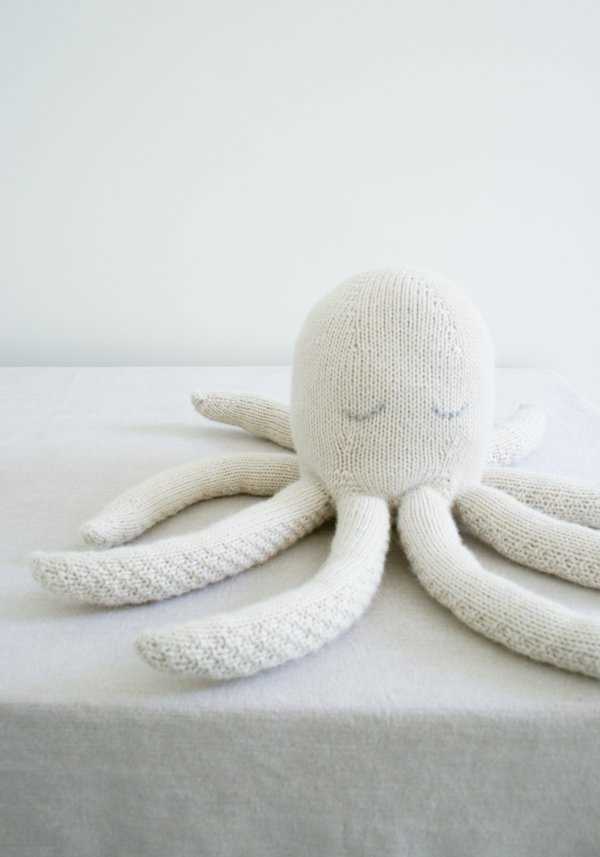
3. Shape the head: After reaching the desired length for the body, you can start shaping the head by decreasing stitches gradually. This will give your octopus that characteristic round shape.
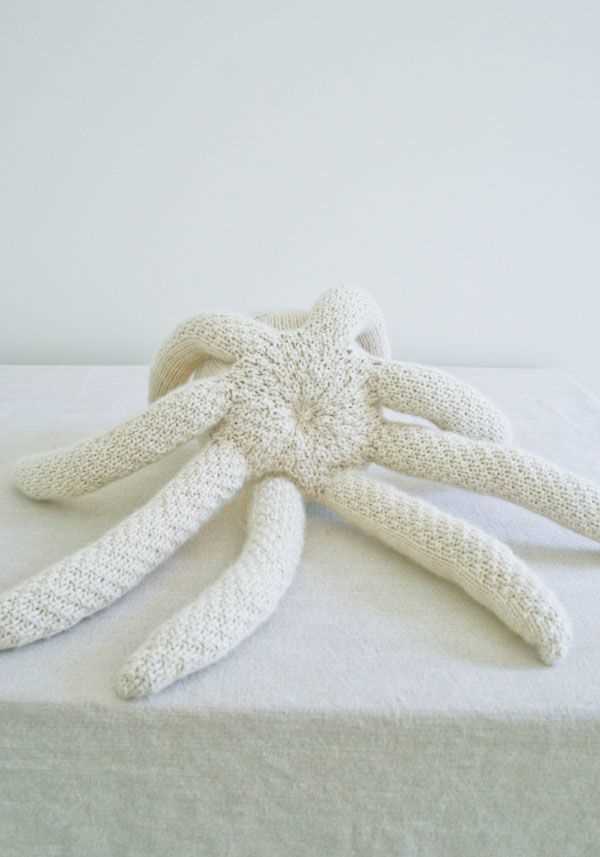
4. Create the tentacles: To make the tentacles, use double-pointed needles and create separate tubes. You can make as many tentacles as you like, but eight is the typical number for an octopus. Attach them securely to the body.
Once you have finished knitting all the parts, it’s time to give your octopus some life! Use the darning needle to sew everything together, leaving a small opening for stuffing. Stuff the body and head with soft filling, making sure it’s evenly distributed. Finally, sew up the opening and secure any loose threads.
It’s time to add the finishing touches! Embroider the eyes onto the head using contrasting yarn. You can also add a small smile or other facial features to give your octopus a unique personality.
Now that you know the basics of creating a knitted octopus, the possibilities are endless. Experiment with different colors, sizes, and decorations to make each octopus truly one-of-a-kind. Whether you keep it for yourself or give it as a gift, your knitted octopus will surely bring joy and warmth to anyone who sees it.
Choosing the Right Yarn and Needles for Your Knitted Octopus
When it comes to knitting an octopus, one of the most important factors to consider is the type of yarn you will use. Octopuses require a yarn that is soft, durable, and safe for children, as they are often made as toys. A good choice for this project is acrylic yarn, which is easy to work with and comes in a wide variety of colors. Moreover, acrylic yarn is machine washable, which is a great advantage when it comes to cleaning a knitted toy.
Another essential element for knitting an octopus is choosing the right needles. It is recommended to use double-pointed needles for this project, as they are ideal for working in the round and creating the spherical shape of the octopus’s body. The size of the needles will depend on the weight of your yarn. For example, if you are using a worsted weight yarn, a set of size 4mm double-pointed needles would be suitable.
If you prefer to use a thinner yarn, such as a sport weight or fingering weight, you can choose a smaller size of double-pointed needles. Keep in mind that the thinner the yarn, the more stitches you will need to cast on in order to create the desired size of your knitted octopus. However, it’s important to note that the final size of the octopus can also be adjusted by using different needle sizes and adjusting the tension of your knitting.
Overall, choosing the right yarn and needles for your knitted octopus is crucial in creating a high-quality and safe toy. By selecting a soft and durable yarn, such as acrylic, and using appropriate double-pointed needles, you can ensure that your octopus will turn out both adorable and long-lasting.
Step-by-Step Instructions for Knitting the Body of the Octopus
When knitting an octopus, the first step is to cast on the desired number of stitches for the body. This will depend on the size of the octopus you want to create. For example, if you want to make a small octopus, you may cast on around 30 stitches. If you want to make a larger octopus, you may cast on around 50 stitches.
Once you have cast on the stitches, you will begin knitting in the round. This means that you will continue knitting in a circular pattern, without turning your work. To do this, you can use either double-pointed needles or circular needles, depending on your preference.
Next, you will continue knitting in the round for a certain number of rows, depending on how long you want the body of the octopus to be. You can use a stitch marker to keep track of your rows if needed. It is important to remember to knit every stitch in each row to create a smooth and even body for the octopus.
When you have reached the desired length for the body, you can begin decreasing stitches to shape the head of the octopus. To do this, you will knit two stitches together at regular intervals throughout the row. This will gradually reduce the number of stitches and create a tapered shape.
Continue knitting rows with decreasing stitches until you have only a few stitches left. Then, carefully cut the yarn, leaving a long tail. Using a yarn needle, thread the tail through the remaining stitches and pull tight to close the top of the head. Secure the tail by weaving it in through the body of the octopus.
Once the body is complete, you can move on to knitting the tentacles of the octopus. But that’s a topic for another set of step-by-step instructions!
Adding the Eyes and Facial Features to Bring Your Octopus to Life
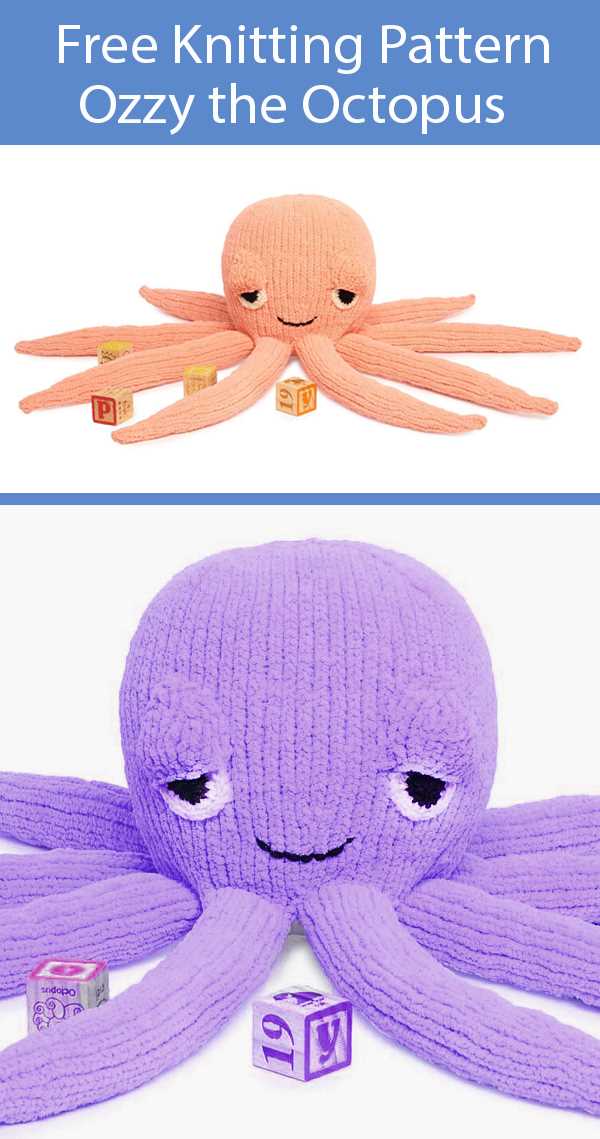
As you near the end of your knitted octopus project, it’s time to add the final touches that will give it personality and bring it to life. The eyes and facial features play a significant role in making your octopus look adorable and charming, so it’s crucial to add them in a way that complements the overall design.
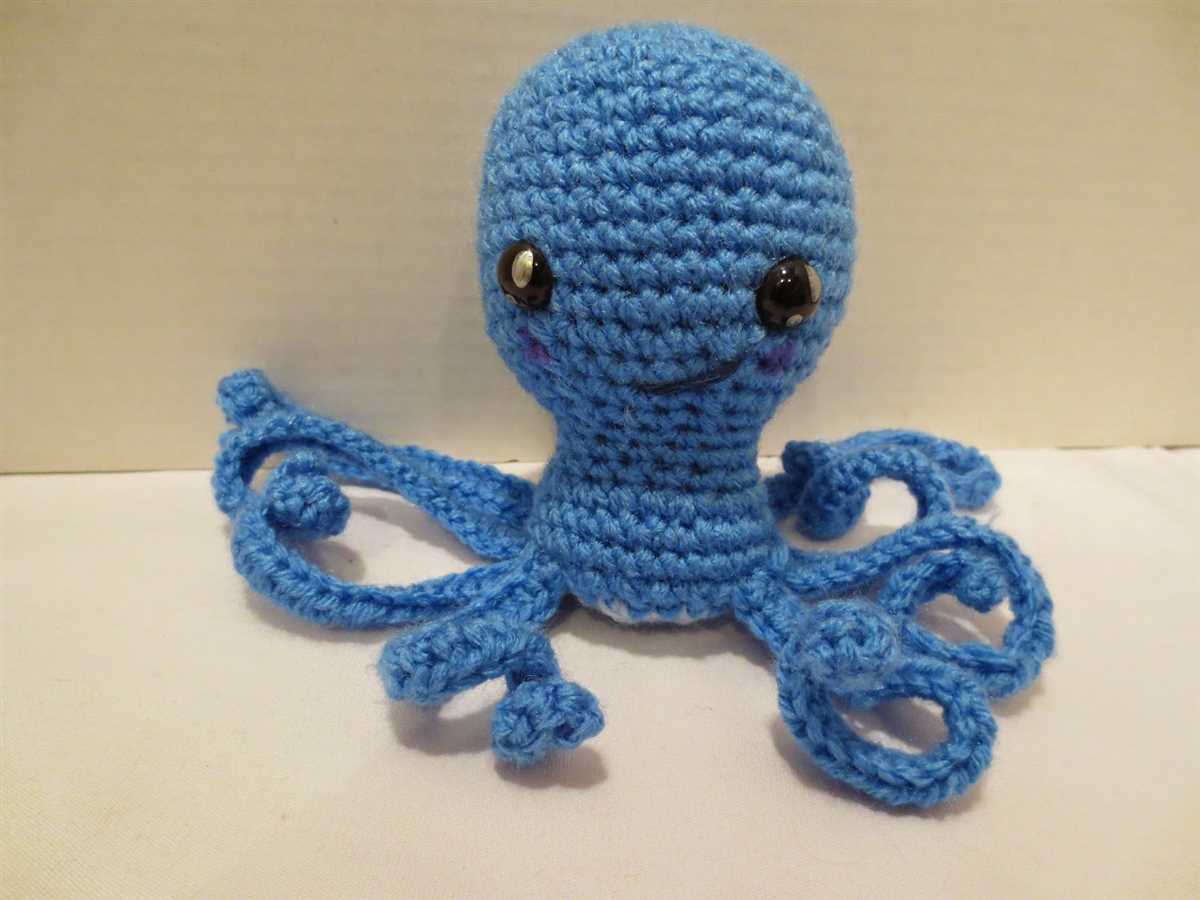
Start by selecting the right materials for the eyes. You can use small black buttons, safety eyes, or even embroider them using black yarn. Consider the size and placement of the eyes to ensure that they are symmetrical and proportionate to the size of your octopus. Sew them securely onto the head of the octopus, making sure they are evenly spaced and centered.
Next, let’s move on to the facial features. You can use embroidery techniques to create a sweet smile for your octopus or use a French knot to make small little dots for the cheeks. You can also add eyebrows or eyelashes using simple embroidery stitches. The key is to keep the features small and delicate, so they don’t overpower the cuteness of the octopus.
Remember to consider the facial expression you want your octopus to have. By slightly adjusting the placement and angle of the eyes and mouth, you can create different expressions, such as a friendly smile or a curious look. Take your time to experiment and find the perfect expression that reflects the personality you envision for your knitted octopus.
To add an extra touch of realism, you can also create a blush on the cheeks of your octopus using a small amount of pink or rosy colored yarn. This subtle detail can make your octopus even more adorable and lifelike.
Once you have finished adding the eyes and facial features, take a step back and admire your creation. The eyes and facial expression will truly bring your knitted octopus to life, making it a charming and lovable companion for anyone lucky enough to receive it.
Creating the Tentacles: Techniques and Tips
The tentacles are an essential part of a knitted octopus, adding charm and character to the finished piece. There are a few techniques and tips to keep in mind when creating these delightful appendages.
1. Knitting Techniques:
When knitting the tentacles, it is best to use double-pointed needles to easily work in the round. This will give the tentacles a seamless appearance and prevent any unsightly seams or jogs. Additionally, using a smaller needle size than what is recommended for the yarn will create a tighter gauge, resulting in sturdier and more defined tentacles.
2. Tentacle Length:
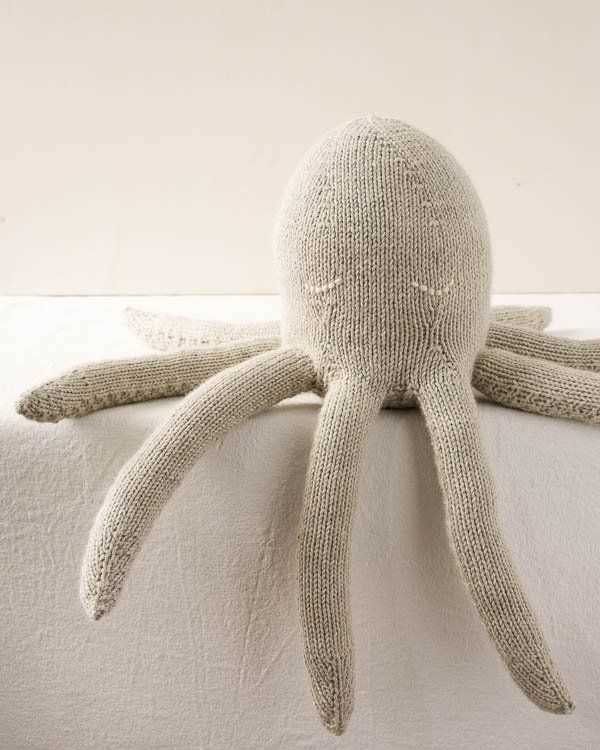
The length of the tentacles can vary depending on personal preference and the desired size of the octopus. However, it is generally recommended to make the tentacles longer than the body to achieve a whimsical and playful look. Knitting a few extra rows before decreasing at the tip will create a tapering effect, adding to the realistic appearance of the tentacles.
3. Embellishments:

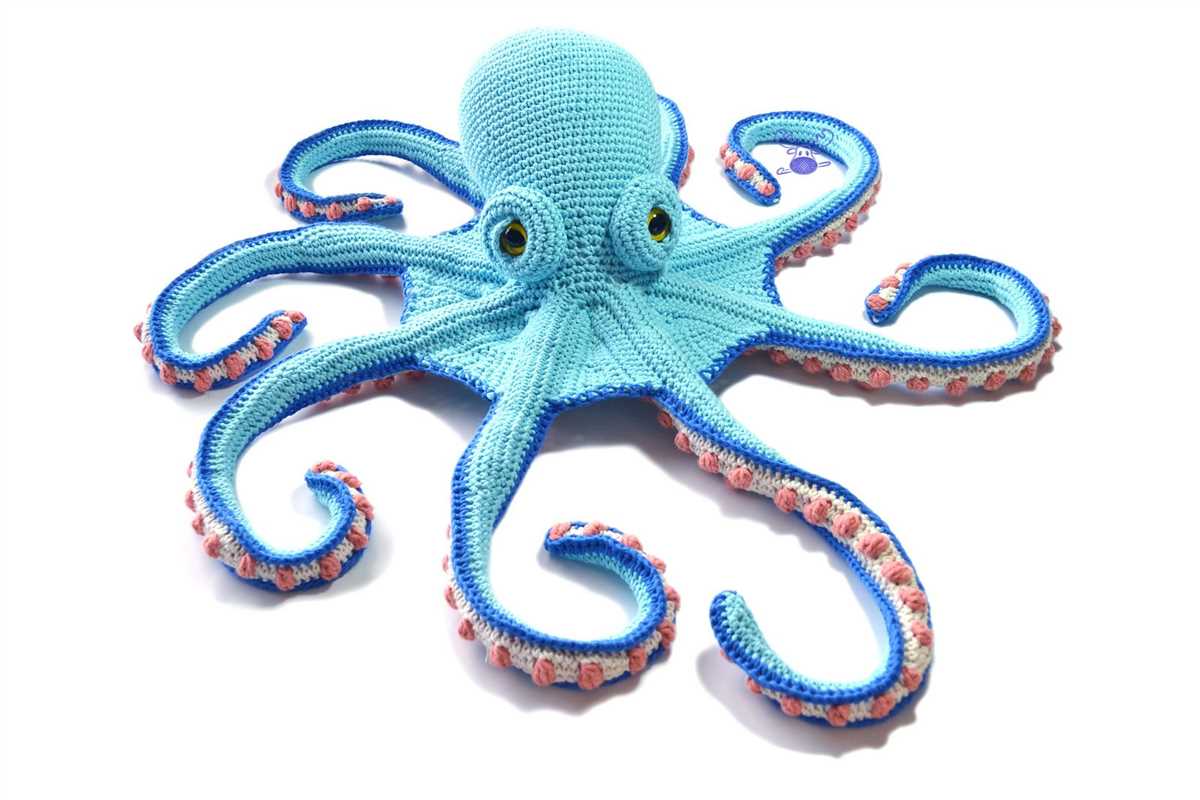
Adding embellishments, such as suckers or texture, can bring the tentacles to life. Small circular or oval shapes can be easily stitched onto the tentacles using embroidery techniques. If desired, different colors of yarn can be used for the suckers to create a more vibrant and eye-catching effect. Additionally, creating ribbed or cabled patterns on the tentacles can add depth and dimension to the overall appearance.
4. Attaching the Tentacles:
Once the tentacles are completed, they can be attached to the body of the octopus using a simple whip stitch. It is important to evenly distribute the tentacles around the body to achieve a balanced and realistic look. Taking care to secure the stitches tightly will ensure that the tentacles are securely attached and will not come loose during play or display. Arranging the tentacles in a curved or twisted position can also add movement and personality to the finished octopus.
Adding Extra Details and Accessories to Customize Your Octopus
Once you have mastered the basic knitting pattern for an octopus, you can have fun adding extra details and accessories to make your octopus truly unique. These additions can add personality to your creation and make it even more special. Here are some ideas to get you started:
1. Embroidered features
Instead of using buttons or safety eyes for the eyes of your octopus, you can embroider the features using threaded yarn. You can use different colors to give your octopus a playful expression or create intricate designs for added detail. This technique allows you to have full control over the look of your octopus’s eyes.
2. Clothing and accessories
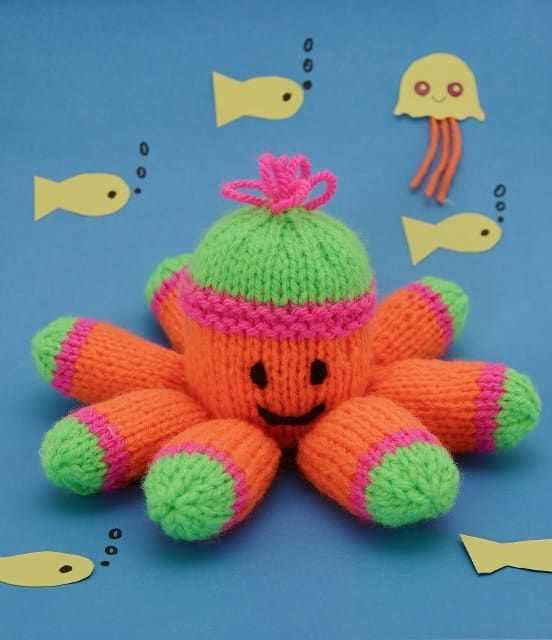
You can knit tiny clothes or accessories to dress up your octopus. This could be a small hat, a scarf, or even a little sweater. You can experiment with different stitches, colors, and patterns to make your octopus look stylish and trendy. It’s a fun way to add some extra flair to your creation and make it stand out.
3. Tentacle decorations
Add some decorative elements to the tentacles of your octopus to give it a festive vibe. You can knit small bows, flowers, or tiny charms and attach them to the tips of the tentacles. These little details can make your octopus look whimsical and add a touch of charm to its overall appearance.
4. Customized colors
While the traditional colors for an octopus are often shades of blue and pink, you can switch it up and use any color combination you like. Let your imagination run wild and create an octopus in your favorite colors or in colors that resonate with a specific theme or mood. Whether it’s a rainbow octopus or a monochromatic masterpiece, the choice is yours.
These are just a few ideas to spark your creativity when customizing your knitted octopus. Feel free to experiment and try out different embellishments and accessories to make your creation truly one-of-a-kind. Remember, the joy of knitting is not only in the process but also in the ability to add your personal touch to each project.
Finishing Touches: Assembling and Stuffing Your Knitted Octopus
After knitting all the separate parts of your octopus, it’s time to assemble them and give your toy its final touches. Follow these steps to ensure your octopus looks perfect:
1. Seaming the Body:
Start by aligning the body pieces and use a tapestry needle to stitch them together. Make sure the right sides of the fabric are facing each other and use a mattress stitch for an invisible seam. Leave an opening at the bottom for stuffing.
2. Attaching the Legs:

Take the legs and sew them onto the body of the octopus using the same tapestry needle and matching yarn. Position them evenly around the body, making sure they are securely attached.
3. Embroidering the Face:
Using a contrasting yarn, embroider the face of the octopus. Create two small eyes by making French knots or using black beads. You can also embroider a happy smile or any other desired facial features.
4. Stuffing the Octopus:
Begin stuffing the octopus through the opening left at the bottom of the body. Use polyester fiberfill or any other stuffing material of your choice. Make sure to firmly stuff the body and legs, but leave them soft enough for cuddling.
5. Closing the Opening:
Once the octopus is fully stuffed, use the tapestry needle to close the opening at the bottom. Make sure the seam is secure and that no stuffing is visible.
Congratulations! You have successfully assembled and stuffed your knitted octopus. Now you can enjoy your adorable new toy or gift it to someone special.
Tips for Cleaning and Maintaining Your Knitted Octopus
A knitted octopus can bring joy and comfort to both children and adults alike, but it’s important to keep it clean and well-maintained to ensure its longevity and hygiene. Here are a few tips to help you care for your knitted octopus:
1. Handwashing is the Best Option
When it comes to cleaning your knitted octopus, handwashing is the recommended method. Fill a basin or sink with lukewarm water and a mild detergent suitable for wool or delicate fabrics. Gently swirl the octopus in the water, making sure to focus on any stained or soiled areas. Rinse thoroughly with clean water and gently squeeze out excess moisture. Avoid wringing or twisting the octopus, as it may lose its shape.
2. Air Drying for Best Results
After washing, lay the knitted octopus flat on a clean towel and gently reshape it to its original form. Avoid hanging it to dry, as it may stretch or distort. Leave it in a well-ventilated area away from direct sunlight and heat sources to air dry completely. This may take a few days, so be patient during the drying process.
3. Spot Cleaning for Quick Fixes
If you have a small stain or spill on your knitted octopus, spot cleaning can be a convenient option. Use a mild detergent mixed with water and a clean cloth or sponge to gently dab and clean the affected area. Remember to blot, not rub, to avoid spreading the stain further. Rinse with clean water and air dry.
4. Proper Storage for Long-Term Preservation
When your knitted octopus is not in use, it’s important to store it properly to prevent damage. Make sure the octopus is completely dry before storing to avoid mildew or odor. Place it in a breathable fabric bag or pillowcase to protect it from dust and dirt. Store it in a cool, dry place away from direct sunlight to maintain its colors and prevent fading. Avoid storing it in plastic bags or containers, as they can trap moisture and lead to mold growth.
By following these simple tips, you can keep your knitted octopus clean, fresh, and ready to provide comfort and joy for years to come. Remember to check the care instructions specific to your octopus, as some may have additional requirements or recommendations for cleaning and maintenance.
Using Different Colors and Patterns for a Unique Octopus Toy
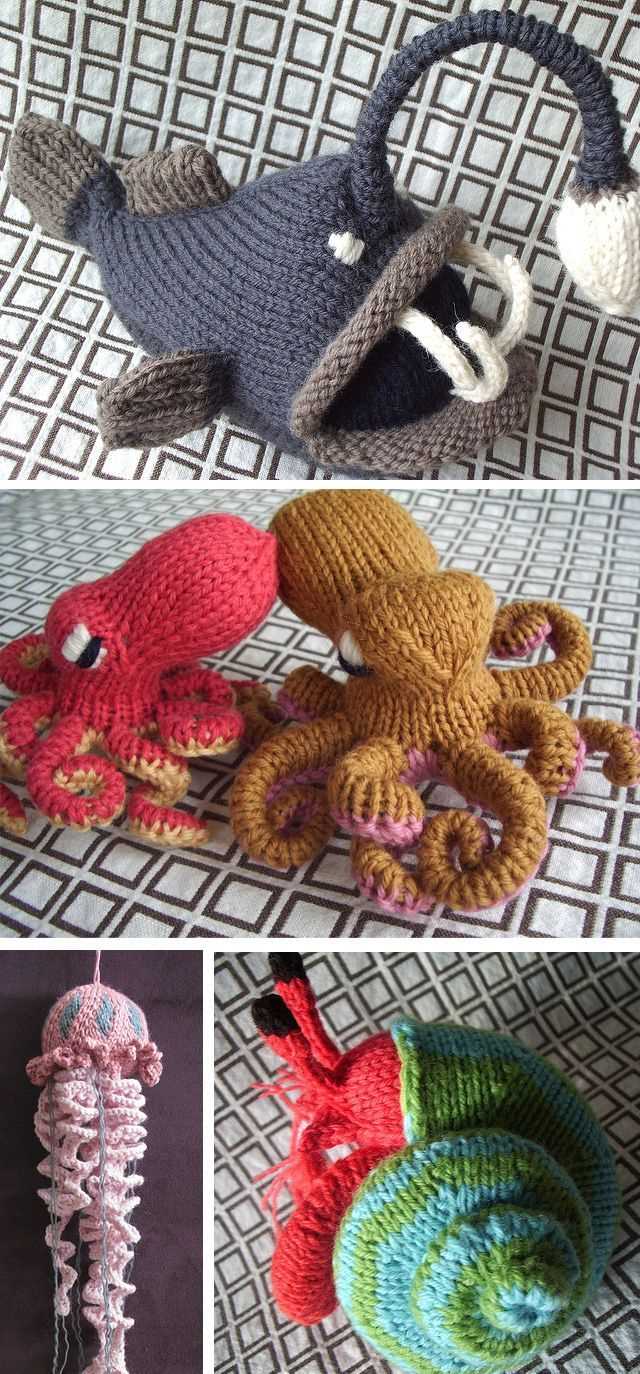
When it comes to creating a unique octopus toy, one of the easiest ways to make it stand out is by using different colors and patterns. By choosing a variety of colors, you can give your knitted octopus a vibrant and playful appearance. You can mix and match colors to create a fun and eye-catching design.
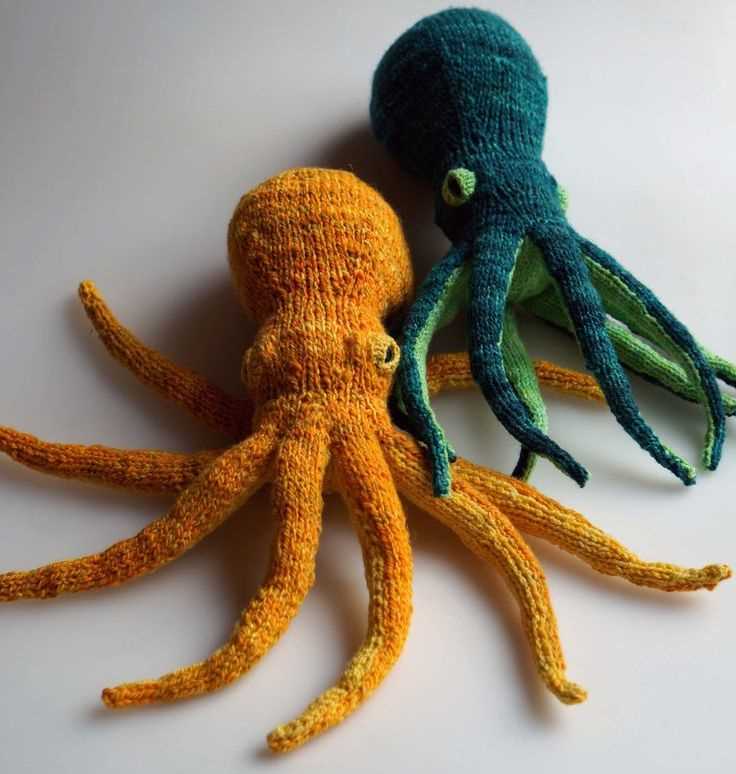
One option is to use bold and contrasting colors for the body and the tentacles. For example, you could choose a bright yellow or orange for the body and pair it with colorful stripes or polka dots for the tentacles. This combination of colors and patterns will make your octopus toy truly unique and visually appealing.
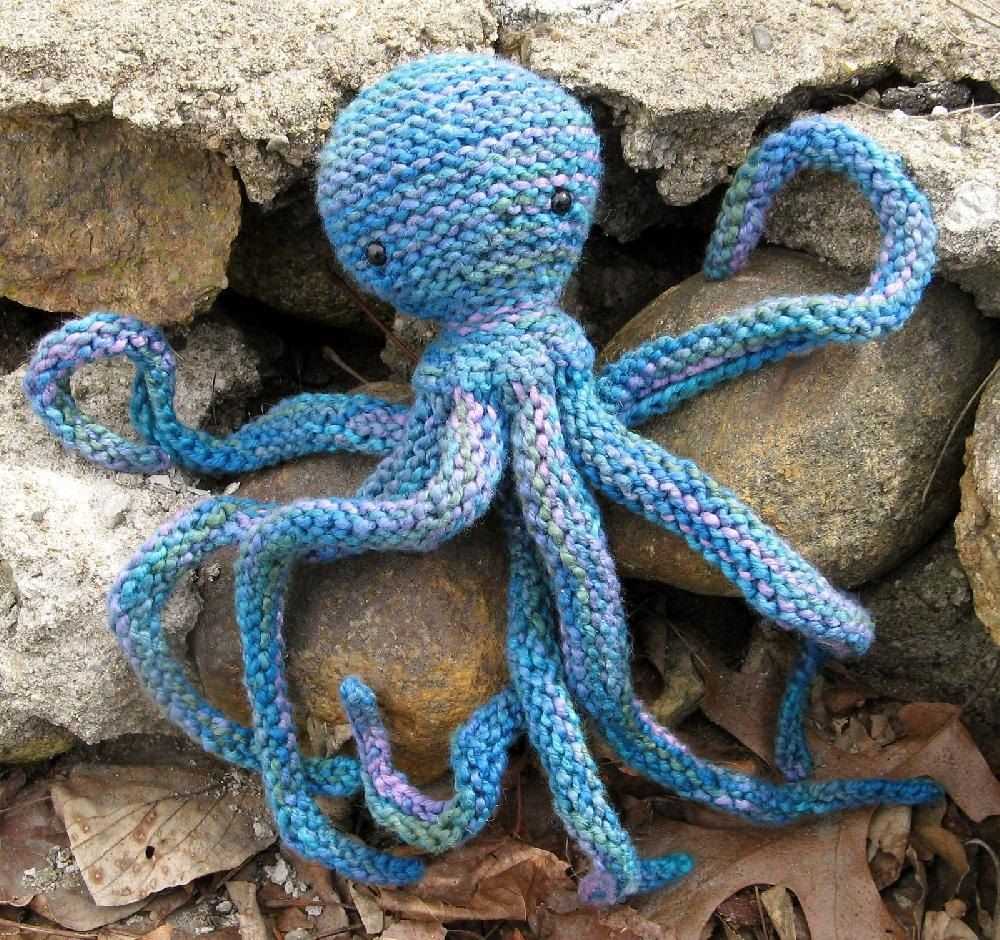
If you prefer a more subtle and elegant look, you can opt for a monochromatic color scheme. This means using different shades of the same color for the body and the tentacles. For instance, you could select various shades of blue, ranging from light blue to navy blue. This creates a cohesive and sophisticated look for your knitted octopus.
In addition to colors, you can also experiment with different patterns. For example, you can use a textured stitch pattern, such as cables or popcorn stitch, to add some dimension and interest to the body of the octopus. Alternatively, you can incorporate a lace pattern for a delicate and intricate look.
When using different colors and patterns, it’s important to consider the overall aesthetic you want to achieve. Whether you’re creating a playful and vibrant octopus or a more elegant and sophisticated one, the key is to have fun and let your creativity shine through. By using different colors and patterns, you can create a truly unique knitted octopus toy that will be loved by children and adults alike.
Knitting the Octopus in Different Sizes: Adapting the Pattern
When it comes to knitting the octopus, following a pattern can be a great way to get started. However, sometimes you may want to create an octopus of a different size than the pattern provides. The good news is that with a few adjustments, you can easily adapt the pattern to create octopuses in various sizes.
The first step in adapting the pattern is to determine the size you want your knitted octopus to be. Once you have decided on the size, you will need to adjust the materials and stitch count accordingly. For example, if you want your octopus to be smaller, you can use a thinner yarn and smaller knitting needles. Conversely, if you want a larger octopus, you can choose a thicker yarn and larger needles. It is important to keep in mind that changing the materials may also affect the overall look and feel of the finished octopus.
Here are a few tips for adapting the pattern to different sizes:
- Adjust the number of stitches: To make a smaller octopus, you can decrease the number of stitches in each section of the pattern. To make a larger octopus, you can increase the number of stitches.
- Modify the dimensions: If you want a taller or shorter octopus, you can adjust the number of rows you knit for each section. For example, to make a shorter octopus, you can knit fewer rows for the head and tentacles.
- Experiment with different yarn weights: Changing the weight of the yarn can have a significant impact on the size and look of the finished octopus. Consider using different yarn weights to achieve your desired size.
Adapting the pattern to different sizes requires some experimentation and trial and error. It is always a good idea to make a test swatch before starting your project to see how the adjustments affect the final size. By being flexible and creative, you can create knitted octopuses in a range of sizes, making them perfect for gifts or decorations.
Sharing Your Knitted Octopus: Ideas for Gifting and Donating
Once you have successfully knitted your octopus, you might be wondering how you can share your creation with others. There are several ways to do this, whether it’s gifting them to friends and family or donating them to a charity. Here are some ideas for sharing your knitted octopus:
Gift Ideas
- Baby Shower Gift: Knitted octopuses make delightful and unique gifts for baby showers. They can be a cute addition to a baby gift set or used as a standalone gift.
- Birthday Present: Surprise a young child or an octopus enthusiast with a beautifully knitted octopus as a birthday present. They will surely appreciate the time and effort put into creating such a special gift.
- Get Well Gift: Knitted octopuses can be a comforting companion for someone who is ill or recovering from surgery. Their soft texture and cheerful appearance can provide some much-needed comfort during difficult times.
- Thank You Gift: Show your appreciation to someone by gifting them a knitted octopus. Whether it’s a teacher, a healthcare worker, or a friend, they will be touched by the thoughtful gesture.
Donation Ideas
- Hospital Donations: Many hospitals accept donations of knitted items for their neonatal intensive care units (NICUs). These octopuses can provide comfort to premature babies by mimicking the feel of their umbilical cord and reducing stress.
- Charity Auctions: Consider donating your knitted octopuses to charity auctions or fundraisers. They can be auctioned off to raise funds for a good cause, and someone will go home with a handmade treasure.
- Children’s Shelter: Local children’s shelters or orphanages may appreciate knitted octopuses as comforting toys for the children under their care. Contact them to see if they accept such donations.
- Senior Centers: Knitted octopuses can bring joy and companionship to the elderly. Contact local senior centers or nursing homes to inquire if they would be interested in receiving handmade octopuses for their residents.
Sharing your knitted octopus allows you to spread joy and comfort to others. Whether you choose to gift them to loved ones or donate them to those in need, your handmade creation is sure to bring smiles and warmth to their recipients.