
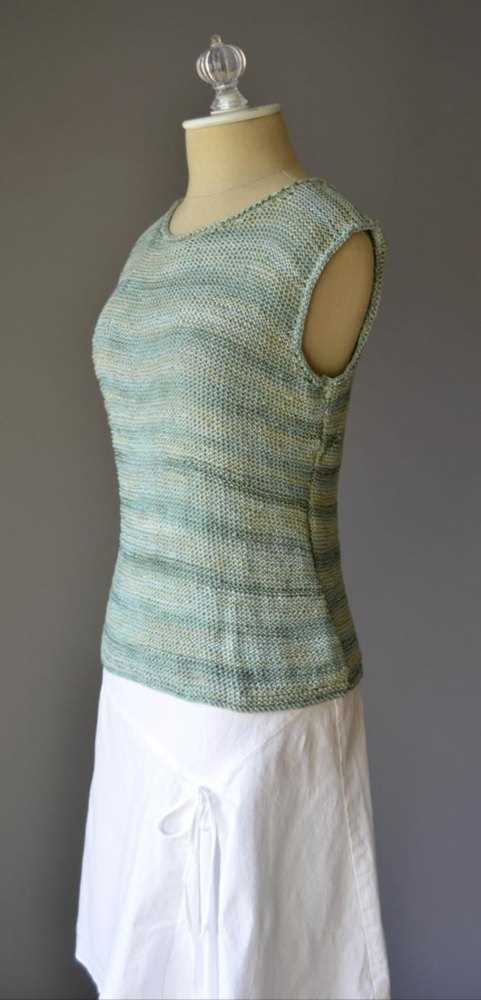
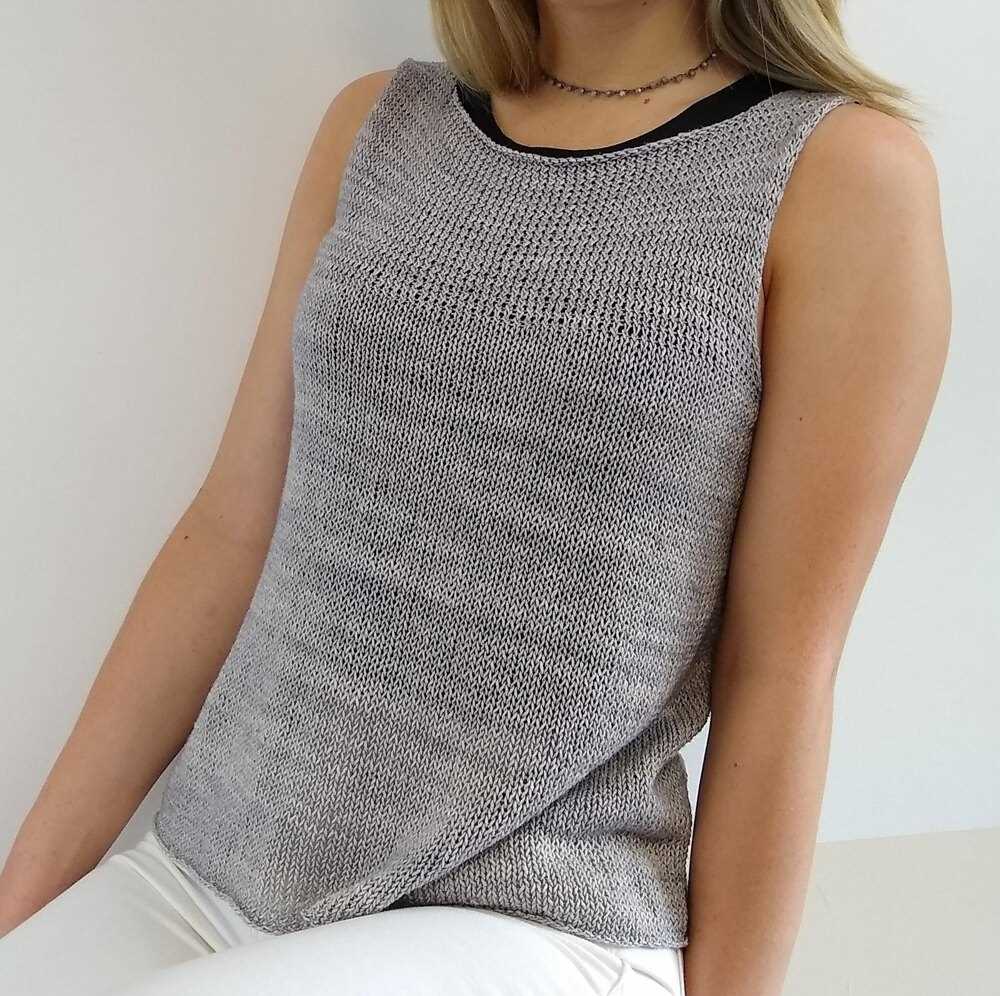
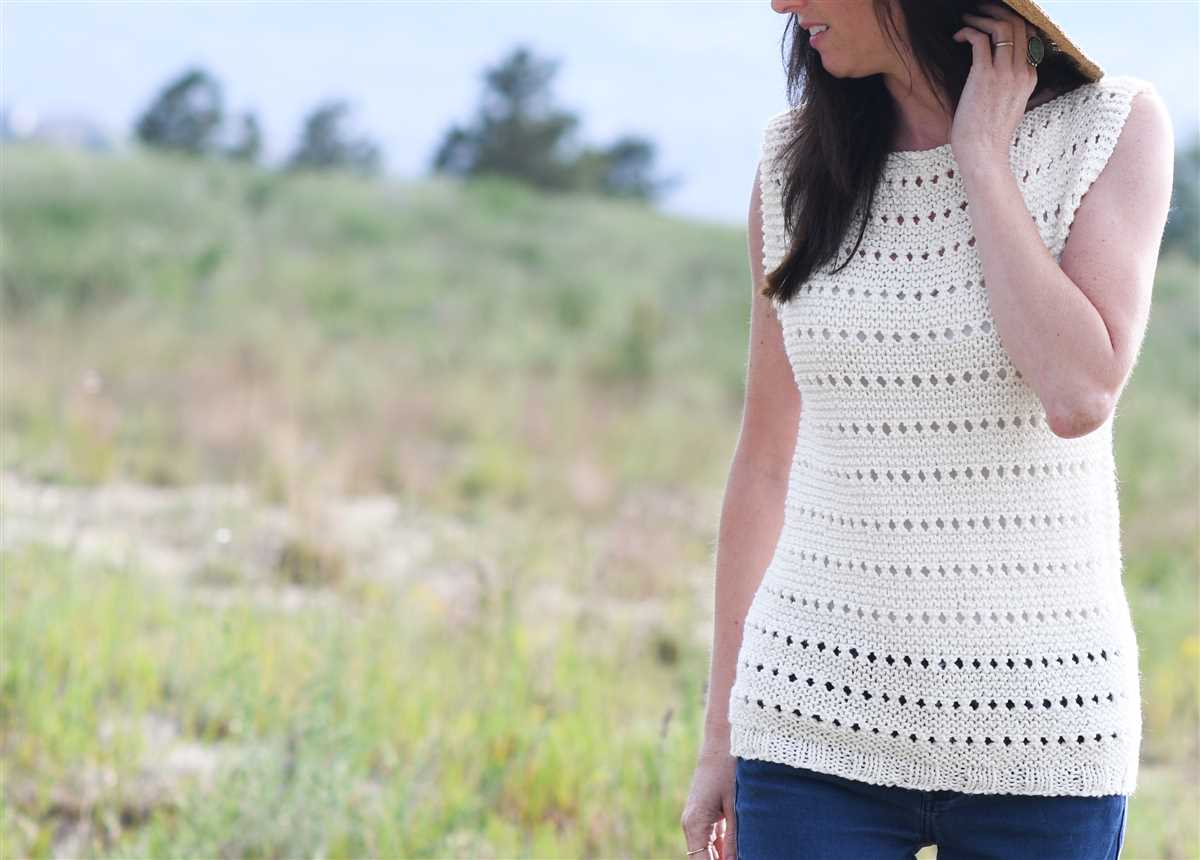
Knitting is a popular and relaxing hobby that allows you to create beautiful and unique garments. If you’re new to knitting or looking for a simple and stylish project, a tank top is a great choice. Tank tops are versatile, timeless, and perfect for warmer weather.
This simple tank top knitting pattern is perfect for beginners and will guide you through the process of creating your own stylish tank top. With just a few basic knitting stitches, you’ll be able to create a beautiful garment that you can wear with pride.
For this pattern, you’ll need some basic knitting supplies, including knitting needles, yarn, and a tapestry needle. Choose a soft and breathable yarn that is suitable for warm weather, such as cotton or bamboo. You can also customize your tank top by selecting your favorite color or adding embellishments like buttons or lace.
Simple Tank Top Knitting Pattern

If you’re new to knitting or looking for a quick and easy project, a simple tank top knitting pattern is a great choice. With just a few basic stitches and techniques, you can create a stylish and versatile garment that’s perfect for warm weather.
To begin, you’ll need to gather your materials. For this tank top pattern, you’ll need a set of knitting needles in the appropriate size for the yarn you’ve chosen. You’ll also need a few skeins of lightweight yarn in the color of your choice.
Once you have your materials ready, it’s time to cast on. Start by creating a slip knot, and then cast on the desired number of stitches for the size you’re making. This pattern typically uses a simple rib stitch for the bottom band, followed by stockinette stitch for the body of the tank top.
To create the rib stitch, alternate between knitting and purling each row. This creates a stretchy and textured fabric that will help the tank top stay in place. After a few rows of ribbing, switch to stockinette stitch for the body. This involves knitting one row and purling the next, creating a smooth fabric with a nice drape.
Continue knitting in stockinette stitch until the tank top measures the desired length. Then, it’s time to shape the armholes and neckline. You can do this by binding off a certain number of stitches at each edge and continuing to knit the center portion. Don’t forget to decrease stitches gradually at the armhole edges for a clean finish.
Once you’ve shaped the armholes and neckline, it’s time to finish off the tank top. Bind off all stitches, weave in any loose ends, and give the garment a good blocking to help it lay flat and take on its final shape.
With just a few simple steps, you can create a beautiful tank top that’s perfect for summer. Feel free to customize the pattern with different stitch patterns, stripes, or even lace details. The possibilities are endless when it comes to knitting, so have fun and enjoy the process of creating your own unique tank top.
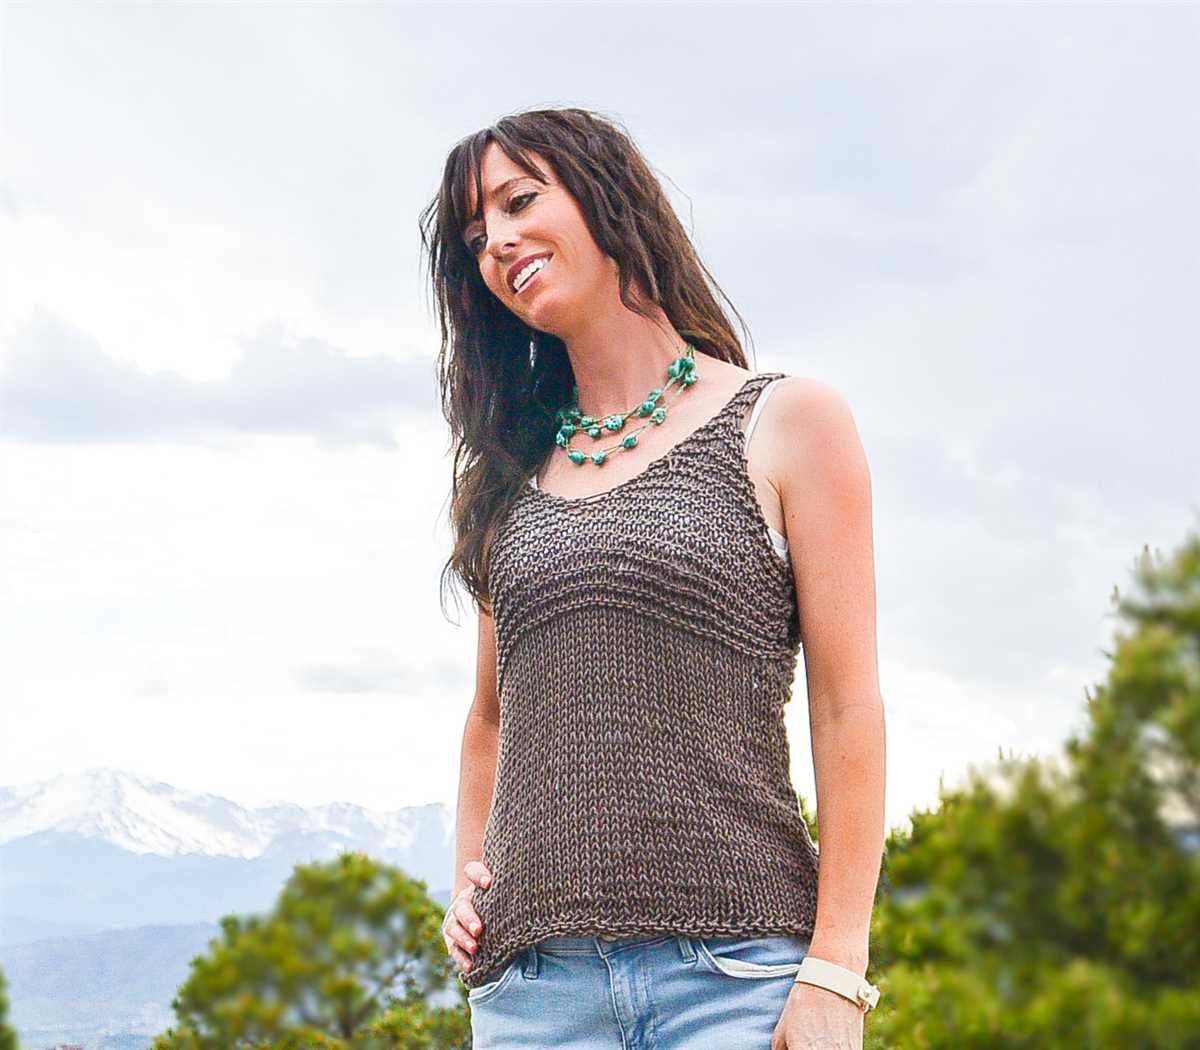
Choosing the Right Yarn
When it comes to knitting a tank top, choosing the right yarn is crucial. The type and quality of yarn you use can greatly influence the overall look and feel of your finished project. Here are some factors to consider when selecting yarn for your tank top:
Fiber content
One of the most important factors to consider is the fiber content of the yarn. Different fibers have different properties and will affect the drape, breathability, and durability of your tank top. Natural fibers like cotton and linen are highly recommended for summer garments as they are breathable and moisture-wicking. Wool or wool blends, on the other hand, provide warmth and elasticity. Consider the climate you will be wearing the tank top in and choose a fiber that suits your needs.
Weight
The weight of the yarn determines the thickness and density of your tank top. Lighter weight yarns, such as fingering or sport weight, will result in a more delicate and airy fabric, while heavier weight yarns, like worsted or bulky, will create a thicker and warmer garment. Consider the season and style you want to achieve and choose a yarn weight accordingly.
Texture
The texture of the yarn can add interest and dimension to your tank top. Smooth and tightly spun yarns will give you a clean and polished look, while textured or tweed yarns can add a rustic or vintage feel. Look for yarns with interesting stitch definition or subtle variations in color for added visual appeal.
Color
The color of your yarn can make a big difference in the overall appearance of your tank top. Consider your skin tone, personal style, and the occasion for which you will be wearing the tank top. Solid, neutral colors are always a safe bet, but don’t be afraid to experiment with bold or variegated yarns to make a statement.
Remember, knitting is a creative and personal endeavor, so have fun with your yarn selection and trust your instincts. Take the time to swatch and see how the yarn behaves before starting your tank top project to ensure you’re happy with the results.
Tools and Supplies
When it comes to knitting a simple tank top, you will need a few essential tools and supplies to get started. These items will ensure that you have everything you need to successfully complete your project.
Knitting Needles
The most important tool for knitting is a pair of knitting needles. For this particular pattern, you will need a pair of circular knitting needles, preferably in size US 7 or the size needed to obtain gauge. Circular needles are recommended as they allow you to easily knit in the round, which is essential for creating a seamless tank top.
Yarn
Choosing the right yarn is crucial for the outcome of your tank top. For a simple tank top, a cotton or linen blend yarn is recommended as it is lightweight, breathable, and perfect for the warmer months. Make sure to check the yarn label for the recommended gauge and amount of yarn needed for your size.
Tape Measure

A tape measure is an essential tool for any knitting project. It will help you measure your gauge and ensure that your tank top fits properly. Use the tape measure to measure your stitch and row gauge before starting your project, and check it periodically as you knit to ensure you are on track.
Stitch Markers
Stitch markers are useful for marking specific points in your knitting, such as the beginning of a round or any pattern repeats. They can be simple plastic rings or decorative charms and can help keep you organized and prevent mistakes.
Darning Needle

Lastly, you will need a darning needle to weave in any loose ends and finish off your tank top. This needle is used to sew in any yarn tails and ensure that your tank top looks neat and professional.
With these tools and supplies at your disposal, you are ready to start knitting your simple tank top. Be sure to gather all the necessary materials before you begin, and don’t forget to enjoy the process of creating something beautiful with your own two hands.
Getting Started: Casting On

Before you can begin knitting your tank top, you need to cast on your stitches. Casting on is the process of creating the foundation row of stitches on your knitting needle. There are several methods you can use to cast on stitches, but for this simple tank top pattern, we will be using the long-tail cast on method.
Long-Tail Cast On
The long-tail cast on method is a versatile and commonly used technique in knitting. To begin, you will need to estimate the length of yarn that you will need to cast on the desired number of stitches. This can be done by measuring about an inch of yarn per stitch you want to cast on.
Once you have estimated the length of yarn, make a slip knot on your needle and tighten it so it’s snug but not too tight. Hold the needle with the slip knot in your right hand, and grasp the yarn with your left hand.
Insert your right-hand needle into the slip knot from front to back, and then bring the tip of the needle under the yarn, creating a loop. This loop will be counted as your first cast-on stitch. To cast on the next stitch, insert the right-hand needle between the first and second stitches on the left-hand needle, and then bring the tip of the needle under the yarn and create another loop.
Continue this process of inserting the needle between the stitches and creating loops until you have cast on the desired number of stitches. It’s important to keep the tension of your stitches consistent, neither too loose nor too tight, to ensure an even and neat edge.
Once you have cast on all your stitches, you are ready to start knitting the tank top! Follow the next steps in the pattern to create the body and shape of the tank top.
Knitting the Body
To begin knitting the body of the tank top, you will need to cast on the desired number of stitches. This will depend on the size you are making and the gauge of your yarn. Start by placing a slip knot on one of your knitting needles, then proceed to make additional stitches using the long tail cast on method or whichever cast on method you prefer.
Once you have cast on the necessary number of stitches, it’s time to start knitting the body. You can use a simple stockinette stitch, which is achieved by knitting one row and purling one row alternately. This will create a smooth, even fabric that is perfect for a tank top. Alternatively, you could choose a different stitch pattern to add more texture to your design.
Remember to work in any necessary increases or decreases as indicated in the pattern. This is crucial for shaping the body of your tank top. Common types of increases include knit front and back (kfb) or make one (m1), while decreases can be achieved through knit two together (k2tog) or slip-slip-knit (ssk).
As you continue knitting the body, make sure to periodically try it on to ensure it fits properly. This is especially important if you are making the tank top for yourself or someone else with specific measurements. You can also adjust the length of the body by adding or subtracting rows according to your preference.
Once you have completed knitting the body, bind off all the stitches to secure your work. You can use a regular bind off method or choose a stretchier bind off, such as the sewn bind off, for a more flexible edge. After binding off, you can block your tank top to even out the stitches and give it a polished look.
Now that the body is complete, you can move on to knitting the straps or any other finishing touches, depending on the specific tank top pattern you are following. With patience and attention to detail, you will soon have a beautiful tank top that you can wear with pride or gift to a loved one.
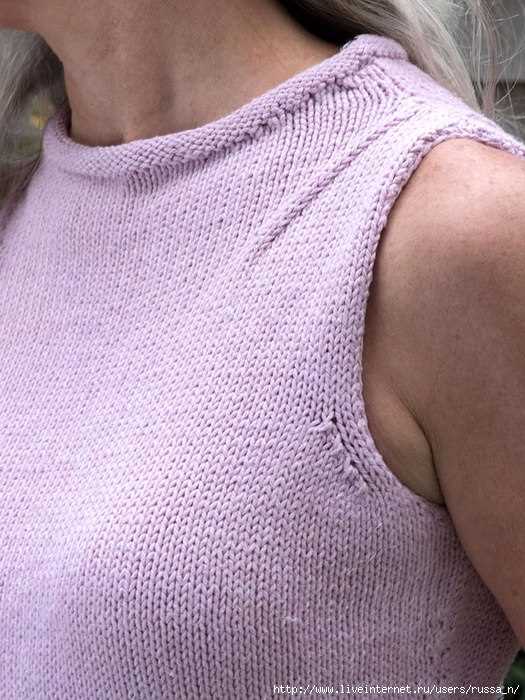
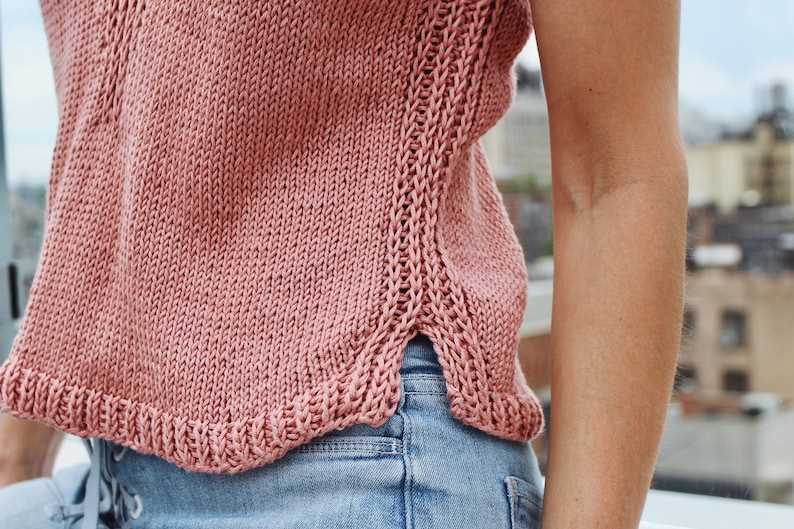
Shaping the Armholes
Once you have completed the desired length of the tank top, it is time to shape the armholes. To do this, you will need to decrease stitches on each side of the armhole area.
Row 1: Starting on the right side of your work, knit to the last 3 stitches, then knit 2 together, knit 1. This decrease will help create a smoother curve for the armhole.
Row 2: Purl across all stitches.
Repeat these two rows until you have reached the desired depth of the armhole. Make sure to keep track of your stitch count and decrease evenly on both sides of the armhole.
Note: The number of rows you need to work will depend on the size of your tank top and the desired armhole depth. Refer to your pattern or measurements for guidance.
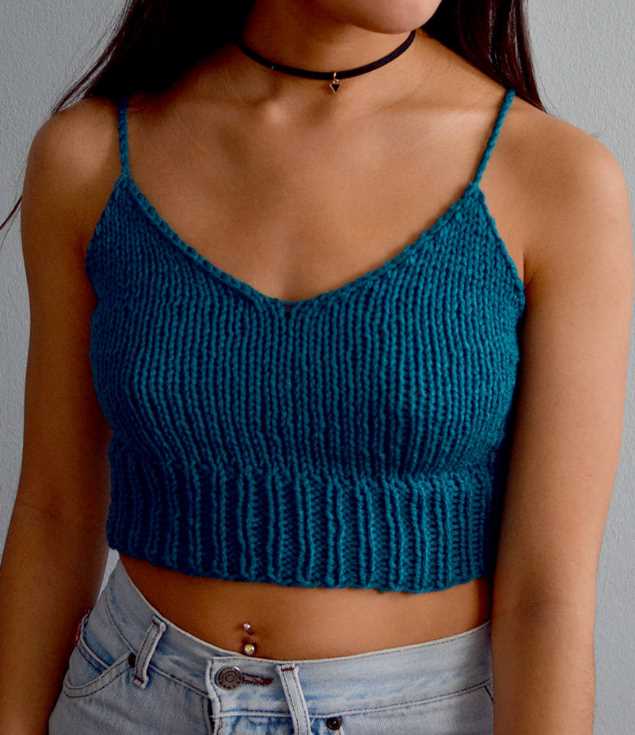
Knitting the Straps
Once you have completed the main body of the tank top, it’s time to knit the straps. The straps will be what hold the tank top up and provide support, so it’s important to ensure they are sturdy and secure.
To begin, you will need to pick up stitches along the top edge of the tank top. This can be done by inserting your needle into the edge of the fabric and pulling a loop of yarn through. Repeat this process along the entire top edge, placing the stitches onto your knitting needle.
Once you have picked up all the stitches, you can begin knitting the straps. This can be done by knitting every row, or by following a specific stitch pattern if desired. It’s important to make the straps long enough to comfortably fit over your shoulders, but not too long that they will stretch out or sag.
One option for the straps is to knit them in a ribbed stitch pattern, which will create a stretchy and comfortable strap. To do this, you can alternate between knitting and purling stitches every row, or follow a specific ribbing pattern such as 2×2 ribbing.
Another option for the straps is to create a twisted or braided effect. This can be done by knitting multiple strands of yarn together, or by working cables or twists in the knitting. These details can add a decorative element to the tank top and make the straps more interesting to knit.
Once you have finished knitting the straps, you can secure the ends by either binding off or by sewing them together. This will ensure that the straps stay in place and do not unravel. After securing the ends, try on the tank top to ensure the straps are the desired length and fit. Make any adjustments as needed before finishing off the tank top.
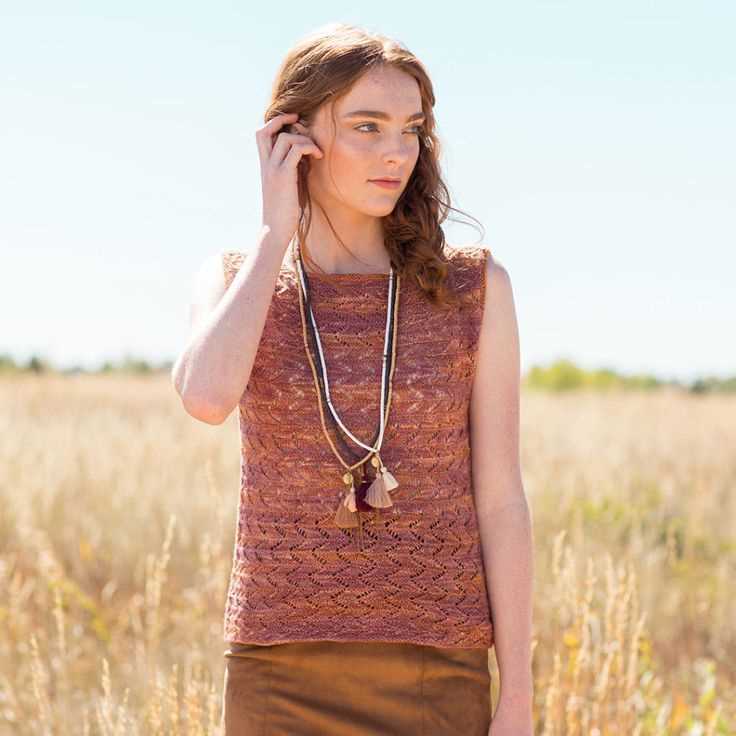
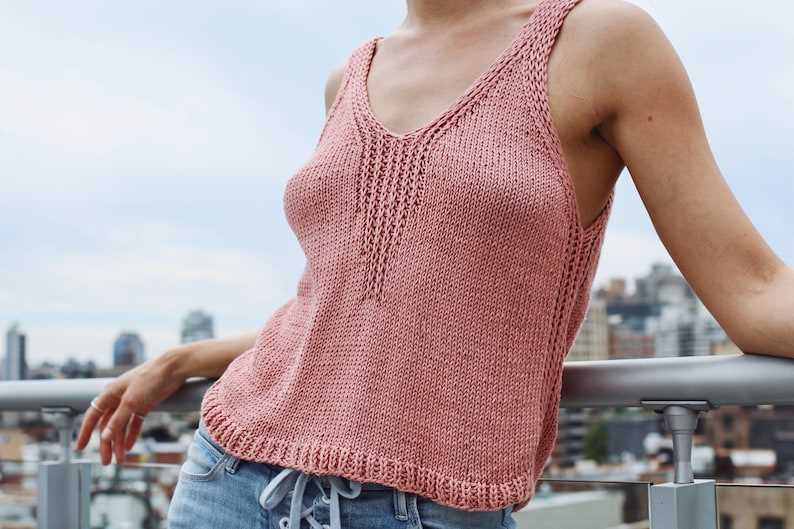
Adding Decorative Details
Once you have completed the basic tank top pattern, you can add decorative details to enhance its visual appeal. There are several ways to do this, depending on your skill level and personal preference.
1. Lace or Eyelet Panels: If you want to add a feminine touch to your tank top, you can incorporate lace or eyelet panels. These can be knitted separately and then sewn onto the front or back of the tank top. Alternatively, you can create lace or eyelet patterns directly on the fabric by following a specific lace knitting pattern.
2. Colorwork: Another way to add decorative details is by incorporating colorwork. This can be done using different colored yarns or by creating patterns with intarsia or fair isle knitting techniques. For a subtle effect, you can add a contrasting color to the edges of the tank top or create a simple stripe pattern.
3. Embroidery or Appliqués: If you enjoy embroidery or want to add a unique touch to your tank top, you can use embroidery or appliqués to create decorative details. This can be done by using embroidery stitches to add intricate designs or by sewing on pre-made appliqués or patches.
4. Beads or Sequins: For a touch of glamour, you can incorporate beads or sequins into your tank top. These can be added directly during the knitting process or sewn on afterwards. You can experiment with different bead or sequin placements to create unique patterns or accents.
5. Ribbons or Trims: Adding ribbons or trims can give your tank top a polished and finished look. You can sew on ribbons as straps or use them to trim the edges of the tank top. Similarly, you can add lace or crochet trims to create a delicate and feminine touch.
By adding decorative details to your simple tank top, you can personalize it and create a unique garment that suits your style. Whether you choose to incorporate lace, colorwork, embroidery, beads, or trims, these details will enhance the overall design and make your tank top stand out.
Finishing Touches: Binding Off
Once you’ve finished knitting the body of your tank top, it’s time to bind off your stitches to create a finished edge. Binding off is the process of taking your stitches off the needles and securing them so they don’t unravel. Here’s how you can bind off your tank top:
1. Knit the first two stitches
Begin by knitting the first two stitches, just as you would if you were starting a new row. This step helps to create a smooth edge.
2. Insert the left needle
After knitting the first two stitches, insert the left needle into the first stitch on the right needle.
3. Lift the first stitch over the second stitch
Using the left needle, lift the first stitch on the right needle up and over the second stitch, allowing it to pass over the second stitch and off the needle. This process is called “passing over” and it binds off the first stitch.
4. Knit the next stitch
After binding off the first stitch, knit the next stitch on the right needle as normal.
5. Repeat steps 2-4
Continue repeating steps 2-4 until you have bound off all the stitches on your needles. This will create a neat and secure edge for your tank top.
Once you have finished binding off, you can cut the yarn, leaving a tail to weave in later. Congratulations, you have successfully completed the finishing touches of binding off your tank top!
Blocking and Seaming
Blocking is an important step in the knitting process that helps to shape and size your finished garment. It involves wetting or steaming the piece to relax the fibers and allow them to settle into their final shape. Before blocking, it’s important to check the yarn label for any specific blocking instructions.
To block your tank top, start by filling a sink or basin with lukewarm water and a mild detergent. Gently place the knitted piece into the water, making sure it is fully submerged. Allow it to soak for about 15-20 minutes, then remove it from the water and gently squeeze out any excess moisture. Avoid wringing or twisting the fabric, as this can damage the fibers.
Next, lay the tank top flat on a clean, dry towel and gently roll it up, pressing out any remaining water. Unroll the towel and carefully arrange the piece into its desired shape, making sure the edges are straight and the stitches are even. Use rustproof pins to secure the edges in place, stretching and shaping the fabric as needed.
You can also use a blocking board or mat with a grid pattern to help with accuracy and symmetry. Once the tank top is completely dry, remove the pins and admire your beautifully blocked piece!
Seaming is the process of joining the separate pieces of your knitted tank top together to create the final garment. It’s important to take your time and ensure that the seams are neat and tidy.
To seam the tank top, lay the pieces flat with the right sides facing each other. Use a yarn needle and matching yarn to stitch the pieces together, using a mattress stitch or your preferred seaming method. Be sure to work from the bottom up or from one end to the other to ensure consistent tension and a smooth seam.
Once the main seams are stitched, you can also seam any other edges or details, such as the armholes or neckline. Take care to match the stitches and keep the tension even throughout.
After seaming, give your tank top a final blocking to help the seams settle and lay flat. Once dry, your tank top is ready to wear or gift to someone special!
Tips and Tricks
When knitting a simple tank top, there are a few tips and tricks that can help you achieve the best results. Whether you’re a beginner or an experienced knitter, these suggestions can make the process smoother and more enjoyable.
Choose the right yarn – Select a yarn that is suitable for the tank top pattern you have chosen. Consider the fiber content, weight, and texture of the yarn to ensure it will drape nicely and provide the desired level of comfort.
Swatch for gauge – Take the time to create a swatch and measure your gauge. This step is crucial to ensure that your tank top will have the correct dimensions and fit properly. Adjust your needle size if needed to achieve the correct gauge.
Read and understand the pattern – Before you start knitting, take the time to thoroughly read and understand the pattern. Pay attention to any special stitch instructions, shaping techniques, and finishing details. Familiarize yourself with the abbreviations used in the pattern to avoid confusion.
Use stitch markers – Stitch markers can be a helpful tool when working on a tank top. They can help you keep track of stitch patterns, sleeve decreases, or any other specific instructions. Place them at the beginning and end of each repeat or section to ensure accuracy.
Block your finished tank top – Once you have completed your tank top, consider blocking it to give it a polished and professional look. Blocking can help even out stitches, improve the drape, and enhance the overall appearance of your project. Follow the blocking instructions provided with your chosen yarn.
Take breaks and enjoy the process – Knitting a tank top can be a time-consuming project, so it’s important to take breaks and pace yourself. Enjoy the process and celebrate your progress along the way. Remember to relax and have fun with your knitting!
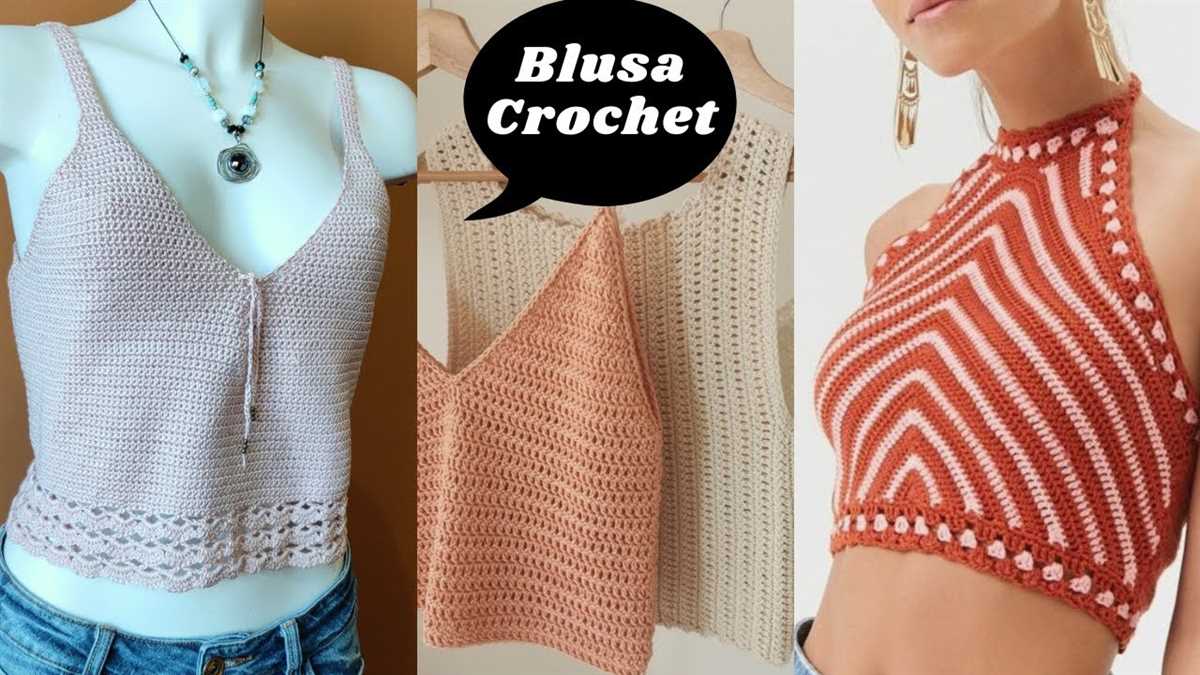
Customization Ideas
Now that you have mastered the basic tank top knitting pattern, it’s time to get creative and add your own personal touch to your tank top. Here are some customization ideas to inspire you:
- Color Blocking: Experiment with different color combinations by knitting different sections of your tank top in contrasting colors. This will create a visually striking effect and allow you to showcase your favorite colors.
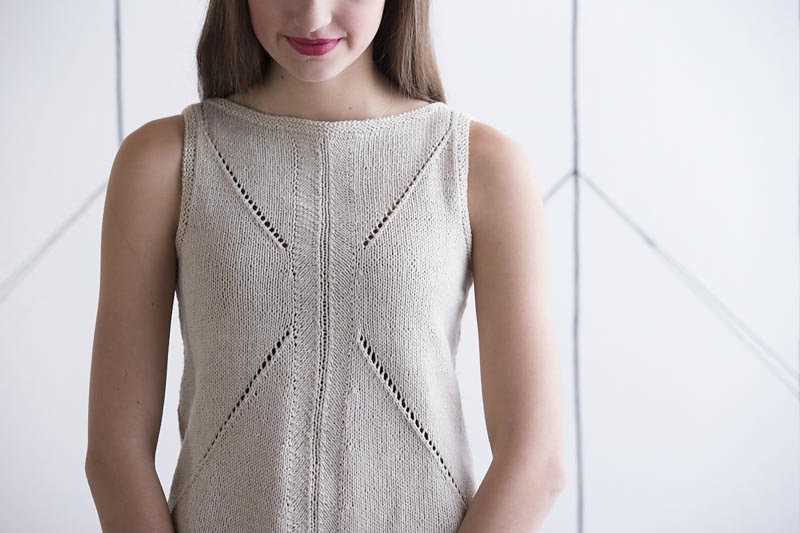
- Lace Detailing: If you love delicate and feminine designs, consider adding some lace detailing to your tank top. You can knit lace panels along the sides or at the bottom of the tank top for an elegant touch.
- Textured Stitch Patterns: Incorporate textured stitch patterns into your tank top to create a unique and eye-catching design. Try knitting cables, bobbles, or seed stitch patterns to add depth and dimension to your tank top.
- Embroidery or Appliqués: Get crafty and personalize your tank top by adding embroidery or appliqués. You can stitch your initials, favorite motifs, or even floral designs onto your tank top to make it truly one-of-a-kind.
- Add Straps: If you prefer a tank top with straps, you can easily modify the pattern to include them. Knit the tank top as instructed, and then attach thin straps to the shoulders using a simple seaming technique.
With these customization ideas, you can take the basic tank top pattern and transform it into a unique and personalized piece of clothing. Get creative, have fun, and enjoy the process of customizing your own tank top!