
If you’re looking for a fun and unique knitting project, then consider making a chicken vest! This quirky accessory is not only cute but also practical, as it helps protect chickens from harsh weather conditions. Whether you have a backyard flock or just a few pet chickens, this knitting pattern is a great way to show your love and care for your feathered friends.
This chicken vest knitting pattern is suitable for knitters of all skill levels. It features a simple design with a ribbed collar and leg holes, allowing for easy on and off. The pattern can be easily adjusted to fit different chicken sizes, making it suitable for a wide range of breeds. Whether you have a small bantam or a larger chicken, you can create a vest that fits comfortably.
Knitting a chicken vest can be a fun and rewarding project. Not only will it provide protection for your chickens, but it will also allow you to showcase your knitting skills and creativity. You can choose from a wide range of yarn colors to create a unique and personalized vest for each chicken. Plus, knitting for your pets is a great way to bond with them and show them how much you care.
So, if you’re ready to embark on a new knitting adventure, why not give the chicken vest a try? With this knitting pattern, you’ll be able to create a practical and adorable accessory for your feathered friends. Grab your knitting needles and get started today!
Chicken Vest Knitting Pattern: A Cozy Accessory for Your Feathered Friends
Keeping our pets warm and comfortable is always a top priority, and this extends to our feathered friends as well. If you have a flock of chickens and want to provide them with some extra warmth during the colder months, why not knit them their very own chicken vests? Not only will these adorable accessories keep them cozy, but they will also make your chickens the envy of the neighborhood!
The chicken vest knitting pattern is a simple and fun project that allows you to create a custom-fit vest for each of your chickens. The pattern typically includes instructions for various sizes, so whether you have bantams or larger chicken breeds, you can easily find a vest that will fit them perfectly. The vests are usually designed with adjustable straps that can be fastened around the chicken’s body, ensuring a snug and secure fit.
What makes these chicken vests so special?
- Protection from the elements: Just like humans, chickens can feel the cold. The chicken vests provide an extra layer of insulation to keep them warm and protected from harsh weather conditions.
- Adds a touch of style: Who says chickens can’t be fashionable? The chicken vests come in a variety of colors and patterns, allowing you to showcase your creativity and add a touch of style to your flock.
- Prevents feather picking: Some chickens tend to engage in feather picking behaviors, which can result in bald patches and injuries. The vests act as a barrier, preventing other chickens from plucking at their feathers.
- Easy to clean and maintain: Most chicken vests are made from washable materials, making them easy to clean and maintain. Simply toss them in the washing machine, dry them, and they’ll be ready to go again.
So, if you’re looking to provide your chickens with a cozy and stylish accessory, why not try knitting them their very own vest? The chicken vest knitting pattern is a unique way to show your feathered friends some love and keep them warm and comfortable throughout the year.
Why Knitting a Chicken Vest is a Great Project for Beginner Knitters

Knitting can be a fun and rewarding hobby for people of all ages, and it’s a great way to create unique and practical items. If you’re a beginner knitter and looking for a project that is both manageable and useful, why not try knitting a chicken vest? This quirky and adorable accessory serves a practical purpose while allowing you to practice essential knitting techniques.
One of the reasons why knitting a chicken vest is an excellent project for beginner knitters is that it is relatively small and doesn’t require a significant time commitment. Knitting a full-sized sweater or scarf can be intimidating for someone just starting out, but a chicken vest is much more manageable. Its smaller size means you can complete the project relatively quickly and feel a sense of accomplishment.
Another advantage of knitting a chicken vest as a beginner is that it allows you to practice essential knitting techniques. The pattern typically involves working with basic stitches, such as knit and purl, and simple shaping techniques like increasing and decreasing stitches. By following the pattern and repeating these techniques, you’ll build your skills and confidence as a knitter.
If you’re worried about making mistakes along the way, don’t be! Making mistakes is a crucial part of learning and growing as a knitter. The small scale of a chicken vest project makes it easier to fix any errors you might encounter. Remember, knitting is a forgiving craft, and there’s always a way to fix or modify an imperfect stitch.
Finally, knitting a chicken vest allows you to create something unique and whimsical. Whether you’re making it for your own backyard chicken or as a gift for a fellow chicken enthusiast, a hand-knitted chicken vest is sure to bring a smile to anyone’s face. You can use different colors and patterns to make each vest one-of-a-kind, showcasing your creativity and personal style.
In conclusion, knitting a chicken vest is a great project for beginner knitters because it is manageable in size and time commitment, allows for practicing essential knitting techniques, accommodates for mistakes, and offers an opportunity for creativity. So grab your knitting needles, some yarn, and give the chicken vest pattern a try – you’ll be amazed at what you can create!
Choosing the Right Yarn for Your Chicken Vest
When it comes to knitting a vest for your chicken, choosing the right yarn is crucial. Not all yarns are suitable for this particular project, as chickens have specific needs in terms of comfort and insulation. Here are some factors to consider when selecting the perfect yarn for your chicken vest.
Type of Yarn:
One important aspect to consider is the type of yarn you’ll be using. Natural fibers like wool and cotton are preferred for their breathability and softness. These materials provide insulation without causing overheating or discomfort for your feathered friend. Avoid synthetic fibers as they can trap moisture and make your chicken uncomfortable.
Yarn Weight:
The weight of the yarn is another factor to consider. Since chickens have delicate feathers, you’ll want to choose a lightweight yarn that won’t put unnecessary weight or strain on them. Look for yarns labeled as “fingering” or “sport” weight, as they are thin and gentle on feathers.
Color and Design:
While the aesthetics may not be the primary concern when selecting yarn for a chicken vest, it’s still worth considering. You can choose a yarn color that matches your chicken’s plumage to create a cohesive look, or go for a contrasting color to make a fashion statement. Additionally, you can also consider yarns with different textures or patterns to add some flair to the vest.
Durability:
Chickens are active creatures, so you’ll want to choose yarn that can withstand their movements and pecking. Opt for yarns that have good stitch definition and are less likely to unravel easily. This will ensure that the vest holds up well over time, even with your chicken’s natural inclination to explore and scratch around.
Conclusion:
Choosing the right yarn for your chicken vest is essential to provide comfort and functionality. By considering the type of yarn, weight, color, and durability, you can knit a vest that not only keeps your chicken warm but also adds a touch of style to their wardrobe.
Essential Knitting Tools You’ll Need for the Chicken Vest Pattern
When knitting the chicken vest pattern, it is important to have the right tools to ensure a successful and enjoyable project. Here are some essential knitting tools you’ll need:
1. Knitting Needles
Choose a pair of knitting needles that are suitable for the yarn weight you’ll be using for the chicken vest. The pattern will usually specify the recommended needle size. Circular needles with a length of at least 24 inches are often preferred for larger projects like the chicken vest.
2. Stitch Markers
Stitch markers are essential for marking specific stitches or sections in the pattern. They can be used to mark the beginning of a round, increases, decreases, or any other important points in the pattern. Using stitch markers will help you keep track of your progress and ensure your stitches are in the right place.
3. Tapestry Needle
A tapestry needle is used for sewing in loose ends and seaming the pieces of the chicken vest together. Choose a tapestry needle with a large eye for easy threading and a blunt tip to avoid splitting the yarn.
4. Row Counter
A row counter is a handy tool to keep track of the number of rows you have knitted. This is particularly useful for patterns that require a specific number of rows or when shaping the chicken vest. You can use a physical row counter or a digital one on your knitting app or phone.
5. Yarn and Skein Holder
Keeping your yarn organized and tangle-free is important for a smooth knitting process. Consider using a yarn holder or swift to hold the skein of yarn while you work. This will prevent the yarn from rolling around and getting tangled, allowing you to focus on knitting without interruption.
With these essential knitting tools, you’ll be well-equipped to tackle the chicken vest pattern and create a cozy and stylish garment for your feathered friends.
Understanding the Construction of a Chicken Vest
Knitting a chicken vest may seem like an unusual project, but it can be a practical and fun way to keep your feathered friends warm and protected. The construction of a chicken vest involves several key elements that contribute to its functionality and fit.
Pattern: The first step in knitting a chicken vest is to find a suitable pattern. Most chicken vest patterns are designed to be adjustable and customizable to fit different sizes and breeds of chickens. The pattern typically includes instructions for knitting the vest in different sizes, as well as variations for different styles and embellishments.
Material: Chicken vests are usually knitted using soft and warm yarns, such as wool or acrylic blends. These materials provide insulation and comfort for the chickens while also being durable and easy to care for. It is important to choose a yarn that is suitable for the intended purpose and climate, as chickens may have different needs depending on the weather conditions in their environment.
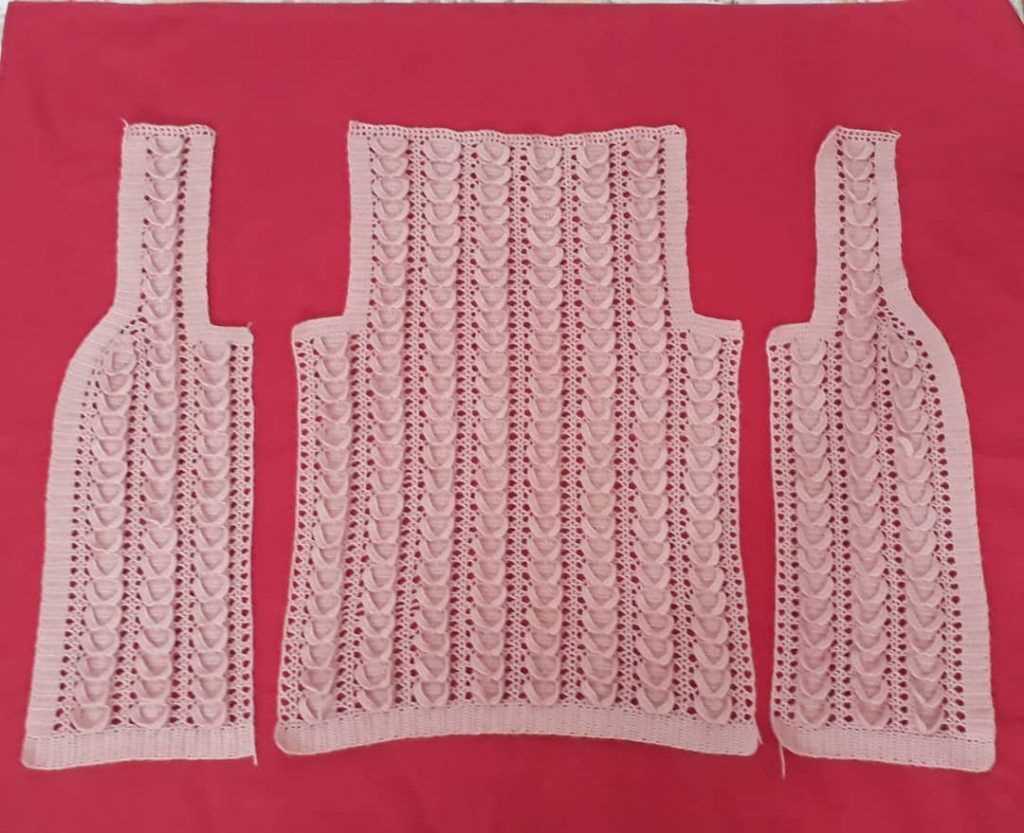
Construction: The construction of a chicken vest involves knitting the main body piece, which covers the chicken’s back and wings, and attaching straps that secure the vest in place. The body piece is typically knitted in a rectangular shape and then stitched together along the sides and top, leaving openings for the chicken’s head, wings, and tail feathers. The straps are added afterward and can be adjusted to ensure a snug and comfortable fit for the chicken.
Functionality: Chicken vests serve multiple purposes, including protection from cold weather, preventing feather pecking, and aiding in the healing of wounds or injuries. The knitted fabric provides insulation, keeping the chickens warm during colder months. Additionally, the vest can act as a barrier, preventing other chickens from pecking at the feathers, which can lead to injuries and stress. The design of the vest also allows for easy movement and does not restrict the chicken’s natural behavior.
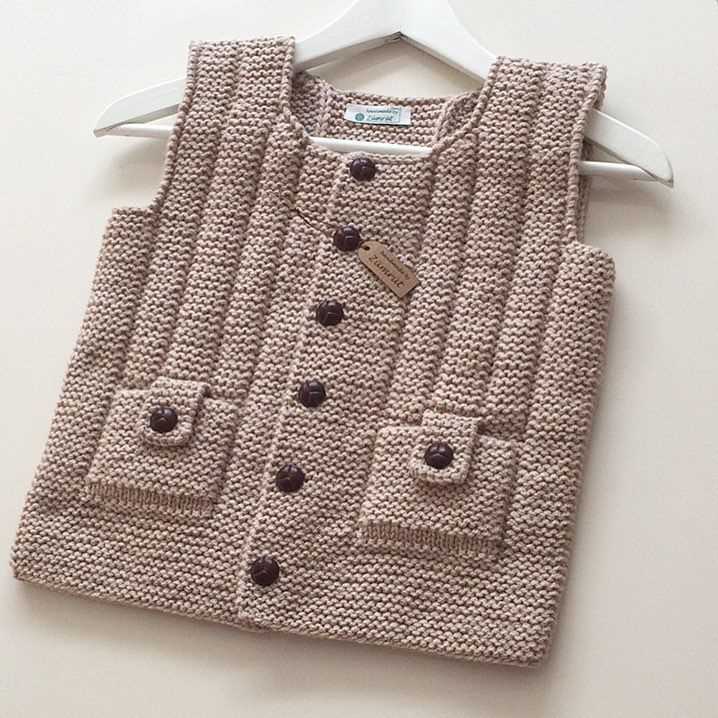
Customization: One of the great benefits of knitting a chicken vest is the ability to customize it according to your preferences and the needs of your chickens. You can experiment with different colors, patterns, and embellishments to make each vest unique. Some knitters also choose to add additional features, such as pockets or loops for attaching small accessories, to make the vest even more functional and stylish.
- Overall, understanding the construction of a chicken vest is essential for successfully knitting one yourself. By following a suitable pattern, choosing the right materials, and considering the functionality and customization options, you can create a practical and fashionable vest that will keep your chickens warm and protected.
Step-by-Step Instructions for Knitting a Chicken Vest
Knitting a chicken vest can be a fun and creative project for poultry owners who want to keep their chickens warm and stylish. Whether you’re a beginner knitter or have some experience, this step-by-step guide will help you create a cozy vest for your feathered friends.
Materials Needed:
- Medium-weight yarn in the desired color
- Knitting needles, size 8 (5mm)
- Tape measure
- Scissors
Instructions:
1. Take Measurements: Start by measuring your chicken’s chest circumference and the length from the base of the neck to the base of the tail feathers. These measurements will determine the size of the vest you need to knit.
2. Gauge Swatch: Knit a small swatch using your chosen yarn and needle size to determine your gauge. Measure the number of stitches per inch and rows per inch to ensure the correct fit for the vest.
3. Cast On: Using your gauge measurements, cast on the required number of stitches for the back of the chicken vest. This will form the bottom edge of the vest.
4. Knit the Back: Knit in stockinette stitch (knit one row, purl one row) for the length determined by your measurements. This will create the main body of the vest.
5. Shape the Armholes: At the desired length, bind off stitches for the armholes on each side of the work. This will create openings for the chicken’s wings.
6. Knit the Front: Repeat steps 3 and 4 to knit the front of the chicken vest. The front should be slightly shorter than the back to accommodate the neck opening.
7. Join the Front and Back: With the right sides facing each other, use a tapestry needle and some yarn to sew the shoulder seams, leaving an opening for the chicken’s head.
8. Finish the Edges: To give the vest a neater finish, knit ribbing or a simple garter stitch along the neckline, armholes, and bottom edge. This will help prevent curling and add some stretch.
9. Try It On: Once the vest is complete, carefully slip it over your chicken’s head and secure it in place. Make any necessary adjustments to ensure a comfortable fit.
10. Enjoy: Admire your handiwork and watch as your chicken struts around in style, cozy and fashionable in their new vest!
Now that you have the step-by-step instructions, grab your knitting needles and get started on creating a one-of-a-kind chicken vest. Your feathered friends will thank you for the extra warmth and fashion flair!
Tips and Tricks for Customizing Your Chicken Vest’s Design

When it comes to knitting a chicken vest, there are plenty of options for customizing the design to make it unique and personalized. Whether you want to add a pop of color or incorporate different patterns, here are some tips and tricks to help you create the perfect chicken vest:
1. Experiment with Different Yarns
One of the easiest ways to customize your chicken vest is by using different types of yarns. Consider using variegated yarns for a vibrant and multicolored look, or opt for a soft and fluffy yarn for a cozy feel. You can also mix and match different yarn weights to create contrasting textures.
2. Add Embellishments
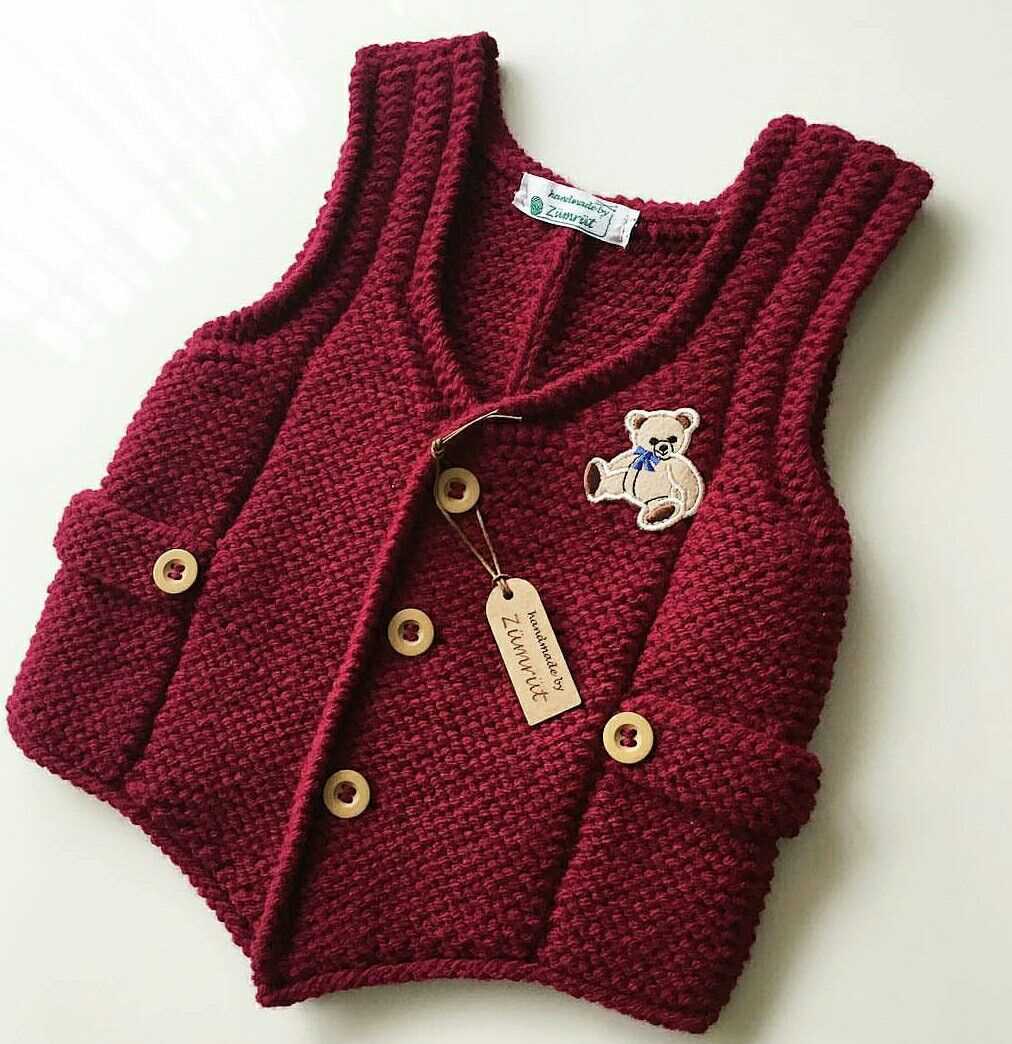
Embellishments can take your chicken vest design to the next level. You can use beads, buttons, or even patches to add a touch of personality. For a rustic look, try incorporating wooden buttons, or for a more elegant touch, use rhinestones or sequins. The possibilities are endless!
3. Incorporate Colorwork
If you want to create a visually stunning chicken vest, consider incorporating colorwork techniques. Fair Isle knitting or stranded knitting can add beautiful patterns and designs to your vest. You can create geometric shapes or even animal motifs to make your chicken vest truly one-of-a-kind.
4. Customize the Fit
Another way to personalize your chicken vest is by customizing the fit. You can adjust the length, width, or even the neckline to ensure the vest fits your chicken perfectly. This can be especially useful if you have a larger or smaller breed of chicken that requires a different size.
5. Make it Reversible
If you want to make your chicken vest even more versatile, consider designing it to be reversible. This way, you can have two different looks in one vest. You can use different colors, patterns, or textures on each side, giving your chicken even more style options.
With these tips and tricks, you can create a chicken vest that is not only functional but also reflects your personal style. Whether you choose to experiment with different yarns, add embellishments, or incorporate colorwork, the key is to have fun and let your creativity shine.
How to Properly Fit a Chicken Vest on Your Feathered Friend
Knitting a chicken vest for your feathered friend can provide them with extra warmth and protection, but it’s important to ensure that the vest fits properly. A well-fitted vest will allow your chicken to move freely and comfortably while still providing the intended benefits.
1. Choose the right size: When knitting a chicken vest, it’s important to consider the size of your chicken. Measure your chicken’s body length, neck circumference, and chest circumference before starting the project. Use these measurements as a guide to determine the appropriate size for the vest.
2. Adjust the pattern if needed: If the pattern you are using doesn’t match the measurements of your chicken, you may need to make some adjustments. This can involve increasing or decreasing the number of stitches or rows to achieve the desired fit. Remember to consider the elasticity of the yarn you are using and make allowances for stretch.
3. Take into account the chicken’s movement: Chickens are active creatures that need to be able to move freely and comfortably. When fitting the vest, make sure it doesn’t restrict their ability to walk, scratch, or flap their wings. Pay attention to areas such as the neck and wing areas, ensuring that the vest is snug but not too tight.
4. Secure the vest properly: The vest should fit securely on your chicken to prevent it from slipping or getting caught on objects. Consider using adjustable straps or buttons for closures, as they allow for easy adjustments and ensure a snug fit. Monitor your chicken’s behavior and check the vest regularly to ensure it hasn’t become loose or uncomfortable.
By following these tips, you can ensure that the chicken vest you knit for your feathered friend will fit properly and provide the desired warmth and protection without restricting their movement.
Recommended Maintenance and Cleaning Tips for Chicken Vests
Chicken vests, also known as chicken saddles, are an essential accessory for protecting your feathered friends. These vests help prevent feather loss and injuries caused by pecking or mating. To ensure the longevity and functionality of your chicken vests, proper maintenance and cleaning are necessary. Here are some recommended tips to keep your chicken vests in excellent condition:
Regular Inspection
It is essential to regularly inspect your chicken vests for any signs of damage or wear and tear. Check the straps, buckles, and stitching to make sure they are still secure and intact. Look for frayed edges or loose threads that may compromise the effectiveness of the vest. Early detection of any issues will allow you to repair or replace the vest before it becomes a problem.
Hand Washing

Chicken vests should be hand washed to avoid damaging the delicate fabric and fastenings. Fill a basin or sink with lukewarm water and a mild detergent. Gently agitate the water to create a soapy solution. Submerge the vest in the water and use your hands to scrub gently, paying extra attention to any soiled areas. Rinse the vest thoroughly with clean water to remove all traces of detergent. Avoid wringing or twisting the vest as it can cause deformation.
Drying and Storage

After washing, gently squeeze out any excess water from the vest. Lay it flat on a clean towel or hang it in a well-ventilated area to air dry. Avoid direct sunlight, as it can fade the colors of the fabric. Make sure the vest is completely dry before storing it to prevent the growth of mold or mildew. Fold the vest neatly and store it in a dry, dust-free environment until it is needed again.
By following these maintenance and cleaning tips, you can ensure that your chicken vests remain in optimal condition, providing the necessary protection for your chickens. Regular inspections, gentle hand washing, and proper drying and storage will help extend the lifespan of your chicken vests and keep your feathered friends comfortable and safe.
Exploring Different Variations and Patterns for Chicken Vests
In this article, we have discussed the importance of chicken vests in protecting chickens from the elements and preventing feather picking. We have also provided a basic knitting pattern for a chicken vest.
Now, let’s explore some different variations and patterns for chicken vests that you can try:
1. Colorful and Striped Vests
You can add a pop of color to your chicken vests by incorporating different yarn colors. Stripes are also a fun way to add visual interest to the vest. Experiment with different color combinations and create unique and eye-catching vests for your chickens.
2. Cable Knit Vests
If you’re an advanced knitter looking for a challenge, try knitting a cable knit vest for your chickens. Cable knitting creates beautiful and intricate designs that will make your chicken stand out. Look for cable knitting patterns and adapt them to suit the size and shape of your chicken.
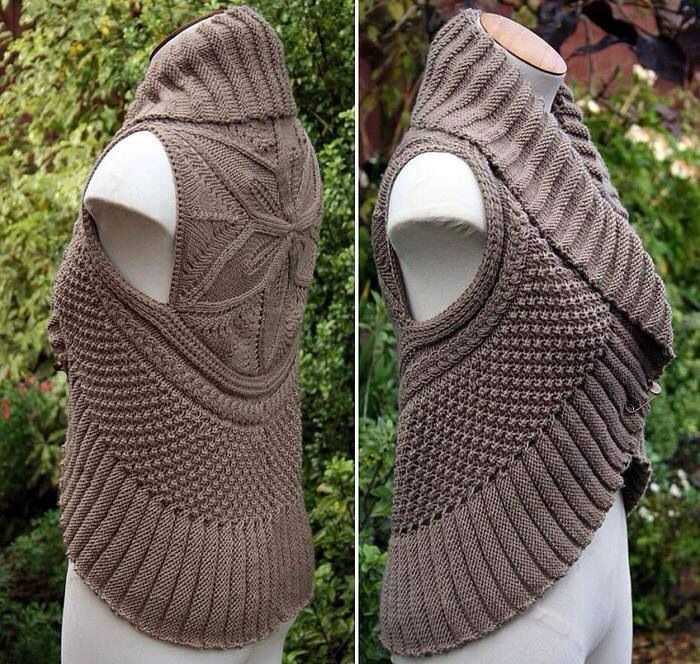
3. Lace Vests
Lace vests are delicate and elegant, perfect for pampered chickens. Use a lace knitting pattern to create a vest with intricate lacework. The light and airy design will not only keep your chicken protected but will also add a touch of sophistication to their attire.
4. Embellished Vests
If you want to take your chicken vest to the next level, consider adding embellishments such as buttons, ribbons, or even small bells. These decorative elements can add a whimsical touch to the vest and make your chicken the star of the coop.
5. Customized Vests
No two chickens are alike, so why should their vests be? Get creative and customize your chicken vests to fit your chickens’ personalities. Add their names, initials, or fun designs that reflect their individuality. This personal touch will make the vests even more special.
Remember, the main goal of a chicken vest is to protect your chickens and prevent feather picking. So, make sure to choose patterns that provide adequate coverage and fit snugly on your chickens. Experiment with different variations and patterns, and have fun creating unique and fashionable vests for your feathered friends.
Q&A:
What is a chicken vest knitting pattern?
A chicken vest knitting pattern is a pattern that allows you to knit a vest specifically designed for chickens. It is used to make a protective cover for chickens, usually to keep them warm during the colder months or to prevent them from plucking out their feathers.
Why would chickens need a vest?
Chickens may need a vest for various reasons. Some chickens have a tendency to pluck out their feathers, which can lead to health issues. A vest can help prevent this behavior by providing a barrier between the chicken’s beak and its body. Additionally, a vest can also be used to keep chickens warm in colder climates or during winter months.
Where can I find chicken vest knitting patterns?
There are several places where you can find chicken vest knitting patterns. You can search online on websites that offer knitting patterns, such as Ravelry or Etsy. You can also find patterns in knitting books or magazines that specialize in animal or pet knitting patterns. Additionally, you can also join knitting communities or forums where fellow knitters may have shared their own chicken vest patterns.
What materials are needed to knit a chicken vest?
The materials needed to knit a chicken vest typically include knitting needles, yarn, and any additional accessories or embellishments you may want to add. The specific size of needles and type of yarn will depend on the pattern you choose and the size of the chicken. Some patterns may also require additional materials such as buttons or elastic for closures or straps.
Are there different sizes of chicken vest knitting patterns?
Yes, there are different sizes of chicken vest knitting patterns available. Just like with human clothing patterns, chicken vest patterns can be adjusted to fit different sizes of chickens. Some patterns may include multiple size options, while others may provide instructions on how to adjust the pattern to fit your specific chicken’s measurements.
What is a chicken vest knitting pattern?
A chicken vest knitting pattern is a set of instructions and guidelines that assist knitters in creating a vest for chickens. It typically includes details on the type of yarn and needles to use, stitch patterns, and measurements for the chicken’s body.
Why would a chicken need a vest?
Chicken vests serve as a protective layer for chickens, particularly in colder climates or when they have injuries or bald spots. Vests help keep them warm, protect their skin, and prevent pecking or scratching of sensitive areas.