
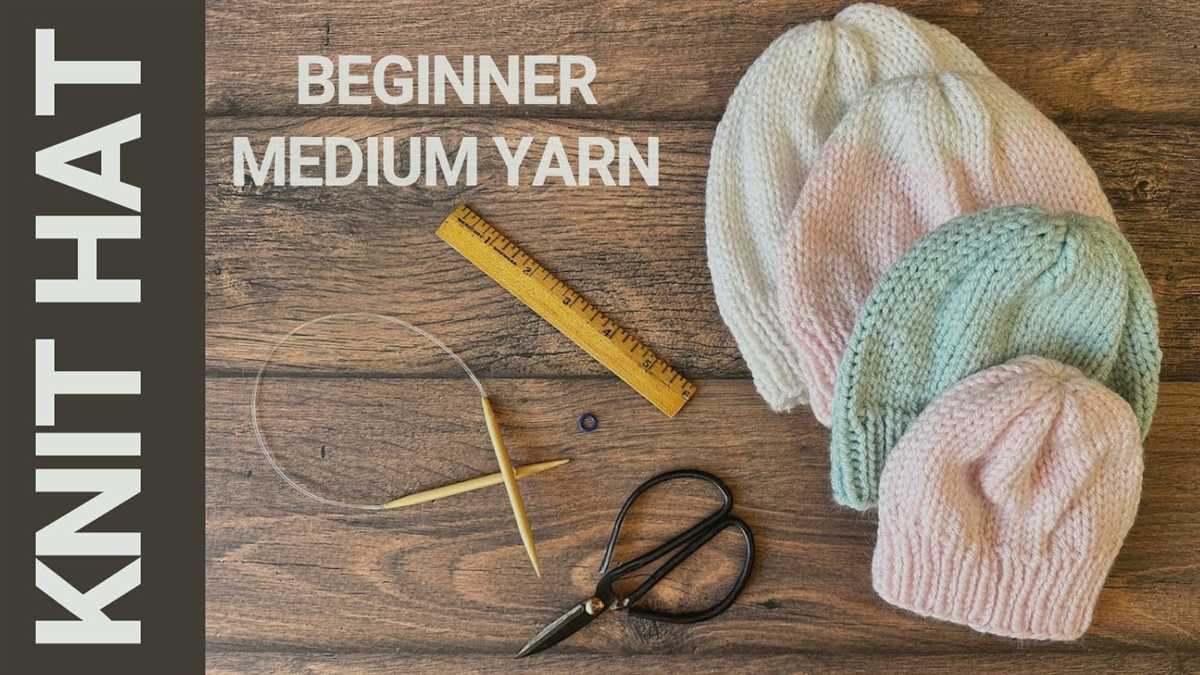
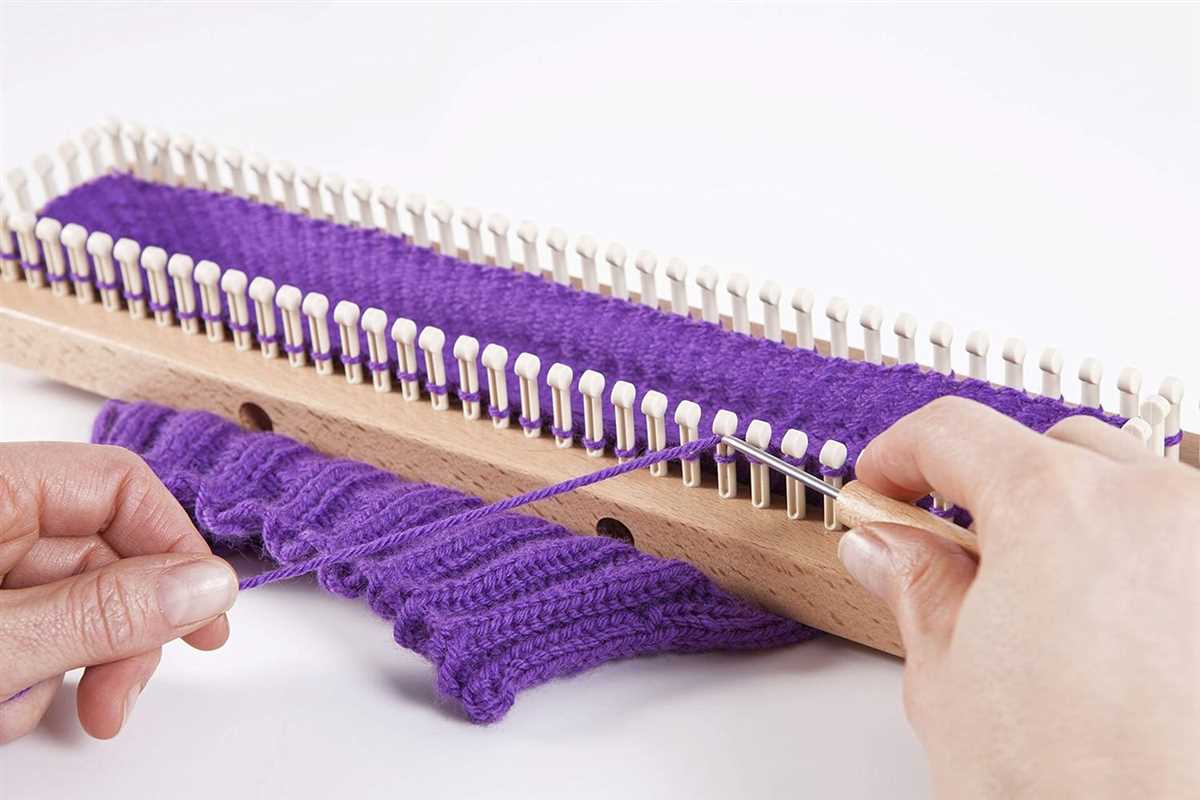
Knitting is a versatile craft that allows you to create beautiful and functional pieces with just a few simple tools. However, one of the challenges that knitters often face is finding the right yarn weight to match a pattern. Yarn weight can make a significant difference in the finished project, affecting both the size and the overall look. Fortunately, with a little knowledge and a few adjustments, you can easily adapt a knitting pattern to suit a different yarn weight.
When adjusting a knitting pattern for a different yarn weight, the first step is to understand the relationship between yarn weight and gauge. Yarn weight refers to the thickness of the yarn, which can range from lace weight to super bulky. Each yarn weight has a recommended gauge, which is the number of stitches and rows per inch that the yarn should be knit to create the intended fabric. By matching the gauge of your new yarn to the gauge specified in the pattern, you can ensure that the size and fit of your finished project will be similar.
To adjust a knitting pattern for a different yarn weight, you will need to make changes to the number of stitches and rows you knit. If you are knitting with a heavier yarn than the pattern calls for, you will need to cast on fewer stitches and knit fewer rows to achieve the same size. Conversely, if you are knitting with a lighter yarn, you will need to cast on more stitches and knit more rows.
Choosing the right yarn for your knitting project

When starting a knitting project, one of the most important decisions is choosing the right yarn. The type and weight of the yarn will determine the final look, drape, and texture of your knitted item.
First, consider the pattern or design you will be working with. Look for any specific recommendations regarding yarn weight, fiber content, or texture. Some patterns may have specific yarn suggestions, while others may provide more flexibility. It’s important to understand the recommendations and requirements of the pattern to ensure a successful outcome.
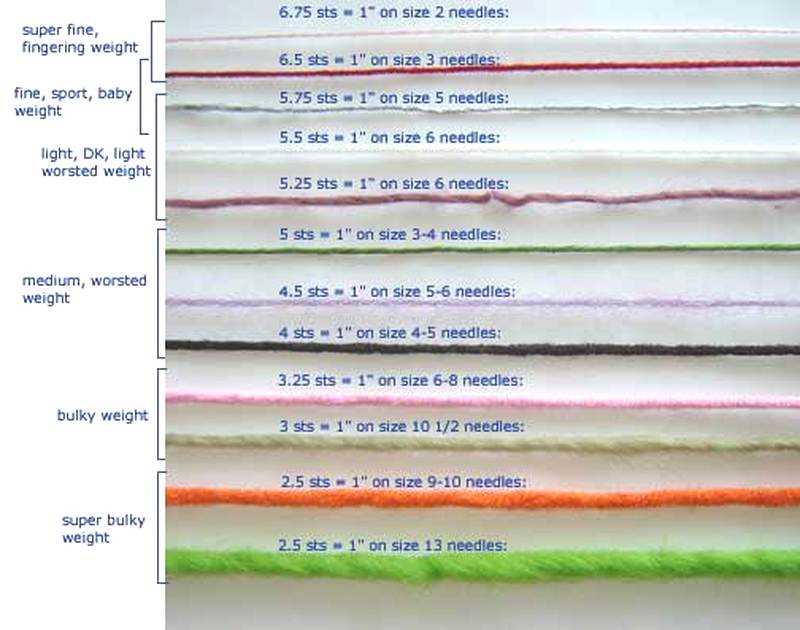
In terms of yarn weight, there are several options to choose from. The most common weights are lace, fingering, sport, DK, worsted, and bulky. Lace and fingering weights are typically used for delicate or lightweight projects, while sport and DK weights are great for garments and accessories. Worsted and bulky weights are ideal for cozy and warm projects like sweaters and blankets.
Next, consider the fiber content of the yarn. This will affect the durability, breathability, and feel of the finished item. Some popular natural fibers include wool, alpaca, cotton, and silk, each with its own unique characteristics. Synthetic fibers like acrylic and nylon are also commonly used and often offer increased durability and easy care.
It’s also worth considering the dye and color of the yarn. Solid or semi-solid colors can highlight stitch patterns and textures, while variegated or multi-colored yarns can add visual interest and depth. Keep in mind that different yarns may react differently to dye, so it’s a good idea to check the dyeing instructions or swatch before starting your project.
Ultimately, the right yarn choice depends on your personal preferences, the project requirements, and your knitting skills. By considering the pattern, yarn weight, fiber content, and color options, you can make an informed decision that will result in a beautiful, well-suited knitted item.
Understanding yarn weight categories
When it comes to knitting, understanding the different yarn weight categories is essential. Yarn weight refers to the thickness or diameter of the yarn, and it plays a significant role in determining the final outcome and size of your knitted project. Each yarn weight category has its own characteristics and recommended needle size, which can help you choose the right yarn for your desired project.
1. Lace Weight (0)

Lace weight yarn is the thinnest yarn weight category. It is typically used for delicate and lightweight projects such as lace shawls, doilies, and fine garments. Due to its thinness, lace weight yarn requires smaller needles, usually in the range of US 000-1 (1.5-2.25mm), to create a fabric with a lacy appearance.
2. Fingering/Sock Weight (1)

Fingering or sock weight yarn is slightly thicker than lace weight yarn. It is commonly used for knitting socks, but it can also be used for shawls, light garments, and baby items. The recommended needle size for fingering weight yarn is usually in the range of US 1-3 (2.25-3.25mm).
3. Sport Weight (2)
Sport weight yarn is a medium-fine category that falls between fingering and DK (double knitting) weight yarn. It is often used for lightweight sweaters, baby blankets, and accessories. The recommended needle size for sport weight yarn is usually in the range of US 3-5 (3.25-3.75mm).
4. Worsted/Aran Weight (4)

Worsted or Aran weight yarn is a popular choice for a wide range of projects, including garments, blankets, and home decor. It is a medium-weight yarn that provides good stitch definition and is easy to work with. The recommended needle size for worsted weight yarn is usually in the range of US 7-9 (4.5-5.5mm).
5. Bulky/Chunky Weight (5)

Bulky or chunky weight yarn is thicker and heavier than worsted weight yarn. It is often used for warm and cozy projects such as hats, scarves, and blankets. The recommended needle size for bulky weight yarn is usually in the range of US 10-11 (6-8mm).
6. Super Bulky/Jumbo Weight (6)
Super bulky or jumbo weight yarn is the thickest yarn weight category. It is perfect for quick and chunky projects like oversized sweaters and blankets. The recommended needle size for super bulky weight yarn is usually in the range of US 13 and above (9mm and above).
By understanding the different yarn weight categories and their characteristics, you can confidently choose the right yarn for your knitting project and make adjustments to the pattern if needed.
Calculating gauge with different yarn weights
When adjusting a knitting pattern for a different yarn weight, it’s important to calculate the gauge to ensure your finished project turns out the correct size. Gauge refers to the number of stitches and rows per inch in your knitting. By matching the pattern’s gauge, you can ensure that your stitches and rows will be the same size as the pattern intended.
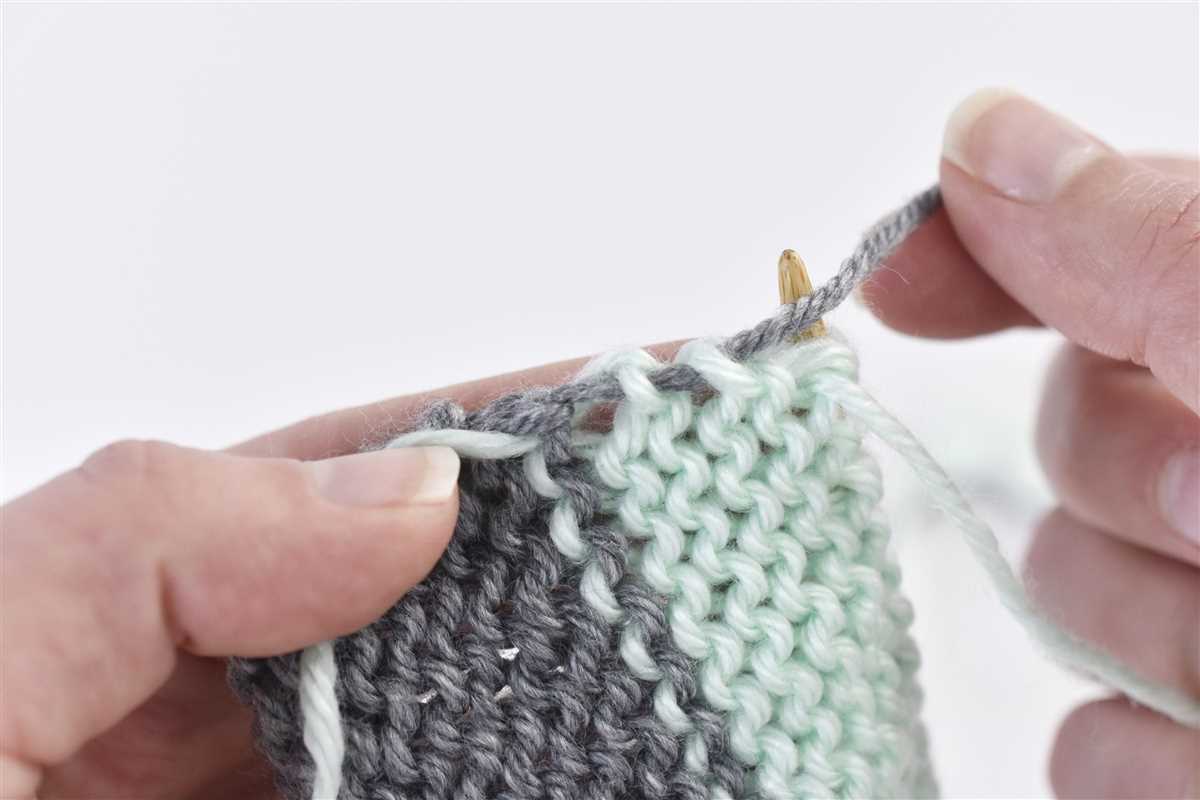
To calculate the gauge with a different yarn weight, you will need to swatch. A swatch is a small sample of knitting that allows you to measure your stitches per inch. Use the recommended needle size for the yarn you’re using and cast on a few inches of stitches. Knit a few rows in the desired stitch pattern, and then measure the stitches per inch using a ruler or a gauge tool.
Here’s how to calculate the gauge:
- Count the number of stitches across 4 inches on your swatch.
- Divide the total number of stitches by 4 to get the average number of stitches per inch.
- Repeat the same steps to calculate the number of rows per inch.
Once you have the gauge for your swatch, you can compare it to the gauge listed in the pattern. If your gauge doesn’t match the pattern’s gauge, you will need to make adjustments.
If your gauge is smaller than the pattern’s gauge:
- Try using a larger needle size to create larger stitches.
- Re-swatch with the larger needle size and compare your new gauge to the pattern’s gauge.
- If needed, continue adjusting the needle size until you achieve the correct gauge.
If your gauge is larger than the pattern’s gauge:
- Try using a smaller needle size to create smaller stitches.
- Re-swatch with the smaller needle size and compare your new gauge to the pattern’s gauge.
- If needed, continue adjusting the needle size until you achieve the correct gauge.
Remember, adjusting the gauge may affect the size of your finished project, so always check your gauge before starting a new knitting project with a different yarn weight.
Converting pattern measurements for different yarn weights
When working with different yarn weights, it’s essential to adjust the pattern measurements accordingly. By making the necessary modifications, you can ensure that the final garment or accessory will fit properly and have the desired look and drape.
To convert pattern measurements for different yarn weights, start by determining the gauge of your chosen yarn. This information can usually be found on the yarn label. The gauge provides information about the number of stitches and rows that should be achieved over a given measurement.
Once you know the gauge of your yarn, compare it to the gauge specified in the pattern. If your gauge is different, you will need to make adjustments. If your gauge is larger, you will need to use smaller needles to achieve the correct number of stitches and rows. Conversely, if your gauge is smaller, you will need to use larger needles.
In addition to adjusting the needle size, you may also need to alter the number of stitches and rows in the pattern to achieve the desired measurements. For example, if your gauge is larger than the pattern’s gauge, you may need to work fewer stitches and rows to achieve the same dimensions. Conversely, if your gauge is smaller, you may need to work more stitches and rows.
It’s important to note that adjusting pattern measurements for different yarn weights may also require modifications to the shaping and construction of the garment or accessory. This can include altering the number of increases or decreases, adjusting the length of certain sections, or even changing the overall design to accommodate the different drape and weight of the yarn.
By carefully considering the gauge, needle size, and necessary adjustments, you can successfully convert pattern measurements for different yarn weights and create a beautiful and well-fitting finished project.
Modifying Stitch Patterns for Different Yarn Weights
When working with different yarn weights, it is important to adjust the stitch patterns in your knitting project to ensure that you achieve the desired size and drape. Modifying stitch patterns for different yarn weights can be done by changing the number of stitches, the number of repeats, or even the type of stitch used.
Changing the Number of Stitches: One way to modify stitch patterns is by adjusting the number of stitches in each row. If you are working with a bulkier yarn, you may need to decrease the number of stitches to maintain the desired width. On the other hand, if you are working with a lighter weight yarn, you may need to increase the number of stitches to achieve the same width.
- Example: If your pattern calls for a stitch pattern with a multiple of 10 stitches, but you are working with a bulkier yarn, you could try reducing the number of stitches to a multiple of 8 or even 6 stitches instead.
Changing the Number of Repeats: Another way to modify stitch patterns is by adjusting the number of repeats. If you are working with a thicker yarn, you may need to decrease the number of repeats to maintain the desired length. Conversely, if you are working with a thinner yarn, you may need to increase the number of repeats to achieve the same length.
- Example: If your pattern calls for a stitch pattern with a repeat of 8 rows, but you are working with a thinner yarn, you could try increasing the number of repeats to 10 or even 12 rows instead.
Changing the Type of Stitch: Finally, you can also modify stitch patterns by changing the type of stitch used. For example, if your pattern calls for a lace stitch but you are working with a bulkier yarn, you may want to consider substituting the lace stitch with a simpler stitch pattern that is better suited for the yarn weight.
- Example: If your pattern calls for a intricate lace pattern, but you are working with a bulky yarn, you could try substituting the lace stitches with a basic ribbing pattern instead.
Overall, when modifying stitch patterns for different yarn weights, it is important to consider both the width and length of your project. Experimenting with different stitch counts, repeat numbers, and even stitch patterns can help you achieve the desired outcome and create a beautiful knitted piece.
Using different needle sizes with different yarn weights

When adjusting a knitting pattern for a different yarn weight, it is essential to consider using different needle sizes. Needle size directly impacts the tension and gauge of the knitted fabric, and by adjusting the needle size, you can achieve the desired outcome with a different yarn weight.
Generally, the thicker the yarn, the larger the needle size you will need. If you are using a bulkier yarn, such as a chunky or super bulky yarn, you will likely need larger needles to create a fabric with the correct tension and drape. On the other hand, if you are working with a finer yarn, such as laceweight or fingering weight, you will need smaller needles to achieve the desired tension.
It is crucial to refer to the pattern’s recommended needle size as a starting point. If the pattern suggests a specific size for a particular yarn weight, you can adjust the needle size accordingly. For example, if the pattern calls for a size 8 needle with a worsted weight yarn, and you are using a thinner sport weight yarn, you may want to try using a size 6 or 7 needle to achieve the correct gauge.
Keep in mind that adjusting the needle size may also affect the final size of your project. If you are following a pattern for a sweater, for instance, using larger needles may result in a larger-sized garment. Take this into consideration and make any necessary adjustments to the pattern’s measurements to ensure the perfect fit.
Experimenting with different needle sizes and yarn weights can be a fun and creative way to modify knitting patterns. It allows you to explore different textures and create unique designs. However, it is crucial to swatch and check your gauge before starting a project to ensure that your adjustments will yield the desired results.
Adjusting the number of stitches and rows for different yarn weights

One of the main considerations when adjusting for different yarn weights is the number of stitches and rows. A pattern typically specifies the gauge, which is the number of stitches and rows per inch. To adjust for a different yarn weight, you’ll need to calculate the new stitch and row counts based on the gauge of the new yarn.
Adjusting the number of stitches:

- Determine the gauge of the new yarn by knitting a swatch with the recommended needle size.
- Measure the number of stitches per inch in your swatch.
- Divide the desired finished width of your project by the number of stitches per inch in your swatch to calculate the new stitch count.
Adjusting the number of rows:
- Measure the number of rows per inch in your swatch.
- Divide the desired finished length of your project by the number of rows per inch in your swatch to calculate the new row count.
Once you have calculated the new stitch and row counts, you can simply follow the pattern as written, using the new counts instead of the original ones. Keep in mind that changing the yarn weight may also affect the overall drape and appearance of the finished project, so it’s always a good idea to make a swatch and check the results before diving into your project.
Accounting for drape and weight differences in the final product
When adjusting a knitting pattern for different yarn weight, it is important to consider both the drape and weight differences that may arise in the final product. These factors can significantly impact the overall look and feel of the knitted item.
Drape:
The drape of a knitted fabric refers to how it hangs and falls when worn. Different yarn weights have different levels of drape due to their thickness and fiber content. For example, a garment made with a bulky yarn will have a heavier and less fluid drape compared to one made with a lightweight yarn. To account for the drape differences, it is necessary to adjust the pattern’s stitch and row counts. Increasing the stitch count can create a looser and more fluid fabric, while decreasing the stitch count can make the fabric denser and less drapey.
Weight:

The weight of a knitted item also plays a role in its overall appearance and functionality. Heavier yarns are more suitable for cozy winter garments and accessories, while lighter yarns are preferred for delicate and airy designs. When adjusting the pattern for a different yarn weight, it is important to consider the final weight of the garment and how it will affect the wearer. For instance, a sweater made with a heavier yarn may feel too bulky and uncomfortable, while a lightweight yarn may not provide enough warmth. Adjustments to the pattern can be made by adding or subtracting stitches and rows to achieve the desired weight and bulkiness.
Overall, when adjusting a knitting pattern for different yarn weights, it is crucial to consider the drape and weight differences that will occur in the final product. Making adjustments to stitch and row counts can help achieve the desired drape and weight, ensuring that the knitted item looks and feels as intended. It is always recommended to make a gauge swatch and test out the new yarn weight before fully committing to the pattern adjustments.
Adapting shaping instructions for different yarn weights

When adjusting a knitting pattern for different yarn weights, it’s important to also consider how the shaping instructions may need to be modified. The shaping instructions in a knitting pattern are often written with specific yarn weights in mind, so when using a different yarn weight, it’s necessary to make some adjustments.
Increase and decrease rates: The rates at which you increase or decrease stitches in a pattern can be affected by the thickness and drape of the yarn. When using a lighter weight yarn, you may need to increase or decrease stitches more frequently to achieve the desired shape and fit. Conversely, if using a heavier weight yarn, fewer increases or decreases may be needed. It’s important to keep track of your gauge and adjust the shaping instructions accordingly.
Shaping placement: The placement of shaping elements, such as darts or decreases, may also need to be adjusted when using a different yarn weight. For example, a pattern may call for shaping to be placed at a certain number of inches from the cast on edge, but if you’re using a heavier yarn, the bulkiness of the fabric may require you to place the shaping elements closer to the edge or further apart. It’s important to consider the drape and weight of the fabric when determining the placement of shaping elements.
Visualizing the finished shape: When adapting shaping instructions for different yarn weights, it can be helpful to visualize the finished shape of the garment. Lighter weight yarns tend to create more drape and flow, so you may need to adjust the shaping to create a more fitted silhouette. Heavier yarns, on the other hand, can create a more structured and bulky look, so you may need to adjust the shaping to achieve a looser fit. It’s important to consider the overall look and feel you want to achieve and make adjustments to the shaping instructions accordingly.
Overall, adapting shaping instructions for different yarn weights requires careful consideration of the yarn’s thickness, drape, and visual characteristics. By adjusting the increase and decrease rates, shaping placement, and visualizing the finished shape, you can ensure that the garment will fit and look the way you desire, regardless of the chosen yarn weight.
Considering the Impact of Yarn Weight on Garment Fit
When choosing a yarn for a knitting project, it’s important to consider the impact yarn weight will have on the fit of the final garment. Yarn weight refers to the thickness of the yarn, which determines the size and drape of the finished piece. Different yarn weights will require adjustments to the knitting pattern to ensure the desired fit.
Firstly, the yarn weight will affect the gauge of the knitting project. Gauge is the number of stitches and rows per inch, and it is crucial for achieving the correct size and fit. Using a heavier yarn will typically result in a larger gauge, while using a lighter yarn will result in a smaller gauge. To adjust for the yarn weight, it may be necessary to change the needle size or tension to achieve the desired gauge.
Secondly, the thickness of the yarn will impact the overall size and drape of the garment. Thicker yarns will create a bulkier and more substantial fabric, whereas thinner yarns will create a lighter and more delicate fabric. It’s important to consider how this will affect the intended fit of the garment. For example, if the pattern calls for a loose and flowy sweater, using a heavy yarn may result in a tight and stiff fabric that doesn’t drape well.
In conclusion, when adjusting a knitting pattern for a different yarn weight, it’s important to take into account the impact on gauge and overall fit. Making the necessary adjustments to needle size, tension, and pattern instructions will ensure that the final garment has the desired fit and appearance. Understanding the characteristics of different yarn weights and their impact on the finished fabric will enable knitters to make informed choices and create beautifully fitting garments.
Troubleshooting common issues when adjusting patterns for different yarn weights
When adjusting knitting patterns for different yarn weights, it is common to encounter some issues along the way. Here are some common problems that you may face and how to troubleshoot them:
1. Size discrepancies

If you find that your finished project is turning out too large or too small, it could be due to a difference in gauge between the original pattern and the yarn that you are using. Make sure to check your gauge before starting the project and adjust your needle size accordingly. If your gauge still doesn’t match, you may need to try a different yarn weight or make further adjustments to the pattern.
2. Texture and drape

Changing yarn weights can impact the overall texture and drape of the finished project. Thicker yarns tend to create a stiffer and bulkier fabric, while thinner yarns create a more delicate and flowing fabric. If you want to maintain the same texture and drape as the original pattern, you may need to adjust the stitch pattern or make additional modifications to compensate for the change in yarn weight.
3. Yardage requirements
When using a different yarn weight, you may need to adjust the yardage requirements for the pattern. Thicker yarns typically require more yardage than thinner yarns to achieve the same size project. Make sure to check the recommended yardage for the original pattern and compare it to the yardage of your chosen yarn. If there is a significant difference, you may need to purchase additional yarn or make modifications to the pattern to accommodate the yarn that you have.
4. Overall aesthetics
Lastly, it is important to consider the overall aesthetics of your adjusted pattern. While changing yarn weights can create unique and interesting effects, it may also alter the intended look of the original pattern. Take into account the drape, stitch definition, and overall appearance of the fabric when making adjustments. If necessary, consult the original pattern designer or experienced knitters for advice on achieving the desired aesthetic with a different yarn weight.
Remember, adjusting knitting patterns for different yarn weights can be a fun and creative process. Don’t be afraid to experiment and make adjustments as needed to achieve the desired outcome. With practice and experience, you’ll become more comfortable in adapting patterns to suit the yarn that you have on hand.