
Blankets are a cozy and comforting addition to any home, and a beautiful border can elevate their appearance. Adding a border to a knitted blanket not only gives it a finished look, but it also allows you to personalize your creation by choosing a design that suits your style and complements the overall aesthetic of your home decor. Blanket border knitting patterns come in a variety of styles, from simple and elegant to intricate and eye-catching. Whether you’re a beginner or an experienced knitter, there’s a border pattern out there that will enhance your blanket and make it a standout piece.
One popular choice for a blanket border pattern is the garter stitch. This simple yet classic design features a row of knitted bumps that provide a lovely texture to the edge of the blanket. The garter stitch border is ideal for beginners as it only requires knit stitches and can be easily adjusted to fit any size of blanket. For a more refined look, you can also add a slip stitch edge to your garter stitch border, which creates a neat and polished finish.
If you’re looking to add a touch of elegance to your knitted blanket, lace border patterns are a perfect option. Lace borders feature intricate stitch patterns that create a delicate and airy effect. They can be designed with a repeating pattern or feature an elaborate motif, such as flowers or leaves. Lace borders are often used for baby blankets, shawls, or other delicate projects, but they can also be stunning on larger blankets. Knitting a lace border may require some experience and concentration, but the result is well worth the effort.
Blanket Border Knitting Patterns

If you’re a knitting enthusiast, you know that a beautiful border can elevate a plain blanket to a stunning piece of art. Blanket border knitting patterns allow you to add a finishing touch to your knitted blankets, making them even more special and unique. With a wide array of patterns to choose from, you can find the perfect design to match the theme or style of your blanket.
Why use blanket border knitting patterns?
Blanket border knitting patterns not only add visual interest to a blanket, but they also serve a practical purpose. The border can help prevent the edges of the blanket from curling and provide stability to the overall structure. Additionally, it can add an extra layer of warmth and coziness.
Types of blanket border knitting patterns
There are countless options when it comes to blanket border knitting patterns, allowing you to get as creative as you like. Some popular choices include lace borders, cable borders, seed stitch borders, and ribbed borders. Whether you prefer a delicate and intricate design or a more simple and structured look, there’s a pattern out there for you.
- Lace borders: Lace borders are perfect for adding a touch of elegance and femininity to a blanket. They often feature delicate and intricate floral or geometric motifs that create a beautiful ethereal effect.
- Cable borders: If you’re looking for a more classic and timeless design, cable borders are a great choice. With their interwoven twists and braids, they add depth and texture to your blanket.
- Seed stitch borders: Seed stitch borders are simple yet effective. They create a subtle texture that adds interest without overpowering the rest of the blanket. This pattern is great for both beginner and experienced knitters.
- Ribbed borders: Ribbed borders are a popular choice for their versatility and stretchiness. They provide a clean and structured look that works well with both simple and intricate blanket designs.
Customizing your blanket border knitting pattern
Once you’ve chosen a blanket border knitting pattern, you can further customize it to suit your preferences. You can adjust the width of the border, incorporate different colors or yarns, or even combine multiple patterns for a unique and personalized look. The possibilities are endless, allowing you to create a one-of-a-kind blanket that reflects your creative vision.
In conclusion, blanket border knitting patterns are a fantastic way to add that extra touch of style and functionality to your knitted blankets. Whether you’re gifting them to loved ones or using them to decorate your home, these patterns allow you to unleash your creativity and showcase your knitting skills.
Types of Blanket Borders to Knit
When it comes to knitting blankets, adding a border can help to enhance the overall look and add a finishing touch. There are different types of blanket borders that you can knit, each offering a unique design and style. Let’s explore some popular options.
1. Garter Stitch Border
A garter stitch border is a simple yet classic option that can complement any blanket pattern. This border is created by knitting every row, resulting in a textured and squishy edging. It provides a clean and polished look to the blanket.
2. Ribbing Border
A ribbing border adds a touch of elegance and sophistication to a blanket. It can be worked in a 1×1 or 2×2 rib pattern, depending on your preference. Ribbing creates a stretchy and flexible border that lays flat and gives a professional finish to the blanket.
3. Lace Border
If you want to add a delicate and intricate touch to your blanket, a lace border is the perfect choice. Lace patterns can range from simple eyelet designs to more complex motifs. Knitting a lace border requires attention to detail and offers a beautiful, feminine look to the finished blanket.
4. Seed Stitch Border
A seed stitch border is created by alternating knit and purl stitches in a pattern. This border adds texture and interest to a blanket, giving it a cozy and rustic feel. The seed stitch border works well with both solid and variegated yarns, and it can complement various blanket designs.
5. Cabled Border
If you want to add a touch of sophistication and intricacy to your blanket, a cabled border is an excellent choice. Cable knitting involves crossing stitches to create unique patterns and textures. Knitting a cabled border requires intermediate to advanced knitting skills but results in a stunning and eye-catching border.
These are just a few examples of the types of blanket borders you can knit. Depending on your personal style and the design of the blanket, you can create a border that perfectly complements your project and adds a finishing touch to your beautiful knitted creation.
How to Choose the Perfect Border for Your Blanket
When it comes to knitting a blanket, choosing the right border can make all the difference in the finished product. The border not only adds a decorative touch, but also helps to frame the blanket and give it a polished look. Here are some tips on how to choose the perfect border for your blanket.
Consider the Style of the Blanket
Before choosing a border pattern, consider the overall style and design of your blanket. Is it a simple and minimalist design, or does it have intricate details and patterns? The border should complement the blanket’s style and enhance its overall appearance. For a simple and clean blanket, a basic garter stitch or seed stitch border can work well. If the blanket has more complex patterns, consider a border with cables or lace to add interest and texture.
Think About the Yarn
The type of yarn you are using can also influence your border choice. If you are using a bulky or textured yarn, a simple and understated border may be the best option to let the yarn shine. On the other hand, if the yarn is smooth and has a beautiful drape, you may want to choose a more intricate border pattern to showcase its qualities. Consider the weight, color, and texture of the yarn, and how it will interact with the border design.
Experiment with Samples

Before committing to a border pattern for your entire blanket, it can be helpful to knit a small sample and try out different border options. This will allow you to see how the border looks with the main body of the blanket and make any necessary adjustments. Knit a few inches of the blanket and then experiment with different border patterns to see which one you like best. You can also try different border widths to see how it changes the overall look of the blanket.
Choosing the perfect border for your blanket requires careful consideration of the blanket’s style, the yarn used, and experimentation with different samples. Take the time to find the border that complements your blanket and brings out its best features. With the right border, your knitted blanket will be a beautiful and cozy addition to your home.
Tips for Knitting a Seamless Border
When knitting a blanket border, it’s important to create a seamless and professional-looking edge. Here are some helpful tips to achieve this:
1. Choose a complementary stitch pattern
Select a stitch pattern that complements the main body of your blanket. Consider the texture, color, and overall style of the blanket to help determine the best stitch pattern for the border. This will ensure a cohesive and aesthetically pleasing finished product.
2. Calculate the number of stitches
Before starting the border, calculate the number of stitches needed to maintain an even edge. This will depend on the stitch pattern and gauge of your blanket. Make sure to distribute the stitches evenly along each side to maintain symmetry.
3. Use markers or stitch holders
If your border involves multiple stitch patterns or sections, use stitch markers or stitch holders to separate and keep track of each section. This will help you maintain the pattern consistently and avoid any mistakes or confusion.
4. Be mindful of tension

Pay attention to your tension while knitting the border. If your tension is different from the main body of the blanket, it may result in a wavy or puckered edge. Adjust your tension if needed to maintain a consistent appearance throughout the project.
5. Block your blanket

Once you have completed the border, block your blanket to even out the stitches and ensure a polished finish. Blocking can help flatten any curling edges and improve the overall drape and appearance of the blanket.
By following these tips, you can create a seamless and professional-looking border for your knitted blanket. Take your time, be patient, and enjoy the process of adding the finishing touch to your cozy creation!
Creative Border Ideas for Blankets

A border can add a beautiful finishing touch to a knitted blanket, elevating it from simple to stunning. With a wide range of knitting patterns and techniques available, there are endless possibilities for creating unique and creative borders for your blankets. Whether you’re looking for something simple and elegant or bold and eye-catching, here are some ideas to inspire your next blanket project.
1. Lace Border
Add a delicate and feminine touch to your blanket with a lace border. Lace patterns can range from simple and repetitive to intricate and complex, allowing you to customize the look and feel of your blanket. Choose a lace pattern that complements the overall design of your blanket and watch as your project transforms into a work of art.
2. Cable Border

If you’re looking for a more textured and cozy border, consider adding cables to your blanket. Cable knitting creates beautiful twisted patterns that add depth and interest to your project. Whether you opt for a simple cable design or a more intricate cable pattern, a cable border will surely make your blanket stand out.
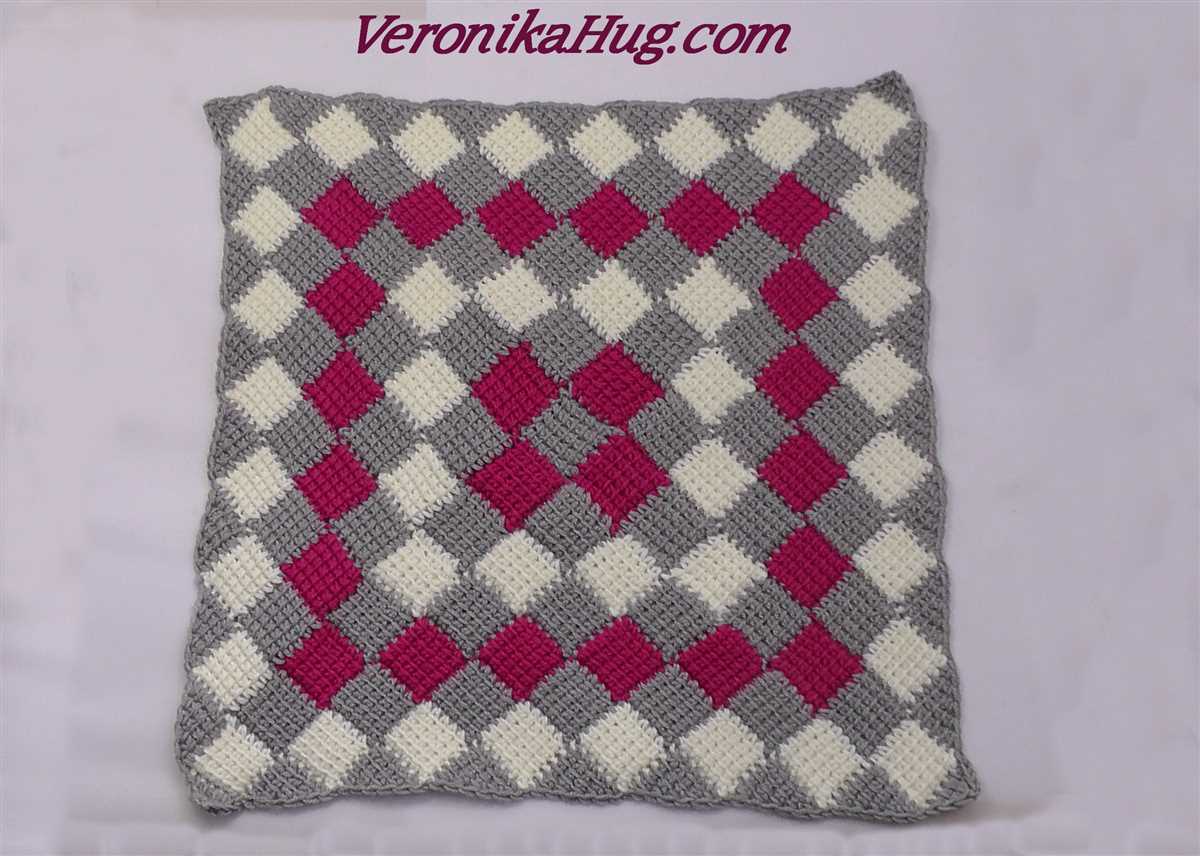
3. Colorwork Border
Add a pop of color to your blanket with a colorwork border. Colorwork knitting allows you to create stunning patterns and motifs using multiple colors of yarn. Whether you choose to create a geometric design, floral motifs, or any other pattern that catches your eye, a colorwork border will add visual interest and vibrancy to your blanket.
4. Garter Stitch Border
For a simple and classic look, a garter stitch border is always a good choice. Garter stitch is created by knitting every row, resulting in a bumpy texture that adds a cozy and timeless element to your blanket. A garter stitch border can be used to frame your blanket or create a subtle contrast to a more complex stitch pattern.
5. Bobble Border

If you’re looking to add some whimsy and texture to your blanket, a bobble border is the way to go. Bobbles are small, raised clusters of stitches that create a playful and 3-dimensional effect. Whether you choose to add bobbles sporadically or create a more uniform pattern, a bobble border will make your blanket visually intriguing and fun to touch.
With these creative border ideas, you can take your knitted blankets to the next level. Whether you’re a beginner or an experienced knitter, experimenting with different border patterns and techniques will allow you to add a personal touch to your projects and create blankets that are truly one-of-a-kind.
Step-by-Step Guide to Knitting a Ribbed Border
Adding a ribbed border to your knitted blanket is a great way to give it a finished and polished look. The ribbed texture creates a nice contrast to the smoothness of the main body of the blanket. Follow this step-by-step guide to learn how to create a ribbed border for your blanket.
Materials and Tools:

- Knitting needles
- Yarn in a color of your choice
- Yarn needle
- Scissors
Step 1: Cast On Stitches

Start by casting on the desired number of stitches onto your knitting needles. The number of stitches will depend on the size of your blanket and the desired width of the border. For a ribbed border, it’s best to cast on a multiple of 2 stitches.
Step 2: Knit the First Row
After casting on, knit the entire first row using the basic knit stitch. This will create a foundation for your ribbed border.
Step 3: Begin the Ribbing Pattern

Now, it’s time to start the ribbing pattern. The most common ribbing pattern is the 1×1 ribbing, where you alternate between knitting 1 stitch and purling 1 stitch. Repeat this pattern for each row of the border until you reach the desired length.
Step 4: Bind Off
Once you’ve reached the desired length for your ribbed border, it’s time to bind off. Knit the first 2 stitches as usual, then insert the left needle into the first stitch on the right needle. Lift it over the second stitch and completely off the needle. Knit the next stitch and repeat this process until you’ve bound off all stitches.
Step 5: Finishing Touches
After binding off, weave in any loose ends using a yarn needle. Trim the excess yarn with scissors. Give your blanket a gentle blocking to even out the stitches and help the ribbed border lay flat.
That’s it! You’ve successfully created a ribbed border for your knitted blanket. Experiment with different ribbing patterns or even combine different colors to customize your border and make it unique.
Lace Border Patterns for Elegant Blankets
If you’re looking to add a touch of elegance to your knitted blankets, lace border patterns are the perfect choice. Incorporating delicate and intricate lace designs into the border of your blanket can elevate its beauty and create a stunning finished look. Whether you’re a beginner knitter or have years of experience, there are lace border patterns available for all skill levels.
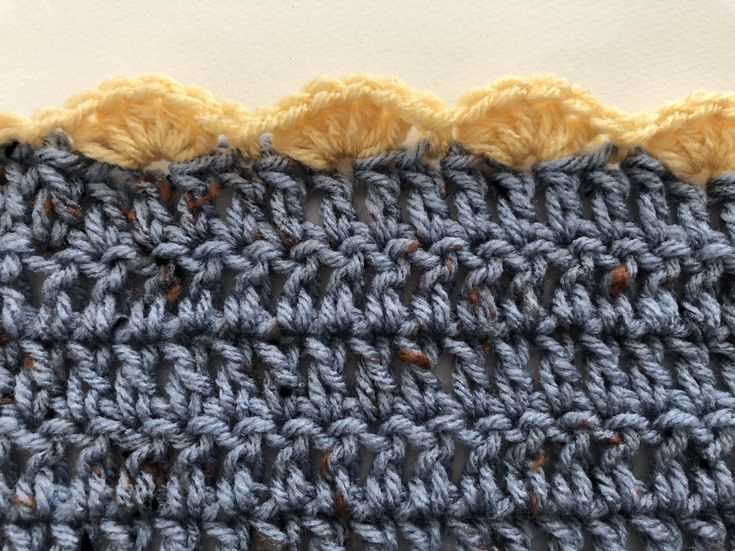
One popular lace border pattern is the “Feather and Fan” stitch. This classic pattern features a repeating sequence of yarn-overs and decreases, creating a graceful scalloped edge. The “Feather and Fan” stitch adds subtle texture and movement to the border of your blanket, resulting in a sophisticated and timeless design.
If you’re looking for a more intricate lace pattern, the “Leaf Lace” stitch is an excellent option. This pattern features a series of leaf-like motifs that intertwine and create a visually stunning border. The “Leaf Lace” stitch requires a bit more expertise and attention to detail but the end result is a breathtakingly beautiful blanket.
For those who prefer a simpler lace border pattern, the “Eyelet Lace” stitch is a great choice. This pattern consists of a series of evenly spaced eyelets that run along the edge of the blanket. The “Eyelet Lace” stitch adds a touch of delicacy and femininity to your blanket without being too overwhelming or complicated.
When selecting a lace border pattern for your elegant blanket, consider the overall style and aesthetic you want to achieve. Whether you prefer a classic, intricate, or minimalist design, there is a lace border pattern out there that will perfectly complement your vision. So pick up your needles, choose your favorite lace border pattern, and create a stunningly elegant blanket that will be cherished for years to come.
Cable Stitch Borders for Cozy Blankets

Blankets are the perfect way to stay warm and cozy during the colder months. Adding a cable stitch border to your blanket can elevate its overall look and make it even cozier.
There are various cable stitch patterns that you can use to create a beautiful border for your blanket. One popular choice is the classic braided cable stitch. This stitch creates a twisted, interlocking pattern that adds texture and interest to the edge of your blanket.
To knit a braided cable stitch border, you will need to have some experience with cable knitting techniques. The process involves crossing stitches over each other to create the braided effect. It may take some practice to get the hang of it, but the end result is definitely worth the effort.
Another option for a cable stitch border is the horseshoe cable stitch. This pattern creates a series of horseshoe shapes that add a touch of elegance to your blanket. The horseshoe cable stitch is slightly less complex than the braided cable stitch, making it a good choice for beginners who want to try their hand at cable knitting.
When choosing a cable stitch border for your blanket, consider the overall design and style you want to achieve. The cable stitch can add a rustic, traditional feel or a modern, contemporary touch depending on the pattern and yarn you choose. Experiment with different cable stitch patterns and yarn combinations to find the perfect border for your cozy blanket.
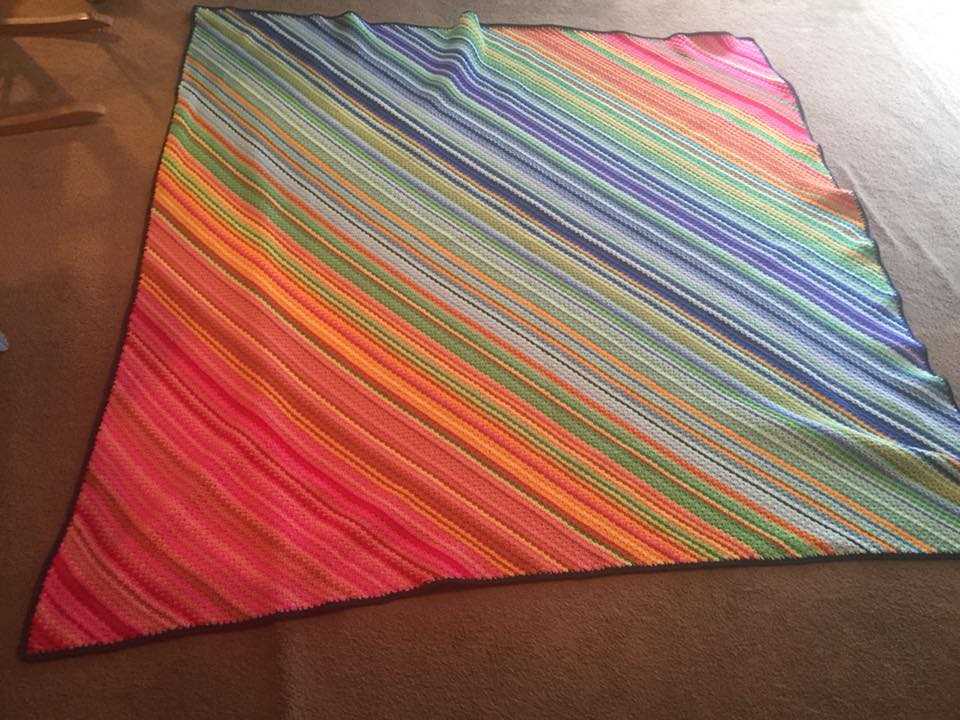
Colorful Striped Borders for Playful Blankets
Blankets are not only warm and cozy, but they can also be a great way to add a touch of color and playfulness to any room. One popular way to elevate the design of a blanket is by incorporating colorful striped borders. These borders can be a fun and creative way to add visual interest to an otherwise plain blanket, making it the perfect accessory for a child’s bedroom or playroom.
When it comes to choosing the colors for your striped border, the possibilities are endless. You can opt for a vibrant rainbow pattern, with each stripe representing a different color of the spectrum. This will create a cheerful and whimsical look that will instantly brighten up any space. Another option is to choose complementary colors that work well together, such as shades of blue and green, or pink and purple. This will create a more harmonious and soothing effect.
When knitting the striped border, you can get creative with the pattern and design. One popular technique is to alternate between two colors for each stripe, creating a simple yet eye-catching pattern. For a more intricate look, you can experiment with different stitch patterns, such as ribbing or seed stitch. This will add texture and dimension to the border, making it even more visually appealing.
Another option to consider is incorporating different widths for each stripe. For example, you can have thin stripes in one color and wider stripes in another color. This will create a dynamic and playful look that will attract attention and make the blanket stand out.
Overall, adding colorful striped borders to blankets is a fantastic way to inject some personality and style into your home decor. Whether you’re looking to create a vibrant and energetic space or a calm and soothing environment, there is a striped border pattern that will suit your needs. So grab your knitting needles and get ready to create a blanket that is not only warm and cozy but also a feast for the eyes!
Adding Tassels or Fringe to Finish Your Blanket

A great way to add a decorative touch to your knitted blanket is by adding tassels or fringe. Tassels and fringe can give your blanket a unique and stylish look, and they are also a fun and easy way to personalize your project. Whether you’re knitting a baby blanket, a cozy throw, or a decorative afghan, adding tassels or fringe can be a great finishing touch.
To add tassels to your blanket, you will need some extra yarn in a contrasting color. Cut several strands of yarn to your desired length, usually around six to eight inches. Take a crochet hook and insert it into one corner of your blanket, then pull the yarn strands through. Divide the strands into two groups and tie a knot to secure them in place. Repeat this process along the edge of your blanket, spacing the tassels evenly.
If you prefer fringe instead of tassels, you can achieve a similar effect by cutting longer strands of yarn, usually around ten to twelve inches. Again, take a crochet hook and insert it into the edge of your blanket, then pull the yarn strands through. Group the strands into twos or threes and tie a knot to secure them. Continue attaching fringe along the edge of your blanket, spacing them evenly.
Note: When adding tassels or fringe, it’s a good idea to plan and measure beforehand to ensure even spacing. You can use pins or markers to mark where each tassel or fringe will be attached. This will help you achieve a more polished and professional look.
Adding tassels or fringe to your knitted blanket is a simple and effective way to give it a finished and polished look. Whether you choose tassels or fringe, this decorative touch will add a touch of style to your project. So grab some extra yarn and get creative with your finishing touches!
Using Border Patterns to Customize Your Blanket Design
Adding a border to your knitted blanket can bring a beautiful finish to your project and give it a personalized touch. With a variety of border patterns to choose from, you can create a design that complements the style of your blanket and expresses your creativity.
When selecting a border pattern, consider the overall look and feel you want to achieve. If you’re knitting a cozy, rustic blanket, you may opt for a simple garter or seed stitch border. For a more elegant and intricate design, you could choose a lace or cable pattern. The border can also be a great opportunity to incorporate a contrasting color or texture, adding visual interest to your blanket.
Benefits of using border patterns:
- Enhances the aesthetics of your knitted blanket
- Provides a personalized touch
- Offers endless design possibilities
- Adds visual interest
- Allows for creativity and customization
Tips for using border patterns:
- Choose a border pattern that complements the overall design of your blanket.
- Consider the skill level required for the pattern and ensure it matches your knitting abilities.
- Take into account the dimensions of your blanket and adjust the border pattern accordingly.
- Experiment with different colors and textures to create a unique border.
- Practice the border pattern on a smaller swatch before applying it to your entire blanket.
In conclusion, adding a border pattern to your knitted blanket can elevate its visual appeal and make it truly one-of-a-kind. Whether you’re a beginner or an advanced knitter, there’s a border pattern out there that can help you achieve the desired look for your blanket. Through experimentation and creativity, you can customize your design and create a blanket that is both functional and beautiful.
Q&A:
What is a blanket border in knitting?
A blanket border in knitting is an additional decorative edge or trim added to the outer edges of a knitted blanket. It adds a finishing touch to the blanket and can help to prevent the edges from curling.
Why would I want to add a border to my knitted blanket?
Adding a border to a knitted blanket can enhance its appearance and make it look more finished. It can also help to stabilize the edges and prevent them from stretching or curling over time.
What are some popular blanket border knitting patterns?
Some popular blanket border knitting patterns include garter stitch borders, seed stitch borders, ribbed borders, lace borders, and cable borders. These patterns can be knitted separately and then sewn onto the blanket, or they can be worked directly onto the live stitches of the blanket.
How do I choose the right border pattern for my knitted blanket?
When choosing a border pattern for your knitted blanket, consider the overall style and design of the blanket. If the blanket has a simple and clean design, a garter stitch or seed stitch border could complement it well. For a more intricate or lace-like design, a lace border pattern might be a better choice. Also, consider the desired width and thickness of the border and how it will affect the final dimensions of the blanket.
Can I use different border patterns for different sides of the blanket?
Yes, you can definitely use different border patterns for different sides of the blanket. This can add visual interest and create a unique look for your blanket. Just make sure that the border patterns you choose are compatible in terms of stitch count and overall design.
What are blanket border knitting patterns?
Blanket border knitting patterns are decorative patterns that are used to add a finished edge to a knitted blanket. They can be simple or intricate designs, and are often used to create a polished and professional look to the blanket.
How do I knit a blanket border?
To knit a blanket border, you will need to determine the number of stitches required for your desired border width. Once you have this number, you can choose a border pattern and follow the instructions to knit the pattern along the edge of your blanket. It is recommended to use a circular needle or double-pointed needles to accommodate the large number of stitches.