
Knitting your own beanie is not only a practical and stylish way to keep warm, but it also allows you to customize the design and fit to your liking. If you’re looking for a knitting pattern for a beanie made with 8 ply yarn, you’re in the right place!
In this article, we will provide you with a step-by-step guide to knitting a beanie using 8 ply yarn. Whether you’re a beginner knitter or an experienced one, this pattern is suitable for all skill levels. You’ll learn basic knitting techniques such as casting on, knitting in the round, decreasing stitches, and casting off.
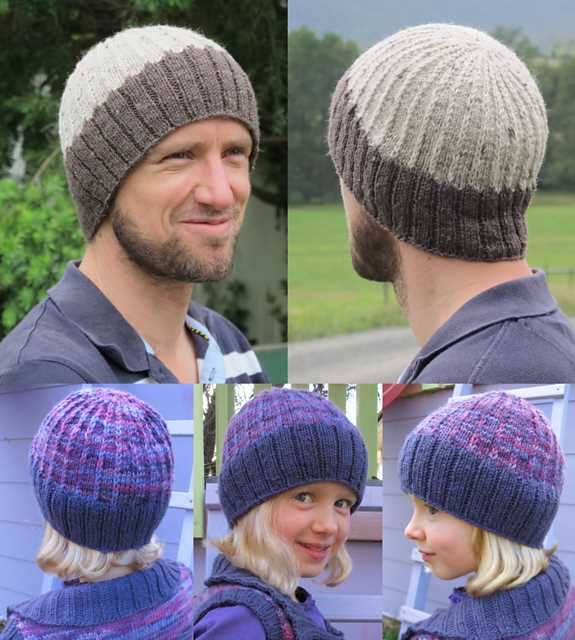
With this beanie knitting pattern, you’ll be able to create a cozy and stylish accessory for yourself or as a gift for a loved one. The 8 ply yarn is perfect for a beanie as it provides the right amount of warmth without being too bulky. Plus, there are so many color options to choose from, allowing you to match the beanie with your outfits or make it a fun and colorful statement piece.
Understanding the Beanie Knitting Pattern 8 Ply
Knitting a beanie can be a fun and satisfying project for both beginner and experienced knitters. When working with an 8 ply (or double knit) yarn, it’s important to understand the specific instructions provided in the beanie knitting pattern. Here are some key points to consider when working with a beanie knitting pattern in 8 ply.
Yarn Weight and Gauge
The first thing to pay attention to in the beanie knitting pattern is the recommended yarn weight, which in this case is 8 ply. This refers to the thickness of the yarn and is important for achieving the desired size and fit of the beanie. It’s crucial to use the correct weight of yarn to ensure your beanie turns out the way it should.
Additionally, the pattern will often mention the gauge, which is the number of stitches and rows needed to achieve a certain measurement. Typically, the pattern will include a note on what the gauge should be, such as “22 stitches and 30 rows = 4 inches in stockinette stitch.” Checking your gauge before starting the project can help ensure that your beanie will fit properly.
Needle Size and Stitch Patterns
The beanie knitting pattern will also specify the appropriate needle size to use, which is usually indicated in either millimeters (e.g., 4mm) or US sizes (e.g., size 6). It’s important to use the recommended needle size to achieve the correct tension and stitch definition in your beanie.
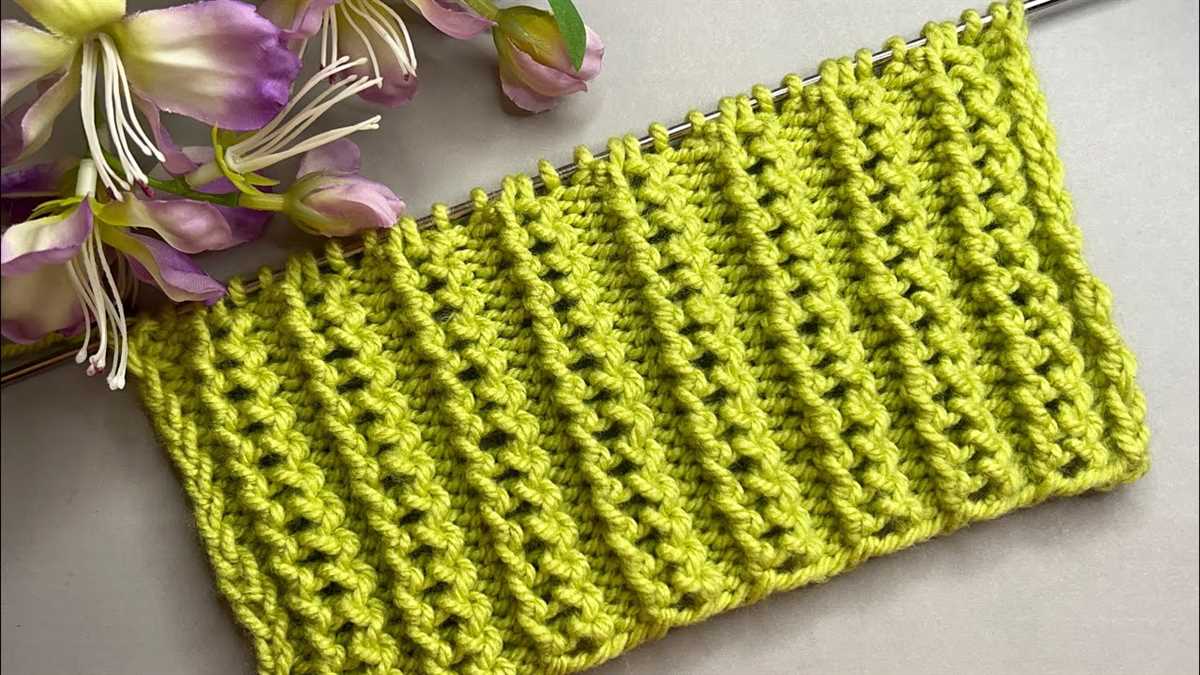
Furthermore, the pattern may include specific stitch patterns to create certain textures or designs on the beanie. Common stitch patterns used in beanies include ribbing, seed stitch, and cables. It’s important to carefully follow the instructions for these stitch patterns to achieve the desired look and texture in your beanie.
Choosing the Right Yarn for Your Beanie
When it comes to knitting a beanie, choosing the right yarn is crucial to achieving the desired result. The yarn thickness, also known as the ply, plays a significant role in determining the overall look and feel of your beanie. For a beanie knitting pattern that requires 8 ply yarn, it’s important to understand the characteristics of this type of yarn and how it can affect your final project.
1. Consider the warmth: 8 ply yarn is considered a medium weight yarn, which makes it an excellent choice for beanies that need to provide warmth. This thickness provides enough insulation without making the beanie too bulky or heavy.
2. Assess the material: Various types of materials can be used for 8 ply yarn, including wool, acrylic, or a blend of fibers. Each material has its own unique properties. Wool provides warmth and natural moisture-wicking properties, while acrylic is more affordable and easier to maintain. Consider the intended use of your beanie and choose a material that suits your needs.
3. Check the gauge: Before starting your project, check the gauge specified in the beanie knitting pattern. The gauge refers to the number of stitches and rows that should be achieved within a specific measurement. It’s crucial to match the gauge with the yarn you choose to ensure that your beanie turns out the right size and fits properly.
4. Opt for a suitable color: The color of the yarn can greatly impact the appearance of your beanie. Take into account the recipient’s preferences and the overall style you want to achieve. Darker colors tend to be more versatile and forgiving, while lighter colors can accentuate the stitches and patterns in the beanie.
- In conclusion, choosing the right yarn for your beanie is essential for achieving the desired result. Consider the warmth, material, gauge, and color when selecting your 8 ply yarn. By paying attention to these factors, you’ll be able to create a beanie that is not only functional but also visually appealing.
Selecting the Appropriate Needles for Your Beanie
When it comes to knitting a beanie, choosing the right needles is crucial to achieve the desired result. The needle size and material can greatly affect the overall look, fit, and texture of the finished beanie. Here are some factors to consider when selecting the appropriate needles for your beanie project.
1. Needle Size:
The size of the needles you choose will determine the gauge and tension of your knitting. For a beanie knitting pattern with 8 ply yarn, the recommended needle size is usually around 4.5mm to 5mm. It’s important to follow the pattern instructions to ensure the correct needle size for the desired gauge. Using larger or smaller needles can result in a looser or tighter fabric respectively.
2. Needle Material:
The material of the needles can also impact the outcome of your beanie. The most common options are metal, wood, and plastic. Metal needles are known for their smoothness and durability, making them a popular choice for many knitters. Wood needles provide a warm and natural feel, and they can be particularly suitable for those who prefer a slower knitting pace. Plastic needles are lightweight and often more affordable, making them a good option for beginners.
Ultimately, the choice of needles for your beanie knitting project depends on your personal preference and the desired outcome. It’s always a good idea to experiment with different needle sizes and materials to find the one that works best for you. Remember to check the pattern instructions and gauge recommendations to ensure accurate and successful results.
Casting On: Starting Your Beanie
When you’re ready to start knitting your beanie, the first step is to cast on. Casting on is the process of creating the first row of stitches on your knitting needles. This is an essential step that sets the foundation for your beanie and determines the size and stretchiness of the finished product.
There are various methods you can use to cast on, but the long tail cast on is a popular choice for beanies. To do the long tail cast on, you will need to estimate the amount of yarn you will need for your cast on stitches. This can be done by measuring your yarn against your knitting needle, allowing for some extra length for the tail. Once you have measured the yarn, make a slipknot and place it on your needle.
Next, insert your needle into the loop of the slipknot, and wrap the yarn around the needle from left to right. Pull the yarn through the loop, creating a new stitch on your needle. Repeat this process for the desired number of stitches, making sure to keep an even tension on the yarn to avoid loose or tight stitches.
As you cast on, it can be helpful to count your stitches periodically to ensure you have the correct number for your pattern. If you make a mistake or need to add or subtract stitches, you can simply undo the cast on and start again. Once you have successfully cast on the required number of stitches, you are ready to begin knitting your beanie.
Knitting the Main Body of Your Beanie
Once you have cast on your stitches and worked the ribbing, it’s time to start knitting the main body of your beanie. This is where you’ll begin to see your project take shape and get a sense of the finished result.
Using your 8 ply yarn and the needles recommended in your pattern, continue working in the specified stitch pattern for the main body. Whether it’s stockinette stitch, a cable pattern, or a combination of different stitches, make sure to follow the instructions carefully to achieve the desired look.
If you’re using a pattern that includes shaping, such as decreasing or increasing stitches to create a slouchy or fitted beanie, pay close attention to the instructions at this stage. It’s important to knit the correct number of rows before making any adjustments to the stitch count.
As you work on the main body of your beanie, take breaks to periodically try it on and check the fit. This will help ensure that you’re on the right track and can make any necessary adjustments before finishing the project. Keep in mind that knitting can stretch, so it’s better to err on the side of slightly snug rather than too loose.
Continue knitting the main body of your beanie until you reach the desired length, as specified in your pattern. Remember to keep track of your rows, especially if you’re working on any stitch patterns that require a specific number of repeats. Once you’ve reached the final row, you’re ready to move on to the next phase of your beanie project.
Creating a Ribbed Brim for Your Beanie

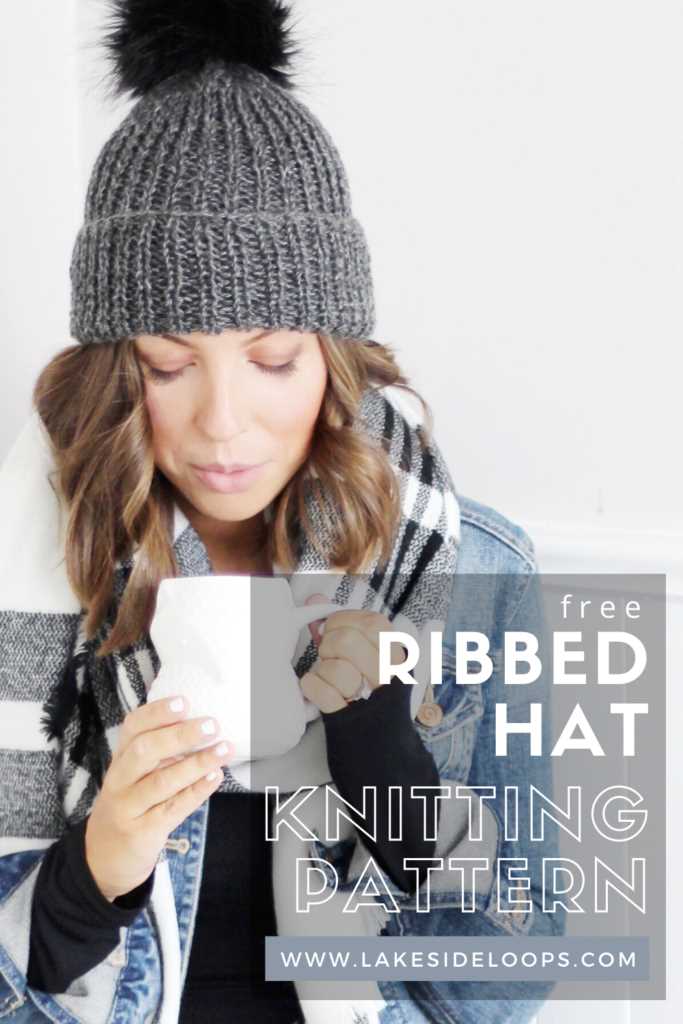
When it comes to knitting beanies, a ribbed brim is a popular choice as it adds both style and functionality to your finished project. The ribbed brim not only gives the beanie a stretchy and snug fit but also adds an interesting texture to the design. In this article, we will guide you through the process of creating a ribbed brim for your beanie, using an 8-ply yarn.
Firstly, it’s important to choose the right needle size for your 8-ply yarn. Generally, a needle size of US 6 (4.0mm) or US 7 (4.5mm) is recommended for a balanced tension. However, you can adjust the needle size according to your personal preference and the desired gauge.
Step 1: Casting On

To begin, cast on the desired number of stitches for the ribbed brim. For example, if you want a brim that is 2 inches wide, you can cast on around 60 stitches. It’s important to cast on using a stretchy method, such as the long tail cast-on, to ensure a comfortable fit.
Step 2: Ribbing Pattern
Once you have cast on the stitches, you can start working the ribbing pattern. The most common ribbing pattern is the 2×2 rib, where you alternate between knitting two stitches and purling two stitches. This pattern creates vertical columns of knits and purls, adding elasticity to the brim. Repeat the 2×2 rib pattern for the desired length of the brim, keeping in mind that ribbing tends to retract slightly when worn.
Step 3: Binding Off
Once you have reached the desired length for your ribbed brim, it’s time to bind off. Using a regular bind-off method, continue in pattern as you bind off each stitch. Be careful not to bind off too tightly, as this may affect the stretchiness of the brim.
By following these steps, you can easily create a ribbed brim for your beanie using an 8-ply yarn. Remember to choose the right needle size, cast on using a stretchy method, work the ribbing pattern, and bind off appropriately. With a well-executed ribbed brim, your beanie will not only look stylish but also provide a comfortable and snug fit.
Shaping the Crown of Your Beanie
One of the most important aspects of knitting a beanie is shaping the crown. The crown is the top part of the beanie that fits snugly on your head. There are several different methods for shaping the crown, depending on the style and design of the beanie.
Decreasing stitches: One common method for shaping the crown is to decrease the number of stitches as you knit towards the top. This creates a gradual narrowing effect, resulting in a rounded crown shape. The most commonly used decrease stitch is the knit two together (k2tog) or the purl two together (p2tog), which involve knitting or purling two stitches together as one. These decrease stitches are usually spaced evenly around the crown to create a symmetrical shape.
Decreasing in a pattern: Another popular technique for shaping the crown is to incorporate a pattern into the decreases. This could be a simple cable or lace pattern, or a more intricate Fair Isle design. By using a pattern, you can add interest and texture to the crown of your beanie, making it more visually appealing.
Using short rows: Short rows are another method for shaping the crown of a beanie. This technique involves knitting or purling partway across a row, and then turning the work to knit or purl back in the opposite direction. By working short rows, you can create different levels or layers in the crown, adding depth and dimension to the finished beanie.
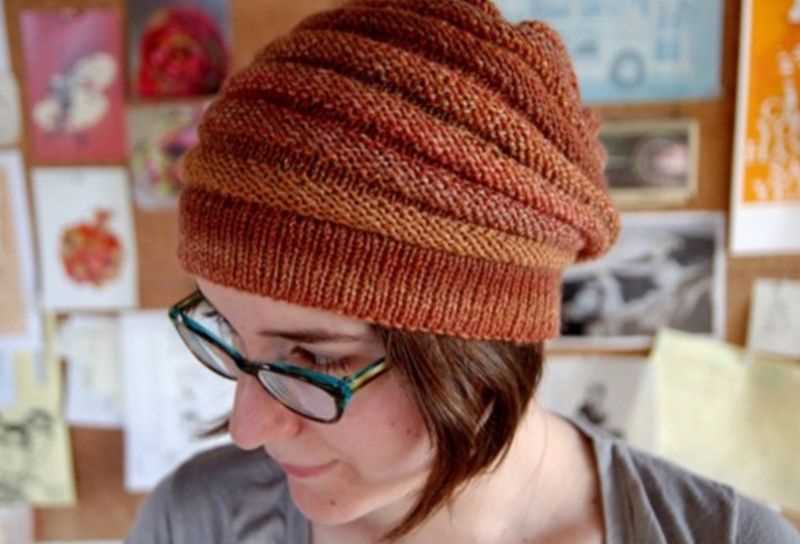
Adding a gathered or slouchy effect: If you prefer a looser, more relaxed fit, you can also shape the crown of your beanie to create a gathered or slouchy effect. This can be achieved by gradually increasing the number of stitches as you knit towards the top, and then gathering the excess fabric at the top of the beanie with a cinching technique or by using a decorative pom-pom.
Overall, shaping the crown of your beanie is an important step in creating a well-fitting and stylish accessory. Whether you choose to decrease stitches, incorporate a pattern, use short rows, or create a gathered effect, the crown shaping technique you choose will ultimately determine the final look and fit of your beanie.
Adding Decorative Elements to Your Beanie

When knitting a beanie, adding decorative elements can take it from simple and functional to stylish and personalized. There are various ways to incorporate decorative elements into your beanie knitting pattern. Whether you want to add a pop of color, a unique texture, or a fun design, these elements can make your beanie stand out from the rest.
Colorwork: One popular way to add decoration to your beanie is through colorwork. This technique involves using multiple colors of yarn to create patterns or motifs on the hat. You can choose to create stripes, geometric shapes, or even intricate Fair Isle designs. Colorwork can add visual interest and make your beanie more eye-catching.
Cables: Another way to add decoration to your beanie is by incorporating cable stitches. Cables are created by crossing stitches over each other, creating a twisted, rope-like effect. Adding cables to your beanie can give it a cozy and textured look. You can choose to create simple cable patterns or more intricate designs depending on your knitting skills and preferences.
Embroidery: If you prefer to add decorative elements after knitting your beanie, embroidery can be a great option. You can use embroidery thread or yarn to add colorful and detailed designs to your beanie. Whether you want to stitch flowers, animals, or initials, embroidery gives you the freedom to create unique and personalized designs on your beanie.
Pom-poms: Pom-poms are a fun and playful addition to any beanie. They can be easily made using leftover yarn or special pom-pom makers. Attaching a pom-pom to the top of your beanie can give it a whimsical and trendy look. You can choose to make pom-poms in contrasting colors or match them to the main color of your beanie.
Buttons: Adding buttons is another way to decorate your beanie. You can sew buttons onto the brim or the body of your hat to create unique and eye-catching patterns. Buttons come in various shapes, sizes, and colors, allowing you to customize your beanie to your liking. Just ensure that the buttons are securely attached to avoid any safety hazards.
By adding decorative elements to your beanie, you can create a one-of-a-kind accessory that reflects your personal style and creativity. Whether you choose to incorporate colorwork, cables, embroidery, pom-poms, or buttons, these decorative elements will surely make your beanie a standout piece.
Blocking and Finishing Your Beanie
Blocking your beanie is an essential step in the finishing process. It helps to shape the hat, make the stitches more even, and give it a professional finish. To block your beanie, you will need a blocking mat or towel, rustproof pins or T-pins, and a spray bottle filled with water.
Begin by gently soaking your beanie in lukewarm water. Avoid using hot water as it can cause the fibers to shrink or felt. Gently squeeze out the excess water without wringing or twisting the beanie. Lay the damp beanie on the blocking mat or towel and gently reshape it to the desired size and shape. Use rustproof pins or T-pins to secure the beanie in place, making sure to evenly distribute the tension.
Leave the beanie to dry completely. This can take anywhere from a few hours to overnight, depending on the thickness of the yarn and the humidity in the air. Avoid moving or touching the beanie while it is drying to prevent any distortion in the shape. Once the beanie is completely dry, carefully remove the pins and admire your beautifully blocked beanie.
Finishing your beanie involves weaving in any loose ends and adding any desired embellishments such as pom-poms or buttons. To weave in the ends, thread them onto a yarn needle and carefully weave them through the stitches on the inside of the beanie. Trim any excess yarn, making sure not to cut the stitches. If you are adding a pom-pom, attach it securely to the top of the beanie using a yarn needle and yarn.
With these simple steps, you can transform your knitted beanie into a polished and professional-looking accessory. Whether you are making it for yourself or as a gift, taking the time to block and finish your beanie will ensure that it looks its best and stands the test of time.
Tips and Tricks for Knitting the Beanie Pattern
If you’re planning to knit a beanie using an 8 ply pattern, here are some tips and tricks to help you along the way. Whether you’re a beginner or an experienced knitter, these pointers will ensure that your beanie turns out exactly as you envision it.
1. Choose the Right Yarn and Needles
Before starting your project, make sure you have the right materials. For an 8 ply beanie pattern, you’ll need yarn that is suitable for 8 ply weight, as well as the appropriate knitting needles. Check the pattern for the recommended yarn weight and needle size, and ensure that you have the right tools to achieve the desired gauge.
2. Pay Attention to Gauge

Gauge is crucial in knitting, as it determines the size and fit of your finished project. Take the time to create a gauge swatch before diving into the beanie pattern. This will help you ensure that your stitches and rows match the measurements specified in the pattern. Adjust your needle size if necessary to achieve the correct gauge.
3. Follow the Pattern Carefully
When working on the beanie pattern, it’s important to carefully follow the instructions. Pay attention to stitch counts, decreases, and color changes, if applicable. Use stitch markers to help you keep track of specific sections in the pattern, and always double-check your work before moving on to the next step.
4. Customize with Color and Embellishments
While the basic beanie pattern is a classic, feel free to customize it to make it your own. Add stripes or color blocks by changing yarn colors at specific intervals. You can also experiment with different stitch patterns, such as ribbing or cables, to add texture and interest to your beanie. Additionally, consider adding embellishments like pom-poms or buttons to further personalize your creation.
- 5. Take Breaks and Relax: Remember to take breaks while knitting to prevent hand fatigue. Knitting should be enjoyable and relaxing, so don’t hesitate to step away from your project for a while and return to it with a fresh perspective.
- 6. Practice and Learn: Knitting is a skill that improves with practice. Don’t be discouraged if your first beanie doesn’t turn out exactly as you imagined. Each project provides an opportunity to learn and refine your knitting techniques. Embrace the process and enjoy the journey.
By keeping these tips and tricks in mind, you’ll be well-equipped to knit a beautiful beanie using an 8 ply pattern. Have fun experimenting with colors and stitches, and enjoy the satisfying feeling of creating a cozy accessory with your own two hands.
Beanie Knitting Pattern 8 Ply: Troubleshooting Common Issues
While knitting a beanie using an 8 ply pattern, you may encounter some common issues along the way. Here are some troubleshooting tips to help you overcome these challenges and create a perfect beanie:
1. Gauge Problems
One common issue is when your beanie turns out either too large or too small. This can be due to differences in gauge. Make sure to check your gauge before starting the project and adjust your needle size accordingly. If your beanie is too large, try using smaller needles, and if it is too small, try using larger needles.
2. Tension Issues
Tension plays an essential role in the overall appearance of your beanie. If you find that your stitches are too tight, try to relax your grip on the needles. On the other hand, if your stitches are too loose, try to tighten your grip slightly. Remember to maintain consistent tension throughout the project for a uniform look.
3. Uneven Decreases
When shaping the crown of your beanie by decreasing stitches, it is essential to keep the decreases even and symmetrical. To achieve this, make sure to follow the pattern instructions carefully and count your stitches regularly to ensure accuracy. If you notice any inconsistencies, you may need to rip back and redo the decrease rounds to maintain symmetry.
4. Twisted Stitches
Twisted stitches can occur when you accidentally twist the stitch as you work. To prevent this, make sure to insert your needle correctly before knitting or purling each stitch. If you notice twisted stitches, you may need to unravel and rework the affected rows to fix the issue.
5. Yarn Tangles

Tangling and knotting of yarn can be frustrating while knitting. To avoid this, make sure your yarn is properly wound and organized before starting your project. You can use a yarn bowl or a yarn holder to keep the yarn from tangling as you knit. If you do encounter a tangle, gently untangle it or cut the yarn to remove the knot and reattach it.
By following these troubleshooting tips, you can overcome common issues that may arise when knitting a beanie using an 8 ply pattern. Remember to stay patient and enjoy the process as you create a beautiful and cozy beanie!