
Knitting has always been a popular hobby for those looking to create cozy and unique items. And now, thanks to the adorable character dubbed “Baby Yoda” from the hit show “The Mandalorian,” there’s a new pattern that has captured the hearts of knitters everywhere. If you’re a fan of this beloved character and love to knit, this Baby Yoda knitting pattern is a must-try!
The pattern allows you to create your very own Baby Yoda plush toy, making it the perfect gift for yourself or any fellow Star Wars fan. Whether you’re an experienced knitter or a beginner, this pattern is designed to be accessible for all skill levels. With clear instructions and step-by-step photos, you’ll be able to bring this lovable character to life with your knitting needles.
Not only is this pattern a great way to practice your knitting skills, but it’s also a fantastic opportunity to showcase your creativity by choosing your favorite colors and yarns. From the iconic green skin to the oversized eyes and cute little robes, you have the freedom to customize your Baby Yoda to be as true to the character as you’d like or put your own unique spin on it.
So, if you’re ready to embark on a knitting adventure and create your very own Baby Yoda, gather your knitting supplies and get ready to bring this beloved character into the world of knitting. With this Baby Yoda knitting pattern, you’ll enjoy a fun and rewarding project that will leave you with a cuddly companion to treasure for years to come.
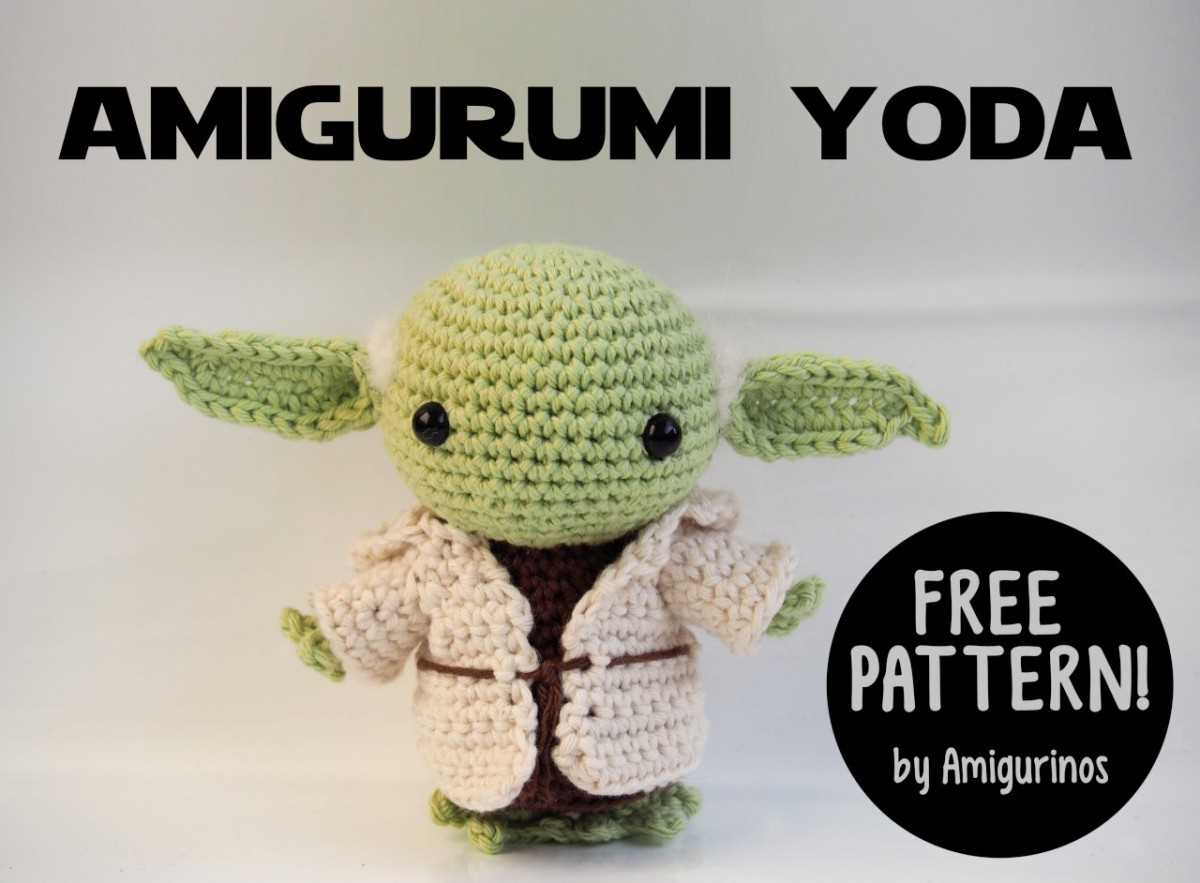
Baby Yoda Knitting Pattern: Create Your Own Adorable Amigurumi

If you’re a fan of Star Wars and knitting, then you’ll love creating your own Baby Yoda amigurumi with this knitting pattern. This adorable little creature gained popularity after appearing in the Disney+ series “The Mandalorian,” and now you can bring it to life with your knitting needles.
Materials: To make your own Baby Yoda amigurumi, you’ll need the following materials:
- Worsted weight yarn in green, brown, and cream
- Pair of knitting needles in size US 4
- Tapestry needle for sewing and weaving in ends
- Polyester fiberfill for stuffing
- Stitch markers
- Scissors
Instructions: Follow these steps to create your Baby Yoda amigurumi:
- Start with the head. Cast on 10 stitches in green yarn and knit in stockinette stitch for 10 rows. Then, decrease 1 stitch at each end of the next 5 rows to shape the top of the head.
- Next, knit 8 rows in brown yarn for the body. Then, switch to green yarn and knit in stockinette stitch for 20 rows to create the robe.
- For the arms, cast on 8 stitches in green yarn and knit in stockinette stitch for 10 rows. Then, decrease 1 stitch at each end of the next 2 rows and bind off.
- For the ears, cast on 4 stitches in green yarn and knit in stockinette stitch for 10 rows. Then, decrease 1 stitch at each end of the next 2 rows and bind off.
Once you’ve knitted all the individual pieces, it’s time to assemble your Baby Yoda amigurumi. Sew the head and body together, stuffing with polyester fiberfill as you go. Attach the arms and ears to the body, making sure they’re securely sewn in place.
Finishing Touches: Use the brown yarn to embroider the eyes and mouth on Baby Yoda’s face. You can also add any other details you like, such as a tiny knitted robe or a miniature Baby Yoda-sized prop. Get creative and make your Baby Yoda amigurumi unique!
With this knitting pattern, you can create your own adorable Baby Yoda amigurumi to keep or gift to another Star Wars fan. Knitting allows you to bring your favorite characters to life in a unique and personalized way, and this Baby Yoda pattern is sure to bring joy to anyone who sees it.
Gathering Materials: What You’ll Need for the Project

Before you can start knitting your very own Baby Yoda, it’s important to gather all the necessary materials. Here is a list of items you’ll need to embark on this adorable knitting project:
- Yarn: Select a soft, high-quality yarn in the appropriate colors for Baby Yoda. You’ll need several shades of green, brown, beige, and black to capture his distinct features.
- Knitting Needles: Choose a pair of knitting needles that are suitable for the thickness of your yarn. The size will depend on your knitting tension and the desired finished dimensions of your Baby Yoda.
- Tapestry Needle: A tapestry needle with a large eye will be essential for weaving in loose ends and sewing pieces together.
- Stuffing: To give your Baby Yoda a plush and huggable feel, you’ll need to fill him with stuffing. Look for polyester fiberfill at your local craft store.
- Scissors: A trusty pair of scissors will come in handy for trimming yarn, cutting thread, and snipping any excess fabric.
- Stitch Markers: Using stitch markers can help you keep track of the beginning of each round or certain sections of the pattern, making it easier to count your stitches.
With these essential materials in hand, you’ll be well-prepared to tackle the Baby Yoda knitting pattern and bring your very own adorable little creature to life!
Choosing the Right Yarn: Best Options for the Baby Yoda Design
When it comes to starting your Baby Yoda knitting project, choosing the right yarn is crucial to achieve the perfect result. The choice of yarn not only affects the overall appearance of your final piece but also determines the texture, drape, and durability of your knitted item. It is important to consider factors such as fiber content, weight, and color when selecting yarn for the Baby Yoda design.
Fiber Content

The fiber content of the yarn is an important consideration when knitting the Baby Yoda design. A soft and lightweight yarn is recommended to capture the adorable and delicate features of Baby Yoda. A blend of natural fibers like wool and bamboo can provide a good balance of softness and warmth. Acrylic yarns can also be a suitable option as they are easy to care for and offer a wide range of color choices.
Yarn Weight

The weight of the yarn determines the thickness and density of the knitted fabric. For the Baby Yoda design, a light or sport weight yarn is ideal as it allows for finer stitch definition and a more delicate appearance. This weight of yarn will also ensure that the final piece is not too bulky or heavy.
Color Selection
Choosing the right colors is essential to capture the likeness of Baby Yoda. For the main body, a light, neutral shade like beige or light green can be used. For the clothing or accessories, vibrant colors like dark green or brown can be chosen to add depth and contrast. It is important to select colors that complement each other and enhance the overall look of the Baby Yoda design.
Overall, when selecting yarn for the Baby Yoda knitting project, it is important to consider the fiber content, weight, and color to achieve the desired result. Taking these factors into account will help you create a knitted Baby Yoda that is both adorable and true to the character from “The Mandalorian”. So, grab your knitting needles and choose the perfect yarn to bring Baby Yoda to life!
Selecting Knitting Needles: Finding the Perfect Size

When it comes to knitting, one of the most important factors to consider is the size of your knitting needles. The size of your needles will determine the final size and tension of your knitted project. It’s crucial to find the perfect size needles that match the gauge specified in your knitting pattern. Here are a few tips to help you select the right knitting needles for your project.
1. Check the pattern: Start by carefully reading your knitting pattern. Look for any specific needle size recommendations mentioned in the pattern instructions. The pattern may specify a particular size of needles or give a gauge that you need to match.
2. Consider yarn weight: The weight of the yarn you are using is another crucial factor when selecting knitting needles. Different yarn weights require different needle sizes. For example, bulky or chunky yarns may call for larger needles, while lace or fingering weight yarns may require smaller needles. Refer to the yarn label or pattern recommendations for guidance.
- 3. Knitting needle sizing system: Knitting needles are sized using different systems, such as US, UK, or metric sizing. Familiarize yourself with the system used in your pattern and make sure you have needles in the corresponding size.
- 4. Gauge swatch: Before starting your project, it’s essential to knit a gauge swatch using the recommended needles. This will help you determine if you need to adjust your needle size to match the specified gauge. Make sure to check both stitch and row gauge.
- 5. Knitter’s preference: Finally, your personal knitting style and preference can also influence your needle size selection. Some knitters prefer metal needles for their smoothness, while others enjoy the warmth and flexibility of wooden needles. Experiment with different needle materials and find what works best for you.
By considering these factors and following the guidance of your knitting pattern, you can select the perfect size knitting needles for your project. Remember, finding the right needle size will ensure that your knitting comes out just as intended and that your finished project is a success.
Understanding the Pattern: Step-by-Step Instructions
When it comes to knitting the adorable Baby Yoda, it’s important to have a clear understanding of the pattern before you begin. This will ensure that you can successfully create the cute character and enjoy the process along the way.
Here are step-by-step instructions to help you navigate the Baby Yoda knitting pattern:
- Review the materials: Before you begin knitting, familiarize yourself with the materials required for the project. This may include specific types of yarn, knitting needles, and any additional supplies.
- Read the pattern: Carefully read through the entire knitting pattern before starting. Take note of any abbreviations, special stitches, or repeats that may be mentioned. This will help you understand the overall structure of the pattern.
- Check your gauge: To ensure your Baby Yoda turns out the correct size, it’s essential to check your gauge before diving into the project. Follow the gauge instructions provided in the pattern to determine if you need to adjust your needle size.
- Start with a swatch: Before knitting the entire Baby Yoda, it’s a good idea to start with a swatch to practice the pattern stitches. This will give you an opportunity to familiarize yourself with any new stitch patterns and make any necessary adjustments.
- Follow the instructions: Proceed with knitting Baby Yoda following the instructions provided in the pattern. Take your time and refer back to the pattern as needed, especially when it comes to shaping and joining different sections of the character.
- Pay attention to details: Baby Yoda is full of charming details, so it’s important to pay attention to the small nuances mentioned in the pattern. This could include adding facial features or attaching certain accessories to bring the character to life.
- Finishing touches: Once you have completed all the knitting, it’s time to add any finishing touches. This may involve seaming the various parts together or adding embroidery for additional details.
- Celebrate your creation: Once you have finished knitting Baby Yoda, take a moment to admire your creation. Celebrate your accomplishment and enjoy the adorable character you have brought to life through your knitting skills!
By following these step-by-step instructions and paying attention to the details, you’ll be able to successfully knit your own Baby Yoda and showcase your knitting talents.
Casting On: Starting Your Baby Yoda Creation
As you embark on your Baby Yoda knitting project, one of the first steps is casting on. In knitting, casting on refers to the process of creating the foundation row of stitches on your needle. This initial row provides the base for your project and sets the stage for the rest of your knitting journey.
Before you start casting on, it is important to gather all the necessary materials. You will need your chosen yarn, appropriate knitting needles, and a pair of scissors. Make sure to select a yarn that is suitable for the project, keeping in mind the desired texture and appearance of your Baby Yoda creation.
There are several methods for casting on, but the simplest and most common one is the long-tail cast on. To begin, measure a length of yarn that is approximately four times the width of your finished project. This tail will be used to create the first row of stitches, while the working yarn will be used to form the subsequent rows.
Hold the knitting needle in your right hand and make a slipknot with the yarn, leaving a long tail. Place the slipknot on the needle, pulling it snugly. With your thumb and index finger, hold both the working yarn and the tail of the yarn together. Insert the needle into the slipknot from left to right, creating a loop around the needle with both yarns.
Next, bring the needle under the working yarn and over the tail, then back under the working yarn. Pull the working yarn snugly to secure the loop on the needle. Repeat this process, creating additional loops on the needle until you have the desired number of stitches for your project. Remember to keep the tension even throughout the casting on process to achieve a uniform appearance.
Once you have cast on all the stitches, you are ready to begin knitting your Baby Yoda creation. The casting on step sets the foundation for your project, and with each subsequent row, you will bring your adorable Baby Yoda to life, stitch by stitch.
Knitting is a craft that has been practiced for centuries, and it involves creating fabric by using two or more needles to interlock loops of yarn. One of the most important aspects of knitting is mastering the stitches, as they form the foundation of any knitted project.
There are a variety of knitting techniques that can be used to create different stitches and patterns. One of the most basic stitches is the knit stitch, where the yarn is pulled through a loop on the needle to create a new loop. This stitch is commonly used to create a smooth and even fabric. Another common stitch is the purl stitch, where the yarn is wrapped around the needle and pulled through the loop on the needle. This creates a bumpy texture on the fabric.
Basic Knitting Stitches
- Knit Stitch: The basic stitch in knitting, formed by pulling the yarn through a loop on the needle.
- Purl Stitch: The opposite of the knit stitch, created by wrapping the yarn around the needle and pulling it through a loop.
- Stockinette Stitch: Created by alternating rows of knit and purl stitches, resulting in a smooth and flat fabric.
- Garter Stitch: Created by knitting every row, resulting in rows of ridges on both sides of the fabric.
Once the basic stitches are mastered, knitters can explore more advanced techniques, such as cable knitting, lace knitting, and colorwork. These techniques involve manipulating the stitches in different ways to create intricate patterns and designs.
Advanced Knitting Techniques

- Cable Knitting: Involves crossing stitches over each other to create a twisted cable pattern.
- Lace Knitting: Uses yarn overs and decreases to create intricate and delicate lace patterns.
- Colorwork: Involves knitting with multiple colors to create patterns and designs.
Overall, mastering the stitches in knitting is essential for any knitter, whether they are creating a simple scarf or a complex sweater. By learning and practicing different knitting techniques, knitters can unlock endless possibilities to create beautiful and unique handmade items.
Shaping and Increasing: Giving Your Baby Yoda Form

When knitting a Baby Yoda, one of the most important steps is shaping and increasing to give the doll its recognizable form. By strategically adding stitches and changing the knitting pattern, you can create the round face and large ears that make Baby Yoda so adorable.
To begin shaping the face, you will need to increase stitches on either side of the work. This is usually done by knitting into the front and back of a stitch, or by using an M1 (make one) increase. By increasing a certain number of stitches on each row, you will gradually create a wider shape, forming the chubby cheeks of the Baby Yoda.
After shaping the face, it’s time to focus on the ears. Baby Yoda’s ears are one of its most distinct features, so it’s essential to get them right. To make the ears, you will need to cast on additional stitches and shape them using decreases, such as knit two stitches together or slip slip knit. These decreases help create a tapered shape, making the ears wider at the base and narrower at the top.
As you continue knitting, remember to refer to the pattern instructions for the exact shaping techniques and placement of increases and decreases. It may take some trial and error to achieve the perfect shape, but with persistence and attention to detail, you will be able to give your Baby Yoda knitting project the form and charm that captures the spirit of the beloved character.
Adding Details: Eyes, Ears, and Clothes

When knitting a baby Yoda, adding the details is what will really bring your creation to life. One of the most important details to include is the eyes. To make the eyes, you can use small black buttons or embroider them with black yarn. Sew or stitch the eyes onto the face of your baby Yoda, making sure to place them evenly and symmetrically.
Next, let’s move on to the ears. Baby Yoda has large, pointy ears that stick out from the sides of his head. To create the ears, you can use a simple triangle shape. Knit two triangles using a green yarn that matches the color of your baby Yoda’s head. Sew the triangles onto the sides of the head, positioning them towards the top for an accurate depiction of Baby Yoda’s iconic ears.
Finally, it’s time to dress up your baby Yoda. While Baby Yoda is often seen wearing a tan robe, you can get creative with the clothes you choose to knit for your creation. You can try knitting a tiny robe using a light brown or tan yarn, or you can knit a small sweater or shirt in any color you prefer. Get creative with the patterns and textures you use for the clothes, making your baby Yoda unique and personalized.
Final Touches: Finishing and Assembling Your Baby Yoda

Once you have completed all the individual pieces of your Baby Yoda knitting pattern, it’s time to bring them together and add some finishing touches. Follow these steps to bring your adorable Baby Yoda to life:
1. Blocking and Seaming:

Before assembling your Baby Yoda, block each piece to ensure they have the desired shape and size. Wet blocking or steam blocking can help smooth out any uneven stitches and make it easier to seam the pieces together.
Use a tapestry needle and matching yarn to seam the pieces together. It’s important to be meticulous with your seaming, as it will greatly affect the final appearance of your Baby Yoda. Take your time and make sure all edges line up perfectly before sewing them together.
2. Stuffing:
Once your Baby Yoda’s body is fully seamed, it’s time to stuff it. Use polyester fiberfill or your preferred stuffing material to give your Baby Yoda a plump and huggable shape. Start by stuffing the head and body, making sure to distribute the stuffing evenly and avoid overstuffing, which can distort the shape.
After stuffing the head and body, move on to the arms, legs, and ears. Stuff them firmly, but be careful not to overstuff or understuff, as it will affect the overall appearance. Take your time to shape and mold each part as you go along.
3. Embroidery and Facial Features:

With your Baby Yoda fully stuffed, it’s time to add the adorable facial features. Use black yarn or embroidery thread to embroider the eyes, nose, and mouth. The exact placement and size will depend on your personal preference and the pattern you are following.
If you want to add some extra detail, you can use embroidery thread in a lighter color to create highlights or create other facial expressions. Get creative and make your Baby Yoda unique!
4. Finishing Touches:
Once your Baby Yoda is assembled and has all the facial features, you can add any additional details or accessories. This can include a small robe, a toy or prop, or even a tiny crochet or knit hat. Use your imagination to give your Baby Yoda some extra personality.
Finally, give your Baby Yoda a gentle shake to make sure all the stuffing is distributed evenly and the seams are secure.
With all the finishing touches complete, step back and admire your adorable Baby Yoda! Whether it’s a gift for a friend or a charming decoration for your own space, your Baby Yoda will bring joy to any Star Wars fan.