
Knitting is a popular pastime that allows you to create beautiful and functional pieces with just a few simple tools and techniques. If you’re looking to try your hand at a new knitting project, why not give the easy two colour knitting pattern a try? This pattern is perfect for beginners who are looking to expand their skills and create a unique and eye-catching piece.
The two colour knitting pattern involves using two different coloured yarns to create a pattern or design. This technique adds depth and visual interest to your knitting, making it a great way to create one-of-a-kind garments and accessories. Whether you’re looking to knit a pair of cozy socks, a warm hat, or a stylish sweater, the two colour knitting pattern is versatile enough to be used in a variety of projects.
The best part about the two colour knitting pattern is that it’s relatively easy to learn and execute. With a basic understanding of knitting stitches and some practice, you’ll quickly be able to create intricate and beautiful designs. Plus, there are countless resources available online that offer step-by-step instructions and tutorials to help you get started and improve your skills.
Easy Two Colour Knitting Pattern

If you’re new to knitting or looking for a simple project to work on, an easy two colour knitting pattern is a great choice. Whether you want to make a scarf, hat, or blanket, this pattern allows you to add texture and interest to your knitting without getting too complicated.
One popular two colour knitting pattern is the striped stockinette stitch. To create this pattern, you’ll alternate between two different coloured yarns, knitting one row with one colour and then the next row with the other colour. This creates a striped effect that is both visually appealing and easy to achieve.
To make this pattern even easier, you can use a self-striping yarn. These yarns have built-in colour changes, so you don’t have to switch between different skeins. Simply knit with the yarn as it comes, and the stripes will automatically appear in your work.
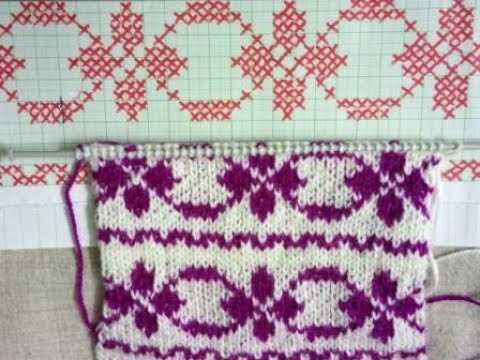
If you want to add more complexity to your two colour knitting pattern, you can try a colourwork design. This involves working with multiple colours in the same row to create intricate patterns. Fair Isle and intarsia are two popular colourwork techniques that can be used to create stunning designs.
Tips for Success:

- Choose two colours that complement each other and create a pleasing contrast.
- Practice your tension and gauge to ensure an even and consistent fabric.
- Take your time with colour changes to avoid tangled yarn and messy stitches.
- Have fun and experiment with different colour combinations and patterns.
With an easy two colour knitting pattern, you can create beautiful and unique projects that showcase your creativity. Whether you’re a beginner or an experienced knitter, this pattern is a great way to add some colour and texture to your work.
Getting Started

Before you begin knitting the easy two colour pattern, there are a few things you need to gather and prepare. First and foremost, you will need two colours of yarn. These can be any two colours of your choice and can be contrasting or complementary, depending on the effect you want to achieve. Make sure you have enough yarn in each colour to complete your project.
Next, you will need the appropriate knitting needles for your chosen yarn. Check the label on your yarn to determine the recommended needle size. It’s important to use the correct needle size to ensure that your stitches are the right tension and your finished project turns out as intended.
Once you have your yarn and needles ready, it’s time to cast on. This is the process of creating the first row of stitches on your needles. Start with one colour of yarn and use your preferred casting on method. You can use a basic cast on, like the long tail cast on, or a stretchy cast on, such as the knitted cast on.
After you have cast on, it’s time to start the pattern. Follow the instructions provided for the easy two colour knitting pattern, which will guide you through each row. Remember to switch colours as directed in the pattern to create the desired pattern effect. Keep track of your stitches and rows by using stitch markers or by counting your stitches after each row.
As you progress with your knitting, you will see the two colours come together to form a beautiful pattern. Take your time and enjoy the process of creating something unique and eye-catching. With a little practice, you will become more comfortable with the pattern and be able to create stunning two colour knitted projects.
Choosing Yarn and Needles

When it comes to choosing yarn and needles for an easy two-colour knitting pattern, there are a few things to consider. First, you’ll want to determine the weight of yarn you want to use. This will depend on the desired thickness and drape of your finished project. Lighter weight yarns are typically used for delicate, lacy designs, while heavier weight yarns are great for thicker, warmer projects.
Next, you’ll want to decide on the type of yarn you want to work with. There are many different fiber options available, such as wool, cotton, acrylic, and blends. Each fiber has its own unique qualities, so consider factors like warmth, durability, and ease of care when making your decision. Wool, for example, is known for its warmth and elasticity, while cotton is often chosen for its breathability and softness. Blends can offer the best of both worlds, combining the desirable qualities of multiple fibers.
Once you’ve chosen your yarn, it’s time to select the right needles. The size of your needles will depend on the weight of your yarn and the desired tension of your finished project. Thicker yarns will require larger needles to create a looser, more open stitch, while thinner yarns will need smaller needles for a tighter stitch. It’s also important to consider your own knitting style and preference. Some knitters prefer the control and precision of metal or wooden needles, while others may find plastic or bamboo needles more comfortable to work with.
Overall, choosing the right yarn and needles for your easy two-colour knitting pattern is an important part of the creative process. By considering factors like yarn weight, fiber content, and needle size, you can ensure that your finished project is both visually stunning and enjoyable to knit.
Casting On

Before you can start knitting your two-color pattern, you need to cast on your stitches. Casting on is the process of creating the initial row of stitches on your knitting needle, which will serve as the foundation for your project. There are various methods of casting on, but for this easy two-color knitting pattern, we will use the long-tail cast-on method.
The long-tail cast-on method is a versatile and popular method that creates a neat edge. Here’s how to do it:
- Start by making a slipknot about 6 inches from the end of your yarn.
- With the slipknot on your needle, hold the needle in your right hand and the yarn in your left hand.
- Using your thumb and index finger of your left hand, grab both strands of yarn and pull to create a loop on your needle. This loop will serve as your first stitch.
- Continue making loops in the same way, holding the yarn with your thumb and index finger and pulling it through the previous loop to create a new loop on your needle.
- Make sure to keep the tension even as you cast on each stitch, not too tight and not too loose.
- Repeat this process until you have the desired number of stitches cast on. Counting the slipknot as one stitch, each loop you make will create one stitch.
- When you have cast on all your stitches, you can start knitting your pattern following the instructions for the two-color design.
Casting on is an essential step in knitting, and mastering the long-tail cast-on method will open up a world of possibilities for your knitting projects. Once you have mastered this method, you can experiment with different cast-on techniques and explore more complex patterns and designs.
Knitting the First Colour

When starting a two colour knitting pattern, it is important to choose the first colour and begin knitting with it. The first colour will set the foundation for the pattern and will be the dominant colour throughout the project.
Before starting, make sure you have the necessary tools and materials, including the knitting needles, yarn, and any pattern instructions. Once you have everything ready, it’s time to begin knitting.
Step 1: Cast On
The first step in knitting the first colour is to cast on the required number of stitches onto the knitting needles. The cast on method will depend on your preference and the pattern instructions. Ensure that the cast on is neat and even, as it will affect the overall appearance of the project.
Step 2: Knit the First Row
With the stitches cast on, it’s time to start knitting the first row. Hold the knitting needles in your preferred hand and insert the right needle into the first stitch on the left needle. Wrap the yarn around the right needle from back to front, then pull it through the stitch, slipping the stitch off the left needle. Repeat this process for each stitch on the left needle.
Continue knitting each row in the first colour until you have completed the desired number of rows or reached a specific point in the pattern. It is important to maintain an even tension and avoid any gaps or tight stitches.
Step 3: Changing Colour

If the pattern requires a change in colour, follow the instructions provided. Typically, this involves joining the second colour yarn and knitting with it for a specified number of rows or stitches. The first colour yarn can be carried along the back of the work, being loosely woven in as you knit. Remember to keep the tension consistent to ensure an even appearance.
Once you have finished knitting the first colour, you can move on to knitting the second colour or continue with the pattern as specified. With practice, you will become more comfortable and confident in knitting with multiple colours, creating beautiful and intricate designs.
Changing to the Second Colour
Once you have completed the desired number of rows in your first colour, it’s time to switch to the second colour. This will create a beautiful contrasting effect in your knitting pattern.
To change to the second colour, follow these steps:
- Hold both strands of yarn together, one from each colour.
- Take the yarn from the second colour and pass it over the working yarn from the first colour.
- Hold the strands together, making sure they are not tangled or twisted.
- Begin knitting with the second colour, leaving a tail of yarn from both colours to weave in later.
Tip: To ensure a neat and tidy color change, try weaving the tail ends of both colours into your knitting as you go, rather than waiting until the end. This will minimize the amount of loose yarn to weave in later.
Creating Stripes

When knitting with two colors, creating stripes is a popular and fun technique to add visual interest to your project. Stripes can be created with any combination of colors, whether they are contrasting or complementary, and they can be as wide or narrow as you like.
1. Planning your stripes: Before starting your project, decide the order and number of rows for each color. You can create evenly sized stripes or experiment with different widths for a more dynamic effect. Make sure to consider the overall length of your project and how the stripes will look when completed.
2. Joining new colors: When you reach the end of a row and need to change colors, there are different techniques you can use to ensure a clean and seamless transition. One method is to carry the yarn up the side of your work, and another is to cut the yarn and weave in the ends later. Whichever method you choose, make sure to weave in any loose ends to prevent unraveling.
3. Tension and consistency: When knitting with two colors, it’s important to maintain an even tension throughout your work to ensure consistent and professional-looking stripes. Pay attention to how tightly you are knitting with each color and adjust as needed. Practice and experience will help you develop a steady hand and achieve the desired results.
4. Blocking: After completing your project, blocking can help to even out any inconsistencies in tension and ensure that your stripes lie flat and straight. Follow the blocking instructions for your specific yarn and project to achieve the best results.
By following these tips and techniques, you can create beautiful and well-executed stripes in your knitting projects. Whether you’re making a simple scarf or a complex sweater, adding stripes can elevate your design and make it uniquely your own.
Carrying Yarn

Carrying yarn is an important technique in two-color knitting patterns. When working with two different colors, you will need to switch between them to create the desired pattern. Carrying yarn refers to the method of carrying the non-working color along the rows or rounds, so that it is easily accessible when you need to switch colors.
One common method of carrying yarn is called “floats.” This involves carrying the non-working color behind the stitches as you work with the other color. The floats should be loose enough to allow the fabric to stretch, but tight enough to prevent them from getting tangled or catching on anything. It’s also important to make sure that the floats are not too long, as this can create a messy appearance on the right side of the work.
When you reach the point where you need to switch colors, you can simply drop the working yarn and pick up the other color. To prevent holes or gaps in your fabric, it’s important to twist the two colors together on the wrong side of the work at each color change. This will help secure the floats and create a neat and even appearance.
Another method of carrying yarn is called “weaving.” This involves weaving the non-working color in and out of the stitches as you work with the other color. This technique is especially useful for intricate colorwork patterns, as it keeps the floats securely trapped within the fabric and prevents them from snagging or catching.
Overall, carrying yarn is an essential skill to master when working with multiple colors in knitting. Whether you choose to use floats or weaving, the key is to find a method that works best for you and creates the desired result. With practice and patience, you’ll be able to create beautiful two-color knitting patterns with ease.
Creating a Checkerboard Pattern
Knitting a checkerboard pattern is a fun and easy way to add interest and variety to your knitting projects. This classic design is created by alternating two contrasting colors to create the illusion of a checkerboard. Whether you’re a beginner knitter or have years of experience, this pattern is a great way to practice colorwork techniques and experiment with different color combinations.
To create a checkerboard pattern, you will need two colors of yarn and basic knitting skills. Start by casting on an even number of stitches, depending on the size of your project. You can use any type of yarn, but using a medium-weight yarn will give you a good balance between stitch definition and drape.
Step 1: Set up the checkerboard pattern
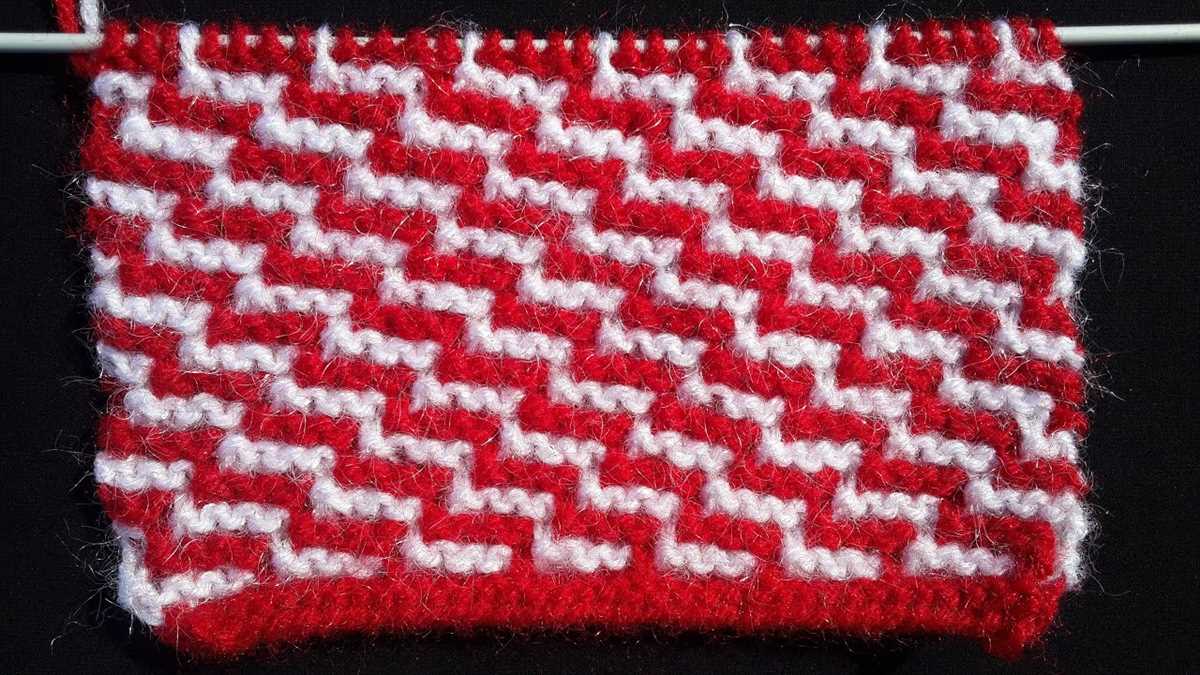
Begin by knitting the first row of your project with one color. Then, switch to the second color and knit the second row. Repeat this pattern, knitting one row with each color, until you have reached the desired length of your project.
Step 2: Creating the checkerboard pattern
Once you have established the base pattern, you can start creating the checkerboard effect by working in a specific color sequence. For example, you can choose to work two rows in one color, followed by two rows in the other color. Alternatively, you can experiment with different color sequences, such as three rows in one color and one row in the other color.
Continue working in your chosen color sequence until you have completed the checkerboard pattern. Remember to weave in any loose ends as you go, so you don’t have to do it all at the end.
This checkerboard pattern can be used to create a wide variety of projects, such as scarves, blankets, and even sweaters. You can also play around with different yarn weights and needle sizes to create different effects. So grab your yarn and needles and have fun experimenting with this versatile and visually appealing knitting pattern!
Adding Texture
Adding texture to your knitting projects can bring them to life and make them more interesting to look at and touch. By incorporating different knitting techniques and stitch patterns, you can create a variety of textures that will make your project stand out.
One way to add texture is by using a combination of knit and purl stitches. By alternating between knits and purls in different patterns, you can create ribbing, seed stitch, and other interesting textures. For example, by knitting one row and then purling the next, you can create a classic rib pattern that adds depth and dimension to your project.
Another technique to add texture is by incorporating cable stitches. Cables are created by crossing a set of stitches over each other, creating a twisted or braided effect. This technique adds a unique texture and can be used to create beautiful designs, such as rope cables or intricate lattice patterns.
You can also experiment with different yarns to add texture to your projects. Yarns with different thicknesses, textures, and fibers can create a wide range of textures. For example, using a chunky yarn will create a thick and cozy texture, while using a lace weight yarn will create a delicate and airy texture.
Lastly, you can add texture by incorporating embellishments and accessories to your knitting projects. This can include adding buttons, beads, or even embroidery to create additional texture and visual interest. These small details can make a big difference and take your project to the next level.
Here are some ways to add texture to your knitting projects:

- Use a combination of knit and purl stitches
- Incorporate cable stitches
- Experiment with different yarns
- Add embellishments and accessories
Finishing Off

After completing your two-color knitting project, it’s important to properly finish off your work to ensure a clean and polished final product. Here are some steps to follow to help you achieve that perfect finish:
1. Weave in the ends: Start by securing all loose yarn ends on the wrong side of your work. Use a tapestry needle to weave the yarn ends in and out of the stitches, following the direction of the knitting. This will help prevent any loose ends from unraveling and give your project a neat appearance.
2. Block your project: Blocking is a process that involves wetting or steaming your finished knitting to help shape and set the stitches. This can help even out any uneven tension or stitches and give your project a more professional look. Follow the blocking instructions specific to the type of yarn you used in your project.
Optional steps:
- Add a border: If you’d like to give your project an extra finishing touch, consider adding a border. This can be done by picking up stitches along the edge of your work and knitting or crocheting a border in a contrasting color or stitch pattern.
- Attach any additional embellishments: If you want to add buttons, beads, or other decorative elements to your project, now is the time to do so. Make sure to securely attach them so they don’t come loose during wear or washing.
- Care instructions: Finally, don’t forget to include care instructions with your finished project. This will help the recipient of your work know how to properly care for and maintain the item.
By following these finishing off steps, you can ensure that your two-color knitting project looks professional and polished. Take the time to complete these final touches, and you’ll be proud to show off your beautiful creation!
Blocking Your Knitted Piece
Blocking is an essential step in the knitting process that helps to shape and finish your knitted piece. It involves wetting your finished knitting, then reshaping and drying it to the desired dimensions. Blocking can make a huge difference in the final look and fit of your project, so it’s worth taking the time to do it properly.
Here are some steps to guide you through the blocking process:
- 1. Fill a basin or sink with lukewarm water. Make sure the water is not too hot or too cold, as extreme temperatures can damage your knitted item. Add a small amount of gentle wool wash or mild detergent to the water.
- 2. Submerge your knitting in the water. Gently press the item down into the water, ensuring it is completely saturated. Allow the knitting to soak for about 20 minutes to half an hour.
- 3. Carefully remove the knitting from the water. Avoid wringing or twisting the item, as this can cause it to stretch or lose its shape. Instead, gently squeeze out the excess water by pressing the knitting between your hands.
- 4. Lay the knitting on a clean towel. Roll up the towel, pressing firmly to squeeze out more moisture. Unroll the towel, then carefully remove the knitting and lay it flat on another dry towel or blocking mat.
- 5. Shape the knitting to the desired dimensions. Use measuring tape or ruler to ensure that the length, width, and any other measurements are accurate. Pin the knitting in place using rust-proof T-pins or blocking wires.
- 6. Leave the knitting to dry completely. This can take anywhere from a few hours to a couple of days, depending on the thickness of the yarn and the humidity in the air. Avoid moving or disturbing the knitting while it is drying.
- 7. Remove the pins or wires once the knitting is dry. Carefully lift each pin or wire, being mindful not to pull or snag the knitting. Your knitted piece should now be beautifully shaped and ready to wear or display.
Blocking is particularly important for lace patterns, as it helps to open up the stitches and showcase the intricate design. However, even with simpler patterns, blocking can greatly improve the overall appearance and drape of your knitting. So don’t skip this crucial step – it’s worth the effort!
Tips and Tricks

Knitting with two colours can be a fun and rewarding experience. However, it can also be a bit challenging, especially if you’re new to colourwork. Here are some tips and tricks to help you get started and make your project successful:
1. Choose high contrast colours: When working with two colours, it’s important to choose colours that have a high contrast. This will make the pattern stand out and ensure that your work looks crisp and clear.
2. Practice tension control: Keeping an even tension while knitting with two colours can be tricky. To ensure that your tension stays consistent throughout your work, practice keeping a relaxed grip on your yarn and adjust your tension as needed.
3. Carry floats: When you’re working with two colours, you’ll often have to carry one colour behind your work as you knit with the other. Make sure to carry the float loosely and avoid pulling it too tight, as it can distort the fabric.
4. Use stitch markers: Stitch markers can be helpful when working on a two-colour pattern, especially if the pattern has multiple repeats. Markers can help you keep track of your progress and make it easier to follow the chart or written instructions.
5. Block your work: Blocking is an important step in finishing your knitting project. It can help even out your tension, open up the pattern, and give your project a more polished look. Follow the recommended blocking method for your yarn and take the time to block your work properly.
Summary
Knitting with two colours can be a fun and creative way to add visual interest to your projects. By following these tips and tricks, you can confidently tackle your next two-colour knitting pattern and create beautiful, eye-catching designs. Remember to choose high contrast colours, practice tension control, carry floats loosely, use stitch markers, and block your work for the best results. Happy knitting!