
Knitting a blanket is a popular and rewarding project for many knitters, and the Linus blanket knitting pattern is one that has gained widespread popularity. Named after the beloved Peanuts character, Linus van Pelt, who is often seen with a cozy blanket, this pattern is known for its simplicity and versatility.
The Linus blanket knitting pattern is suitable for knitters of all skill levels, including beginners. The design features a classic garter stitch, which creates a textured fabric that is both warm and comforting. With its simple yet timeless design, this blanket is perfect for snuggling up on the couch or as a baby blanket.
The Linus blanket can be tailored to any size, depending on your preferences. Whether you want a small lap blanket or a large throw, this pattern can be easily adjusted to meet your needs. It also allows for endless customization options with different colors and yarn weights, making each blanket unique.
Linus Blanket Knitting Pattern: A Step-by-Step Guide
If you’re looking for a cozy and comforting knitting project, the Linus blanket pattern is a perfect choice. Named after the beloved Peanuts character, this pattern is known for its simplicity and timeless appeal. Whether you’re a beginner knitter or an experienced one, this step-by-step guide will help you create a beautiful Linus blanket that you can cherish for years to come.
Materials You Will Need
Before you start knitting your Linus blanket, make sure you have all the necessary materials. You will need:
- Yarn: Choose a soft and warm yarn in a color of your choice. Worsted weight or bulky yarn works best for this pattern.
- Knitting needles: Use knitting needles that are appropriate for the yarn you’ve chosen. Size US 10 or 11 needles are commonly used.
- Tapestry needle: This will be used to weave in the loose ends of yarn.
- Scissors: You’ll need a pair of scissors to cut the yarn.
Step 1: Casting On
Start by casting on the desired number of stitches. The Linus blanket can be any size you want, so cast on as many stitches as you’d like for the width of your blanket. Use the long-tail cast-on method or any other cast-on method you’re comfortable with.
Step 2: Knitting the Rows

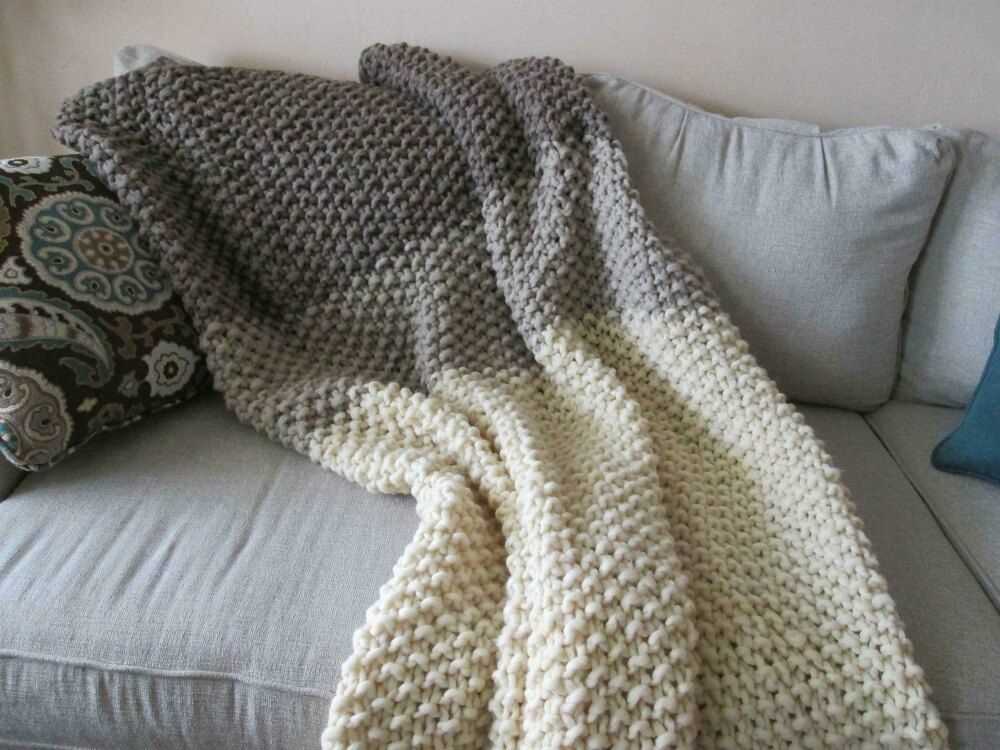
Once you’ve cast on, it’s time to start knitting the rows. Use the garter stitch pattern, which means you’ll knit every row. This creates a cozy and thick texture for the blanket. Continue knitting rows until your blanket reaches the desired length.
Step 3: Binding Off
When you’re ready to finish your Linus blanket, bind off all the stitches. This means knitting the first 2 stitches as usual, then passing the first stitch over the second stitch and off the needle. Continue this process until you have only one stitch left, then cut the yarn and pull it through the final stitch to secure it.
And there you have it! Your Linus blanket is now complete. Feel free to customize it by adding fringe or a border if you’d like. Snuggle up with your cozy creation or gift it to someone special. Happy knitting!
About Linus Blanket
The Linus Blanket is a popular knitting pattern that has been used for many years to create warm and cozy blankets. It was named after the famous Peanuts character, Linus, who was often seen carrying around a security blanket.
This knitting pattern is known for its simplicity and versatility, making it a great choice for both beginner and experienced knitters. The blanket is typically knit in a square or rectangle shape, using basic knitting stitches such as knit and purl. The pattern can be easily customized by changing the size of the needles or the type of yarn used.
Materials
- Knitting needles (size may vary depending on desired gauge)
- Yarn (worsted weight or chunky weight is typically used)
- Scissors
- Yarn needle
Instructions
- Cast on the desired number of stitches, keeping in mind the desired dimensions of the blanket.
- Knit every row until the blanket reaches the desired length.
- Bind off all stitches.
- Weave in any loose ends using a yarn needle.
Once the blanket is completed, it can be used for a variety of purposes. It is perfect for cuddling up on the couch, adding a cozy touch to a bed, or even as a baby blanket. The Linus Blanket is not only practical, but it also brings a sense of nostalgia and comfort to those who use it.
Choosing the Right Yarn and Needles
When it comes to knitting a Linus blanket, choosing the right yarn and needles is essential to achieving the desired result. The yarn and needles you select will determine the overall look, feel, and drape of the blanket.
Yarn: There are various types of yarn available for knitting a Linus blanket, but one key factor to consider is its softness. Since Linus blankets are typically made for children, it’s important to use a yarn that is gentle on the skin and doesn’t cause irritation. Opt for soft and cozy yarns such as acrylic, cotton, or a blend of these materials. These types of yarns are not only soft but also durable, making the blanket suitable for everyday use.
Needles: The size of needles you choose will determine the tension and gauge of your blanket. For a Linus blanket, it’s recommended to use larger-sized needles, such as US size 10 or 11 (6mm or 8mm). These larger needles will create a looser fabric, resulting in a plush and snuggly blanket. Additionally, using circular needles is a popular choice for larger projects like a blanket, as they can accommodate a large number of stitches and make it easier to manage the weight of the blanket as you work.
Remember to check the recommended gauge for the yarn you choose and adjust your needle size if necessary. Always make a gauge swatch before starting your project to ensure that your measurements match the pattern’s requirements.
If you’re unsure about the yarn and needle combination, visiting a local yarn store or seeking advice from experienced knitters can be helpful. They can provide guidance based on your preferences and the specific needs of the project.
Getting Started: Casting On
When starting a knitting project, the first step is to cast on. Casting on is the process of creating the foundation row of stitches on your knitting needle. It is important to cast on the correct number of stitches according to your pattern. In the case of the Linus blanket knitting pattern, the recommended cast on method is the long-tail cast on.
The long-tail cast on method is a versatile and commonly used technique in knitting. To begin, you will need to estimate the amount of yarn you will need for your cast on. This can be done by measuring a length of yarn approximately three times the width of your final project. The tail end of the yarn will be used to create the stitches, while the working end will be used to knit the subsequent rows.
Using the long-tail cast on, you will start by creating a slipknot in the yarn, leaving a long tail. Then, you will insert your needle into the loop of the slipknot and pull the yarn through, creating your first stitch. Repeat this process of creating stitches until you have cast on the desired number, being careful to leave a little bit of space between each stitch. Once you have completed the cast on, you are ready to begin knitting the first row of your Linus blanket.
Knitting the Linus Blanket
The Linus Blanket is a classic knitting pattern that has been loved by knitters for many years. Named after the beloved Peanuts character Linus, who is often seen carrying a security blanket, this pattern is perfect for creating a warm and cozy blanket that is sure to become a cherished item. Whether you are a beginner or an experienced knitter, the Linus Blanket is a great project to work on.
To knit the Linus Blanket, you will need to gather the necessary materials: knitting needles in the appropriate size, yarn in the color and weight of your choice, and a pair of scissors. You may also want to have a tapestry needle on hand for weaving in ends. Once you have all your materials ready, you can begin casting on stitches to start your blanket.
Cast On and Knit Stitches
To cast on, hold one knitting needle in your right hand and hold the loose end of the yarn in your left hand. Create a slipknot by making a loop with the yarn, placing it on the needle, and pulling the tail through the loop. Slide the loop onto the needle and tighten the knot. Now you can start knitting the stitches.
Using the knit stitch, insert the right-hand needle into the first stitch on the left-hand needle from left to right. Wrap the yarn around the right-hand needle counterclockwise, and then pull the right-hand needle through the first stitch, slipping it off the left-hand needle. Repeat this process with each stitch until you have reached the desired length for your blanket. Remember to keep your tension consistent to ensure an even and professional-looking knit fabric.
Continue knitting all rows in the same manner until your blanket is the desired size. To finish off, cast off by knitting two stitches, then using the left-hand needle to lift the first stitch over the second stitch and off the right-hand needle. Repeat until only one stitch remains, then cut the yarn and pull it through the last stitch to secure. Weave in any loose ends with a tapestry needle and your Linus Blanket is complete!
In conclusion, knitting the Linus Blanket is a fun and rewarding project that allows you to create a beautiful and comforting item. Whether you choose to make it for yourself or as a gift for someone special, the Linus Blanket is sure to be cherished and loved for years to come.
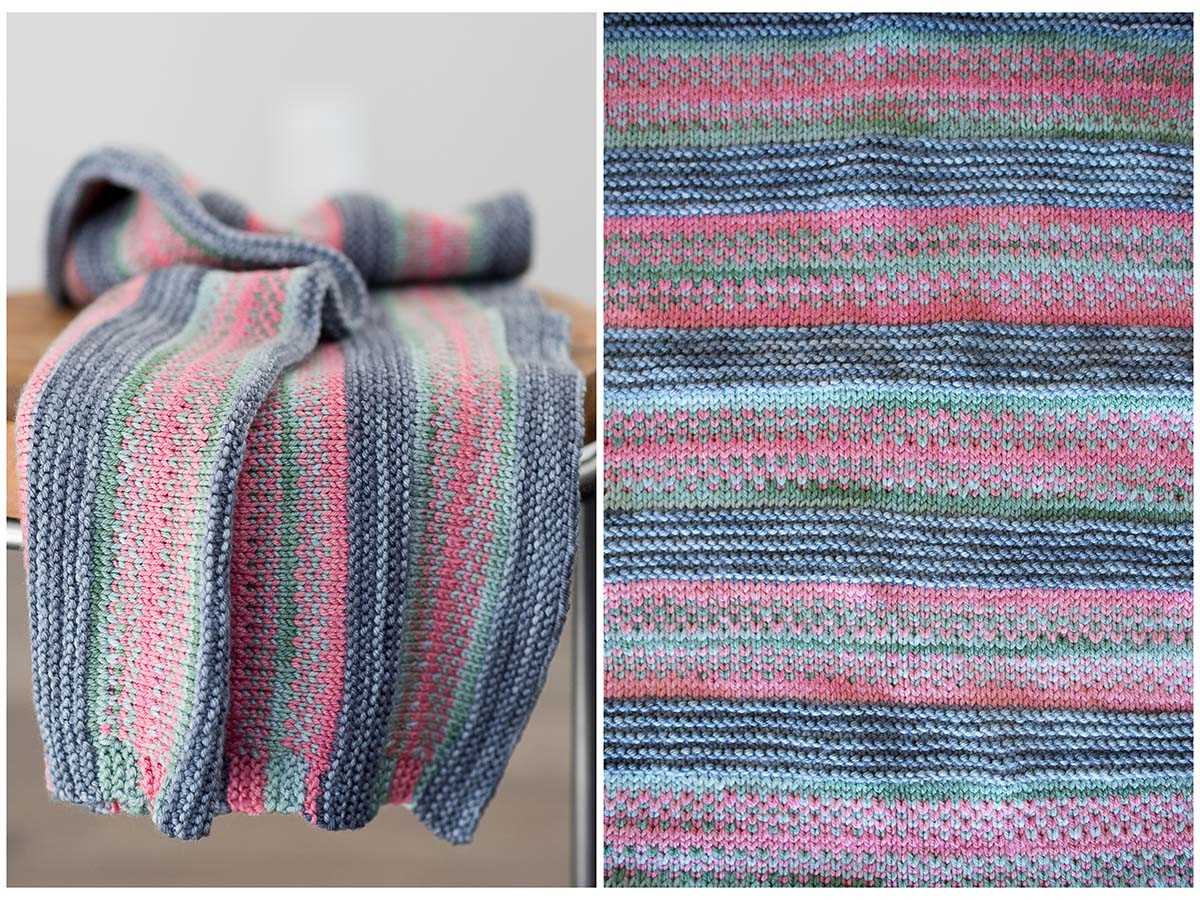
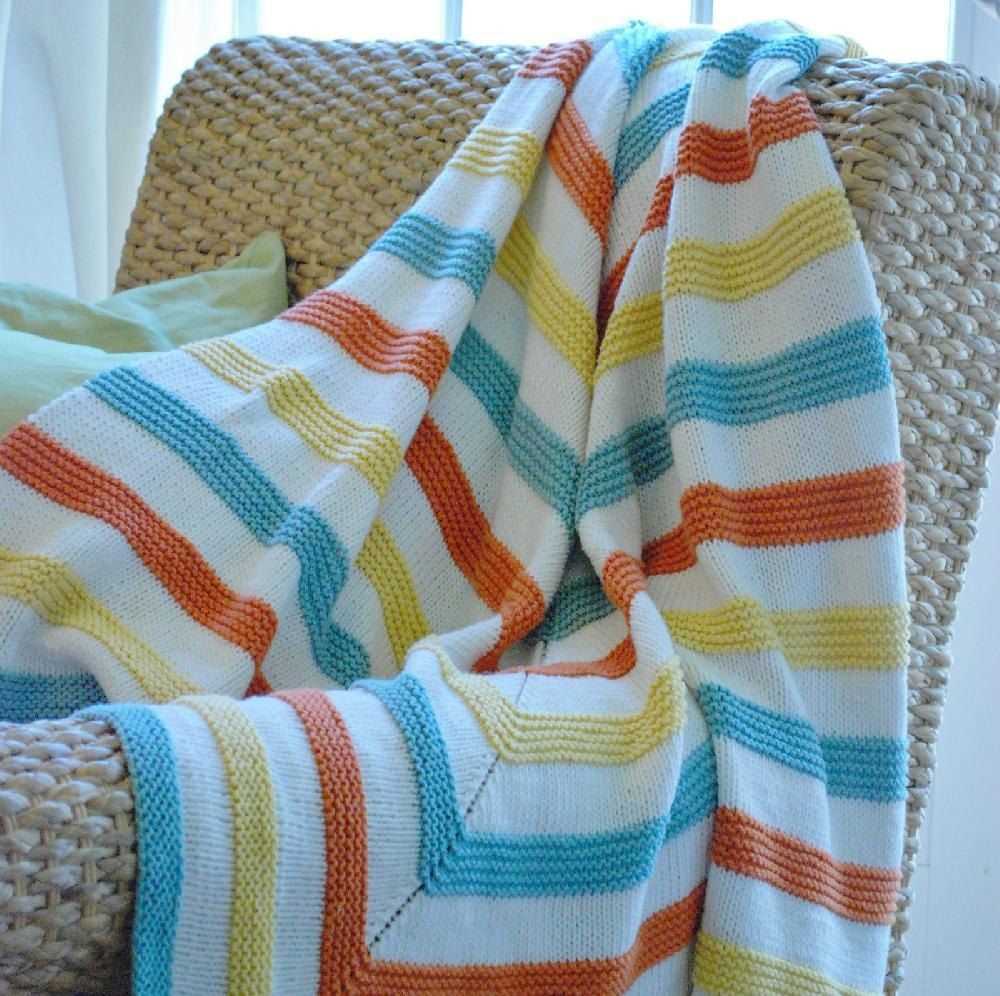
Creating the Stripes
One of the most popular design elements in the Linus blanket knitting pattern is the use of stripes. These stripes add visual interest and depth to the blanket, making it a unique and eye-catching piece. The process of creating the stripes is fairly simple and can be customized to fit your desired color scheme and pattern.
Choosing the Colors
Before you can start knitting the stripes, you’ll need to choose the colors for your blanket. The Linus blanket pattern typically uses a combination of two or three colors, but you can use as many colors as you like. Consider the overall look you want to achieve and select colors that complement each other well. You can choose contrasting colors for a bold and vibrant look, or opt for more subtle shades for a softer and more understated effect. Once you have the colors selected, you’re ready to begin creating the stripes.
Knitting the Stripes

To knit the stripes, you’ll need to follow a simple pattern that alternates between the different colors. This can be done by changing yarn colors at the beginning of each row, or by carrying the yarn along the side of your work to avoid cutting and weaving in ends. You can choose to knit the stripes in a uniform width, or vary the widths for a more interesting and dynamic look. Experiment with different stripe patterns and widths until you find a design that you love. As you knit the stripes, make sure to keep track of your pattern and take care to keep your tension consistent to ensure an even and polished finish.
Creating the stripes in the Linus blanket knitting pattern is a fun and creative process that allows you to personalize your project and make it truly unique. Whether you choose bold and vibrant colors or soft and subtle shades, the stripes will add visual appeal and make your blanket stand out. So gather your yarn, choose your colors, and get ready to create a beautiful striped Linus blanket that will be cherished for years to come.
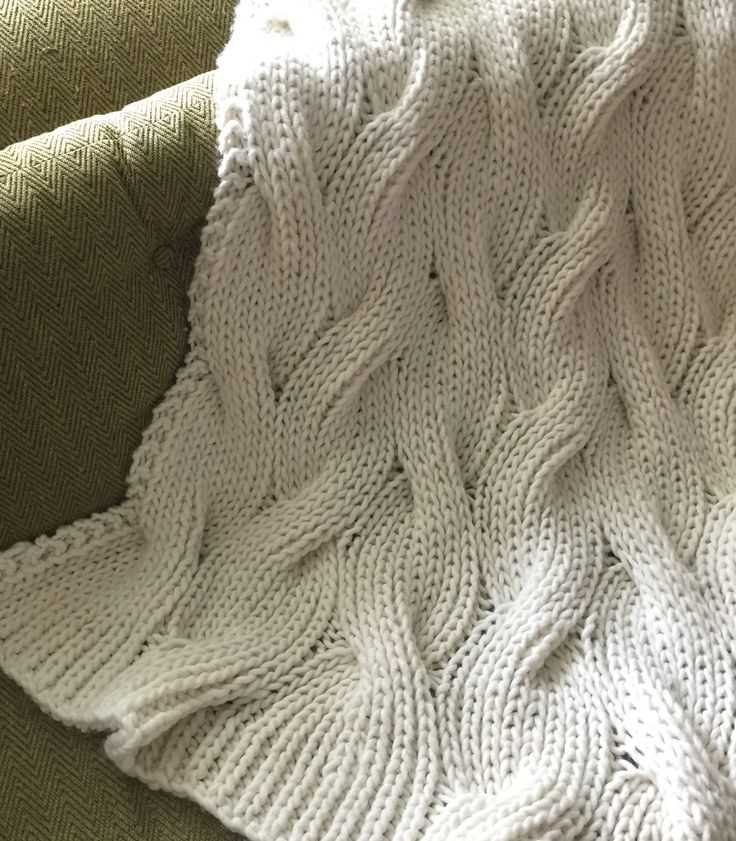
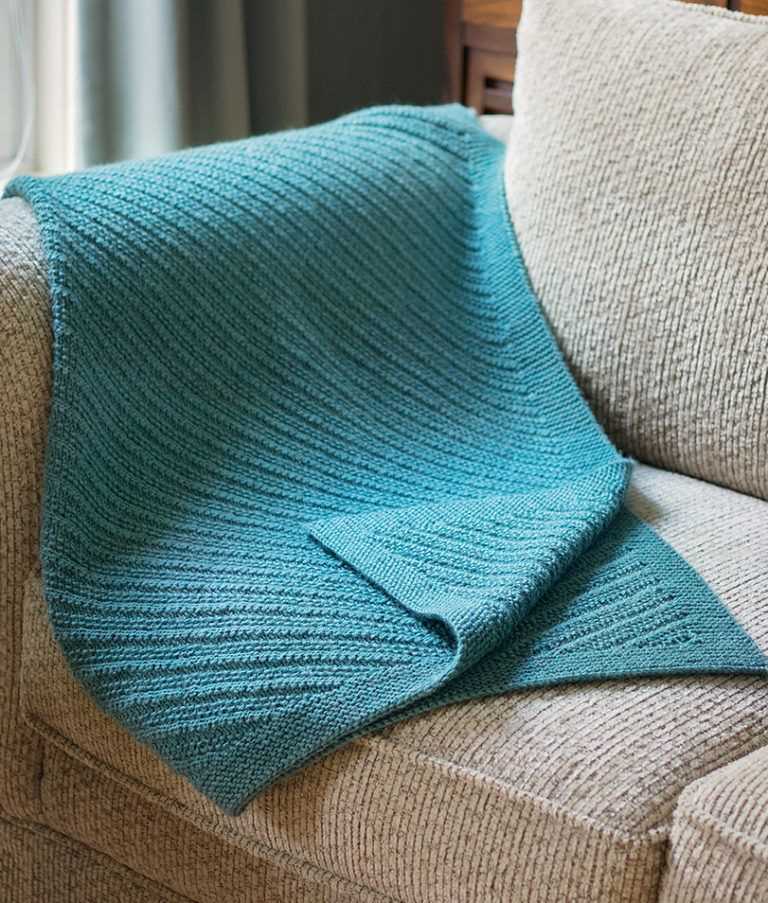
Adding Textures to the Blanket
When knitting a Linus blanket pattern, adding different textures can elevate the overall design and make it more interesting. There are various techniques and stitch patterns that can be incorporated to create texture in your blanket.
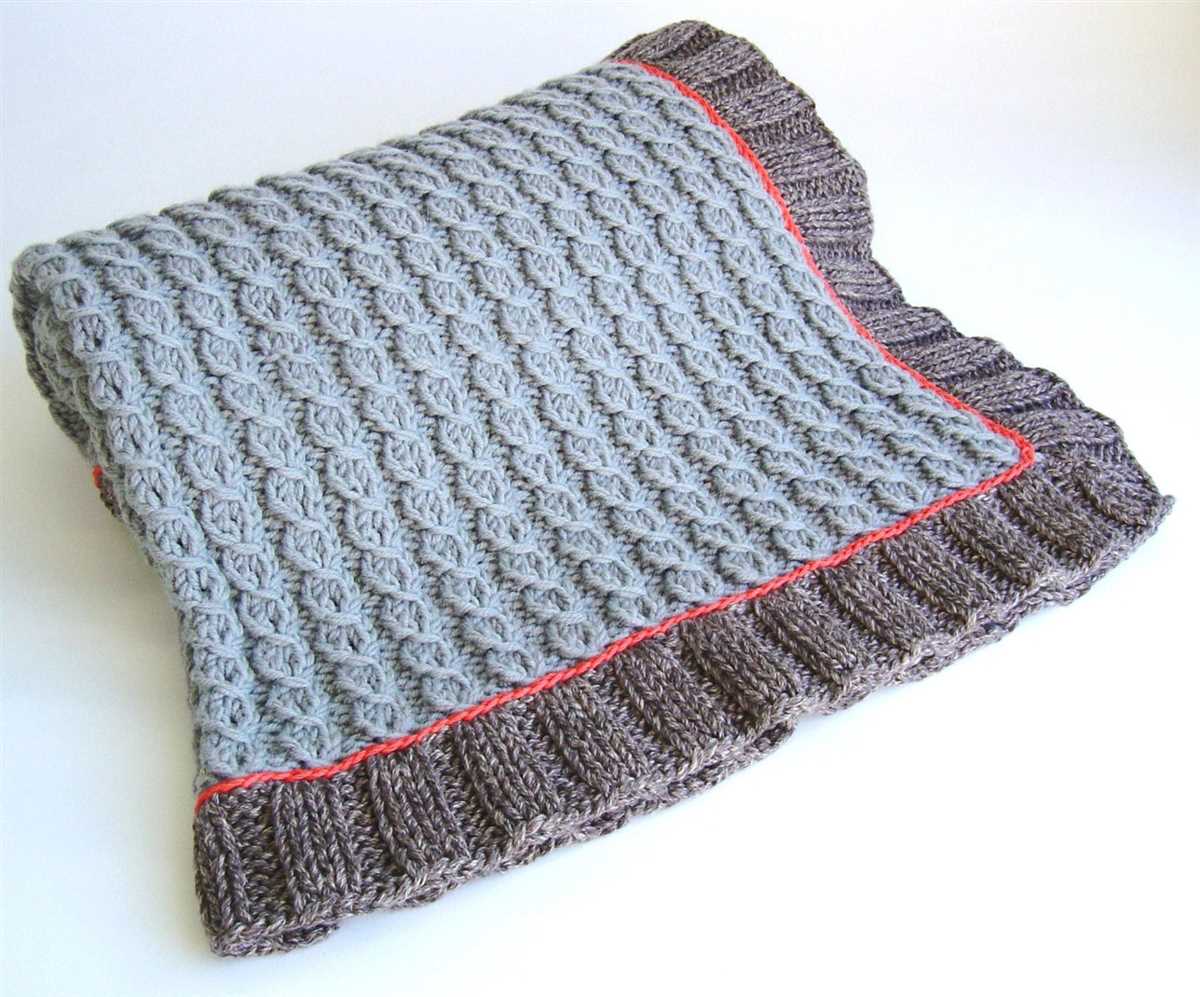
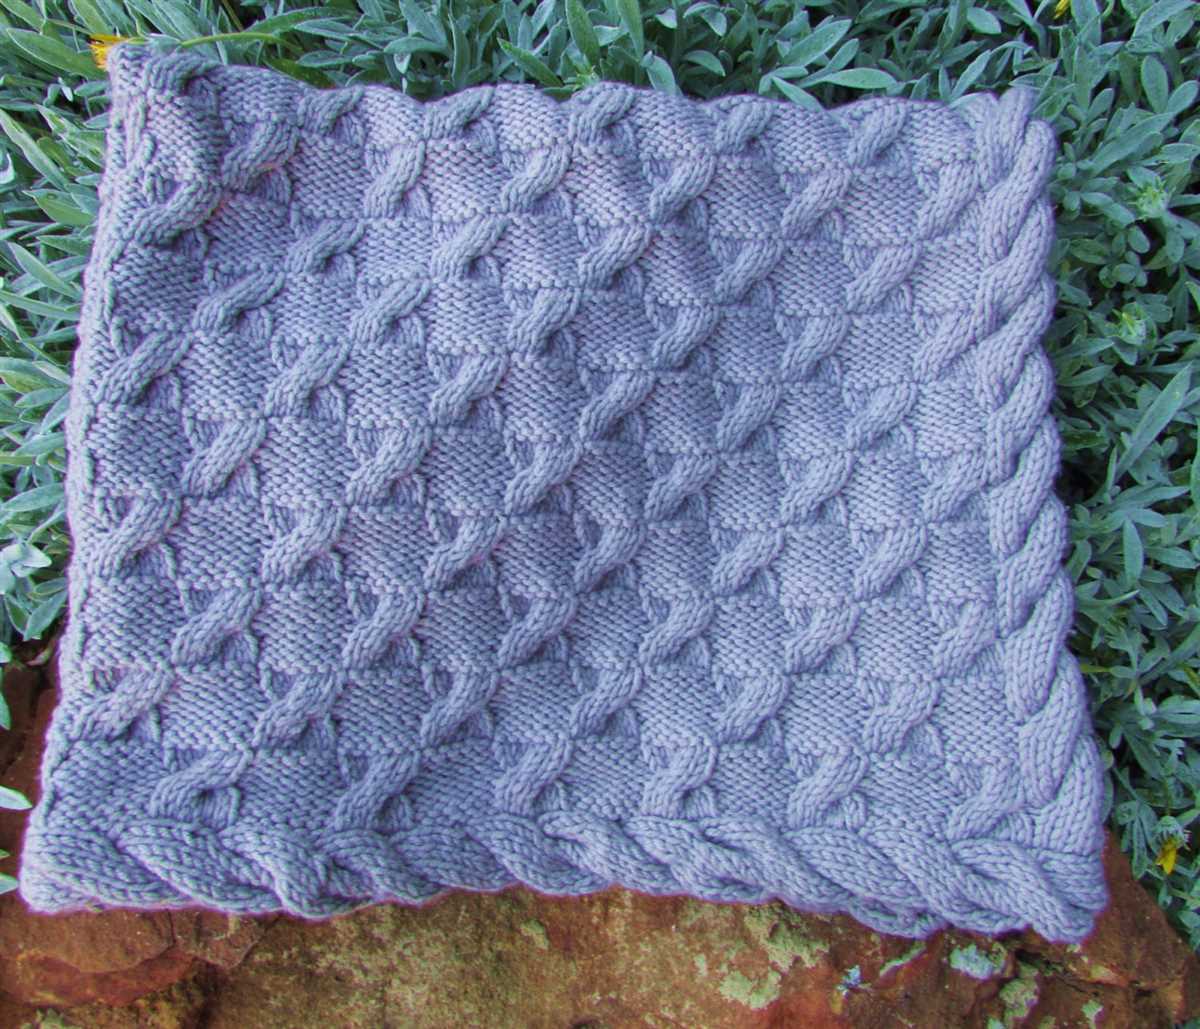
Ribbing: Ribbing is a common technique in knitting that creates a stretchy fabric with vertical lines. It is achieved by alternating knit and purl stitches in a regular pattern. Adding ribbing to your blanket can provide both visual and tactile texture.
Cables: Adding cables to your Linus blanket pattern can create a beautiful raised texture. Cables are created by crossing stitches over each other, creating a twisting effect. They can be done in various sizes and patterns, adding depth and interest to your blanket.
- Garter Stitch: Using garter stitch, which is created by knitting every row, can add a bumpy texture to your blanket. This stitch is simple yet effective in adding visual and tactile interest.
- Seed Stitch: The seed stitch is created by alternating knit and purl stitches in a random pattern. This stitch creates a pebbly texture and is a great way to add dimension to your blanket.
- Moss Stitch: The moss stitch is similar to the seed stitch, but with a different pattern. It is created by alternating knit and purl stitches, but in a consistent pattern. This stitch creates a textured, woven look.
- Bobble Stitch: Adding bobble stitches to your blanket can create a fun and playful texture. Bobbles are created by knitting several stitches into the same stitch, and then quickly decreasing them, causing a raised bump to form.
These are just a few examples of how you can add textures to your Linus blanket pattern. Experiment with different stitch patterns and techniques to create a unique and personalized blanket that is both visually appealing and cozy.
Working on the Border
As you near the end of knitting the main body of your Linus blanket, it’s time to start thinking about the border. The border is an important finishing touch that not only adds visual appeal, but also helps to give the blanket some structure and stability.
Before beginning the border, take a moment to evaluate your blanket and decide on the size and style of the border you want. Consider the overall look you’re going for and how the border will complement the main body of the blanket. It’s also a good idea to swatch the border pattern before diving in to ensure that it matches the gauge and tension of the main body.
Once you have a plan in place, it’s time to start knitting the border. There are several different border patterns to choose from, depending on your skill level and preference. You might opt for a simple garter stitch border for a clean and classic look, or you could try a more intricate pattern like a lace border for a touch of elegance.
Whichever pattern you choose, start by picking up stitches along the edges of the main body. This can be a bit tricky, especially if you’re new to knitting, but take it slow and remember that practice makes perfect. Use a smaller needle size than the one used for the main body to ensure a neat and tidy border.
As you work on the border, pay close attention to your tension and make sure to maintain an even stitch count. Any inconsistencies in tension or stitch count could cause the border to pucker or ripple, so take your time and be mindful of your knitting. Once the border is complete, weave in any loose ends and block the blanket to give it a smooth and professional finish.
Working on the border of your Linus blanket is an exciting and rewarding step in the knitting process. It adds the final touches to your creation and transforms it into a cozy and beautiful blanket that will be treasured for years to come.
Blocking and Finishing Touches
Once you have finished knitting your Linus blanket, it’s important to block it in order to give it a more polished and even appearance. Blocking involves wetting the blanket and then stretching it to the desired dimensions, allowing it to dry in that shape. This helps to even out any uneven stitches and give the blanket a neater look overall.
To block your Linus blanket, start by filling a basin or sink with lukewarm water. Gently submerge the blanket in the water, making sure it is fully saturated. Let it soak for about 10-15 minutes, then carefully lift it out of the water, being mindful not to stretch or distort the fabric.
Next, lay the blanket flat on a clean towel or blocking mat, and use your hands to gently stretch it to the desired dimensions. You can use pins or blocking wires to hold the blanket in place if needed. Allow the blanket to air dry in this stretched position, which may take several hours or even overnight depending on the thickness of the yarn.
Finishing touches
Once your Linus blanket is dry and blocked, it’s time to add the finishing touches. Start by weaving in any loose ends or yarn tails, being careful to secure them tightly so they don’t come undone with use. Trim any excess yarn, making sure to leave a small tail so the knot doesn’t unravel.
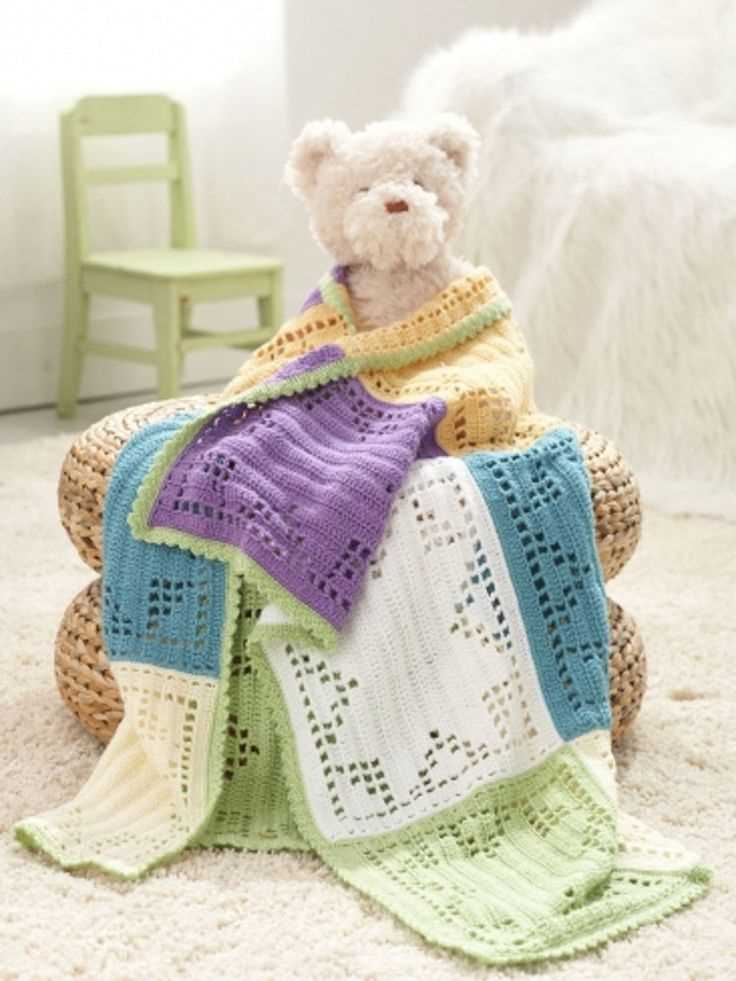
If desired, you can also add a decorative border or edging to your blanket. This can be done using a contrasting color of yarn or by incorporating a different stitch pattern. Some popular choices for blanket borders include ribbing, garter stitch, or a simple crochet edging.
Finally, give your blanket a gentle steam or press with a warm iron to further smooth out any wrinkles or creases. Be sure to use a pressing cloth to protect the yarn from direct contact with the iron. Once your Linus blanket is fully blocked, finished, and pressed, it’s ready to be enjoyed or gifted to someone special.
Personalizing Your Linus Blanket
One of the best things about knitting your own Linus blanket is that you can personalize it to make it truly unique. Here are some ideas to make your blanket special:
Add initials or names:
One way to personalize your Linus blanket is by adding initials or names. You can use duplicate stitch or embroidery techniques to add the initials or names of the recipient or even your own initials. This adds a personal touch and makes the blanket feel even more special.
Choose custom colors:
Another way to make your Linus blanket unique is by choosing custom colors. You can select yarns in the recipient’s favorite colors or colors that match their decor. This allows you to create a blanket that not only provides comfort but also complements the recipient’s personal style.
Add special motifs:
If you want to take personalization a step further, consider adding special motifs to your Linus blanket. You can incorporate motifs that represent the recipient’s hobbies, interests, or even their favorite animals. This adds a touch of personality to the blanket and makes it truly one-of-a-kind.
Include a personalized message:
If you’re making a Linus blanket as a gift, consider including a personalized message. You can write a heartfelt note and attach it to the blanket, making it a cherished keepsake. This adds an emotional element to the blanket and shows the recipient how much thought and love went into creating it.
Remember, the purpose of a Linus blanket is to provide comfort and warmth, but adding personal touches can make it an even more special and meaningful gift. Whether you choose to add initials, custom colors, special motifs, or a personalized message, your Linus blanket will be a treasured item that brings joy to its recipient.