
Knitting fingerless gloves can be a fun and rewarding project for knitters of all skill levels. Whether you are a beginner looking for a simple pattern to practice your knitting skills or an experienced knitter wanting to try something new, fingerless gloves are a versatile and fashionable accessory that can be enjoyed by anyone.
One of the benefits of using circular needles for knitting fingerless gloves is that they eliminate the need for seams. Circular needles allow you to knit in the round, which means that you can knit in a continuous loop without having to turn your work. This makes circular needles a great choice for projects that require seamless construction, like fingerless gloves.
There are countless fingerless gloves knitting patterns available that can be knit using circular needles. Whether you prefer a simple and classic design or something more intricate and unique, you can find a pattern that suits your style and skill level. Circular needles also give you the flexibility to customize your gloves by adjusting the stitch pattern, yarn type, and size, making it easy to create a pair of fingerless gloves that are truly one-of-a-kind.
So, grab your circular needles and get ready to knit a pair of fingerless gloves that will keep your hands warm and stylish all winter long. Whether you’re knitting for yourself or a loved one, fingerless gloves are a fantastic project that combines both fashion and function. With a wide range of patterns and variations available, you’re sure to find a fingerless gloves knitting pattern that you’ll love.
Knitting fingerless gloves: an easy DIY project
If you’re looking for a fun and practical knitting project, fingerless gloves are a great option. With just a few basic knitting skills, you can create a stylish and functional accessory that will keep your hands warm during cooler months while still allowing you to use your fingers freely.
One of the advantages of knitting fingerless gloves is that they are relatively quick and easy to make. Unlike full gloves, which require more time and precision, fingerless gloves can be completed in just a few hours. This makes them a perfect project for beginners or those with limited time.
When starting your fingerless gloves knitting project, it’s important to choose the right pattern and materials. Circular needles are often recommended for knitting fingerless gloves, as they allow you to easily knit in the round and avoid seams. Additionally, using high-quality yarn will ensure that your gloves are soft, cozy, and long-lasting.
To get started, you can search for fingerless gloves knitting patterns online or in knitting books. Many patterns include step-by-step instructions and helpful tips to guide you through the process. You can also choose from a variety of stitch patterns and techniques to add personal flair to your gloves.
Once you’ve chosen your pattern and gathered your materials, it’s time to cast on and get knitting. With each stitch, you’ll feel a sense of accomplishment as your gloves slowly take shape. And when you’re done, you’ll have a beautiful pair of fingerless gloves that you can proudly wear or give as a thoughtful handmade gift.
So, whether you’re a beginner knitter looking for a simple project or an experienced knitter looking to add to your handmade collection, knitting fingerless gloves is a rewarding and enjoyable DIY project. Start knitting your own pair today and embrace the joy of creating something beautiful with your own two hands.
Why choose circular needles for knitting fingerless gloves?
When it comes to knitting fingerless gloves, circular needles offer several advantages over traditional straight needles. Circular needles consist of two needle tips connected by a flexible cable, allowing for seamless knitting in the round. This eliminates the need to sew up a seam later, resulting in a professional and polished finish.
Another benefit of using circular needles for fingerless gloves is the ability to easily adjust the length of the cable. This is particularly useful when knitting gloves, as the circumference of the wrist and hand may vary. By using circular needles, you can easily accommodate different sizes without having to switch to different needle lengths.
Additionally, circular needles distribute the weight of the project more evenly, reducing strain on the wrists and hands. This can be especially helpful when working on larger glove projects that require a significant amount of knitting. The flexible cable also allows for more mobility and flexibility, making it easier to maneuver and work on intricate stitch patterns.
In conclusion, choosing circular needles for knitting fingerless gloves provides a seamless finish, adjustable sizing, even weight distribution, and increased flexibility. These benefits make circular needles a popular choice among knitters for creating fingerless gloves that are both comfortable and stylish.
How to choose the right circular needles for fingerless gloves knitting
When knitting fingerless gloves, having the right set of circular needles can make all the difference in your knitting experience. Circular needles are a versatile tool that allows you to knit in the round, making them ideal for projects like fingerless gloves. Here are some key factors to consider when choosing circular needles for fingerless gloves knitting.
Needle length: The length of the circular needles you choose depends on the circumference of the fingerless gloves you want to knit. For most fingerless gloves, a 16-inch circular needle will suffice. However, if you’re knitting gloves with a larger circumference, you may need a longer needle, such as a 24-inch or 32-inch circular needle.
Needle material: Circular needles can be made from various materials, including metal, wood, and plastic. Each material has its own advantages and disadvantages. Metal needles are known for their durability and smoothness, making them great for speedy knitting. Wood needles, on the other hand, provide more grip and control, making them ideal for beginners or those who prefer a slower knitting pace. Plastic needles are lightweight and affordable, but they may not be as durable as metal or wood. Consider your personal preferences and knitting style when choosing the material of your circular needles.
Needle size: The size of the circular needles is determined by the thickness of the yarn you’re using. It’s important to match the needle size to the recommended gauge of the yarn to ensure your fingerless gloves turn out the right size. The recommended needle size is usually indicated on the yarn label or in the knitting pattern. If you’re unsure, you can always make a gauge swatch to determine the correct needle size.
Interchangeable circular needles: If you’re an avid knitter and plan to make multiple fingerless gloves projects, investing in a set of interchangeable circular needles may be worth considering. These sets typically come with a variety of needle sizes and cable lengths, allowing you to customize your knitting experience for any project. Interchangeable circular needles are convenient and cost-effective in the long run.
Overall, choosing the right circular needles for fingerless gloves knitting is a personal preference. Consider factors such as needle length, material, size, and whether or not you want interchangeable needles. With the right needles, you’ll be able to enjoy a smooth and enjoyable knitting experience while creating beautiful fingerless gloves.
Understanding the importance of gauge when knitting fingerless gloves
When knitting fingerless gloves, it is crucial to understand the importance of gauge. Gauge refers to the number of stitches and rows per inch in a knitted sample. Each knitting pattern specifies a specific gauge to achieve the correct dimensions and fit of the finished gloves. Since fingerless gloves are meant to be snug and functional, achieving the correct gauge is essential to ensure a proper fit on the hands.
Failing to meet the gauge specified in the pattern can result in gloves that are either too large or too small. If the gauge is too loose and there are fewer stitches and rows per inch, the gloves will turn out larger than intended. On the other hand, if the gauge is too tight and there are more stitches and rows per inch, the gloves will be smaller than intended. This can lead to discomfort and an unflattering fit on the wearer’s hands.
When working with circular needles to knit fingerless gloves, it is especially important to check your gauge. Circular needles can produce slightly different gauges compared to straight needles, so it is crucial to swatch and adjust accordingly. Take the time to knit a gauge swatch in the round using the circular needles and the yarn you plan to use for the gloves. Measure the stitches and rows per inch in the swatch using a ruler or gauge tool.
If your gauge does not match the pattern’s specified gauge, you may need to change needle sizes to achieve the correct gauge. If your stitches are too loose, try using a smaller needle size. If your stitches are too tight, try using a larger needle size.
Making these adjustments can ensure that your fingerless gloves will fit well and be comfortable to wear. Remember to always check your gauge before starting any knitting project to avoid any sizing issues and achieve the best results!
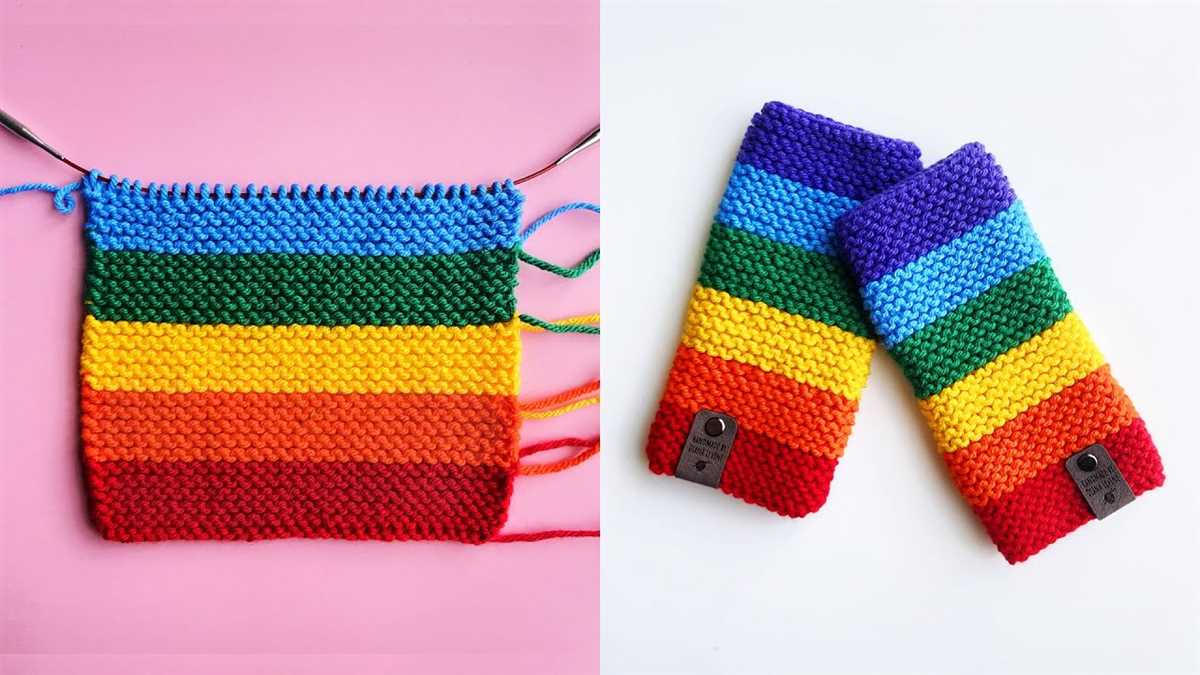
Beginner-friendly Fingerless Gloves Knitting Pattern using Circular Needles
Knitting fingerless gloves can be a fun and rewarding project for beginners. With the right knitting pattern and some basic knowledge of knitting techniques, you can create a stylish and practical accessory in no time. This beginner-friendly fingerless gloves knitting pattern is designed for use with circular needles, which makes it easier to create a seamless product without the need for frequent stitch changes. Whether you’re a beginner looking to start your knitting journey or an experienced knitter searching for a quick and satisfying project, this pattern is perfect for you.
To get started with this fingerless gloves knitting pattern, you will need the following materials:
- Circular knitting needles in the recommended size for your chosen yarn
- Worsted weight yarn in your chosen color
- Tapestry needle for weaving in ends
- Stitch markers
The knitting pattern itself is straightforward and easy to follow. It consists of knitting in the round for the body of the gloves, with separate instructions for the thumb hole. The pattern also includes measurements and guidelines for different sizes, allowing you to customize the gloves to fit your hand perfectly.
In addition to being beginner-friendly, this fingerless gloves knitting pattern is also a great opportunity to practice and improve your knitting skills. It incorporates commonly used techniques like casting on, knitting in the round, ribbing, and binding off. By following this pattern, you’ll not only create a beautiful pair of fingerless gloves but also gain confidence and experience in knitting with circular needles.
Once you’ve completed your fingerless gloves using this pattern, you can enjoy the warmth and versatility they provide. Fingerless gloves are perfect for keeping your hands cozy while still allowing you to use your fingers freely. They make a stylish accessory for cool weather and can be worn for various activities like typing, texting, or even outdoor knitting. Plus, they also make great gifts for friends and family.
In conclusion, this beginner-friendly fingerless gloves knitting pattern using circular needles is an excellent project for knitters of all skill levels. With its clear instructions, practical design, and customizable sizing, it’s a pattern that can be enjoyed by both beginners and experienced knitters. So grab your circular needles, choose your favorite yarn, and get ready to create a pair of cozy fingerless gloves that you’ll love to wear or share.
Advanced techniques for adding texture to fingerless gloves
If you’re looking to level up your fingerless glove knitting skills and add some interesting texture to your designs, there are several advanced techniques you can try. These techniques will not only provide visual interest but also enhance the functionality and warmth of the gloves.
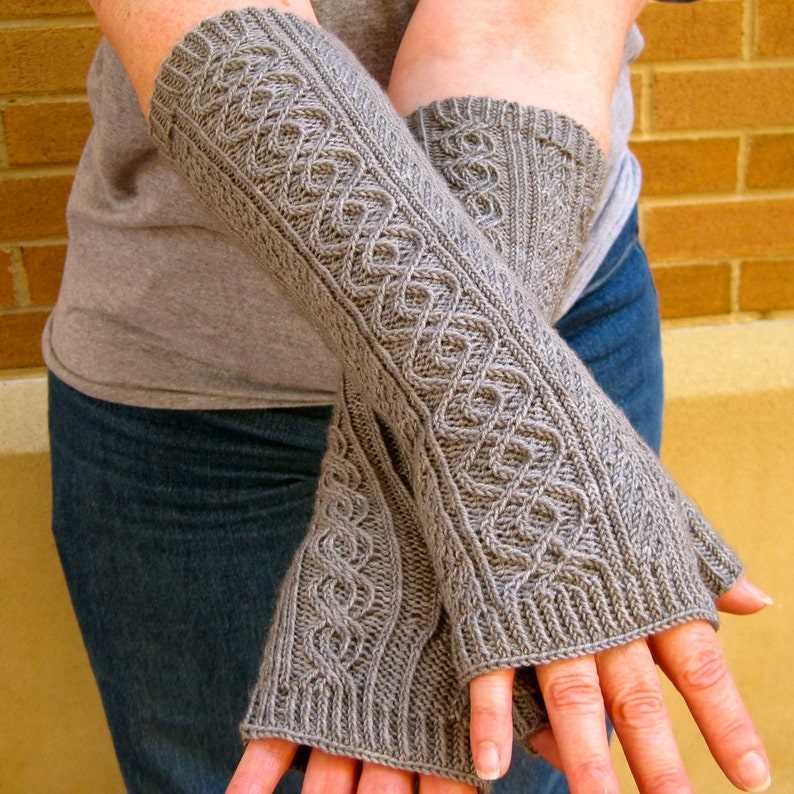
Cable Knitting

One popular technique for adding texture to fingerless gloves is cable knitting. By incorporating cables into your design, you can create intricate patterns that stand out. The cables can be simple twists or more complex braids, depending on your skill level and desired aesthetic. Cable knitting not only adds visual appeal but also adds thickness to the fabric, providing extra warmth.
Lace Knitting
Lace knitting is another technique that can add a delicate and airy texture to your fingerless gloves. Creating lace patterns involves combining yarn overs and decreases to create decorative holes and intricate motifs. This technique adds a feminine and elegant touch to your gloves while also allowing for better breathability.
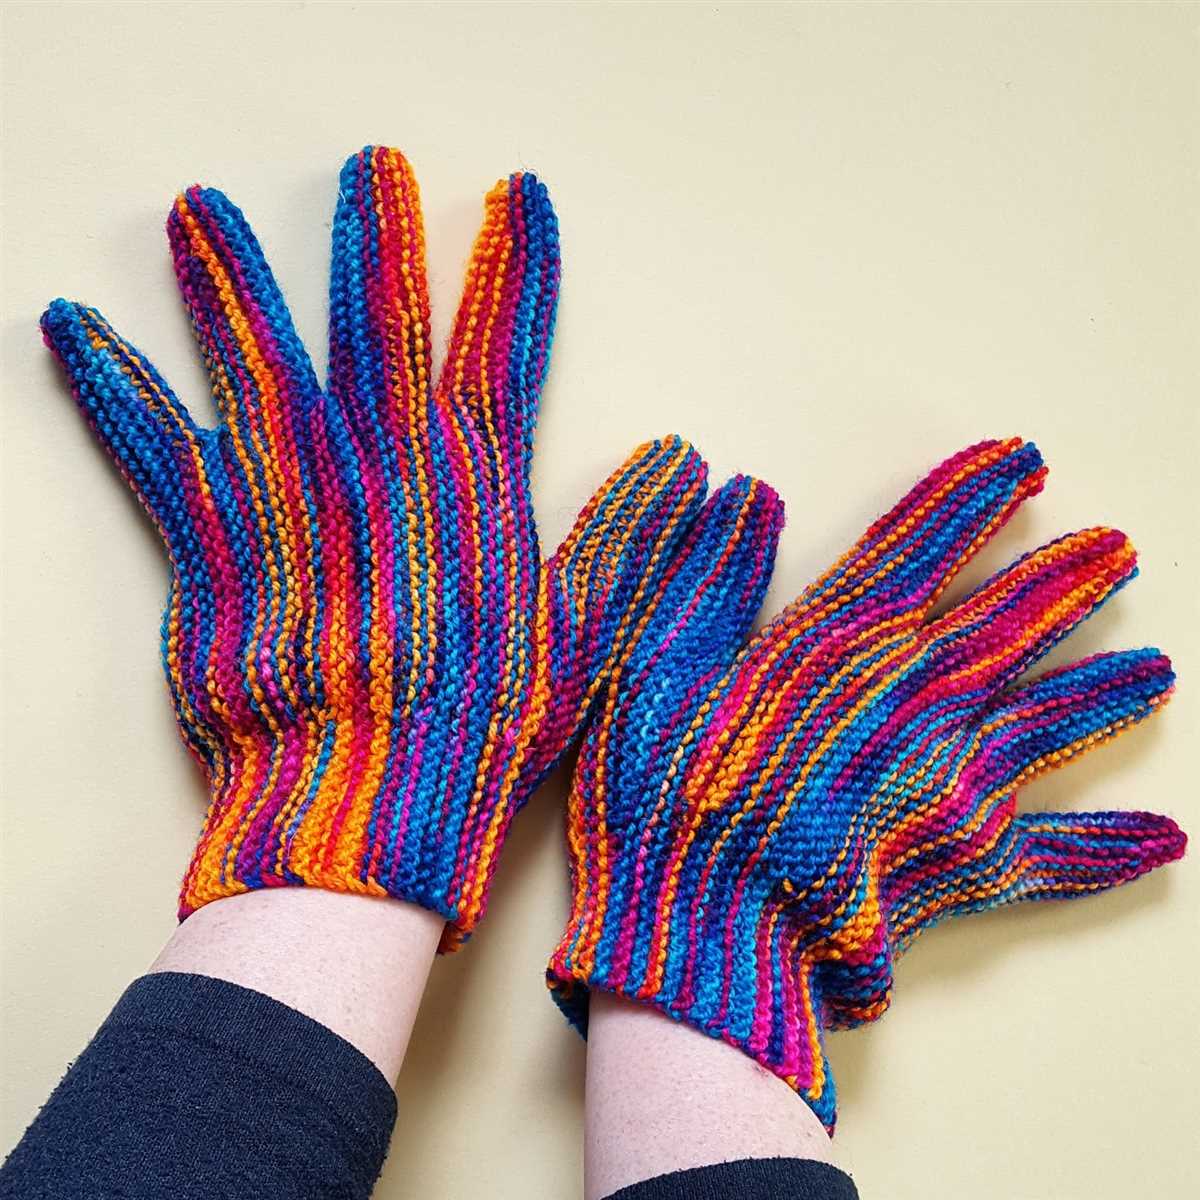
Colorwork
Integrating colorwork into your fingerless gloves can instantly transform a simple design into a vibrant and eye-catching accessory. Fair Isle and stranded knitting are popular techniques for colorwork. By using multiple colors in your design, you can create intricate patterns, stripes, or even pictorial motifs. Colorwork can add depth and complexity to your gloves, making them true works of art.
Textured Stitch Patterns
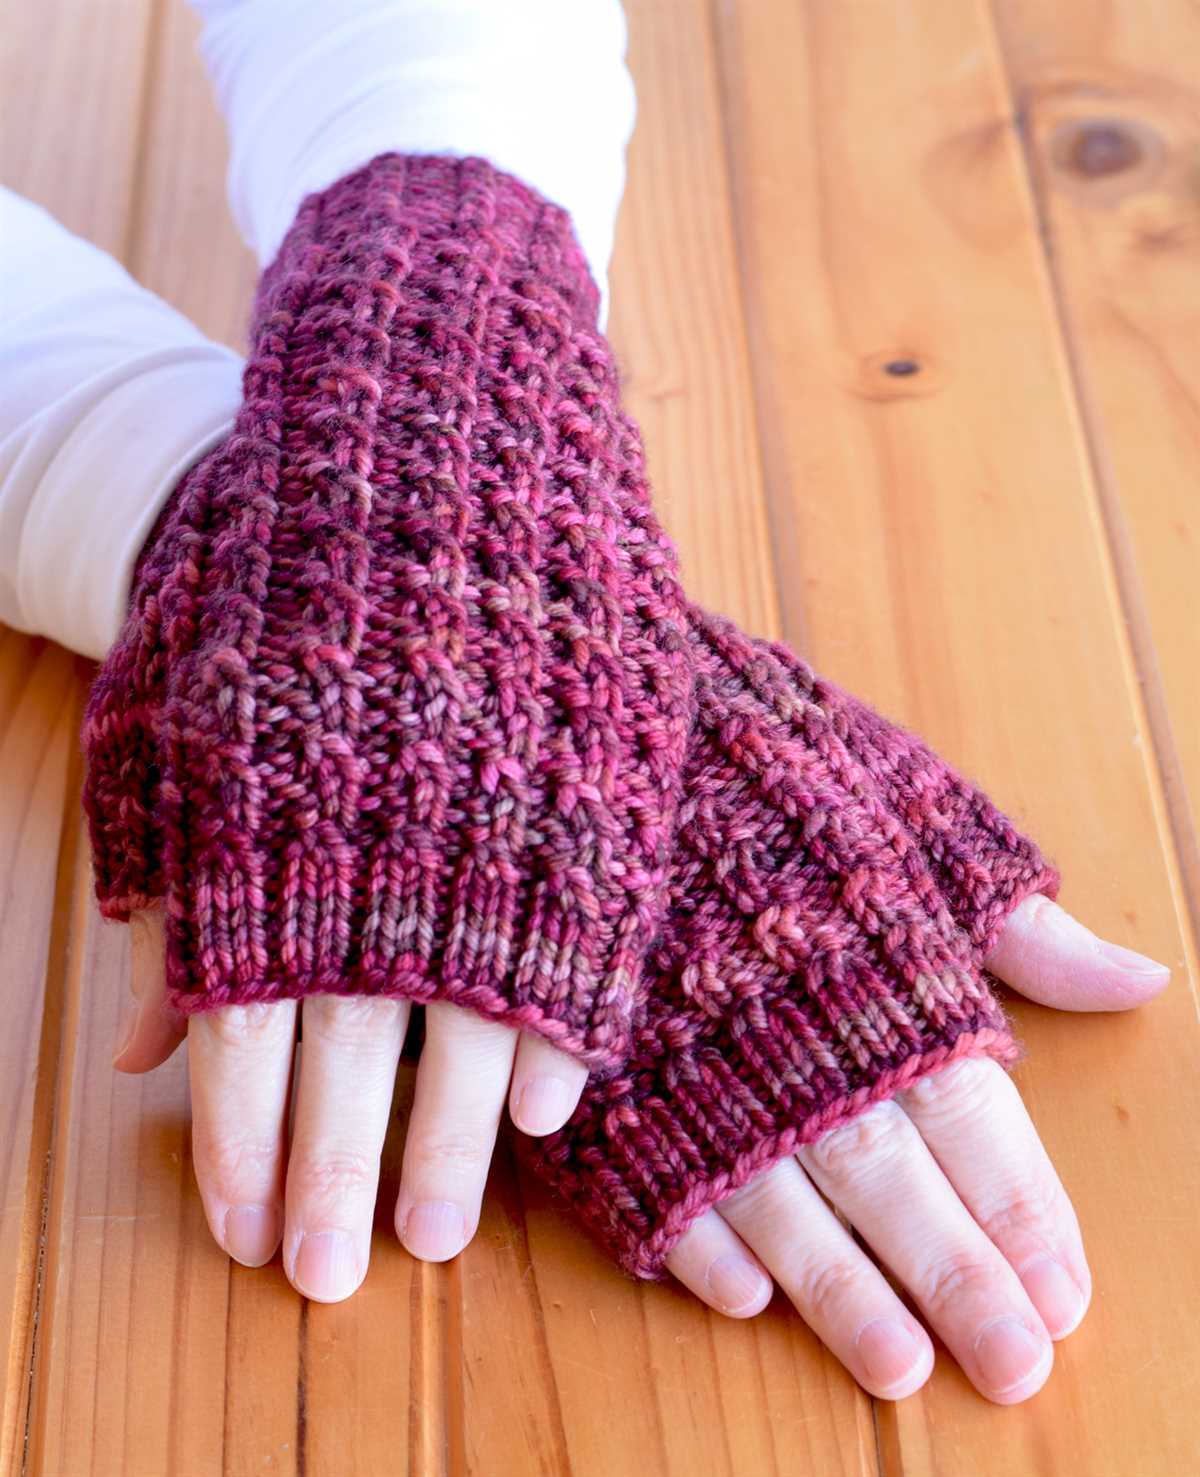
Experimenting with different textured stitch patterns can also add interest to your fingerless gloves. You can try cable patterns, ribbing, seed stitch, moss stitch, or any other stitch pattern that catches your eye. These patterns create raised or recessed areas in the fabric, adding a tactile element to your gloves. They can also provide extra insulation, making the gloves warmer.
By incorporating these advanced techniques into your fingerless glove knitting projects, you can take your designs to the next level and create unique and captivating accessories.
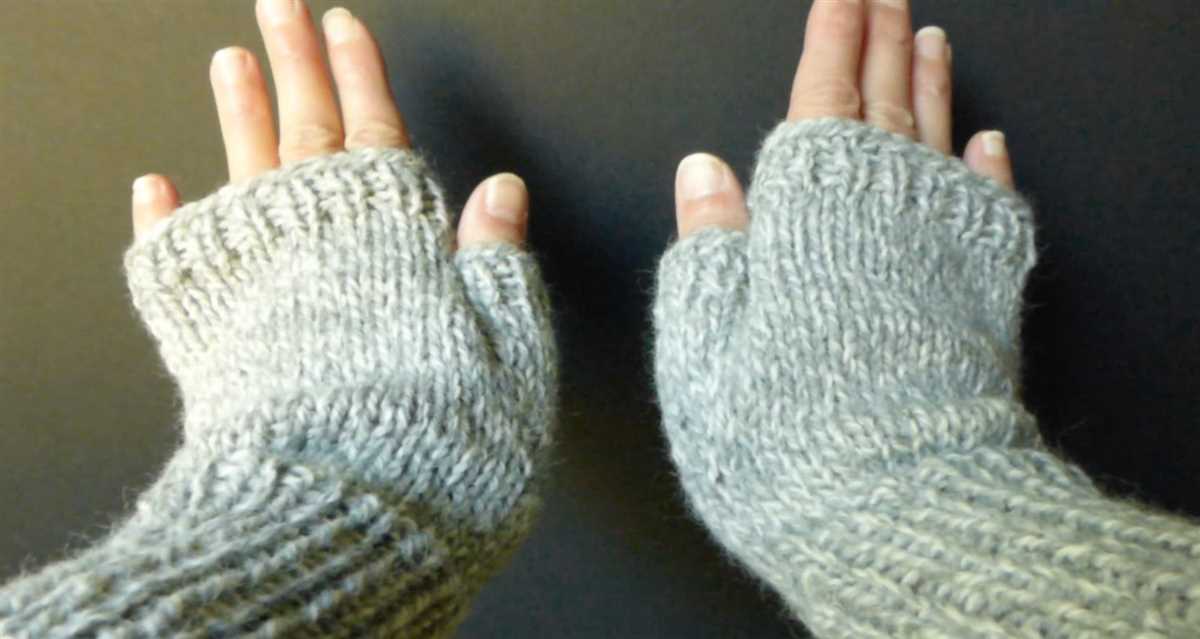
Tips for achieving a perfect fit when knitting fingerless gloves
When knitting fingerless gloves, achieving a perfect fit is essential to ensure comfort and functionality. Here are some tips to help you get the right fit for your gloves:
1. Measure your hand
Before starting the project, measure your hand to determine the appropriate size for your gloves. Measure the circumference of your palm, the length from your wrist to your fingers, and the length of each finger. These measurements will guide you in selecting the correct size and making any necessary adjustments to the pattern.
2. Gauge swatch
Knitting a gauge swatch is crucial to ensure that your stitches match the pattern’s recommended gauge. Use the same yarn and needle size as stated in the pattern, and knit a swatch in the recommended stitch pattern. Measure the number of stitches and rows per inch and compare it to the gauge specified in the pattern. Adjust your needle size if needed to achieve the correct gauge, as this will affect the overall size of the gloves.
3. Modify finger lengths
If the pattern’s finger lengths do not match your measurements, you may need to modify them to achieve a better fit. For example, if your fingers are shorter, you can reduce the number of rows for each finger section. Conversely, if you have longer fingers, you can add extra rows. Keep track of your modifications to ensure consistency when knitting each glove.
4. Try on as you go
While knitting the gloves, periodically try them on to check the fit. This will help you identify any issues or adjustments needed before completing the project. Pay attention to the snugness around the palm and fingers, ensuring that the gloves are not too tight or loose. Adjustments can be made by adding or subtracting stitches, or by increasing or decreasing the needle size if necessary.
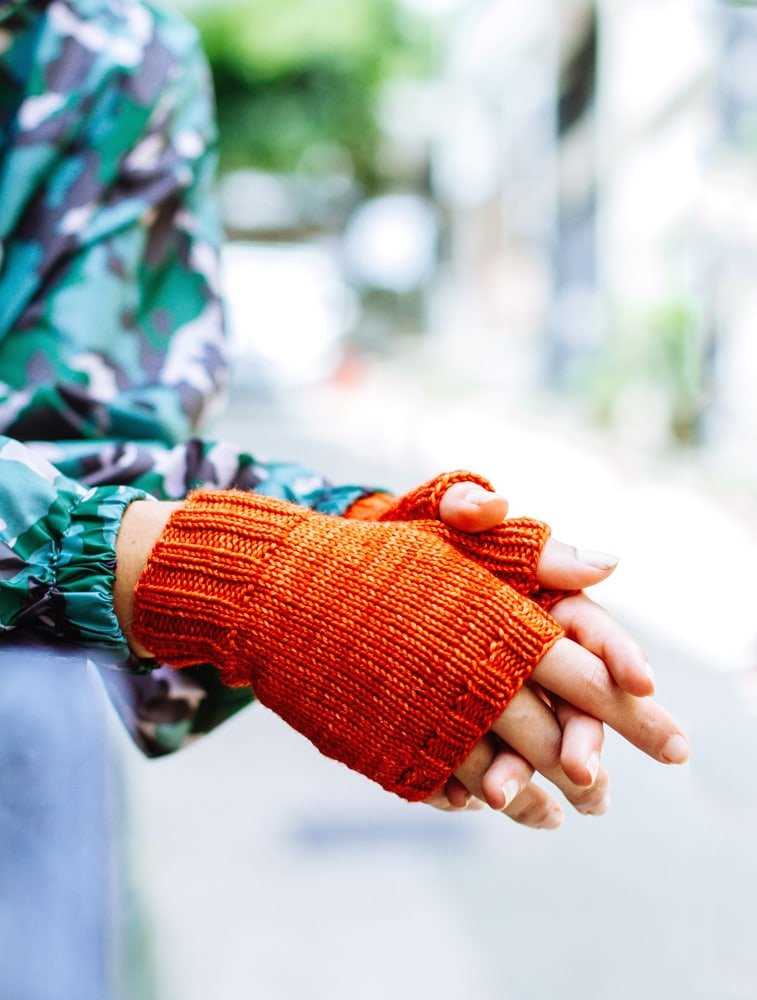
5. Consider stretchy ribbing
To ensure a snug fit around the wrist, consider using a stretchy ribbing pattern for the cuff. Ribbing stitches, such as 1×1 or 2×2 rib, have built-in elasticity and can accommodate a range of wrist sizes. This will provide a comfortable fit and prevent the gloves from sliding down or feeling too tight.
By following these tips and making necessary adjustments, you can achieve a perfect fit when knitting fingerless gloves. Remember to take accurate measurements, swatch for gauge, and try on the gloves as you progress to ensure a comfortable and well-fitting final product.
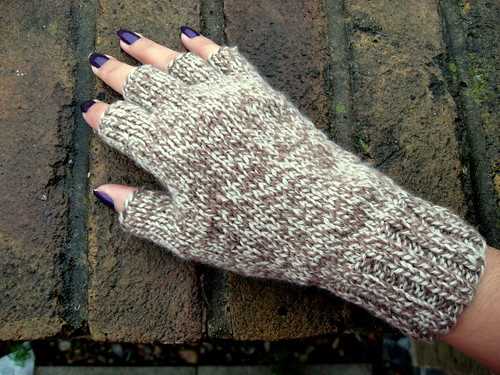
Knitting fingerless gloves for various hand sizes
When knitting fingerless gloves, it’s important to consider the size of the wearer’s hands. Different hand sizes require different measurements and adjustments to ensure the gloves fit properly. By following a few key steps, you can easily adapt a fingerless gloves knitting pattern to accommodate various hand sizes.
1. Choosing the right yarn and needle size
Start by selecting a yarn and needle size that corresponds to the hand size you’re knitting for. Thicker yarn and larger needles are ideal for larger hands, while thinner yarn and smaller needles work well for smaller hands. This will ensure your fingerless gloves have the right amount of stretch and fit comfortably.
2. Taking accurate measurements
To ensure a proper fit, it’s important to take accurate measurements of the wearer’s hand. Measure the circumference of the widest part of the hand, usually around the knuckles, and the length from the wrist to the base of the fingers. These measurements will guide you in adjusting the pattern to fit the specific hand size.
3. Modifying the pattern
Once you have the measurements, you can modify the fingerless gloves knitting pattern accordingly. Adjust the number of stitches cast on or worked in each section of the gloves to accommodate the hand size. You may need to increase or decrease the number of stitches in the wristband, hand section, and finger section to ensure a snug fit.
4. Checking the fit as you go
As you knit the fingerless gloves, periodically check the fit by trying them on the intended wearer. This will allow you to make any necessary adjustments along the way, ensuring the gloves fit comfortably and securely. If the gloves feel too loose or too tight, you can easily make changes by adding or subtracting stitches in the appropriate sections.
With these steps in mind, you can confidently knit fingerless gloves that fit various hand sizes. Whether you’re knitting for yourself or as a gift, taking the time to customize the fit will result in gloves that are both comfortable and stylish.
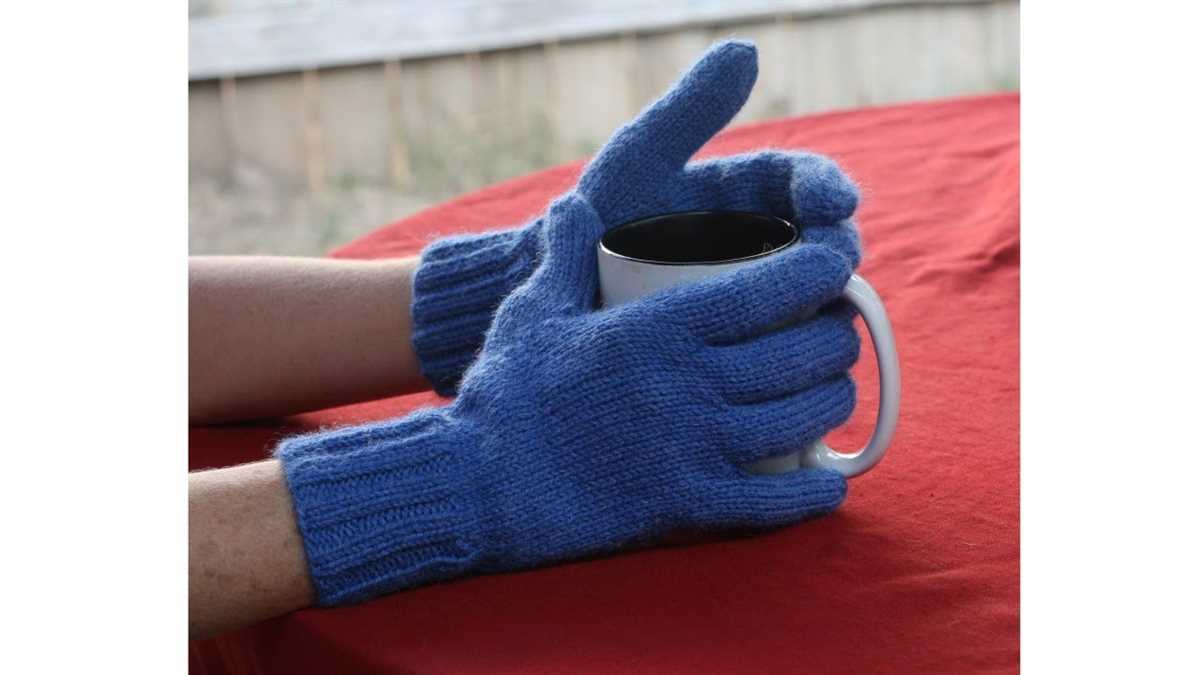
Using circular needles for seamless fingerless gloves knitting
When it comes to knitting fingerless gloves, using circular needles can be a game-changer. Circular needles are a great option for knitting projects that are worked in the round, and fingerless gloves are no exception. By using circular needles, you can seamlessly knit the entire glove without any seams. This not only saves you time and effort but also creates a more comfortable and polished finished product.
One of the main advantages of using circular needles for fingerless gloves is the lack of seams. With traditional straight needles, you would need to knit each section of the glove separately and then sew them together, leaving visible seams. Circular needles, on the other hand, allow you to knit in a continuous loop, eliminating the need for any sewing. This results in a smoother, more professional-looking glove.
When using circular needles for fingerless gloves, it’s important to choose the right needle length. Generally, a 16-inch circular needle is ideal for most glove sizes, as it provides enough room for the stitches without being too long or too short. However, if you are knitting gloves for larger hands, you may need to opt for a longer circular needle, such as a 24-inch or even 32-inch. It’s always a good idea to check the gauge of your knitting and adjust the needle size accordingly to ensure a perfect fit.
Another advantage of using circular needles for fingerless gloves is the ability to try them on as you go. Since you are working in the round, you can easily slip the gloves onto your hands to check the fit and make any necessary adjustments. This is particularly helpful when it comes to sizing the thumb hole, as you can try the glove on and knit the thumb opening to fit perfectly. With straight needles, you would need to wait until the end to try on the finished glove, which could result in an ill-fitting thumb hole.
In conclusion, using circular needles for seamless fingerless gloves knitting offers numerous advantages. From eliminating seams to allowing for easy adjustments and a perfect fit, circular needles are a valuable tool for any fingerless gloves knitting project. So grab your circular needles, choose your favorite yarn, and start knitting your own cozy and stylish fingerless gloves!
Adapting Fingerless Gloves Knitting Patterns for Different Yarn Weights
When it comes to knitting fingerless gloves, choosing the right yarn weight can make a big difference in the final product. Depending on the season or personal preference, you may want a lighter or heavier pair of gloves. Fortunately, with a few adjustments, you can easily adapt fingerless gloves knitting patterns for different yarn weights.
One important aspect to consider when adapting fingerless gloves knitting patterns is the gauge. The gauge refers to the number of stitches and rows per inch of knitted fabric. To ensure an accurate fit, it’s crucial to match the gauge of the original pattern. However, if you’re planning to use a different yarn weight, you may need to adjust the needle size to achieve the same gauge.
For example, if the original pattern recommends using a worsted weight yarn and size 7 circular needles to achieve a gauge of 18 stitches per 4 inches, but you want to use a fingering weight yarn, you may need to go down a couple of needle sizes to obtain the same gauge. This will help ensure that your fingerless gloves turn out the correct size and fit comfortably.
Another factor to consider when adapting fingerless gloves knitting patterns for different yarn weights is the number of stitches and rows. Thicker yarns typically require fewer stitches and rows to achieve the same measurements as thinner yarns. Therefore, if you’re working with a bulky yarn, you may need to cast on fewer stitches and knit fewer rows compared to the original pattern.
It’s important to keep in mind that adapting fingerless gloves knitting patterns for different yarn weights may require some trial and error. If you’re unsure about the adjustments to make, I would recommend creating a gauge swatch with your chosen yarn and needle size to see if it matches the original pattern’s gauge. This will give you a better idea of the modifications needed to ensure a successful project.
In conclusion, adapting fingerless gloves knitting patterns for different yarn weights is completely doable with a little bit of adjustment. Pay attention to the gauge, needle size, and number of stitches and rows, and don’t be afraid to experiment to achieve the desired fit and style.
Finishing touches: blocking and care instructions for fingerless gloves
Once you have finished knitting your fingerless gloves, there are a few final steps to take to ensure that they look their best and last for a long time. Blocking and proper care are essential for maintaining the shape and quality of your gloves.
Blocking
Blocking is the process of shaping and smoothing your knitted item to give it a professional finish. To block your fingerless gloves, follow these steps:
- Fill a basin or sink with lukewarm water and add a small amount of wool wash or mild soap. Avoid using harsh detergents or fabric softeners.
- Place your gloves in the water, making sure they are completely submerged. Gently press down on the gloves to allow the water to penetrate the fibers.
- Let the gloves soak for about 15 minutes.
- Remove the gloves from the water and gently squeeze out the excess water. Do not wring or twist the gloves.
- Lay a clean towel on a flat surface and place the gloves on top, shaping them into the desired size and form.
- Allow the gloves to air dry completely, preferably away from direct sunlight or heat sources.
Care instructions
To keep your fingerless gloves in good condition, follow these care instructions:
- Hand wash your gloves in lukewarm water using a gentle wool wash or mild soap.
- Avoid using bleach or fabric softeners, as they can damage the fibers.
- Gently squeeze out excess water and reshape the gloves while still damp.
- Do not wring or twist the gloves.
- Allow the gloves to air dry completely before storing them.
- Store your gloves in a clean, dry place to prevent them from stretching or getting damaged.
By following these blocking and care instructions, you can ensure that your fingerless gloves stay in great shape and provide you with warmth and style for many seasons to come.