
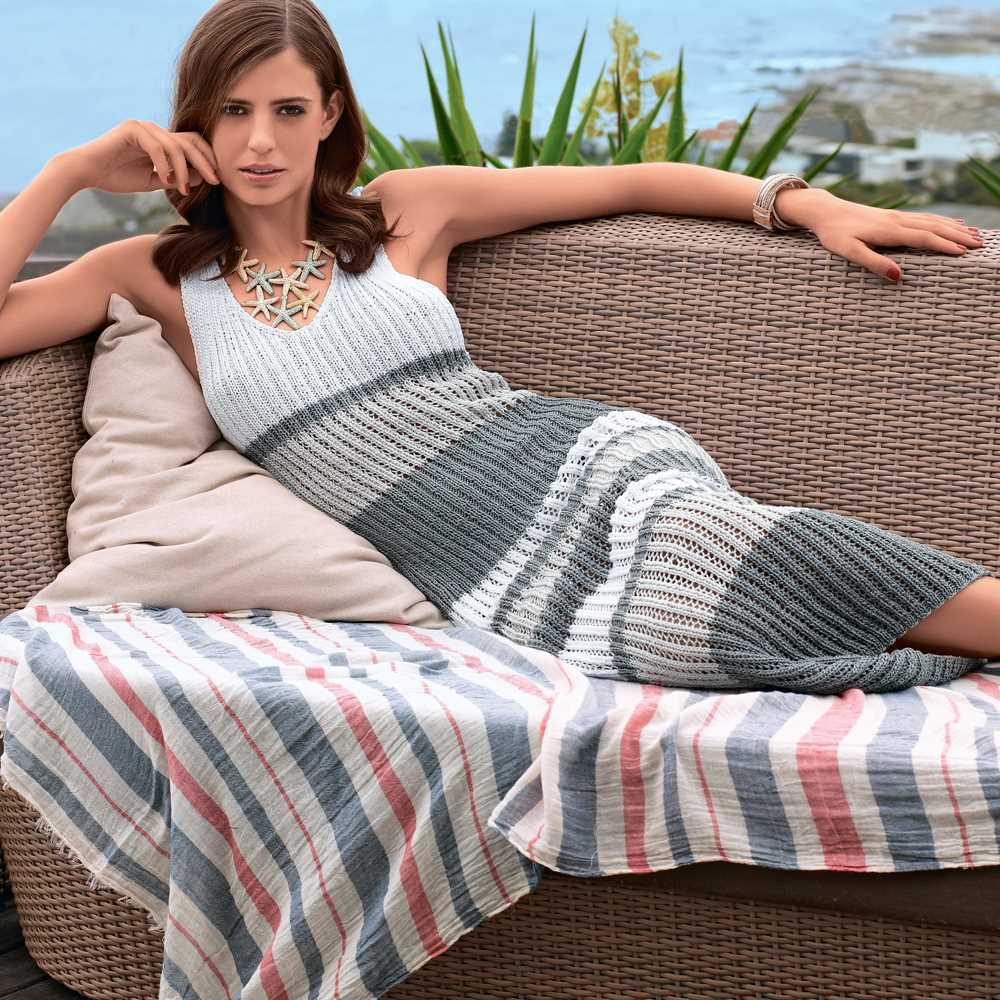
If you’re looking to add a stylish and versatile piece to your wardrobe, a knit halter dress is just what you need. With its flattering silhouette and comfortable fit, this dress is perfect for any occasion, whether it’s a casual day out or a special evening event. And the best part? You can make it yourself, thanks to this easy-to-follow knit halter dress pattern.
This pattern is suitable for both beginners and experienced knitters, as it only requires basic knitting skills. The dress is worked from the top down in one piece, allowing you to easily adjust the length and fit as you go. The halter neckline adds a modern and feminine touch, while the A-line skirt flatters all body types.
To get started, you’ll need a soft and lightweight yarn in your favorite color, along with a pair of knitting needles and a few stitch markers. The pattern provides step-by-step instructions, including stitch counts and measurements, so you can make sure your dress turns out just right. And don’t worry if you make a mistake – knitting is a forgiving craft, and you can always unravel and start again!
Once you finish knitting your halter dress, you can customize it with your favorite accessories, such as a belt or statement necklace. Pair it with sandals for a casual look, or dress it up with heels and a clutch for a night out. Whatever your style, this knit halter dress will become a staple in your wardrobe, offering both comfort and style.
How to Knit a Halter Dress: Step-by-Step Guide
Knitting your own halter dress can be a rewarding project that allows you to create a custom piece that fits perfectly and showcases your creativity. To get started, you will need to gather the necessary materials, including knitting needles, yarn, and a pattern for the dress. You’ll also need to have basic knitting skills, including casting on, knitting, purling, and decreasing stitches.
Step 1: Choose a Pattern
Begin by selecting a knitting pattern for a halter dress. There are many free patterns available online, or you can purchase a pattern from a craft store or website. Look for a pattern that matches your skill level and provides clear instructions. Read through the pattern thoroughly before starting to ensure you understand all of the steps and techniques involved.
Step 2: Gather Materials
Once you have chosen your pattern, gather all of the materials you will need. This includes the appropriate size knitting needles, which are typically specified in the pattern instructions. You will also need the specified type and amount of yarn, as well as any additional notions such as stitch markers or buttons.
Step 3: Swatch and Gauge
Before diving into the dress, it’s important to create a gauge swatch to ensure your stitches match the pattern’s recommended gauge. This will help ensure that the dress fits properly and looks as intended. Follow the pattern’s instructions for creating a gauge swatch, and make any necessary adjustments to your knitting needles or tension to match the correct gauge.
Step 4: Start Knitting
With your materials prepared and gauge confirmed, it’s time to start knitting the halter dress. Begin by following the pattern’s instructions for casting on the required number of stitches. From there, you will work through the pattern’s stitch instructions, following any shaping or design elements as indicated. Pay close attention to any pattern repeats or stitch variations to achieve the desired results.
Step 5: Finishing Touches
Once you’ve completed the main body of the dress, it’s time to add any finishing touches as specified in the pattern. This may include creating straps, adding a decorative edging, or sewing on buttons or other closures. Follow the pattern’s instructions carefully to ensure a polished final product.
With these steps, you can successfully knit your own halter dress. Enjoy the process of creating a unique and stylish garment that you can wear proudly!
Choosing the Right Yarn and Needles
When it comes to knitting a halter dress, choosing the right yarn and needles is crucial. The yarn you select will not only affect the overall look and feel of your dress, but also its drape and durability. Similarly, the type and size of needles you choose will determine the stitch definition and gauge of your project.
When selecting yarn for your knit halter dress, consider the fiber content, weight, and color. Natural fibers like cotton and linen are great options for warm weather garments, as they are breathable and lightweight. For a cozy winter dress, you might opt for a yarn blend that includes wool or alpaca for added warmth. Additionally, the color of your yarn can greatly impact the appearance of your dress. Bold, vibrant hues can make a statement, while soft, neutral tones can create a more understated look.
Fiber Content
The choice of yarn fiber can significantly impact the characteristics of your knit halter dress. Natural fibers like cotton, linen, and bamboo are perfect for warm weather garments, as they are breathable and moisture-wicking. These fibers also tend to have a great drape, which is essential for a flowy and flattering dress. On the other hand, synthetic fibers like acrylic and nylon can provide durability and stretch, making them suitable for more structured designs or garments that require stretch and recovery.
Yarn Weight
Choosing the appropriate yarn weight is crucial for achieving the desired look and feel of your halter dress. Lighter weight yarns like lace or fingering weight are perfect for delicate, lightweight dresses that drape beautifully. Medium-weight yarns like sport or DK (double knitting) can provide a balance between drape and structure, making them versatile options for various dress styles. Bulky or chunky yarns can create a more cozy and substantial look, perfect for winter dresses or those with chunky cable details.
Needles
When selecting needles for your halter dress project, it’s important to consider both the type and size. The type of needle you choose can have an impact on your knitting technique and comfort level. Straight needles are the most common and versatile option, while circular needles are great for larger projects or when working in the round. Double-pointed needles are suitable for working in the round for smaller areas, such as armholes or necklines.
The needle size you choose will determine your stitch gauge and ultimately the size of your dress. Be sure to check the recommended gauge in the pattern and make a gauge swatch to ensure proper fit. Adjusting your needle size can help achieve the correct gauge and ensure your dress fits as intended.
Getting Started: Casting On
Welcome to the world of knitting! If you’re new to this craft, one of the first things you’ll need to learn is how to cast on. Casting on is the process of creating the foundation row of stitches on your knitting needle, and it is the first step in any knitting project. There are several methods of casting on, but today we’ll focus on the long tail cast on method.
The long tail cast on: This is a popular method that creates a neat and flexible edge. To start, you’ll need to leave a long tail of yarn, about three times the width of your knitting project. Make a slipknot by crossing the tail end over the working end and pulling the tail end through the loop. This slipknot will be your first stitch.
- Hold the slipknot on your left hand, with the tail end of the yarn over your thumb and the working end over your index finger. Make sure the working end is coming from the ball of yarn.
- Insert the needle into the loop on your thumb from front to back. Then, bring the needle around and insert it into the loop on your index finger from back to front.
- With your right hand, bring the yarn around the needle in a counterclockwise motion. The yarn should go over the needle and under your thumb.
- Using the needle, pull the loop on your thumb over the loop on your index finger and off your thumb. You’ll now have one stitch on your needle.
- Repeat steps 2-4 until you have cast on the desired number of stitches. Remember to keep the tension even throughout.
Once you have cast on all your stitches, you can start knitting! Casting on may feel a bit tricky at first, but with practice, it will become second nature. Happy knitting!
Knitting the Bodice
The bodice is the top part of the halter dress and it is where the intricate knitting pattern is created. To begin knitting the bodice, you will cast on the required number of stitches for your size, following the instructions provided in the pattern. Make sure to use the recommended yarn and needle size for the best results.
Once you have cast on the stitches, you will start working the knitting pattern. This may involve various stitches such as knit, purl, yarn over, and decreases. The pattern will usually provide row-by-row instructions, so make sure to follow them closely to create the desired design.
The bodice may include various elements such as lace panels, cables, or textured stitches. These elements add visual interest to the dress and make it unique. Take your time to carefully execute each stitch and pay attention to the pattern instructions to achieve a professional-looking result.
As you complete each row, make sure to check your work for any mistakes or dropped stitches. Fix them immediately to prevent any further issues. It is also a good idea to periodically check your gauge to ensure that your knitting tension remains consistent throughout the bodice.
Continue knitting the bodice until you reach the desired length or until the pattern instructs you to switch to another section of the dress. Once you have finished the bodice, you can move on to the next part of the dress pattern, such as the skirt or straps, to continue creating your beautiful knit halter dress.
Shaping the Bust
When knitting a halter dress, one important aspect to consider is the shaping of the bust. This is crucial in order to achieve a flattering fit and provide support for the wearer.
There are various methods for shaping the bust in a knitted garment. One popular technique is to use increases and decreases strategically placed in the pattern. By gradually adding stitches in the bust area, the fabric can accommodate the shape of the breasts and create a curve that follows the natural contours of the body. Similarly, by decreasing stitches, a more fitted and defined shape can be achieved.
Another approach to shaping the bust is through the use of darts. Darting involves creating a triangular or diamond-shaped fabric section that is sewn together to provide additional space and contouring in the bust area. This method allows for greater control over the shaping and can be particularly useful for larger cup sizes.
When shaping the bust in a knit halter dress, it is important to consider the placement and frequency of the shaping elements. By studying the measurements and proportions of the wearer, it is possible to determine where the increases or decreases should be placed in order to achieve the desired fit. It is also important to ensure that the shaping is distributed evenly throughout the garment to maintain balance and symmetry.
Overall, shaping the bust in a knit halter dress requires careful planning and consideration of the wearer’s body shape and measurements. Whether through increases, decreases, or darts, the goal is to create a comfortable and flattering fit that accentuates the natural curves of the body and provides adequate support. With the right techniques and attention to detail, a well-shaped bust can greatly enhance the overall look and feel of a knitted halter dress.
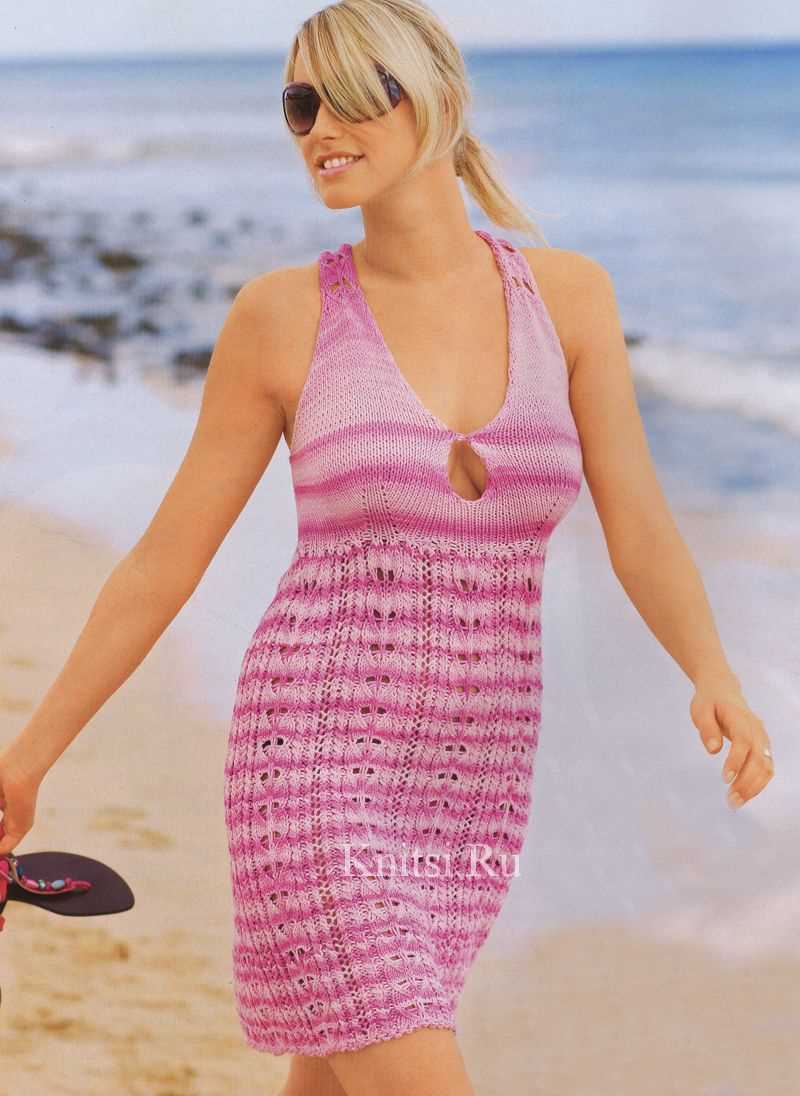
Creating the Halter Neckline
One of the key features of a knit halter dress is the halter neckline, which adds a stylish and feminine touch to the garment. To create the halter neckline, there are a few key steps to follow.
Step 1: Determine the Neckline Placement
Before starting the pattern, decide how high or low you want the neckline to be. This will depend on your personal preference and style. Measure the distance from the base of your neck to the desired neckline placement, and make a note of this measurement.
Step 2: Calculate the Neckband Length
Next, you’ll need to calculate the length of the neckband. Measure the circumference of your neck, and add a few centimeters for ease and comfort. This will ensure that the neckband lays flat and doesn’t feel tight when worn. The final measurement will be the length of the neckband.
Step 3: Create the Neckband
Using the calculated length from step 2, cast on the required number of stitches for the neckband. You can choose to have a straight neckband or add a ribbed or textured pattern for visual interest. Knit the neckband in the desired pattern, making sure to knit in the round if necessary, until it reaches the desired length.
Step 4: Attach the Neckband
Once the neckband is complete, it’s time to attach it to the dress. Pin the neckband evenly around the neckline, matching up the ends if necessary. Use a sewing needle and matching thread to sew the neckband in place, making sure to secure it firmly and evenly.
Following these steps will ensure that you create a beautiful and well-fitting halter neckline for your knit dress. The halter neckline adds a touch of elegance and sophistication to the garment, making it perfect for a variety of occasions. Whether you’re knitting a halter dress for yourself or as a gift, the halter neckline is sure to be a standout feature.
Knitting the Skirt
Once you have finished knitting the bodice of the halter dress, it’s time to move on to the skirt. The skirt is where you can get creative with different stitch patterns and design elements.
First, you will need to determine the length of the skirt. Measure from the waistline of the bodice to where you want the dress to fall. This will be your desired skirt length.
If you want a simple and classic look, you can choose to knit the skirt in a basic stockinette stitch. This stitch creates a smooth and even fabric that drapes beautifully. To knit the skirt in stockinette stitch, simply continue knitting in the round until you reach your desired length.
For a more textured look, you can experiment with different stitch patterns such as ribbing, cables, or lace. Ribbing adds stretch and elasticity to the skirt, making it comfortable to wear. Cables create a three-dimensional effect, adding depth and interest to the design. Lace patterns can give the dress a delicate and feminine look.
As you knit the skirt, make sure to periodically try it on to ensure the fit is perfect. Adjust the length or make any necessary modifications as you go along. Once you have reached your desired length, bind off the skirt and weave in any loose ends.
Remember to always follow the pattern instructions and take your time when knitting the skirt. The skirt is an essential part of the dress and can make a big difference in the overall appearance of the garment. Have fun and enjoy the process of creating your own unique knit halter dress!
Adding Flare: Increasing Stitches
When knitting a halter dress pattern, you may want to add some flare to the skirt portion. This can be achieved by increasing stitches at regular intervals. Increasing stitches will create more fabric and give the skirt a fuller look.
To increase stitches, you have a few options. One method is to make yarn overs. A yarn over is created by simply bringing the yarn over the needle from back to front, creating an extra loop. On the next row, when you come to the yarn over, you will knit or purl it as a regular stitch, effectively increasing the stitch count.
Another method to increase stitches is by knitting into the front and back of the same stitch. This is also known as a KFB increase. To do this, you knit the stitch as you normally would, but instead of sliding it off the needle, you leave it on and knit into the back loop of the same stitch. This creates an extra stitch.
If you want to increase stitches evenly across a row, you can calculate the spacing between increases. For example, if you want to add 10 extra stitches to a row, and you have 100 stitches in total, you can space the increases approximately every 10 stitches. This will ensure that the increases are evenly distributed throughout the row.
By adding flare to your knit halter dress pattern through increasing stitches, you can customize the skirt portion to your desired style. Whether you prefer a subtle flare or a more dramatic one, increasing stitches will allow you to achieve the look you want.
Finishing Touches: Bind Off

As you near the end of your knit halter dress project, it’s important to know how to properly bind off your stitches. The bind off, also known as casting off, is the final step in completing your dress and ensuring that the stitches are secure.
To bind off, you will need a pair of knitting needles or a crochet hook, depending on your preference. Begin by knitting the first two stitches as normal. Then, insert the left needle into the first stitch on the right needle and lift it over the second stitch and off the right needle. This will leave one stitch on the right needle.
Continue this process of knitting a stitch and lifting it over the previous stitch until you have bound off all of your stitches. Once you have reached the end, cut the yarn, leaving a tail that is approximately 6 inches long. Thread the tail through the final stitch and pull tight to secure.
It’s important to note that the tension of your bind off should match the tension of your knitting. If your bind off is too tight, it can cause the edge to pucker, while a bind off that is too loose can make the edge too stretchy. Take your time and practice your bind off to achieve the desired result.
After binding off, you may choose to block your knit halter dress to give it a professional finish. Blocking involves wetting the garment and gently shaping it to the desired dimensions. This can help even out any uneven stitches and give the dress a polished look.
In conclusion, the bind off is an essential skill to master when knitting a halter dress. Knowing how to properly bind off will ensure that your stitches are secure and your dress looks and feels professional. Take your time, practice, and enjoy the process of creating your beautiful knit halter dress.
Making Adjustments: Fitting the Dress
When it comes to knitting a halter dress, achieving the perfect fit is essential for a flattering and comfortable garment. While the pattern may provide measurements and instructions for specific sizes, it’s important to remember that everyone’s body is unique, and some adjustments may be necessary to ensure the dress fits just right.
1. Adjusting the Length: One of the first adjustments you may need to make is to the length of the dress. The original pattern may be designed for a certain length, but if you prefer a shorter or longer dress, you can easily modify this to your preference. Simply knit fewer or more rows in the main body section of the dress to achieve the desired length.
2. Modifying the Bust Area: Another common adjustment that may be needed is to the bust area. The pattern may have a standard measurement for the bust, but if you have a larger or smaller bust, you may need to make modifications. To do this, you can adjust the number of stitches you cast on or increase/decrease the number of rows in the bust area to accommodate your specific measurements.
3. Tailoring the Waist: The waist area is another important part of the dress to consider when making adjustments. If you have a smaller or larger waist than the pattern suggests, you can modify the number of rows or stitches to achieve the perfect fit. You may need to adjust the shaping in this area as well to ensure a flattering silhouette.
4. Customizing the Straps: Lastly, you can customize the straps of the halter dress to fit your preference. If you prefer wider or narrower straps, simply adjust the number of stitches or rows accordingly. You can also experiment with different strap lengths to find the most comfortable option for you.
Remember, making adjustments to the dress pattern is part of the knitting process and allows you to create a garment that fits your body perfectly. Don’t be afraid to experiment and make modifications as needed to achieve the desired fit and style.
Blocking and Care Instructions
Proper blocking and care are essential for maintaining the shape and longevity of your knit halter dress. Blocking, the process of shaping and drying the garment, helps to set the stitches and ensure a professional finish. Follow these instructions to block and care for your halter dress:
Blocking the Knit Halter Dress
Before blocking, make sure to read the pattern instructions carefully. Some patterns may require wet blocking, while others may recommend steam blocking. Here are the general steps to block your knit halter dress:
- Fill a basin or sink with lukewarm water and add a small amount of mild soap or wool wash.
- Gently submerge the dress in the water, making sure it is fully saturated.
- Allow the dress to soak for about 15-20 minutes.
- Drain the water and gently squeeze out the excess moisture. Avoid wringing or twisting the dress.
- Place the dress on a clean towel and roll it up tightly to remove more moisture.
- Lay the dress flat on a blocking mat or an old towel, shaping it to the desired dimensions and smoothing out any wrinkles.
- Pin the edges and any desired shaping points using rust-proof T-pins or blocking wires.
- Allow the dress to air dry completely before unpinning and wearing.
Caring for the Knit Halter Dress
To ensure the longevity of your knit halter dress, follow these care instructions:
- Hand wash the dress using cold or lukewarm water and a mild soap or wool wash.
- Avoid using bleach or harsh detergents, as they can damage the fibers.
- Gently squeeze out excess water and avoid wringing or twisting the dress.
- When drying, lay the dress flat on a clean towel or drying rack to maintain its shape.
- Avoid hanging the dress, as it can stretch the fabric.
- If needed, iron the dress on a low heat setting, using a pressing cloth to protect the fabric.
- Store the dress folded or rolled in a dry, cool place, away from direct sunlight to prevent fading.
- Periodically check for any signs of damage or wear and make any necessary repairs to prolong the life of your knit halter dress.
Styling and Wearing the Knit Halter Dress
Once you have finished knitting your halter dress, it’s time to style and wear it. The versatility of this dress allows you to create different looks depending on the occasion and your personal style. Here are some ideas and tips for styling and wearing your knit halter dress:
1. Casual Daytime Look:
- Pair your knit halter dress with a denim jacket and sneakers for a casual and comfortable outfit.
- Add a wide-brimmed hat and sunglasses for a chic and effortless summertime look.
2. Chic Evening Look:
- Dress up your knit halter dress with a statement belt and high heels for a sophisticated and feminine evening look.
- Accessorize with bold jewelry, such as statement earrings or a chunky necklace, to add glamour and elegance.
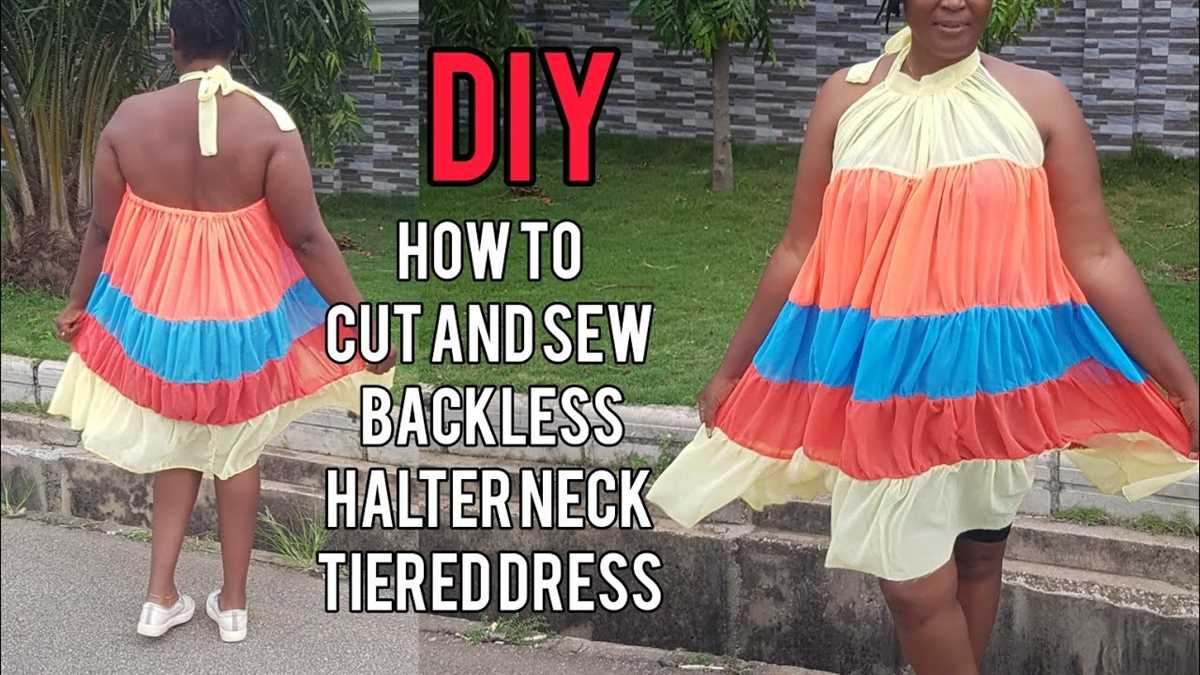
3. Beach or Resort Look:
- Layer your knit halter dress over your favorite swimsuit for a stylish beach or resort outfit.
- Complete the look with a floppy hat, sandals, and a beach bag for a chic and fashionable beachside ensemble.
4. Office or Business Casual Look:
- To make your knit halter dress office-appropriate, layer it with a structured blazer or cardigan and pair it with closed-toe shoes.
- Add a belt to define your waist and give a polished and put-together appearance.
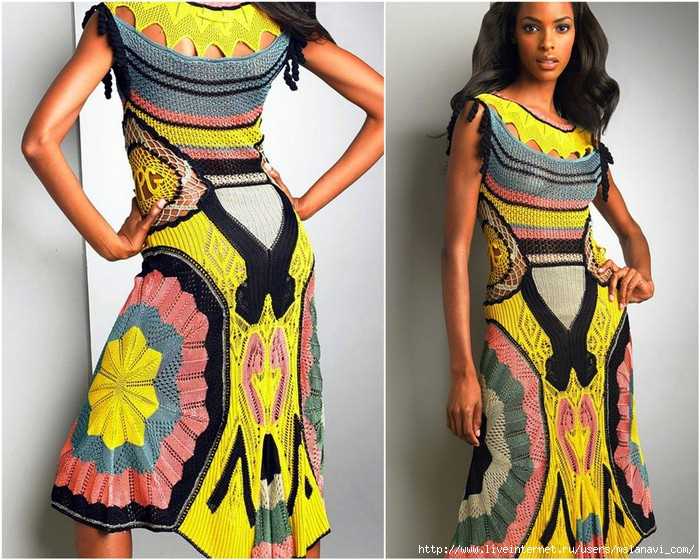
5. Festive or Party Look:
- For a festive or party look, opt for a knit halter dress in a bold color or with embellishments.
- Pair it with statement shoes and a clutch for a standout ensemble.
Remember to choose accessories and shoes that complement your knit halter dress and fit the occasion. Experiment with different styling options to create unique and personalized looks. Whether you’re heading to the office, attending a party, or enjoying a day at the beach, your knit halter dress will be a versatile and fashionable addition to your wardrobe.