
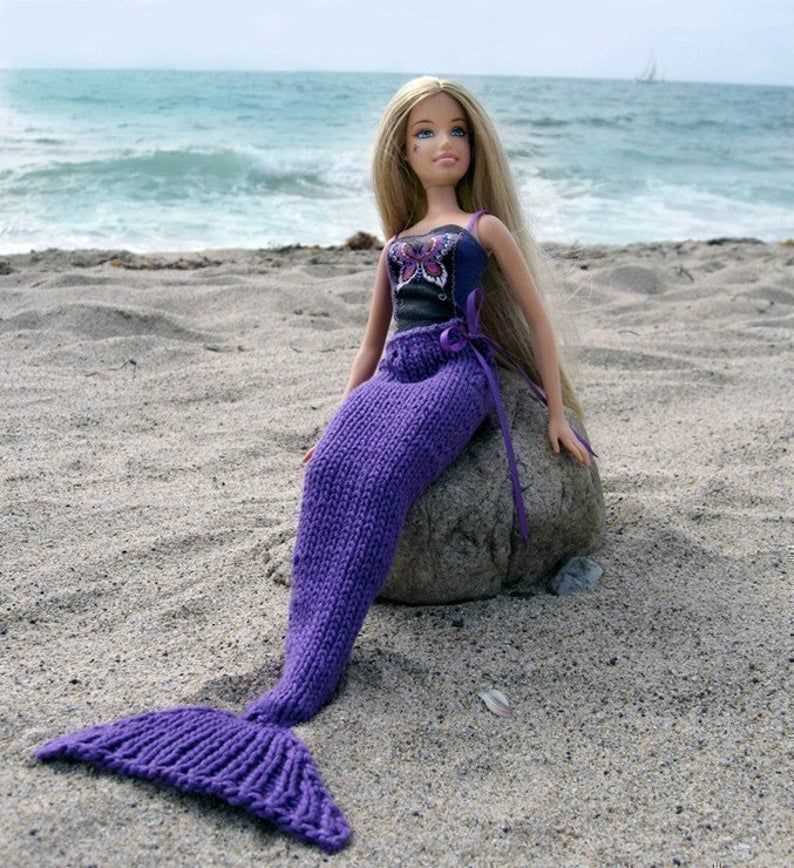
If you’re a lover of all things mermaid and enjoy knitting, then you’re in luck! The knit mermaid tail pattern is a fun and unique project that allows you to create a cozy and whimsical mermaid tail blanket. Whether you want to make one for yourself or as a gift for a friend or family member, this pattern will guide you through the process.
The pattern begins with casting on the desired number of stitches, typically around 150 for an adult-sized blanket. From there, you’ll work in a combination of knitting and purling stitches to create the textured scales that give the tail its mermaid-like appearance. The pattern also includes instructions for shaping the tail and creating a ribbed waistband for added comfort.
One of the great things about this pattern is its versatility. You can customize it to fit any size or color preference, making it a perfect project for knitters of all skill levels. Whether you’re a beginner or an experienced knitter, you’ll find this pattern to be a fun and rewarding challenge.
Knit Mermaid Tail Pattern
If you’re looking for a fun and whimsical knitting project, look no further than a knit mermaid tail pattern. Whether you’re knitting for yourself or for someone else, a mermaid tail blanket is a unique and cozy accessory that is sure to be a hit. With its intricate scales and beautiful colors, a knit mermaid tail can transport you to a magical underwater world.
To get started, you’ll need a set of knitting needles and some yarn in a color of your choice. You can choose to use one color for your tail or make it more realistic by using different shades to mimic scales. You’ll also need a set of double-pointed needles to create the tail’s fin.
Once you have your materials gathered, you can begin the knitting process. The pattern typically starts with casting on stitches to create the base of the tail. From there, you’ll work in a combination of knit and purl stitches to create the scales. This will give the tail its distinctive textured look. As you work, you’ll gradually decrease the number of stitches to shape the tail and create a snug fit.
Once you’ve completed the tail, you’ll move on to knitting the fin. This is done using the double-pointed needles and typically involves shaping the fin using increases and decreases. The fin is then attached to the bottom of the tail to complete the mermaid look.
A knit mermaid tail can be a fun and rewarding project to tackle. It can be a great way to showcase your knitting skills and create a unique and personalized gift. Whether you’re an experienced knitter or a beginner, there are patterns available for all skill levels. So grab your knitting needles and dive into the world of mermaid tails!
What is a mermaid tail pattern?
A mermaid tail pattern is a set of instructions and measurements that guide you in creating a knitted mermaid tail. It typically includes detailed steps on how to knit the tail, as well as the necessary stitches, yarn types, and needle sizes.
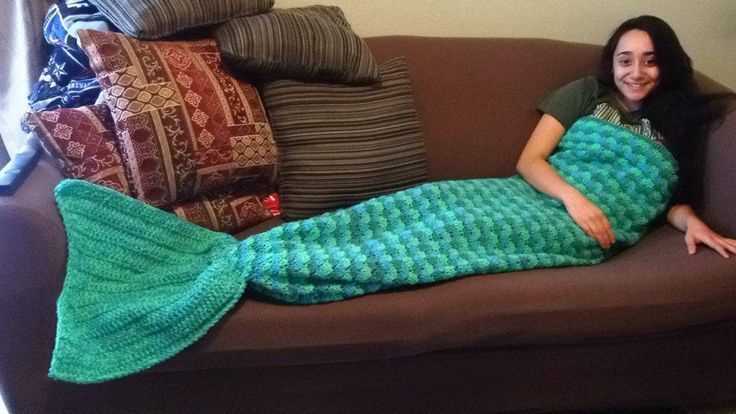
This pattern allows you to create a beautiful and whimsical mermaid tail blanket, which is perfect for lounging or snuggling up on chilly days. The pattern may also include variations, such as different stitch patterns or color options, to add a unique touch to your creation.
Knitting a mermaid tail using a pattern requires some basic knitting skills, such as casting on, knitting, purling, and binding off. It is important to carefully follow the instructions provided in the pattern to ensure accurate measurements and a successful outcome.
Many mermaid tail patterns are available online and in knitting books. Some patterns are designed for children, while others are suitable for adults. You can choose a pattern that matches your skill level and desired size.
When selecting a mermaid tail pattern, it is important to consider the intended recipient or user of the tail. For example, if you are knitting for a child, you may want to choose a pattern that includes a smaller size and vibrant colors. If knitting for an adult, you may prefer a pattern that offers a larger size and more sophisticated color options.
An important aspect of selecting a mermaid tail pattern is also choosing the appropriate yarn and needle size. The pattern should specify the type of yarn recommended, such as acrylic or bulky weight, and the corresponding needle size. This will ensure that your finished tail has the desired look and feel.
By following a mermaid tail pattern, you can create a unique and cozy item that is sure to bring joy and captivate the imagination of any mermaid enthusiast. Whether you are knitting for yourself or as a gift, the finished mermaid tail will be a cherished item for years to come.
Materials needed for knitting a mermaid tail
Are you ready to embark on a magical knitting adventure and create your very own mermaid tail? To get started, you’ll need a few materials to bring your project to life. Here’s a list of essential items you’ll need:
1. Yarn:
Choose a soft and cozy yarn in your favorite color to make your mermaid tail truly enchanting. You’ll need approximately [number] yards of yarn, depending on your desired tail length and size.
2. Knitting Needles:
Select a pair of knitting needles suitable for the weight of your chosen yarn. Circular needles are recommended for larger projects like mermaid tails, as they can accommodate a larger number of stitches.
3. Stitch Markers:
Stitch markers are essential for keeping track of your stitches and marking important sections in your pattern. Use them to mark the beginning of each round or the position of specific stitch patterns.
4. Yarn Needle:
A yarn needle is necessary for weaving in loose ends and seaming your mermaid tail. Choose a large-eye needle that can easily accommodate the thickness of your yarn.
5. Scissors:

A sharp pair of scissors is essential for trimming yarn and cutting off any excess length. Make sure they are sharp enough to cleanly cut through your chosen yarn.
6. Pattern:
To guide you through the knitting process, you’ll need a mermaid tail pattern. There are many free and paid options available online. Choose a pattern that matches your skill level and preferred style.
With these essential materials in hand, you’re now ready to dive into the world of mermaid tail knitting. Get ready to create a cozy and whimsical masterpiece that will make all your mermaid dreams come true!
Choosing the right yarn for your mermaid tail

When it comes to knitting a mermaid tail, choosing the right yarn is essential to ensure that your project turns out both comfortable and visually appealing. The type of yarn you select will determine the overall texture, drape, and warmth of the finished piece.
Fiber content: The first consideration when choosing yarn for your mermaid tail is the fiber content. Acrylic yarn is a popular choice due to its affordability, durability, and wide range of colors. It is also easy to care for, making it suitable for everyday use. However, if you prefer natural fibers, you can opt for cotton, wool, or a blend of these fibers for added warmth and breathability.
Weight and thickness:

The weight and thickness of the yarn will also impact the final outcome of your mermaid tail. Bulky or chunky yarns are a great choice if you want a cozy and warm tail, as they provide extra thickness and insulation. Lighter weight yarns, such as fingering or sport weight, are better suited for a more delicate and lightweight tail. Consider the desired look and feel of your project when selecting the appropriate weight.
Color and texture:
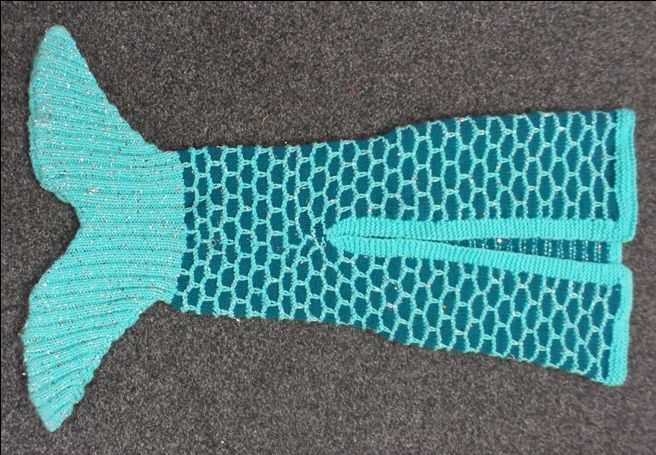
Finally, take into account the color and texture of the yarn. Mermaid tails are often associated with vibrant, ocean-inspired colors such as turquoise, teal, and aqua. Opt for yarns that feature variegated or gradient color patterns to create a visual effect resembling scales or waves. Additionally, consider the texture of the yarn, as certain fibers may create a smoother or more textured appearance.
Ultimately, the choice of yarn for your mermaid tail is a personal one, depending on your preferences for fiber, weight, color, and texture. Take the time to explore different options and swatch samples to ensure that the chosen yarn meets your expectations for both the knitted fabric and the finished product.
Abbreviations used in the mermaid tail pattern

When you’re working on a mermaid tail pattern, it’s important to understand the abbreviations used in the instructions. These abbreviations make the pattern easier to read and follow, and they save space by condensing commonly used terms. Here are some of the most common abbreviations you’ll come across:
- K – Knit stitch: Insert your needle into the stitch on the left needle, from the bottom up, and wrap the yarn around the right needle. Pull the right needle through the stitch, slipping the stitch off the left needle.
- P – Purl stitch: Insert your needle into the stitch on the left needle, from the top down, and wrap the yarn around the right needle. Pull the right needle through the stitch, slipping the stitch off the left needle.
- YO – Yarn over: Wrap the yarn around the right needle from back to front, creating an extra stitch.
- SSK – Slip, slip, knit: Slip the next 2 stitches, one at a time, from the left needle to the right needle as if to knit. Insert the left needle into the front loops of the slipped stitches and knit them together.
- K2tog – Knit 2 stitches together: Insert the right needle into the next 2 stitches on the left needle as if to knit, and knit them together as one stitch.
These are just a few of the abbreviations you may encounter in a mermaid tail pattern. It’s always a good idea to refer to the pattern’s key or glossary section for a complete list of abbreviations and their meanings. Understanding these abbreviations will help you follow the pattern with ease and create a beautiful mermaid tail.
Step-by-Step Instructions for Knitting a Mermaid Tail
Knitting a mermaid tail can be a fun and rewarding project for those who enjoy both knitting and mythical creatures. With these step-by-step instructions, you’ll be able to create your very own cozy mermaid tail blanket in no time.
Materials:
- Knitting needles in the appropriate size for your chosen yarn
- Yarn in your desired colors
- Tapestry needle
- Scissors
- Stitch markers (optional)
Step 1: Cast On
Using your chosen yarn and knitting needles, cast on the desired number of stitches. This will depend on the size of the mermaid tail you want to create and the stitch pattern you plan to use. Make sure to leave a long tail of yarn for later use.
Step 2: Knit the Body
Continue knitting in your chosen stitch pattern until the body of the mermaid tail is the desired length. This could be anywhere from a few inches to several feet, depending on your preference. Remember to periodically try on the blanket to ensure it will fit comfortably.
Step 3: Shaping the Tail
To shape the tail, you will gradually decrease the number of stitches on each row. This can be done by knitting two stitches together, commonly known as a knit two together (k2tog) decrease. Repeat this decrease every few rows until you have reached the desired width for the tail.
Step 4: Finishing Touches
Once the tail is the desired width, continue knitting in your chosen stitch pattern for a few more rows to create a neat edge. Bind off your stitches and weave in any loose ends using a tapestry needle.
And there you have it! Your very own knitted mermaid tail blanket. Feel free to get creative with color combinations and stitch patterns to make your mermaid tail unique. Happy knitting!
Tips and Tricks for Knitting a Perfect Mermaid Tail

Knitting a mermaid tail blanket can be a fun and rewarding project, but it requires some skill and attention to detail to achieve a perfect result. Here are some tips and tricks to help you along the way:
1. Choose the Right Yarn
When knitting a mermaid tail, it’s important to choose a yarn that is soft, warm, and comfortable to wear. Look for yarns that have good stitch definition and a bit of stretch to ensure a snug fit. Mermaid tails are often knit with acrylic or merino wool yarns, but you can experiment with different fibers to achieve the desired texture and drape.
2. Use Circular Needles
Working with circular needles can make the knitting process easier and more efficient, especially when knitting in the round. Circular needles eliminate the need to seam up the sides of the tail, resulting in a smoother and more seamless finish. Make sure to choose the right needle size for your yarn to achieve the desired gauge and tension.
3. Pay Attention to Gauge
Before you begin knitting, take the time to knit a gauge swatch to ensure that your stitches and rows match the pattern. This step is crucial in achieving the right fit and size for your mermaid tail. Adjust your needle size if necessary to obtain the correct gauge. Keep in mind that the gauge may change when knitting in the round, so it’s important to measure your swatch accurately.
4. Follow the Pattern Closely

When knitting a mermaid tail, it’s important to carefully follow the pattern instructions. Pay attention to stitch counts, shaping techniques, and any specific instructions for color changes or stitch patterns. Using stitch markers can help you keep track of your progress and ensure that you’re following the pattern correctly.
5. Add Personal Touches
While following the pattern is important, don’t be afraid to add your own personal touches to your mermaid tail. Consider adding decorative stitches, beads, or sequins to make your tail unique. You can also experiment with different color combinations or yarn textures to create a truly one-of-a-kind mermaid tail.
By following these tips and tricks, you’ll be well on your way to knitting a perfect mermaid tail. Remember to take your time, enjoy the process, and have fun creating a cozy and whimsical accessory.
Finishing touches for your mermaid tail
Once you have completed knitting your mermaid tail, there are a few finishing touches you can add to make it even more beautiful and functional. These details will give your tail a professional look and enhance its overall appearance.
1. Finishing the edges
One of the most important steps in completing your mermaid tail is finishing the edges. You can do this by using a crochet hook to single crochet around the outer edges. This will create a neat and polished look, while also preventing the edges from unraveling. You can choose a contrasting color yarn for the edging to add a pop of color.
2. Adding scales
To truly make your mermaid tail look like it belongs under the sea, consider adding some scales. You can achieve this by embroidering or appliqueing small fish-scale-shaped pieces of fabric onto the tail. Alternatively, you can use fabric paint or a fabric marker to draw scales directly onto the tail. This will give your tail a realistic and whimsical touch.
3. Adding a waistband
To ensure a secure and comfortable fit, it’s a good idea to add a waistband to your mermaid tail. This can be done by knitting or crocheting an elastic band that will hold the tail in place around your waist. Alternatively, you can sew in an elastic band or ribbon that can be tied around your waist. This will ensure that your tail stays in place while you swim and play.
4. Embellishing with seashells or beads

To add an extra touch of underwater magic to your mermaid tail, consider embellishing it with seashells or beads. You can sew small seashells onto the tail, or use a hot glue gun to attach them securely. Similarly, you can thread beads onto the yarn as you knit or crochet the tail to create a mermaid-like shimmer.
By adding these finishing touches, you will take your knitted mermaid tail to the next level. Not only will it be functional and cozy, but it will also look like a beautiful work of art.
Customizing your mermaid tail

When it comes to creating your own mermaid tail, customization is key. You want your tail to reflect your personality and style, and there are several ways to achieve that. Whether you’re knitting your tail from scratch or using a pattern, here are some ideas to help you personalize your mermaid tail.
Choose your colors: The color of your mermaid tail can set the tone for the entire design. Think about the look you want to achieve and select colors that complement each other. You can go for a monochromatic look by using different shades of the same color, or create a bold and vibrant design by combining contrasting colors.
Patterns and textures:
Adding patterns and textures can give your mermaid tail a unique and eye-catching look. Consider incorporating different knitting stitches or techniques to create interesting textures on your tail. You can also experiment with colorwork and create patterns such as scales or waves. The possibilities are endless, so let your creativity shine.
Accessorize:
Don’t forget to accessorize your mermaid tail to make it even more special. You can add ribbons, beads, sequins, or embroidery to enhance the overall look. These small details can make a big difference and make your tail truly one-of-a-kind. Just be mindful of the materials you choose to ensure they are safe and comfortable to wear.
- Finishing touches: Once your tail is complete, don’t forget to add the finishing touches. This could include adding a waistband for a secure fit, or attaching straps for added support. You can also add a decorative border or trim to give your tail a polished look.
- Consider functionality: While customization is important, don’t forget to consider the functionality of your mermaid tail. Make sure it fits you well and allows for ease of movement. You can customize the length and width of your tail to ensure a comfortable and functional fit.
Remember, the most important thing is to have fun and make your mermaid tail uniquely yours. Get creative, experiment with different ideas, and enjoy the process of customizing your own mermaid tail.
Alternatives to knitting a mermaid tail
The mermaid tail has become a popular trend in recent years, with many crafters and enthusiasts looking to create their own cozy, whimsical version. While knitting is a common method for making a mermaid tail, there are several alternatives for those who may not have the knitting skills or simply want to try something different.
1. Crochet
One popular alternative to knitting a mermaid tail is crocheting. Crochet allows for more flexibility in design and stitch patterns, making it an ideal choice for creating a unique mermaid tail. There are many crochet patterns available online, ranging from simple designs for beginners to intricate and detailed patterns for experienced crocheters.
2. Sewing
For those who prefer working with fabric, sewing a mermaid tail can be a rewarding alternative. Using a sewing machine or hand sewing techniques, one can create a tail shape from fabric and add details such as scales or fins. This method allows for a wider variety of fabric choices and can result in a more realistic-looking tail.
3. Felt or fleece
Another alternative to knitting a mermaid tail is using felt or fleece fabric. These fabrics are often used for costumes or accessories and can be easily shaped into a tail form. Felt or fleece tails can be sewn or glued together and decorated with sequins, beads, or other embellishments to add a touch of sparkle and magic.
4. Upcycling
For those who want to be eco-friendly or are looking for a budget-friendly option, upcycling old materials is a creative alternative. Old blankets, sweaters, or even curtains can be repurposed to create a unique and cozy mermaid tail. By cutting and sewing the fabric, one can transform unwanted items into a beautiful new creation.
5. Knitting loom
If you are drawn to knitting but do not have the experience or patience for traditional knitting needles, using a knitting loom can be a great alternative. Knitting looms are circular or rectangular frames with pegs, which allow for easy knitting of various projects, including mermaid tails. With some basic knitting loom techniques, you can create a beautiful tail without the need for traditional knitting needles.
Mermaid Tail Pattern for Beginners
If you’re a beginner knitter looking to dive into the world of mermaid tails, this pattern is perfect for you. With just a few basic knitting skills, you’ll be able to create a beautiful and cozy mermaid tail blanket for yourself or a loved one.
Materials Needed:
- Size 8 knitting needles
- Worsted weight yarn in your chosen colors
- Tapestry needle
- Scissors
Instructions:
- Begin by casting on 100 stitches using your chosen color of yarn.
- Knit in garter stitch (knit every row) for 10 inches.
- Switch to your second color of yarn and continue knitting in garter stitch for another 10 inches.
- Repeat step 3 with your third color of yarn.
- Switch back to your first color of yarn and continue knitting in garter stitch for another 10 inches.
- Bind off all stitches and weave in any loose ends.
Finishing Touches:
Elongate the tail portion of the blanket by sewing a small triangle of fabric to the bottom edge. This will create the traditional mermaid tail shape and add a fun touch to your finished blanket. You can also add embellishments such as sequins or shells to make your blanket even more magical.
With this simple and beginner-friendly pattern, you’ll be able to create your own mermaid tail blanket in no time. Have fun experimenting with different colors and yarns to make your blanket unique and special.
Advanced Techniques for Experienced Knitters
If you are an experienced knitter looking to challenge yourself and take your skills to the next level, here are some advanced techniques that you can try:
1. Cable Knitting
One of the most popular advanced knitting techniques is cable knitting. This technique involves crossing stitches over each other to create intricate and beautiful cable patterns. By using a cable needle or knitting without a cable needle, you can create a variety of cable designs that add depth and texture to your knitting projects.
2. Lace Knitting
Lace knitting is another advanced technique that uses yarn overs, decreases, and increases to create delicate and openwork patterns. This technique requires precise attention to detail and can produce stunning results. Knitting lace patterns can be challenging at first, but with practice, you can create intricate and delicate designs that are perfect for shawls, scarves, and other lightweight garments.
3. Intarsia Knitting
Intarsia knitting is a colorwork technique that allows you to create large, uninterrupted blocks of color within your knitting projects. This technique involves using different balls of yarn for each color block and twisting the yarns at the color changes to prevent holes. Intarsia can be complex, requiring careful attention to color placement and yarn management, but the results can be stunning.
These advanced knitting techniques require patience, practice, and an adventurous spirit. By challenging yourself to learn new skills and techniques, you can expand your knitting repertoire and create beautiful and unique projects.
Conclusion

As an experienced knitter, you have already mastered the basic stitches and techniques. Now is the time to push yourself and try more advanced knitting techniques, such as cable knitting, lace knitting, and intarsia knitting. These techniques will challenge you, but with practice, you can create stunning and intricate designs that showcase your skills. So grab your needles, choose a project, and let your creativity soar!
Q&A:
What is a knit mermaid tail pattern?
A knit mermaid tail pattern is a set of instructions and diagrams that guide you in creating a mermaid tail using knitting techniques. It provides step-by-step instructions on how to cast on, knit, purl, and shape the tail to resemble the scales of a mermaid.
Where can I find a knit mermaid tail pattern?
You can find knit mermaid tail patterns online on various knitting websites, craft blogs, and pattern marketplaces. There are many free patterns available, as well as paid patterns that offer more detailed instructions and customization options.
What supplies do I need to knit a mermaid tail?
To knit a mermaid tail, you will need knitting needles (usually size US 10 or 11), a set of stitch markers, a tapestry needle for sewing, and yarn in the colors of your choice. The specific yarn weight and amount needed will depend on the pattern you choose.
Are knit mermaid tail patterns suitable for beginners?
Some knit mermaid tail patterns are suitable for beginners, while others may require more advanced knitting skills. It’s important to choose a pattern that matches your skill level and includes detailed instructions and explanations of any unfamiliar techniques.
Can I customize a knit mermaid tail pattern?
Yes, you can customize a knit mermaid tail pattern to suit your preferences. You can change the colors of the yarn, adjust the size to fit different age groups, add decorative elements such as sequins or beads, or modify the stitch pattern to create unique effects.
How can I find a knit mermaid tail pattern?
You can find knit mermaid tail patterns on various knitting websites, such as Ravelry, LoveKnitting, or even on craft blogs. You can also search for patterns on knitting forums or social media groups dedicated to knitting.
What materials do I need to knit a mermaid tail?
To knit a mermaid tail, you will need yarn in the color of your choice, knitting needles in the appropriate size for your yarn, a tapestry needle for weaving in ends, and any additional decorations or embellishments you may want to add. Some patterns may also require stitch markers or cable needles.