
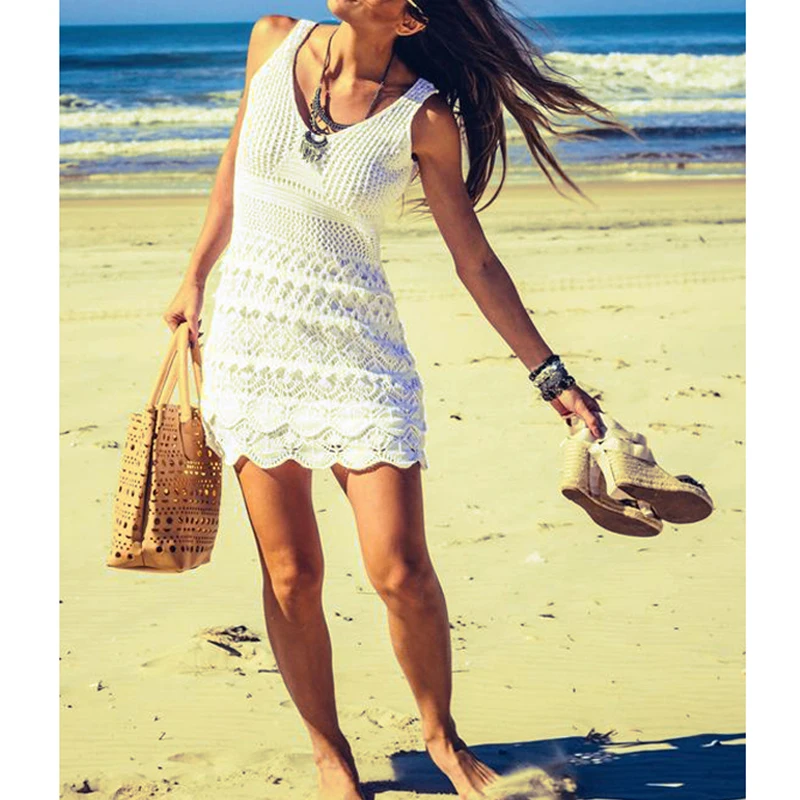
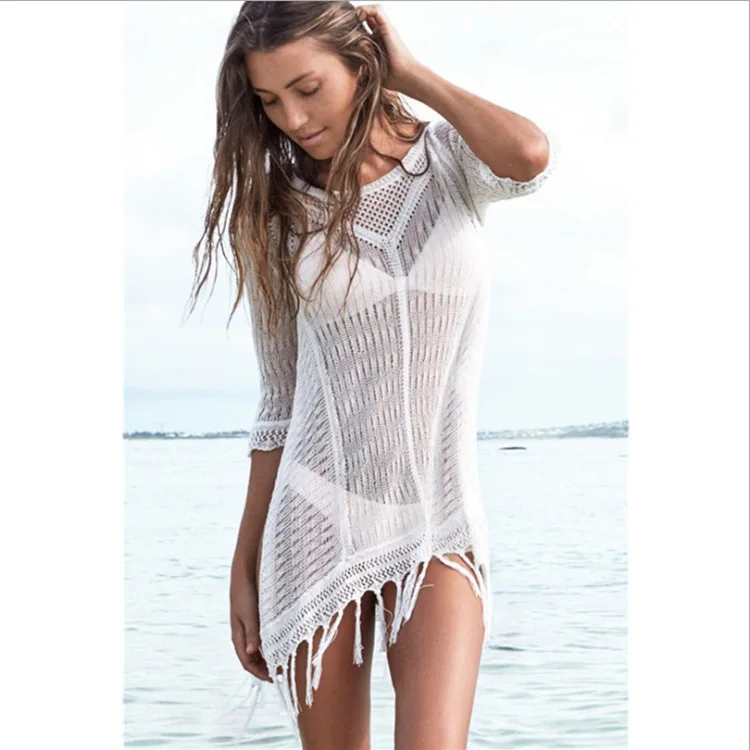
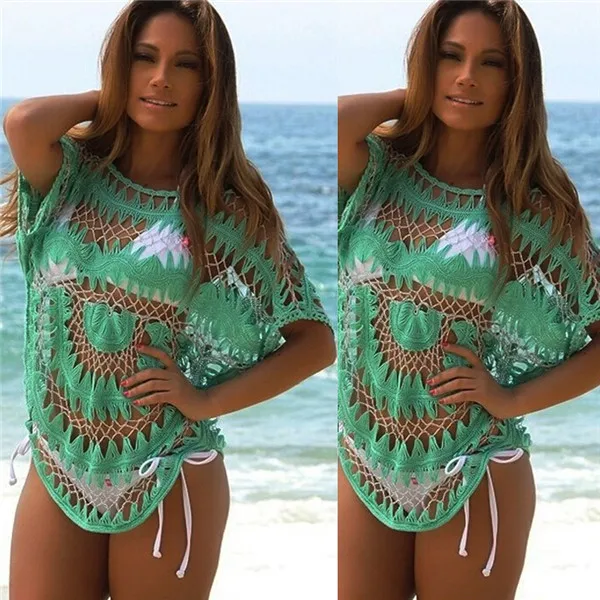
Summer is the perfect time to show off your handmade creations, and what better way to do it than with a knitted bathing suit cover up? This versatile garment is not only stylish but also functional, as it can protect your skin from the sun while adding a touch of elegance to your beach or poolside look.
This knitted bathing suit cover up pattern is a must-have for any knitting enthusiast. Whether you’re a beginner or an experienced knitter, you’ll find this pattern easy to follow and fun to make. With just a few skeins of your favorite yarn and a pair of knitting needles, you’ll be able to create a beautiful cover up that suits your style and body shape.
The pattern includes step-by-step instructions and detailed stitch diagrams, making it suitable for knitters of all skill levels. You can choose from a variety of stitch patterns and decorative elements to personalize your cover up and make it truly unique. Whether you prefer a simple and minimalistic design or want to try your hand at more intricate lacework, this pattern has got you covered.
So why not get started on your knitted bathing suit cover up today? With a little time and effort, you’ll have a stunning garment that will turn heads at the beach or pool. Get your knitting needles ready and let your creativity shine!
Choosing the right knitting pattern
When it comes to knitting, choosing the right pattern is crucial to the success of your project. Whether you’re a beginner or an experienced knitter, finding the perfect pattern can make all the difference in creating a beautiful and functional piece.
Consider your skill level: It’s important to choose a pattern that matches your skill level. If you’re new to knitting, look for patterns labeled as “beginner” or “easy” to start with. These patterns typically use basic stitches and have clear instructions that are easy to follow. On the other hand, if you’re an experienced knitter looking for a challenge, opt for patterns that incorporate complex stitch patterns or techniques.
Think about the garment or accessory: Before selecting a pattern, think about what you want to knit. Are you looking to make a cozy sweater, a stylish scarf, or a functional hat? Consider the purpose of the item and how it will fit into your wardrobe or home. Also, take into account the season and the type of yarn recommended for the pattern. For example, a lightweight cotton yarn might be more suitable for a summer top, while a bulky wool yarn would be perfect for a warm winter hat.
Read reviews and check for errata: Before starting a pattern, take the time to read reviews from other knitters who have already made the item. They can provide valuable feedback on the pattern’s accuracy and any potential issues or modifications that may be needed. Additionally, check the pattern designer’s website or Ravelry page for any known errata or corrections that have been published. This will ensure that you have the most up-to-date version of the pattern and can avoid any potential mistakes.
Consider your personal style: Knitting allows you to express your creativity and personal style. Choose a pattern that reflects your taste and aesthetic preferences. Look for patterns with interesting details, unique stitch patterns, or customizable options. Don’t be afraid to make modifications or add your own personal touches to make the finished piece truly your own.
Take measurements and swatch: Before diving into a pattern, it’s important to take accurate measurements and make a swatch. This will help ensure that your finished piece will fit properly. Follow the pattern’s instructions for measurements and gauge to determine the correct size to knit. Making a swatch will also allow you to practice the stitch pattern and check your tension before starting the actual project.
By considering your skill level, garment or accessory type, reading reviews, thinking about your personal style, and taking accurate measurements, you’ll be well-equipped to choose the perfect knitting pattern for your next project. Happy knitting!
Consider the yarn weight and fiber
When selecting a yarn for your knitted bathing suit cover up, it’s important to consider the weight and fiber of the yarn. The weight of the yarn will determine how thick or thin it is, which will directly impact the drape and overall look of the finished garment.
Choosing a lightweight yarn will create a more delicate and airy cover-up, while a heavier yarn will result in a thicker and warmer piece.
Fiber choice is also crucial in determining the comfort and durability of your cover-up. Natural fibers like cotton or linen are popular choices for bathing suit cover-ups, as they are breathable and absorbent, making them perfect for beach or poolside wear. These fibers also have a nice drape, allowing the garment to hang beautifully. On the other hand, synthetic fibers like acrylic or nylon can be more durable and easier to care for, making them ideal for a cover-up that may be exposed to chlorine or sunscreens.
- Cotton: Soft, breathable, and easily washable.
- Linen: Lightweight, crisp, and perfect for warm weather.
- Acrylic: Durable and easy to care for, with a wide range of colors and textures available.
- Nylon: Strong and resistant to stretching, perfect for beachwear.
Consider your personal preferences and the specific requirements of your knitted bathing suit cover up when choosing the weight and fiber of your yarn. It’s also a good idea to think about the care instructions for the yarn, as some fibers may require special washing or handling to maintain their quality over time.
Select a suitable stitch pattern

When knitting a bathing suit cover up, it is important to choose a stitch pattern that not only adds visual interest but also provides the necessary stretch and drape. There are several stitch patterns that work well for this type of project, each with its own unique characteristics.
Ribbing Stitch
The ribbing stitch is a classic choice for knit garments as it creates a stretchy and elastic fabric. This stitch pattern is achieved by alternating knit and purl stitches in a specific pattern, such as 1×1 or 2×2. The ribbing stitch is great for creating a snug fit around the body and ensures that the cover up stays in place.
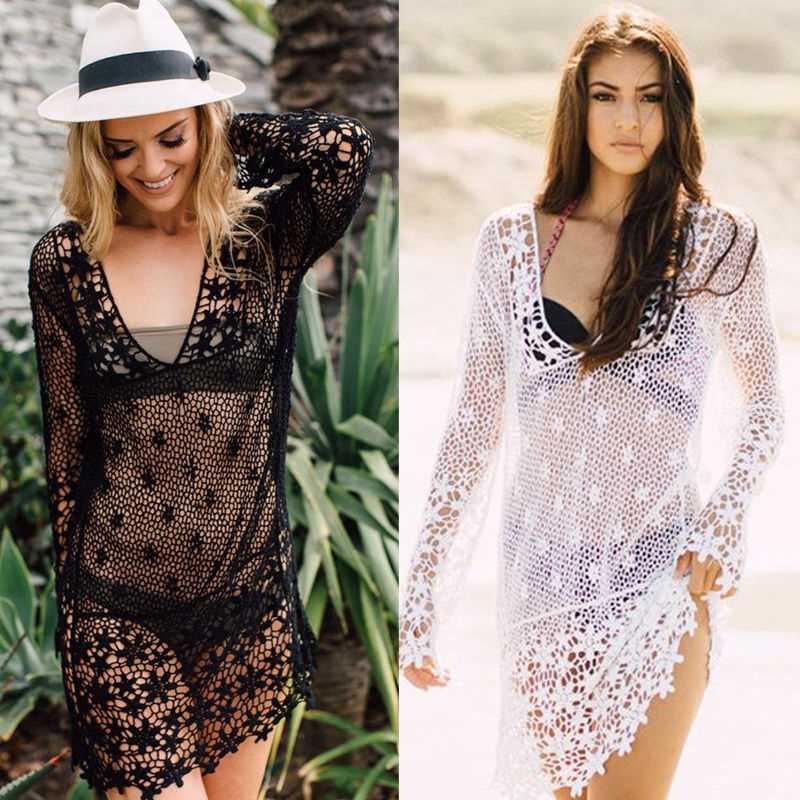
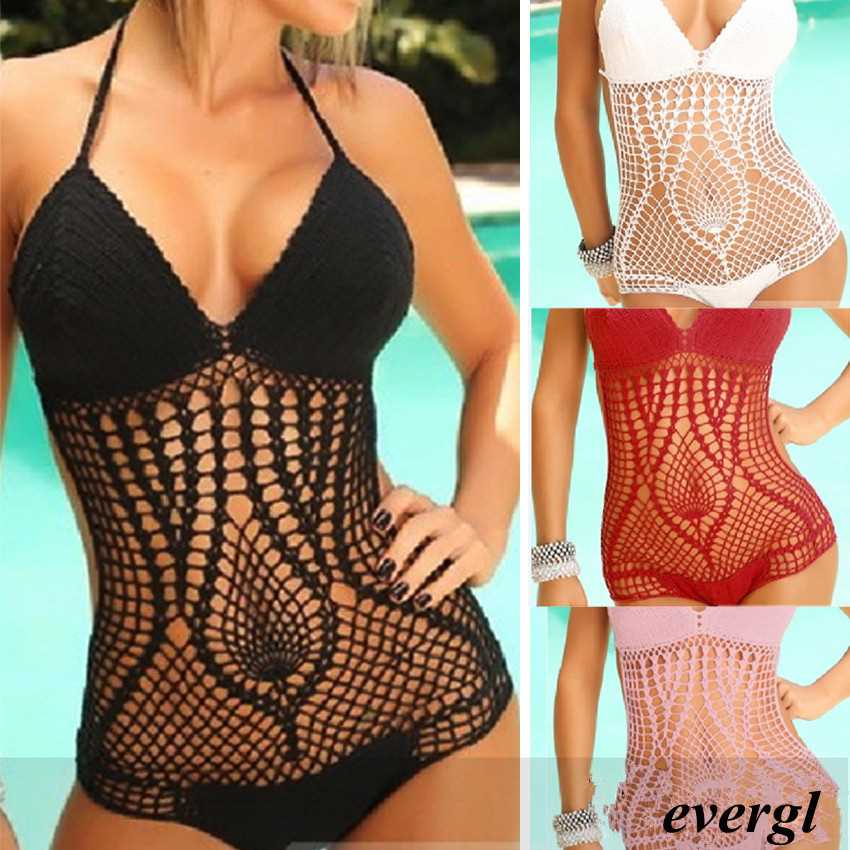
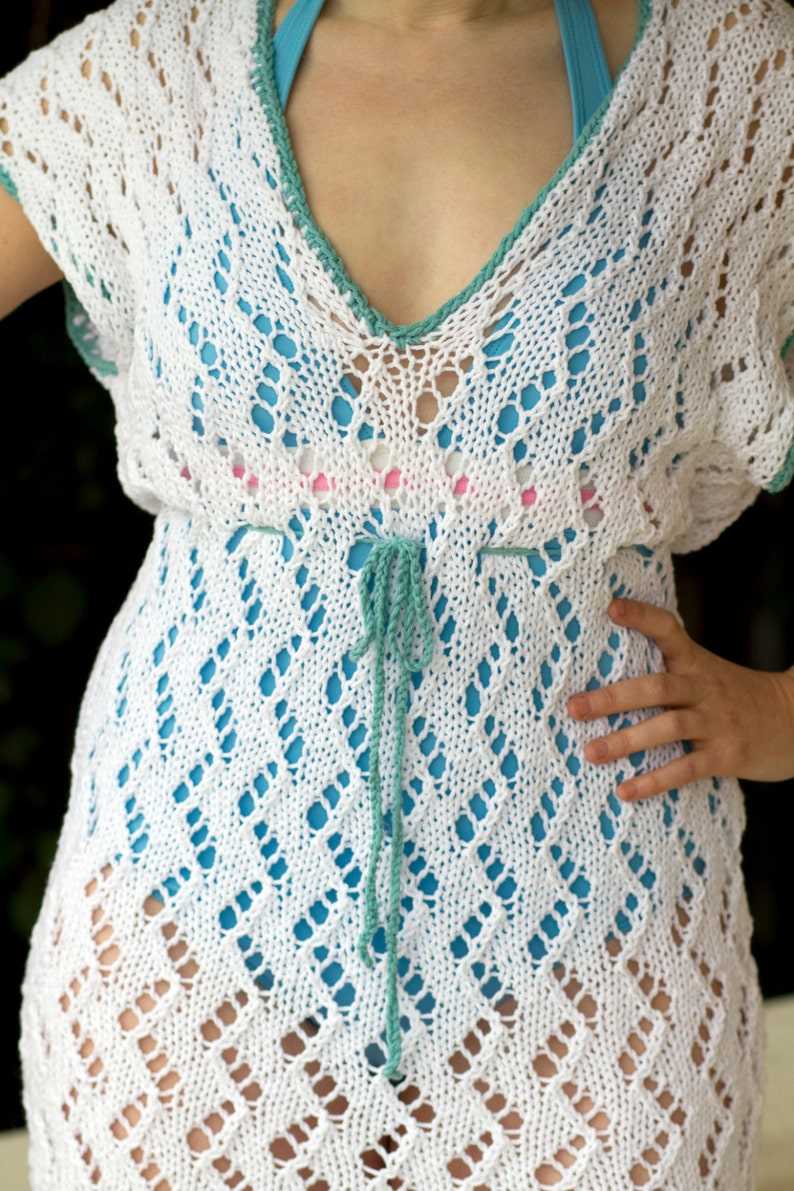
Lace Stitch
A lace stitch pattern adds an elegant and delicate touch to any knitted garment. This stitch pattern typically involves yarn overs and decreases to create decorative openings and patterns. Lace stitches are ideal for creating a breezy and airy cover up, allowing for maximum breathability while still offering coverage.
Cable Stitch
The cable stitch is a popular choice for adding texture and depth to knitted garments. This stitch pattern creates twisted braids or cables that stand out from the fabric. The cable stitch is great for creating a more structured cover up, providing added warmth and visual interest.
When selecting a stitch pattern, consider the functionality and style you want to achieve. Experiment with different patterns and swatch to ensure the desired stretch and drape. With the right stitch pattern, your knitted bathing suit cover up will be both functional and stylish.
Tools and materials needed
In order to make a knitted bathing suit cover up, you will need a few tools and materials to get started. Here is a list of what you will need:
- Knitting Needles: You will need a pair of knitting needles of the appropriate size for your chosen yarn. The size will depend on the pattern you are using and the desired gauge.
- Yarn: Choose a yarn that is appropriate for a bathing suit cover up. Look for a yarn that is lightweight, breathable, and quick-drying. Cotton or bamboo yarns are popular choices for this type of project.
- Tape Measure: A tape measure will come in handy to ensure that your cover up is the correct size. You may need to measure yourself or refer to a sizing chart in your pattern.
- Stitch Markers: Stitch markers can be useful for marking certain points in your pattern, such as where to make increases or decreases.
- Tapestry Needle: A tapestry needle, also known as a yarn needle, is used for weaving in loose ends and seaming your work.
- Scissors: You will need a pair of scissors to cut your yarn and trim any excess.
These are the basic tools and materials you will need to make a knitted bathing suit cover up. Make sure you have everything on hand before you start, so you can focus on the knitting process without any interruptions. Happy knitting!
Getting started
If you’re looking to make your own knitted bathing suit cover up, you’re in the right place! This pattern will guide you through the process of creating a beautiful and functional cover up that you’ll love to wear by the pool or at the beach.
Before you get started, it’s important to gather all the necessary materials. You’ll need a set of knitting needles, yarn in the color of your choice, and any additional embellishments you’d like to add to your cover up. Make sure you have enough yarn to complete the project and consider buying a little extra, just in case.
The first step is to choose the right pattern for your cover up. There are many different styles and designs to choose from, so take some time to browse through various patterns and find one that suits your taste and skill level. Once you’ve chosen a pattern, make sure to read through it carefully and understand all the instructions before you begin knitting.
Now that you have your materials and pattern ready, it’s time to start knitting! Begin by casting on the required number of stitches onto your needles. If you’re new to knitting, there are plenty of online tutorials and videos available to help you learn the basic techniques. As you work your way through the pattern, make sure to keep track of your progress and check your measurements regularly to ensure that your cover up will fit properly.
Remember, knitting is a labor of love and it can take time to complete a project. Be patient with yourself and enjoy the process. Once your cover up is finished, you’ll have a unique and handmade piece that you can proudly show off at your next poolside gathering.
Casting on
When starting a knitted bathing suit cover up, the first step is to cast on the required number of stitches. Casting on is the process of creating the initial row of stitches on the needle. There are several methods to cast on, but one of the most common and simple methods is the long tail cast on.
The long tail cast on involves creating a loop of yarn on the needle, which will become the first stitch. To begin, make a slipknot about 6-8 inches away from the end of the yarn. Insert the needle into the loop of the slipknot, then use your thumb and index finger to hold the tail end of the yarn and the working yarn together.
Next, take the working yarn and bring it over the needle from front to back, creating a loop. Then, bring the working yarn under the needle and back to the front, creating another loop. This process is repeated, with each loop being pulled snugly, until the desired number of stitches is cast on.
The long tail cast on method creates a neat and flexible edge, making it ideal for this bathing suit cover up pattern. It is important to ensure that the stitches are not too tight or too loose, as this can affect the overall fit and drape of the cover up. Once the necessary number of stitches is cast on, you can proceed to the next step of the pattern, such as working the first row or starting the pattern stitch.
Knitting the Body
Once you have completed the ribbed edging for the bottom of the bathing suit cover up, you can start knitting the body. This is where you will create the main part of the cover up that will drape over your swimsuit.
To begin, you will knit the body in stockinette stitch, which means you will knit one row and purl the next row. This will create a smooth, flat fabric that has a nice drape.
Before you start knitting the body, make sure to measure your gauge and adjust your needle size if necessary. This will ensure that your cover up fits properly and has the desired drape.
Once you have the correct gauge, cast on the required number of stitches for the size you are making. If you are using a pattern, it will specify the number of stitches to cast on. If you are creating your own pattern, you can use your gauge swatch to determine the number of stitches needed.
Pro Tip: When casting on a large number of stitches, it can be helpful to use a stitch marker every few stitches to help keep track of your count.
Continue knitting in stockinette stitch until the body measures the desired length. You can try on the cover up as you go to check the fit. Make sure to take into account the stretch of the ribbed edging when determining the length.
Once you have reached the desired length, you can start shaping the neckline and armholes.
If you are following a pattern, it will provide instructions on how to shape the neckline and armholes. If you are creating your own pattern, you can use basic shaping techniques such as decreasing and binding off to create the desired shape.
Adding straps or sleeves
Adding straps or sleeves to a knitted bathing suit cover up can be a great way to modify the design and add some extra style and functionality. Whether you prefer thin straps, thick straps, or even sleeves, there are various options to choose from.
Thin straps: Thin straps can be delicate and feminine, giving the cover up a dainty look. To add thin straps, you can simply pick up stitches along the edges of the front and back of the cover up and knit the straps to the desired length. You can also add straps using i-cord or crochet chains for a more decorative element.
Thick straps: Thick straps can add more support and structure to the cover up, especially if you plan on wearing it as a dress or a top. To add thick straps, you can create wider strips of fabric either by increasing the number of stitches when knitting or using a thicker yarn. You can also consider adding a ribbed or twisted stitch pattern to create more texture.
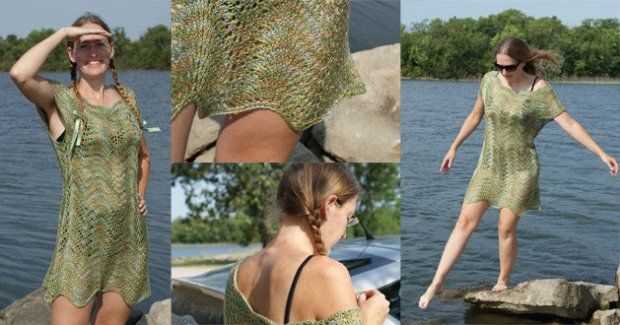
Sleeves: Adding sleeves to a knitted bathing suit cover up can transform it into a stylish tunic or dress. You can opt for short sleeves, long sleeves, or even three-quarter sleeves depending on your preference. To add sleeves, you can pick up stitches along the armholes and knit them in the desired length. You can also experiment with different stitch patterns or lace designs to make the sleeves stand out.
Shaping the cover up

When knitting a bathing suit cover up, it is important to consider the shaping techniques that will give the garment its desired fit and style. One popular method is using decreasing and increasing stitches to create shaping in the body of the cover up. These stitches can be strategically placed to accentuate the waistline or create a flared effect at the hips.
Another way to shape the cover up is by incorporating different stitch patterns. For example, using ribbing at the waist can help create a more fitted look, while a lacy stitch pattern at the bottom can add a feminine touch. By combining different stitch patterns and adjusting the tension of the yarn, you can achieve the desired shaping effect for your cover up.
Decreasing and increasing stitches
Decreasing and increasing stitches are essential when shaping a knitted garment. When working on the cover up, you can use techniques such as knit two together (k2tog) or make one (M1) to decrease or increase the number of stitches. These techniques are often used at the sides and edges of the cover up to create a tapered silhouette.
- To decrease stitches: Use k2tog to knit two stitches together as one, or slip one knitwise, knit one, pass the slipped stitch over (ssk) to create a left-leaning decrease.
- To increase stitches: Use M1 to make one stitch by picking up the horizontal loop between stitches and knitting into it, or use yarn overs (YO) to create a decorative increase.
Stitch patterns and tension
Selecting the right stitch patterns and adjusting the tension can greatly impact the shaping of the cover up. Ribbing, for example, creates a stretchy fabric that can conform to the body, while lacy stitch patterns add drape and femininity. Experimenting with different stitch patterns and adjusting your knitting tension can help you achieve the desired shaping effect for your cover up.
Remember to always take accurate measurements and swatch before starting your project to ensure the cover up fits correctly. Additionally, consider the fiber content of your yarn, as different fibers have different stretch and drape properties, which can also affect the shaping of the cover up.
Finishing touches
Once you have completed knitting your bathing suit cover up, it’s time to add some finishing touches to make it truly unique and beautiful. These final details will elevate your project and give it a polished look.
1. Blocking
Before adding any embellishments or finishing touches, it’s important to block your knitting. Blocking helps to shape the garment and even out any uneven stitches or edges. You can steam block or wet block, depending on the fiber content of your yarn. Follow the instructions for your specific yarn to ensure the best results.
2. Decorative edging
Add a decorative edging to your bathing suit cover up to give it some extra flair. You can choose to knit a picot or scalloped edge, or even add a crocheted border. This will not only add visual interest but also help to prevent the edges from curling.
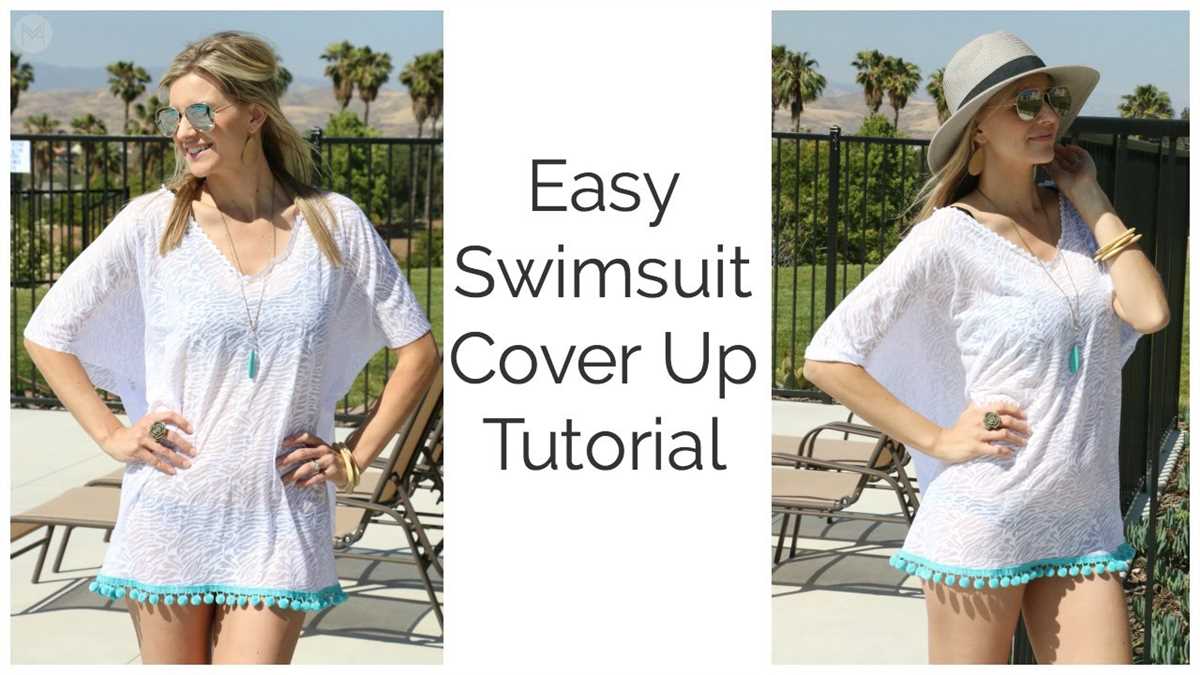
3. Fringe or tassels
If you want to give your cover up a boho or beachy vibe, consider adding fringe or tassels. These can be made using the same yarn as your project or a complementary color. Attach them to the bottom edge or hem of the cover up for a fun and playful touch.
4. Embroidery or appliques
For a more customized look, consider adding embroidery or appliques to your cover up. You can use contrasting yarn or even add beads or sequins for a touch of sparkle. Choose a design that complements the overall style of your cover up and use embroidery stitches or fabric glue to attach the additional pieces.
With these finishing touches, your knitted bathing suit cover up will be ready to be worn and admired. Enjoy the process of adding these details and make it a reflection of your personal style.
Binding Off
Binding off is the final step in finishing your knitted bathing suit cover up. It is the process of securely closing the stitches at the edge of your work so that it won’t unravel. There are several methods you can use to bind off, depending on the desired look and stretchiness of your finished piece.
The standard bind off: This is the basic method used for most projects. To bind off, knit the first two stitches as normal. Then, using your left needle, lift the first stitch over the second stitch and off the right needle. Repeat this process for the remaining stitches until only one stitch remains. Cut the yarn, leaving a tail, and pull it through the last stitch to secure.
The picot bind off: This is a decorative method that creates a picot edge, perfect for adding a feminine touch to your cover up. To do this, bind off the first two stitches as usual. Then, using your left needle, lift the first stitch over the second stitch and off the right needle. Next, cast on two stitches using the backward loop method. Repeat the bind off and cast on process until the end of the row. Cut the yarn, leaving a tail, and pull it through the last stitch to secure.
- The stretchy bind off: If you want a more flexible edge, such as for the neckline or armholes, try the stretchy bind off. This method involves working yarnovers and knitting two stitches together. It creates a looser edge that stretches easily. There are different variations of the stretchy bind off, so you can choose the one that works best for your project.
- The sewn bind off: This method is used when you want an invisible edge that seamlessly blends with the rest of your work. Instead of using your knitting needles, you will use a tapestry needle and yarn to sew the stitches together. It takes a bit more time and patience, but the result is worth it.
Whichever bind off method you choose, be sure to practice on a swatch before applying it to your actual cover up. This will help you get familiar with the technique and ensure that you achieve the desired result. Once you have bound off all the stitches, weave in any loose ends and your knitted bathing suit cover up is complete!
Blocking and Seaming
Blocking and seaming are crucial steps in completing a knitted bathing suit cover up. Blocking refers to the process of gently washing and shaping the knitted pieces to ensure they have a smooth and even appearance. This step helps to eliminate any curling or unevenness that may have occurred during the knitting process. To block the pieces, you will soak them in lukewarm water and then lay them flat on a towel, shaping them to the desired measurements. Allow them to dry completely before moving on to the seaming step.
Seaming involves joining the different pieces of the cover up together to create a finished garment. This is typically done using a tapestry needle and matching yarn or thread. A common method of seaming is the mattress stitch, which creates an invisible seam on the right side of the fabric. This stitch is worked by inserting the needle under the horizontal bars between the stitches on each piece and pulling the yarn through. It’s important to take your time with seaming, ensuring that the edges align properly and the stitches are even. Once all the seams are complete, you can weave in any loose ends and your knitted bathing suit cover up will be ready to wear!
Styling and wearing the knitted bathing suit cover up
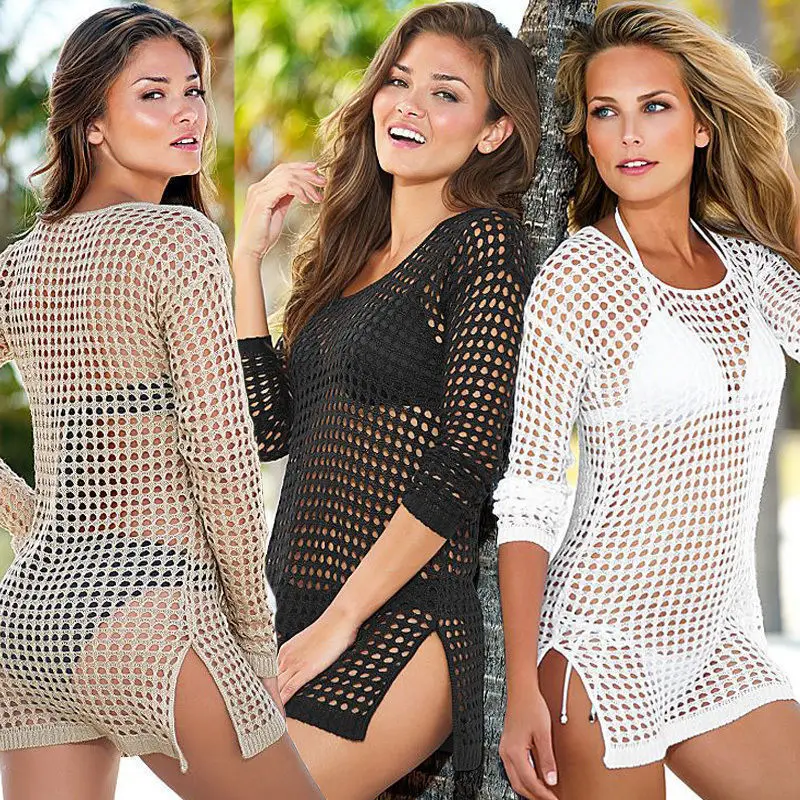
Once you have completed your knitted bathing suit cover up, it’s time to style and wear it. Whether you’re headed to the beach, pool, or a summer party, here are some tips on how to rock your knitted cover up:
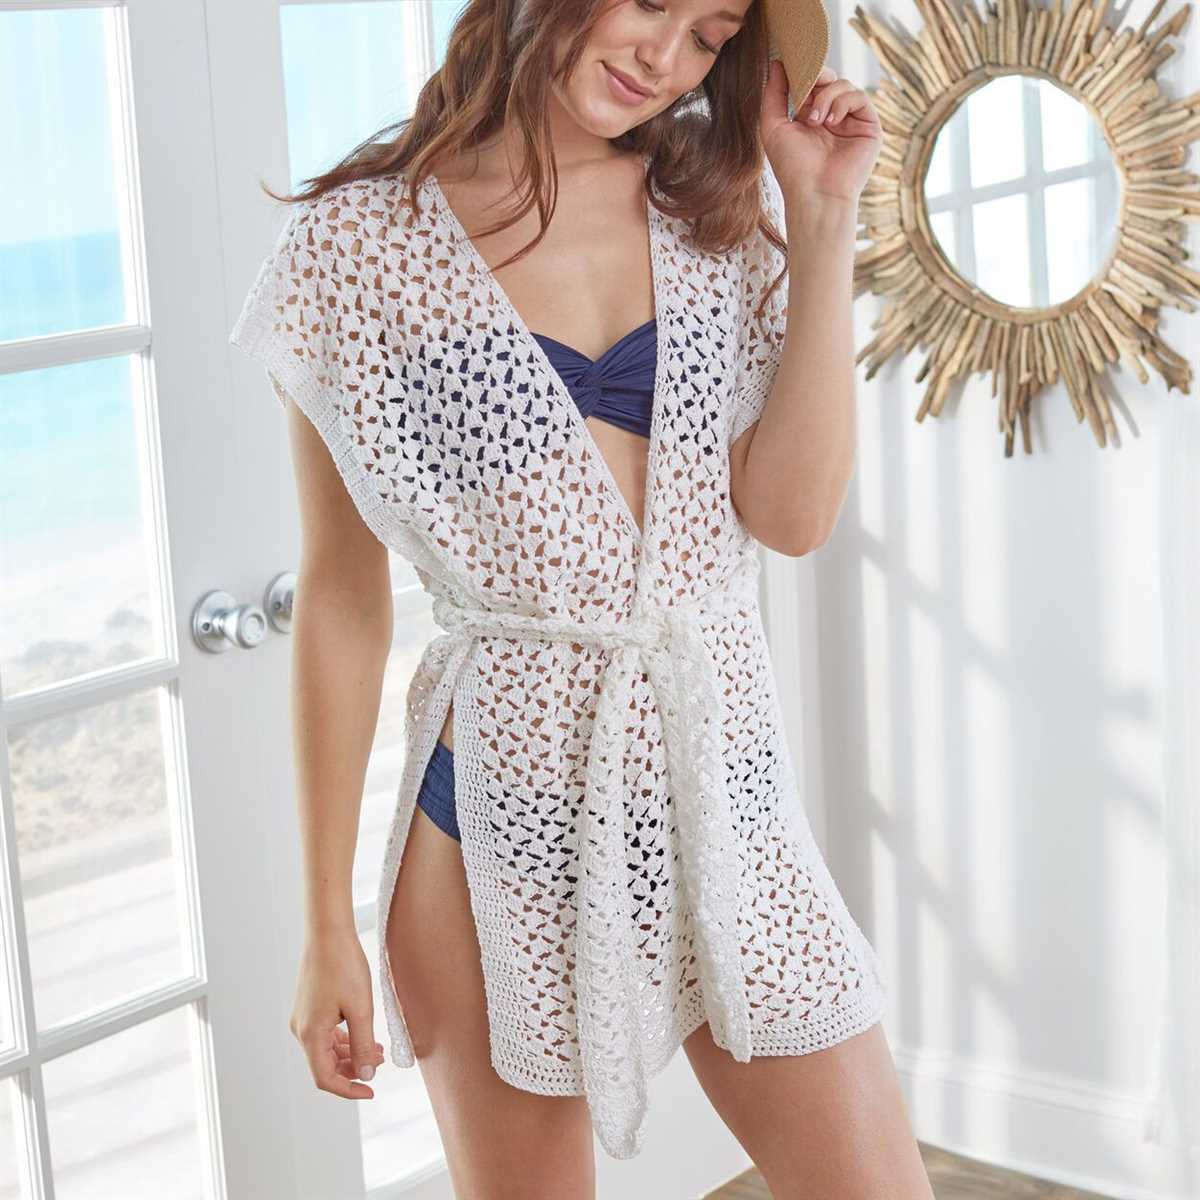
1. Layer it over your swimsuit
When heading to the water, simply slip your knitted cover up over your swimsuit. The loose and airy design of the cover up provides a perfect layer of coverage while still allowing your swimsuit to be visible. You can choose to tie it at the waist for a cinched look or leave it open for a more relaxed vibe.
2. Pair it with shorts or a skirt
If you’re not planning on getting in the water, you can still wear your knitted cover up as a stylish outerwear piece. Pair it with denim shorts or a flowy skirt for a fun and casual summer outfit. The cover up adds an extra layer of texture and dimension to your look.
3. Dress it up

For a more dressed-up look, you can wear your knitted cover up over a solid colored maxi dress. This creates a boho-chic vibe and adds some visual interest to a simple dress. Accessorize with statement jewelry and strappy sandals to complete the outfit.
4. Mix and match patterns

If you’re feeling bold and adventurous, try mixing and matching patterns with your knitted cover up. Pair it with a patterned swimsuit or mix it with other patterned pieces in your wardrobe. Just make sure the patterns have a similar color scheme or complementary colors to create a cohesive look.
5. Take it beyond the beach

Don’t limit your knitted cover up to just the beach or pool. It can also be worn as a lightweight cardigan during summer evenings or as a layering piece over a tank top and shorts. The versatility of the cover up makes it a great addition to your summer wardrobe.
- Layer it over your swimsuit
- Pair it with shorts or a skirt
- Dress it up
- Mix and match patterns
- Take it beyond the beach
With these styling tips, you’re ready to confidently wear your knitted bathing suit cover up and showcase your knitting skills in the most fashionable way!