
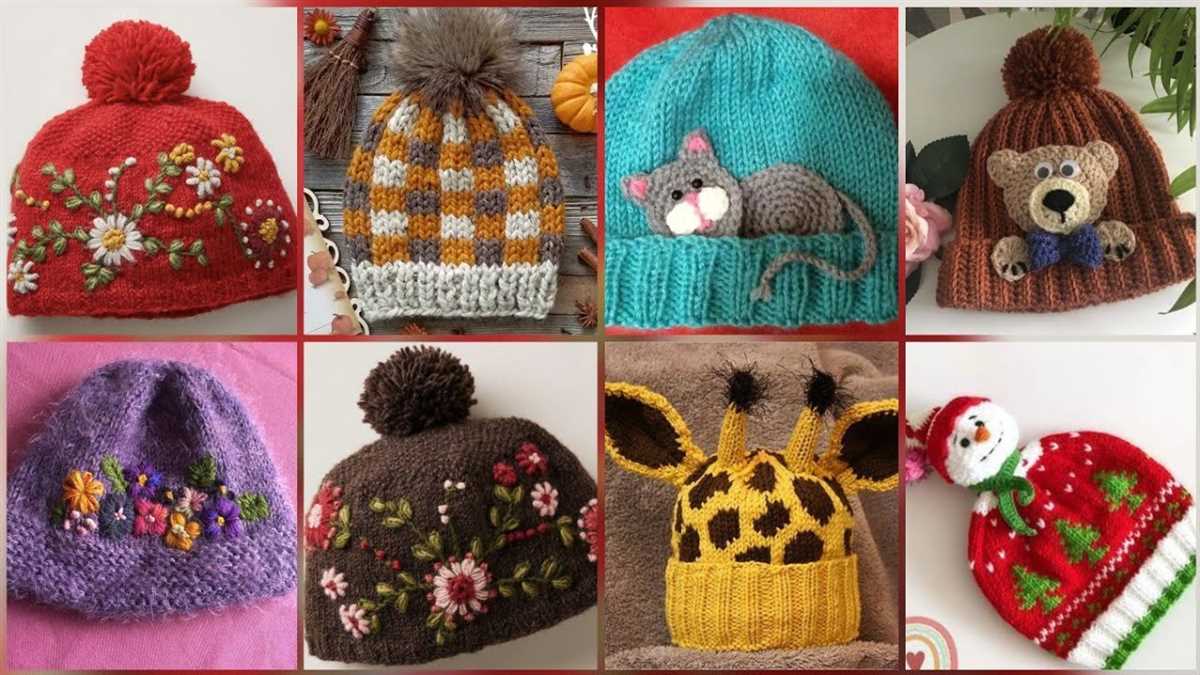
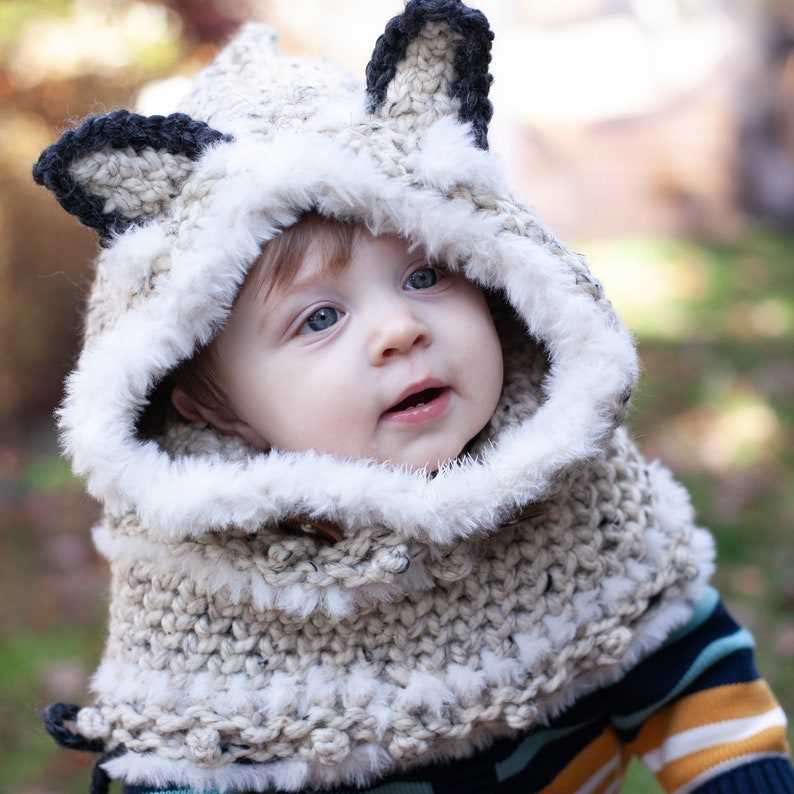
Winter is coming, and what better way to stay warm and stylish than with a knitted wolf hat? This unique and eye-catching accessory is perfect for both adults and children alike. With its adorable wolf ears and cozy design, it’s sure to become a favorite in your winter wardrobe.
Creating your own knitted wolf hat is easier than you think. All you need is some basic knitting skills and the right pattern. In this article, we’ll provide you with a step-by-step guide on how to make your very own wolf hat. Whether you’re a beginner or an experienced knitter, this pattern is suitable for all skill levels.
Not only is this wolf hat fashionable, but it also makes a great gift for loved ones. Imagine the joy on someone’s face when they receive a handmade, one-of-a-kind hat that will keep them warm during the chilly winter months. Plus, knitting is a relaxing and enjoyable hobby that allows you to express your creativity.
How to Knit a Wolf Hat: A Step-by-Step Guide

Knitting your own wolf hat can be a fun and creative project. Whether you’re making it as a gift or for yourself, this step-by-step guide will help you create a unique and cozy accessory.
Materials Needed:
- Worsted weight yarn in gray, white, and black
- Size 8 knitting needles
- Tapestry needle
- Scissors
- Stitch markers
Step 1: Cast On
Start by casting on 80 stitches with the gray yarn. This will form the brim of the wolf hat.
Step 2: Ribbing
Knit 2, purl 2 in a ribbing pattern for 12 rows to create the brim. This will give the hat a snug fit and keep it in place.
Step 3: Main Body
Switch to the white yarn and knit every row until the hat measures approximately 7 inches from the brim.
Step 4: Shaping the Ears

To create the wolf ears, start decreasing stitches. Knit 6, knit 2 together, repeat until the end of the row. Knit the next row. Repeat these two rows until there are 8 stitches remaining.
Step 5: Adding the Face

Switch to black yarn and knit a row. On the next row, knit 3, knit 2 together, repeat until the end of the row. Knit the next row. Repeat these two rows until there are 5 stitches remaining.
Step 6: Finishing Touches
Using the tapestry needle, weave in any loose ends and sew up the back seam of the hat. Attach eyes and a nose using black yarn. You can also add a pom-pom on top for an extra touch.
Now you have your very own knitted wolf hat! Enjoy staying warm and stylish with this unique accessory. Happy knitting!
Materials Needed for Knitting a Wolf Hat

To knit a wolf hat, you will need a few specific materials to ensure that your project turns out as desired. Here is a list of the essential materials you will need:
- Yarn: Choose a soft and warm yarn in shades of grey or black to create the realistic look of a wolf. Acrylic yarn of worsted weight is recommended for this project.
- Knitting Needles: Use a set of double-pointed knitting needles in the recommended size for your chosen yarn weight. This will typically be between size US 6-8 (4-5 mm).
- Stitch Markers: It is helpful to have stitch markers to keep track of your stitches and mark important sections of the pattern.
- Tapestry Needle: A tapestry needle with a large eye is necessary for weaving in loose ends and finishing the hat.
- Scissors: A pair of sharp scissors will be needed to cut the yarn and trim any excess.
- Measuring Tape: A measuring tape or ruler is essential to ensure that you are knitting to the correct gauge and size for the intended recipient.
- Pattern: Lastly, you will need a knitted wolf hat pattern to follow. You can find free patterns online or purchase a pattern from a knitting store or designer.
Gathering these materials before you begin knitting will ensure that you have everything you need to successfully complete your wolf hat project. Once you have all the necessary materials, you can dive into the knitting process and create a cozy and adorable wolf hat for yourself or a loved one.
Choosing the Right Yarn for Your Wolf Hat
When it comes to knitting a wolf hat, one of the most important factors to consider is the type of yarn you choose. The right yarn can make all the difference in the final look and feel of your hat. Here are some key points to keep in mind when selecting yarn for your wolf hat.
1. Weight and thickness:
Consider the weight and thickness of the yarn you are using. Since a wolf hat typically requires a snug fit, using a yarn that is too thick or heavy may result in a hat that is too bulky and uncomfortable to wear. On the other hand, using a yarn that is too thin may create a hat that lacks structure and is unable to hold its shape.
2. Fiber content:
The fiber content of the yarn is also crucial. Opt for a yarn that is soft and warm, as it will provide maximum comfort and insulation during the colder months. Wool is a popular choice for wolf hats due to its natural warmth and ability to retain heat. However, if you or the recipient of the hat has any allergies or sensitivities, consider alternative fibers such as acrylic or a wool blend.
3. Color and texture:

The color and texture of the yarn can greatly influence the overall appearance of your wolf hat. Consider the desired look and feel of your hat and choose a yarn that complements your vision. For a more realistic wolf-like appearance, opt for a yarn that mimics the texture and color of fur. You can also experiment with different color combinations to create a unique and eye-catching hat.
4. Durability and care:
Lastly, think about the durability and care requirements of the yarn. A wolf hat is likely to be worn frequently, so choose a yarn that can withstand regular use and is easy to care for. Look for yarn that is machine washable or can be easily hand-washed without losing its shape or color.
By considering these factors and choosing the right yarn, you can ensure that your knitted wolf hat turns out just as you envisioned it – cozy, stylish, and perfect for any winter adventure.
Getting Started: Casting On and Making a Ribbed Brim
Before you start knitting your wolf hat, you’ll need to cast on your stitches and create a ribbed brim. This initial step is crucial for ensuring the hat fits snugly and comfortably on your head.
To begin, you’ll need a set of knitting needles suitable for your chosen yarn weight and a skein of yarn in a color of your choice. Make sure to select a yarn that is soft and warm, as this will be essential for keeping your head cozy during colder weather.
Step 1: To cast on your stitches, create a slipknot by making a loop with your yarn and pulling the working end through. Place this slipknot onto one of your knitting needles and hold the needle with the slipknot in your dominant hand.
Step 2: With your other hand, hold the second knitting needle and use it to insert it into the slipknot from left to right. Wrap the yarn around the second needle in a counterclockwise direction.
Step 3: Using the second needle, pull the loop of yarn through the slipknot, creating your first cast-on stitch. Slide this stitch onto the first needle, and now you have two stitches on your needle.
Step 4: Repeat steps 2 and 3 until you have cast on the required number of stitches for your hat. The number of stitches may vary depending on your desired hat size and the pattern you are following.
Step 5: Once all the necessary stitches have been cast on, you can begin creating a ribbed brim. Ribbing is created by alternating between knit stitches and purl stitches. A common ribbing pattern is K1, P1, which means you knit one stitch, then purl one stitch, and continue this pattern to the end of the row.
Step 6: Continue working the ribbing pattern for several rows, depending on how wide you want your brim to be. The ribbing creates elasticity, allowing the hat to stretch comfortably around the forehead and provide a secure fit.
By following these instructions, you’ll be well on your way to creating a knitted wolf hat with a cozy and stylish ribbed brim. Enjoy the process and have fun customizing your hat with additional patterns or embellishments!
Knitting the Body of the Wolf Hat
Once you have completed the brim of the hat, it’s time to move on to knitting the body. This is where you’ll bring the wolf design to life and create the shape of the hat.
Step 1: To begin, you’ll need to switch to a larger needle size. This will help create a looser, more comfortable fabric for the main part of the hat. Check your pattern for the recommended needle size to use.
Step 2: Next, continue knitting in the round using the main color of yarn. This will form the base of the body. Depending on the size of your hat, you may need to knit several inches or until you reach the desired length.
Step 3: As you knit, keep an eye on your pattern to know when to start incorporating the wolf design. This may involve changing colors and using different stitch patterns to create the desired effect.
Step 4: Make sure to periodically try on the hat as you knit to ensure it’s fitting properly. This will help you adjust the length if needed and make any necessary modifications to the wolf design.
Step 5: Once you’ve completed the body of the hat, you can finish off any remaining stitches and weave in any loose ends. This will give your hat a polished, professional look.
Step 6: Finally, try on your finished wolf hat and admire your handiwork! Now you’re ready to take on the cold weather in style.
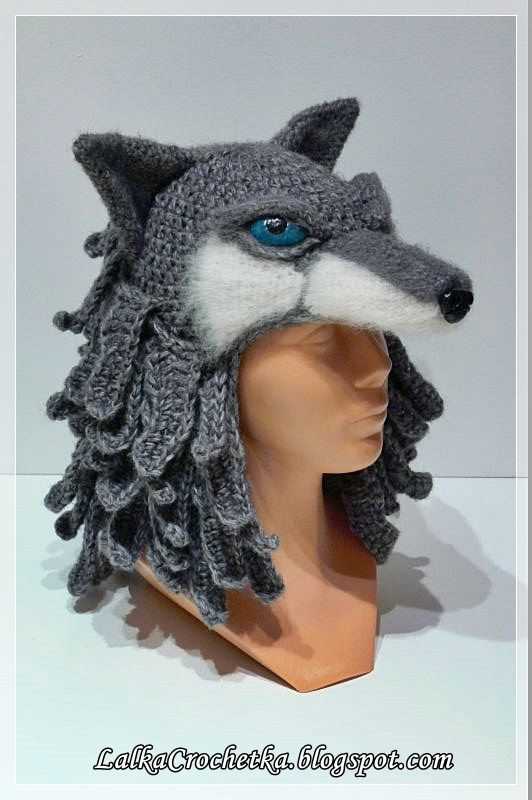
Creating the Wolf Ears: Shaping and Attaching
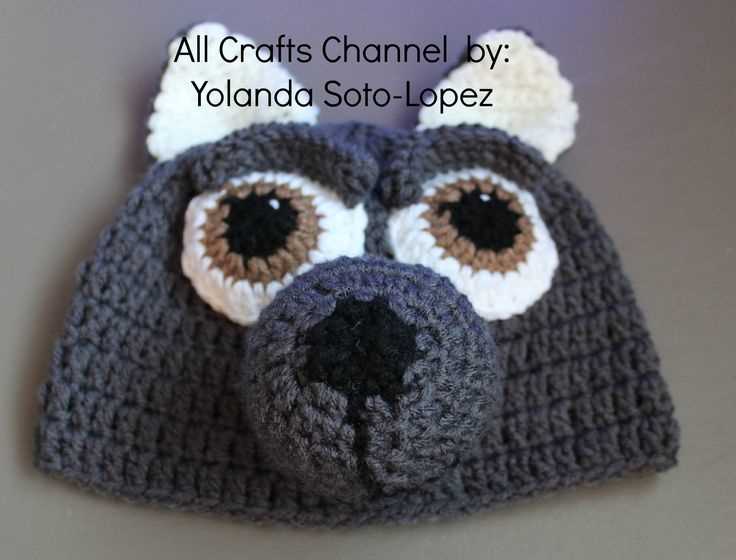
One of the most distinctive features of a wolf hat is its pointy ears. These ears can be easily created using a combination of shaping and attaching techniques. To get started, you will need to have two ear-shaped knitted pieces. These can either be created separately and stitched together later or knitted directly onto the main hat.
To shape the ears, begin by cutting a yarn tail and thread it through a tapestry needle. Starting from the bottom edge of one ear piece, insert the needle into the stitches along the edge, pulling gently to gather the stitches. Continue to do this until the ear is shaped to your liking, making sure to maintain the pointy shape. Once you are satisfied with the shaping, secure the gathered stitches by knotting the yarn tail to prevent them from unraveling. Repeat this process for the second ear piece.
Now that the ears are shaped, it’s time to attach them to the hat. Choose the desired placement for the ears and hold them in position on the hat. Thread a yarn tail through a tapestry needle and insert the needle from the inside of the hat through the base of one ear. Bring the needle through the hat and ear a few times, creating a secure attachment. Repeat this process for the second ear, making sure to align them properly with the first ear. Once both ears are securely attached, weave in any remaining yarn tails to finish off the hat.
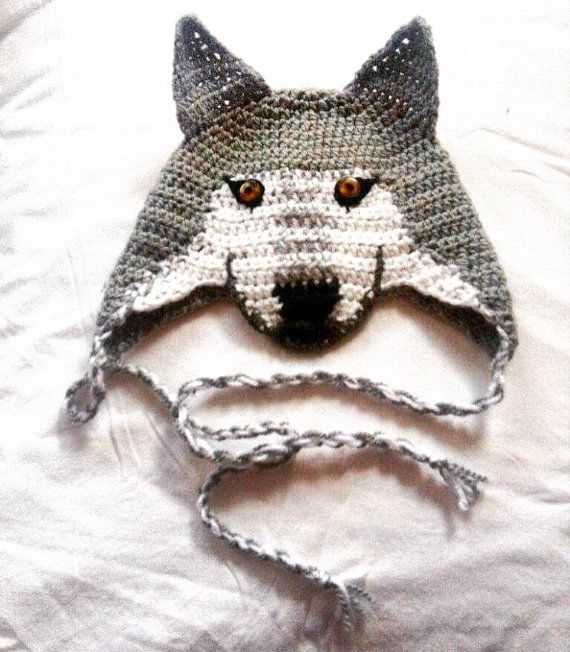
Adding Details: Eyes, Nose, and Mouth
When knitting a wolf hat, adding the details of the eyes, nose, and mouth can really bring the hat to life. These details are what make the hat recognizable as a wolf and add an extra level of cuteness and personality.
To create the eyes, you can use buttons or small pieces of felt or fabric. Sew them onto the hat, making sure they are evenly spaced and centered on the face. You can experiment with different sizes and colors to achieve the desired effect.
The nose is an important feature of a wolf’s face. You can create a simple triangular shape using black yarn or fabric. Sew it onto the hat, positioning it just below the eyes. This will give the hat a more realistic look and make it instantly recognizable as a wolf.
Finally, the mouth is where you can get creative. You can use black yarn or fabric to create a simple stitch for the mouth, or you can add felt or fabric to create a more detailed mouth with teeth. Play around with different shapes and sizes to find the look that you like best.
Remember, the key to adding the details of the eyes, nose, and mouth is to take your time and pay attention to the placement and symmetry. These small touches will make a big difference in the overall appearance of your knitted wolf hat.
Finishing Touches: Sewing and Weaving in Loose Ends
When it comes to knitting a wolf hat, the finishing touches are just as important as the main steps of the pattern. One crucial step in finishing your hat is sewing in loose ends. Throughout the knitting process, you may have noticed that there are loose ends of yarn hanging from your work. These loose ends need to be securely woven in to ensure that your hat holds its shape and has a professional finish.
Sewing in loose ends is a relatively simple process:
- Thread a tapestry needle with the loose end of yarn.
- Insert the needle into the back of the work, following the path of the yarn.
- Weave the needle in and out of the stitches, avoiding tugging or pulling too tightly.
- Cut the excess yarn, leaving a short tail.
- Repeat this process for each loose end of yarn.
By sewing in loose ends, you not only ensure the longevity of your hat but also create a neater appearance. Loose ends that are left unattended can come undone over time, causing potential unraveling of your hard work. Additionally, these loose ends can be unsightly and detract from the overall look of the hat.
Another technique for securing loose ends is backstitching:
- Thread a tapestry needle with the loose end of yarn.
- Insert the needle into the back of the work, close to where the loose end starts.
- Bring the needle through the front of the work a short distance away.
- Insert the needle back into the back of the work at the same point where the loose end starts.
- Repeat this back and forth motion, stitching over the loose end, for a few stitches.
- Cut the excess yarn, leaving a short tail.
- Repeat this process for each loose end of yarn.
When using the backstitching technique, the loose end of yarn is securely trapped within the stitches, providing extra durability. This method is particularly useful for areas of high tension or stress, such as the brim or any other areas that might experience frequent pulling.
Blocking and Shaping the Wolf Hat

Blocking and shaping your knitted wolf hat is an important step to ensure that it has the desired fit and appearance. This process involves wetting the hat, gently stretching and pinning it into shape, and allowing it to dry completely.
1. Wetting the Hat: Start by soaking your knitted hat in lukewarm water. You can add a small amount of mild detergent or wool wash to the water if desired. Gently agitate the hat in the water to ensure that it is fully saturated.
2. Stretching and Pinning: Once the hat is wet, carefully remove it from the water and gently squeeze out excess moisture without wringing or twisting it. Lay the hat flat on a clean towel and use your hands to shape it into the desired size and form.
Next, place the hat on a blocking board or a clean, dry towel. Use rust-resistant pins to secure the hat into shape, making sure to pin it evenly and symmetrically. Pay attention to any specific shaping instructions provided in the wolf hat pattern, such as elongating the ears or creating a snug fit around the face.
3. Allowing to Dry: Once the hat is pinned into shape, allow it to air dry completely. This can take a couple of days, depending on the humidity level in your environment. Avoid exposing the hat to direct sunlight or excessive heat, as this can cause the fibers to become brittle or fade in color.
After the hat is fully dry, carefully remove the pins and try it on to make sure it fits as desired. If necessary, make any additional adjustments to the shaping before wearing or gifting your knitted wolf hat.
Knitting a Matching Scarf for Your Wolf Hat
When you have finished knitting your adorable wolf hat, it’s time to complete the look with a matching scarf. A matching scarf will not only keep you warm and cozy during the winter months but also add a stylish touch to your outfit.
To begin knitting your matching scarf, you will need to gather the necessary materials. These include the same type and color of yarn you used for your wolf hat, knitting needles in an appropriate size, and a tapestry needle for weaving in the ends.
Step 1: Choosing the Right Pattern

There are countless scarf knitting patterns available, so it’s important to choose one that complements your wolf hat. Look for patterns that incorporate similar stitches or motifs to create a cohesive look. You can also consider a simpler pattern to let the wolf hat be the focal point.
Step 2: Casting On and Knitting
Once you have selected your pattern, cast on the desired number of stitches onto your knitting needles. Follow the instructions provided by the pattern to start knitting your scarf. Remember to maintain the same tension and gauge as you did for the wolf hat to ensure the pieces match.
Work row by row, following the pattern’s instructions until the scarf reaches your desired length. Keep in mind that scarves are generally longer than hats, so plan accordingly. You can measure the length against your body or try it on as you go to make adjustments if needed.
Step 3: Finishing Touches

Once you have reached the desired length, it’s time to bind off your stitches. Follow the pattern’s instructions for binding off, ensuring a neat and even edge. Next, use a tapestry needle to weave in any loose yarn ends, securing them in place to prevent unraveling.
Now it’s time to put on your wolf hat and wrap your matching scarf around your neck. You’ll be ready to face the chilly winter weather with a cozy and fashionable ensemble!
Customizing Your Wolf Hat: Color and Pattern Options
When it comes to customizing your wolf hat, you have a variety of color and pattern options to choose from. Whether you want to match your hat with a specific outfit or you simply prefer certain colors, there is a wide range of choices available to suit your personal style.
Color Options: The color of your wolf hat can make a big difference in its overall appearance. From classic gray and black to vibrant blues and reds, you can find a color that suits your preferences. Earth tones like brown and tan can give your hat a more natural and rustic look, while bold colors like purple or neon green can make a statement and add a fun pop of color to your outfit.
Pattern Options: In addition to color, you can also choose from various patterns for your wolf hat. A popular choice is a simple solid color, which allows the wolf design to stand out. However, if you prefer something more unique, there are patterns available that incorporate other elements such as stripes, chevron, or even animal prints. These patterns can add visual interest and make your hat even more eye-catching.
Combining Colors and Patterns: One way to make your wolf hat truly personalized is to combine different colors and patterns. For example, you could choose a hat with a solid color base and then add a striped or patterned band around the brim. This creates a unique look that reflects your individual style.
Mix and Match: Don’t be afraid to mix and match different colors and patterns to create a hat that is truly one-of-a-kind. You can experiment with different combinations until you find the perfect design that speaks to you. Remember, the beauty of a custom hat is that it can be as unique and personal as you want it to be.
Color and Pattern Inspiration:

- Woodland: Choose earthy tones like brown, green, and beige for a hat that blends in with nature.
- Black and White: For a classic and timeless look, opt for a hat in black and white with a simple wolf design.
- Colorful and Bold: If you’re looking to make a statement, go for bright and vibrant colors like neon yellow or hot pink.
- Animal Print: Embrace your wild side with a wolf hat featuring animal print patterns like leopard or zebra.
- Stripes and Chevron: Add some geometric flair to your hat with patterns like stripes or chevron.
Remember, customizing your wolf hat is all about expressing your individuality and personal style. Have fun exploring different color and pattern options to create a hat that is uniquely yours.
Tips and Tricks for Knitting a Perfect Wolf Hat
If you’re looking to knit a wolf hat, here are some tips and tricks to help you create the perfect finished product. Whether you’re a beginner or an experienced knitter, these suggestions will guide you through the process and ensure that your wolf hat turns out beautifully.
1. Choose the right yarn:

When knitting a wolf hat, it’s important to select a yarn that is suitable for the project. Consider using a soft and warm yarn that mimics the texture of a wolf’s fur. A gray or brown yarn with speckles can create a realistic effect. Additionally, opt for a yarn that is easy to work with and won’t split or unravel easily.
2. Use the right needle size:
The needle size you choose can have a significant impact on the final appearance of your wolf hat. If you want a tighter and denser fabric, use smaller needles. For a looser and more relaxed look, opt for larger needles. Make sure to follow the pattern’s recommended gauge to ensure that your hat fits properly.
3. Pay attention to stitch tension:
Consistent stitch tension is crucial for achieving a polished and professional look for your wolf hat. Take the time to practice and adjust your tension as needed before starting the project. If your stitches are too tight, your hat may turn out smaller than intended. Conversely, loose stitches can result in a floppy and ill-fitting hat.
4. Incorporate intarsia or stranded colorwork:

To create a wolf design on your hat, consider incorporating intarsia or stranded colorwork techniques. Intarsia involves using separate bobbins of yarn for each color block, while stranded colorwork involves carrying multiple yarn colors across the row. Follow a chart or pattern to properly execute these techniques and create a visually striking wolf motif.
5. Add finishing touches:
To enhance the overall look of your wolf hat, consider adding some finishing touches. This can include attaching faux fur or yarn pom-poms for ears, embroidering eyes and a nose onto the hat, or even adding a small felt wolf patch. These details can bring your wolf hat to life and make it stand out.
By following these tips and tricks, you’ll be well-equipped to knit a perfect wolf hat. Remember to stay patient, practice your knitting skills, and enjoy the creative process. Happy knitting!
Sharing Your Finished Wolf Hat: Showcasing Your Work

After spending time and effort knitting your very own wolf hat, you may be eager to show off your finished creation to the world. Sharing your work not only allows you to showcase your skills and creativity but also inspires and motivates others to try their hand at knitting their own unique pieces. There are several ways you can share your finished wolf hat and gain recognition for your talent.
One of the easiest ways to share your work is through social media platforms. You can create a post on Instagram, Facebook, or Twitter and upload a photo of yourself wearing the wolf hat. Make sure to include relevant hashtags such as #knitting, #wolfhat, or #handmade to attract the attention of fellow knitters and enthusiasts. Additionally, you can join knitting-related groups or communities online and share your work there. This allows you to connect with like-minded individuals who share your passion for knitting.
If you prefer a more personal touch, you can organize a knitting showcase or participate in knitting competitions. Reach out to local knitting or craft stores to see if they would be interested in hosting an event where knitters can display and share their finished projects. This gives you the opportunity to meet other knitters in your area and receive feedback on your work. Alternatively, you can enter your wolf hat in knitting competitions either online or in person. This allows you to compete with other talented knitters and potentially win recognition for your skill.
No matter how you choose to share your finished wolf hat, remember to take pride in your work and enjoy the process of showcasing your talent. Your creativity, dedication, and craftsmanship deserve to be celebrated, and by sharing your work, you can inspire others to explore their own knitting abilities.
Q&A:
Where can I find a knitted wolf hat pattern?
You can find knitted wolf hat patterns on various websites such as Ravelry, Etsy, and LoveCrafts. You can also try searching for patterns on knitting blogs or forums.
Are there any free knitted wolf hat patterns available?
Yes, there are free knitted wolf hat patterns available online. You can find them on websites like Ravelry or by searching for “free knitted wolf hat pattern” on a search engine.
What materials do I need to knit a wolf hat?
To knit a wolf hat, you will need yarn in colors of your choice (including gray for the wolf’s fur), knitting needles in the correct size for your yarn, a tapestry needle for sewing seams, and optional extras such as buttons for the eyes or pompoms for the ears.
Are wolf hat patterns suitable for beginners?
Some wolf hat patterns may be suitable for beginners, especially if they are labeled as easy or beginner-friendly. However, it is always a good idea to check the skill level required for a pattern before starting, as some may be more advanced or require specific techniques.
Can I modify a wolf hat pattern to fit different sizes?
Yes, you can often modify a wolf hat pattern to fit different sizes by adjusting the number of stitches or using a different size of knitting needles. You may also need to make adjustments to the length or width of the hat. It is recommended to check the pattern instructions for any specific guidance on modifying sizes.
Where can I find a knitted wolf hat pattern?
You can find a knitted wolf hat pattern on various knitting websites, such as Ravelry or Etsy. Additionally, you can also try searching for patterns in knitting books or magazines.