
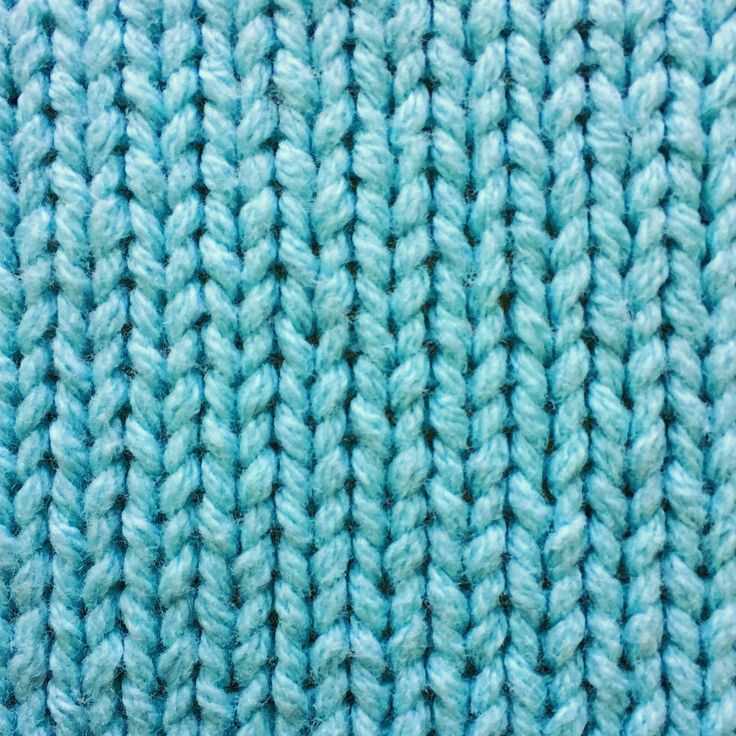
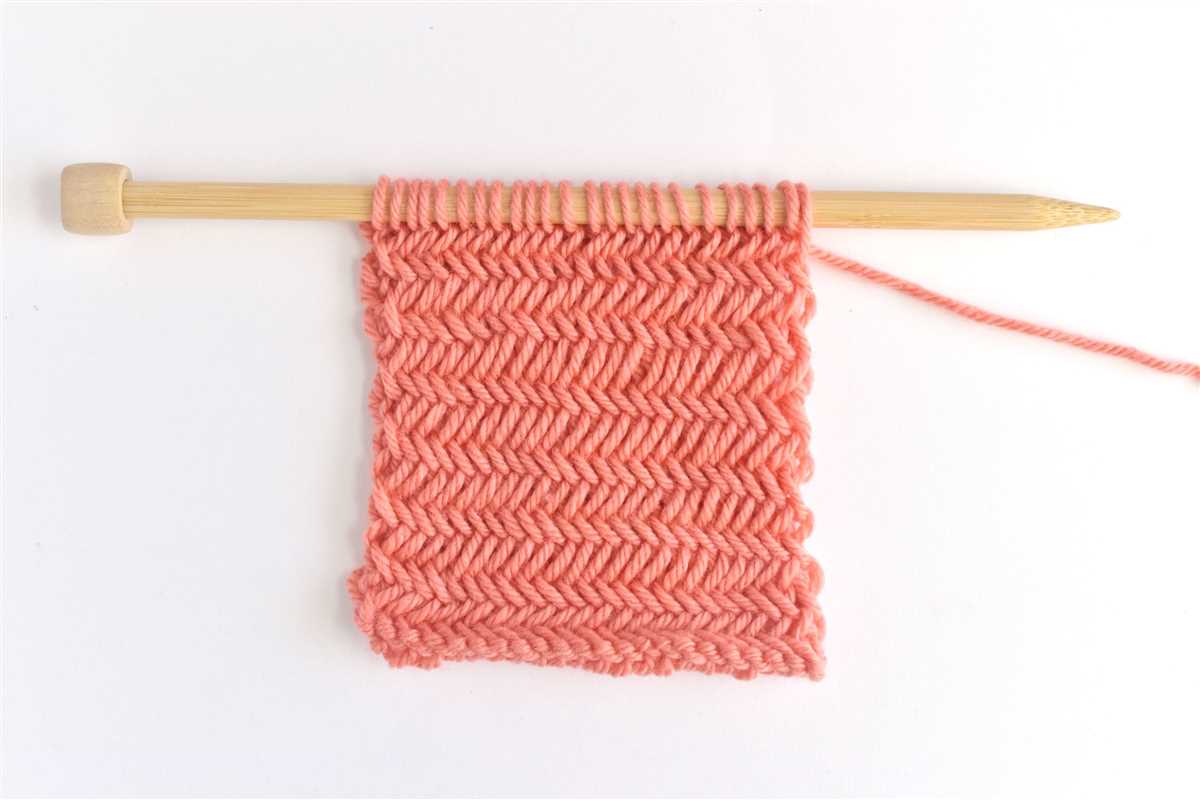
Herringbone stitch is a classic knitting pattern that creates an intricate texture resembling the bones of a fish. It is a beautiful and versatile stitch that can be used to create all kinds of projects, from scarves and hats to sweaters and blankets. The pattern is created by alternating knit and purl stitches in a specific sequence, resulting in a stunning, woven-like design.
One of the most appealing aspects of the herringbone stitch is its ability to create depth and dimension in your knitting. The diagonal lines formed by the stitch pattern add visual interest and make your knitted fabric look more intricate and complex. It’s a great stitch for those who want to take their knitting skills to the next level and try something new.
Another advantage of the herringbone stitch is its versatility. You can use it with different types of yarn, from chunky to fine, and experiment with various color combinations to create unique and personalized designs. The stitch is also reversible, which means that the pattern looks the same on both sides, making it perfect for scarves and other accessories that will be seen from all angles.
What is the herringbone stitch?

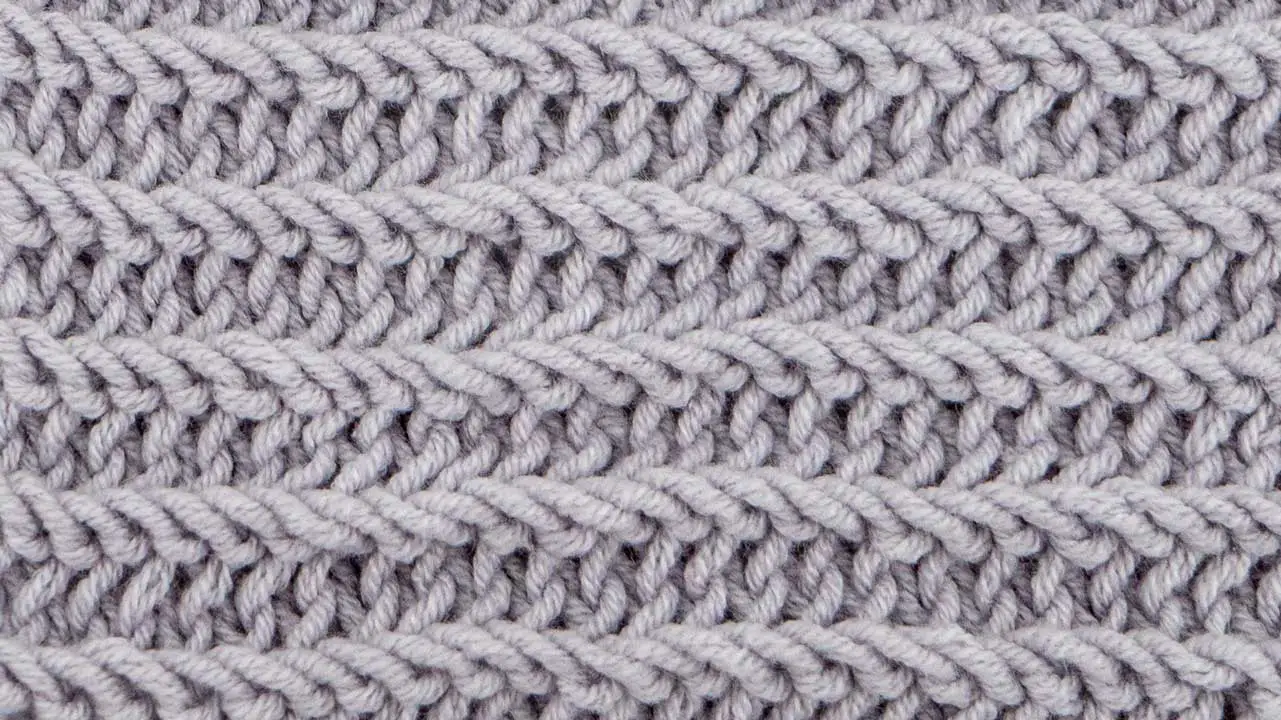
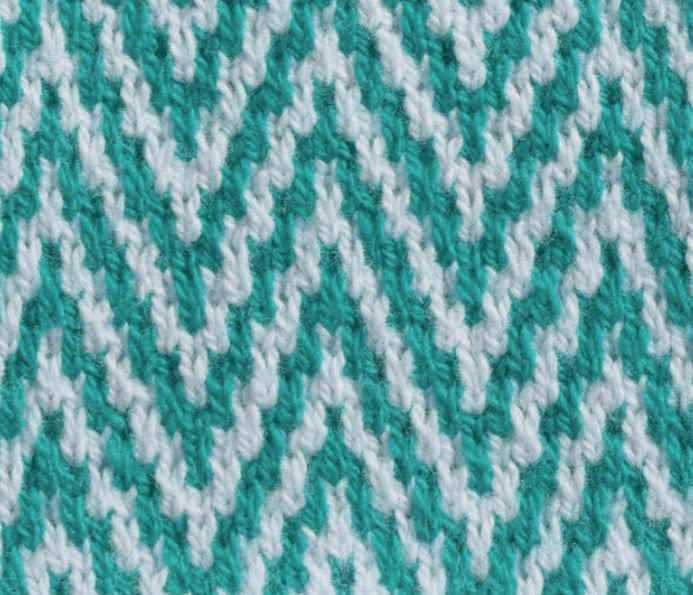
The herringbone stitch is a popular knitting pattern that creates a textured fabric with a striking zigzag pattern. This stitch is named after the herringbone pattern frequently seen in fish bones, as it mimics the interlocking structure of these bones.
To create the herringbone stitch, knitters alternate between knitting and slipping stitches. This creates a pattern of diagonal lines that resemble the bones of a herring. The result is a beautifully textured fabric that adds visual interest to any knitting project.
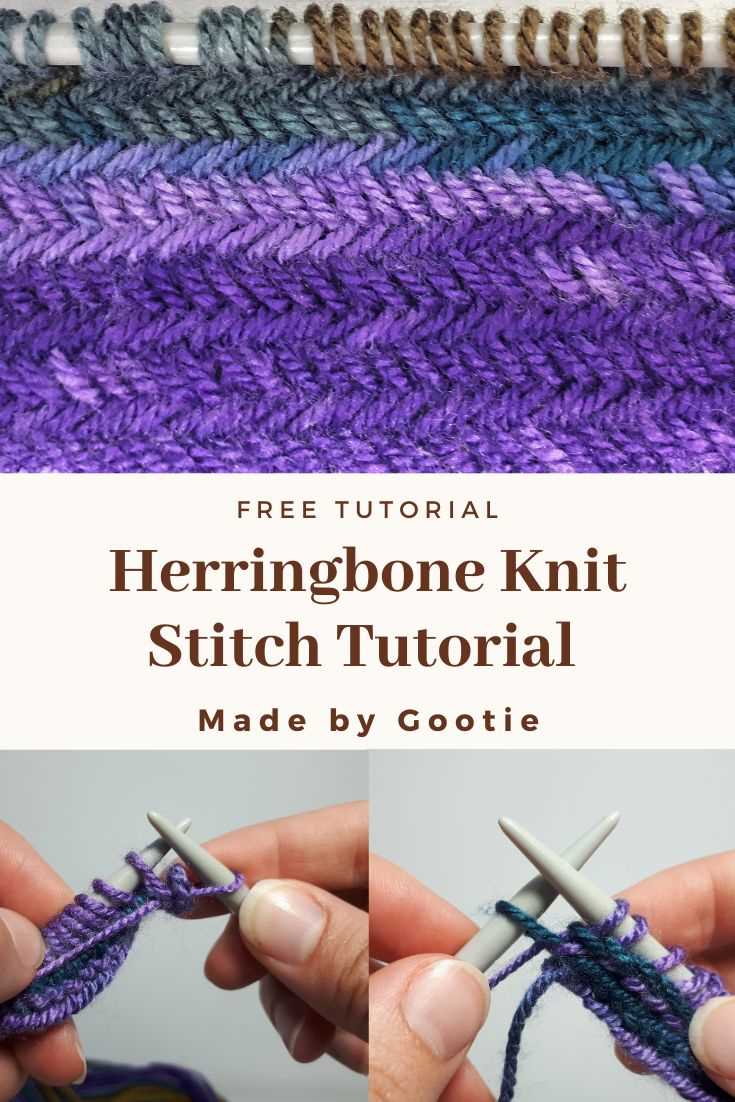
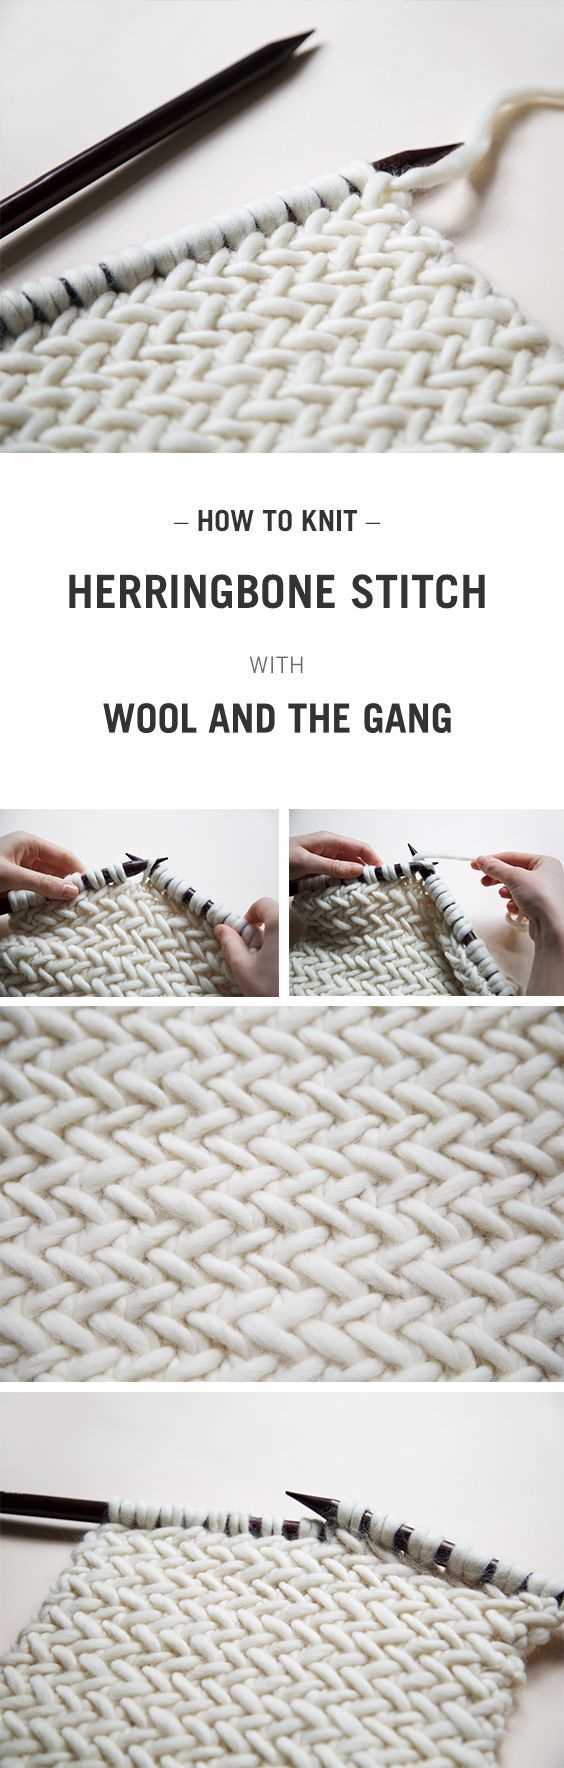
How to knit the herringbone stitch:
- Start by casting on an even number of stitches.
- Row 1: *Knit 1, slip 1 with yarn in front (wyif). Repeat from * across the row.
- Row 2: *Knit 1, slip 1 with yarn in back (wyib). Repeat from * across the row.
- Repeat rows 1 and 2 until you reach your desired length.
- Finish by binding off all stitches.
This stitch pattern is versatile and can be used in a variety of knitting projects, such as scarves, blankets, and sweaters. The herringbone stitch adds a sophisticated touch to any design and is a great way to elevate your knitting skills.
History of the herringbone stitch
The herringbone stitch is a popular knitting pattern that has been used for centuries. Its distinctive V-shaped pattern resembles the skeleton of a herring fish, hence its name. The origin of the herringbone stitch is believed to date back to ancient Egypt, where it was used to create intricate and decorative patterns on textiles.
In addition to Egypt, the herringbone stitch also has roots in other ancient civilizations, such as Greece and Rome. It was often used to create durable and warm garments, as the tight weave of the stitch helped to trap heat and protect against the cold. The herringbone stitch was also commonly used in tapestry weaving, adding texture and visual interest to the finished pieces.
Over time, the herringbone stitch spread across different cultures and became a staple in knitting and weaving traditions. In Europe, it became particularly popular during the Middle Ages, when it was used to create garments for the nobility. In Asia, the herringbone stitch was used in the creation of traditional textiles, such as Japanese kimono and Indian saris.
The herringbone stitch continued to evolve and adapt to different knitting techniques and styles. In the 20th century, it gained prominence in the fashion industry, with designers incorporating the herringbone pattern into their creations. Today, the herringbone stitch remains a favorite among knitters and can be found in a variety of knitting patterns, including scarves, sweaters, and blankets.
Benefits of using the herringbone stitch in knitting patterns

The herringbone stitch is a versatile and visually appealing knitting technique that can add texture and interest to any project. Whether you are working on a scarf, sweater, or blanket, incorporating the herringbone stitch can elevate your design and make it stand out.
One of the main benefits of using the herringbone stitch is its unique pattern. The stitch creates a diagonal design that resembles the bones of a herring, hence its name. This distinctive texture adds depth and dimension to your knitting, giving it a professional and polished look.
Textural Appeal
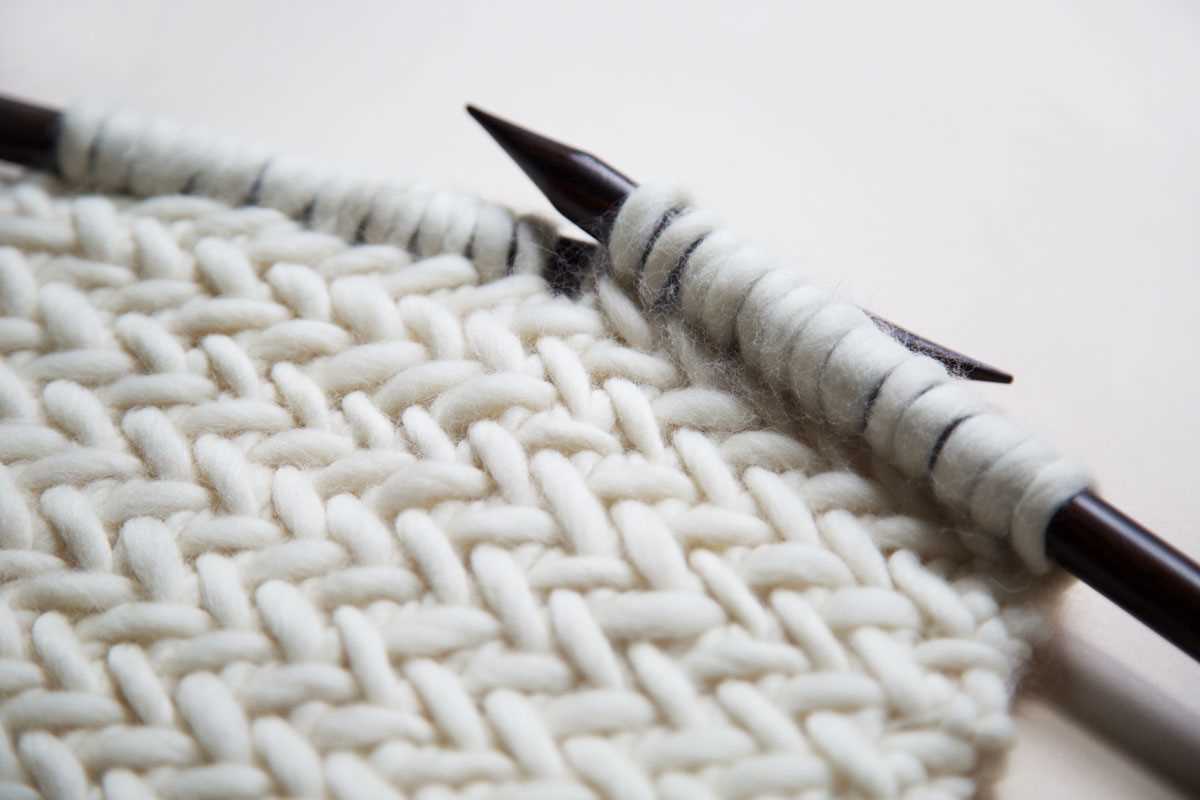
The herringbone stitch’s textural appeal is one of its most striking features. The interlocking pattern creates a visually interesting surface that is both soft and cozy. When worked in a chunky yarn, the herringbone stitch stands out even more, making it perfect for winter accessories such as hats and scarves.
Another advantage of using the herringbone stitch is that it is relatively easy to learn and execute, making it accessible to knitters of all skill levels. Once you have mastered the basic steps, you can experiment with different color combinations and yarn weights to create your unique designs. The herringbone stitch also lends itself well to incorporating other stitch patterns, such as cables or lace, allowing you to create even more intricate and complex designs.
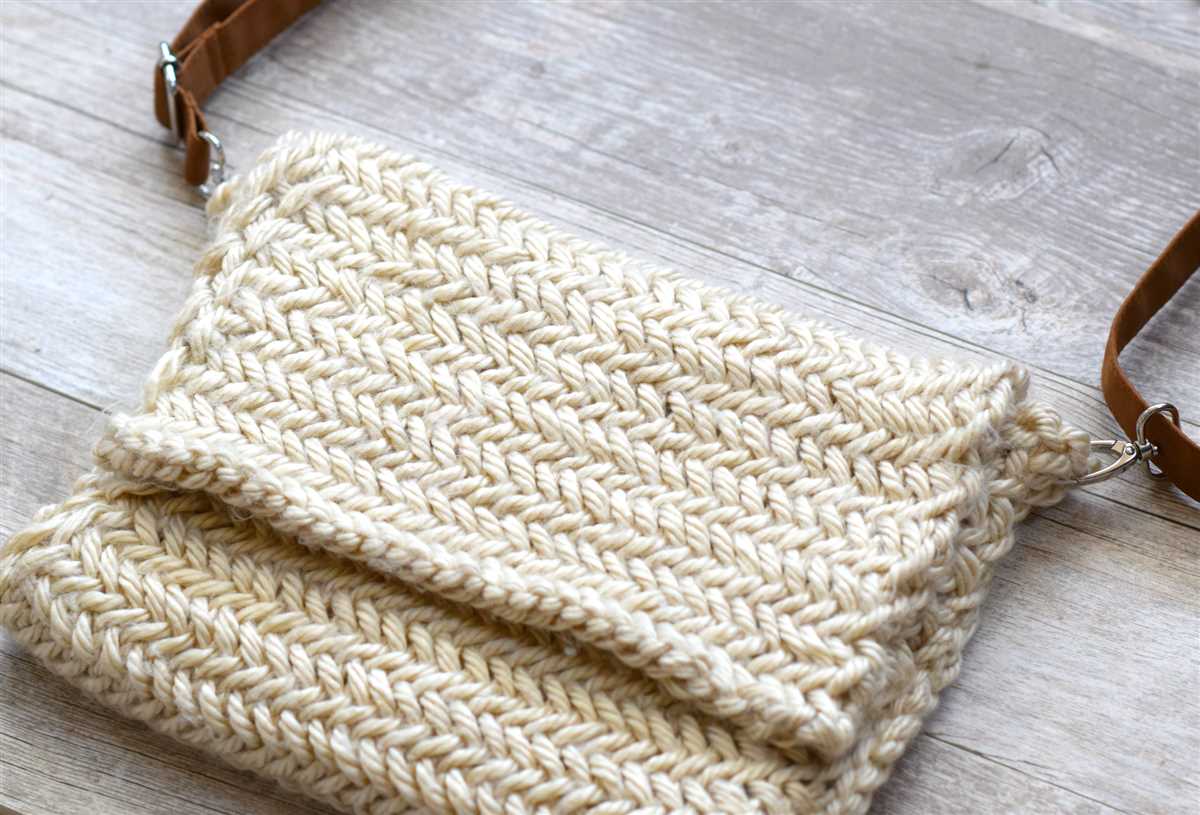
Versatility
The herringbone stitch is highly versatile and can be used in a variety of knitting projects. Its tight and dense fabric makes it ideal for items that require structure and durability, such as bags or home decor items like pillows and blankets. On the other hand, if you use a lighter weight yarn, you can create delicate and lacy designs, perfect for shawls or lightweight garments.
In conclusion, the herringbone stitch is a valuable addition to any knitter’s repertoire. Its unique pattern, textural appeal, and versatility make it a popular choice for a wide range of knitting projects. Whether you are a beginner or experienced knitter, incorporating the herringbone stitch can enhance your designs and showcase your skills.
Popular knitting patterns using the herringbone stitch
The herringbone stitch is a popular knitting technique that creates a beautiful textured pattern resembling the bones of a fish. It adds depth and interest to any project, making it a favorite among knitters. Here are some popular knitting patterns that showcase the herringbone stitch:
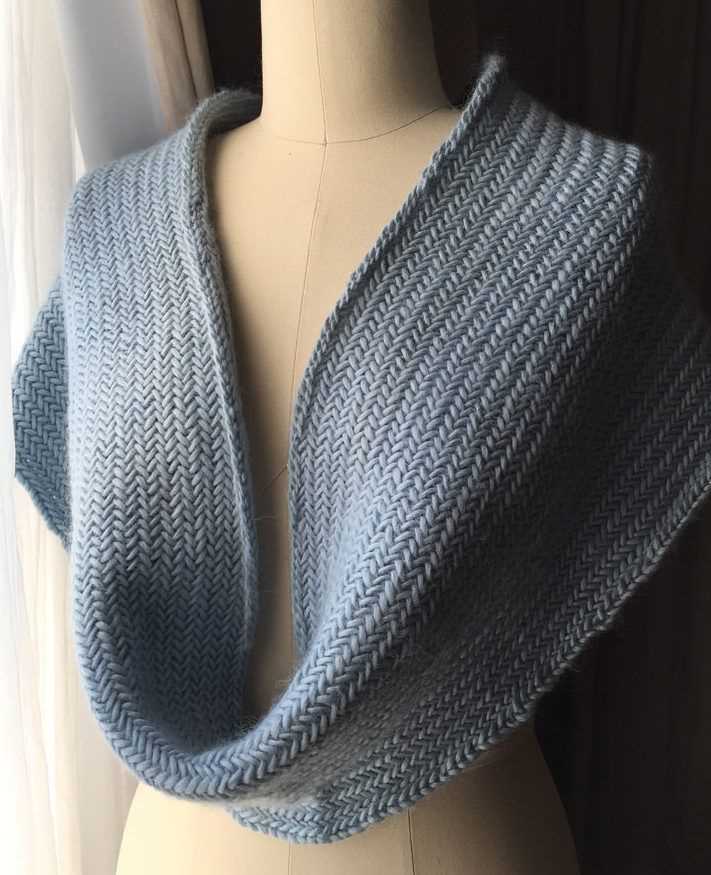
Herringbone Scarf: This stylish scarf is perfect for keeping warm in colder weather. The herringbone stitch gives it a classic, sophisticated look. Knit in a soft, warm yarn, this scarf will not only keep you cozy but also add a touch of elegance to your outfit.
- Herringbone Hat: Add some flair to your winter wardrobe with a herringbone stitch hat. The herringbone pattern adds a unique texture and visual interest to this essential cold-weather accessory. Choose a contrasting color for the brim or add a pompom for a fun twist.
- Herringbone Blanket: Create a cozy and luxurious blanket using the herringbone stitch. The pattern creates a beautiful, textured fabric that is not only warm but also visually appealing. Whether you choose a single color or multiple shades, this blanket is sure to become a favorite for snuggling up on the couch.
- Herringbone Sweater: Elevate your knitwear game with a herringbone stitch sweater. This pattern adds a touch of sophistication to a classic wardrobe staple. Opt for a lightweight yarn for a versatile piece that can be worn year-round or choose a chunkier yarn for a cozy winter sweater.
These are just a few examples of the many knitting patterns that make use of the herringbone stitch. Whether you’re a beginner or an experienced knitter, there’s a herringbone project out there for you. So grab your needles and yarn, and start creating beautiful textured pieces with the herringbone stitch!
Tips and Tricks for Knitting the Herringbone Stitch
Knitting the herringbone stitch can add a beautiful texture and visual interest to your projects. However, it can be a bit tricky to get the hang of at first. Here are some tips and tricks to help you master this unique stitch:
1. Choose the Right Yarn
When knitting the herringbone stitch, it’s important to choose a yarn that has good stitch definition. A smooth, medium-weight yarn works best, as it will highlight the stitch pattern and make it easier to see your progress. Avoid using fuzzy or textured yarns, as they can obscure the herringbone texture.
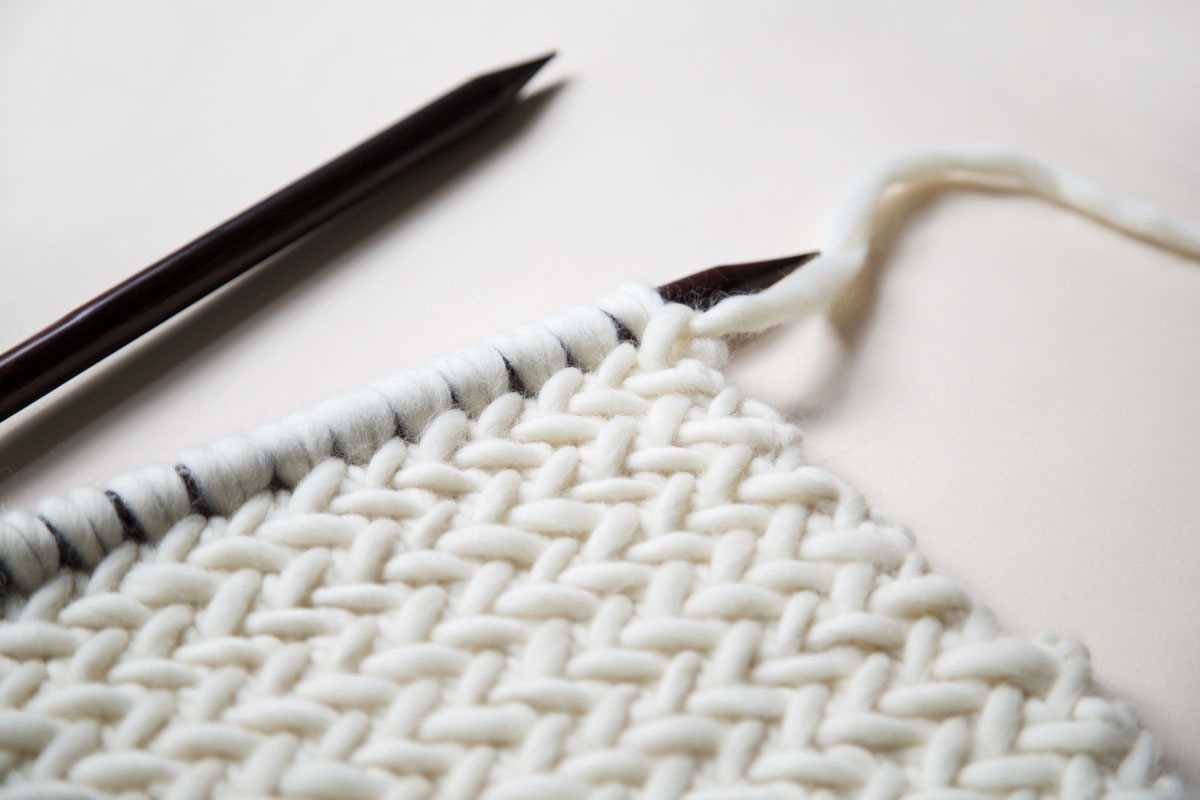
2. Practice with a Swatch
Before diving into a large project using the herringbone stitch, it’s a good idea to practice with a swatch. This will help you familiarize yourself with the stitch pattern and allow you to make any necessary adjustments to your tension. Once you feel comfortable with the stitch, you can confidently tackle your desired project.
3. Keep Your Stitches Loose
One common mistake when knitting the herringbone stitch is making the stitches too tight. This can cause the herringbone pattern to become distorted and difficult to distinguish. To avoid this, make sure to keep your tension loose and relaxed. You may even want to use larger needles than recommended for the yarn to achieve a looser gauge.
4. Use Stitch Markers
To keep track of the herringbone stitch pattern and ensure that you’re working the correct stitches, it can be helpful to use stitch markers. Place them between repeats of the pattern, allowing you to easily count your stitches and catch any mistakes before they become too difficult to fix.
5. Have Patience
Knitting the herringbone stitch requires attention to detail and a bit of patience. It may take some time to get the hang of the pattern and achieve consistent tension. Don’t get discouraged if your first few attempts don’t turn out perfectly. With practice and perseverance, you’ll soon be able to create stunning herringbone stitch projects with ease.
6. Block Your Finished Project

After completing your herringbone stitch project, blocking is essential to enhance the stitch definition and shape the fabric. Wet blocking works well for most yarns, but be sure to check the washing instructions for your chosen yarn. Blocking will help your project look its best and give it a professional finish.
By following these tips and tricks, you’ll be well on your way to knitting beautiful herringbone stitch projects that showcase this unique and versatile stitch pattern.
How to Read a Knitting Pattern for the Herringbone Stitch
The herringbone stitch is a popular knitting pattern that creates a beautiful textured fabric. If you’re new to knitting or have never worked with this stitch before, reading a knitting pattern for the herringbone stitch can seem intimidating. However, with a little practice and understanding of the terminology, you’ll be able to follow the pattern and create stunning herringbone stitch projects.
1. Stitch Abbreviations
When reading a knitting pattern for the herringbone stitch, it’s important to familiarize yourself with the stitch abbreviations. These abbreviations are typically listed at the beginning of the pattern and provide a shorthand way of referring to the stitches used. For the herringbone stitch, you may see abbreviations such as “k” for knit, “p” for purl, “sl” for slip, and “yo” for yarn over.
2. Repeat Pattern Instructions
Next, look for the repeat pattern instructions in the knitting pattern. The herringbone stitch often involves repeating a set of stitches over a certain number of rows. For example, the pattern might instruct you to knit a certain number of stitches, followed by a yarn over, and then repeat this sequence until the end of the row. Make sure to pay attention to the number of times you need to repeat the pattern and any variations that may occur at the beginning or end of a row.
3. Stitch Count and Gauge
In order to ensure that your herringbone stitch project turns out the right size, it’s important to pay attention to the stitch count and gauge specified in the pattern. The stitch count refers to the total number of stitches you should have on your needles at any given point in the pattern. The gauge refers to the number of stitches and rows per inch that you should aim for in order to achieve the desired size and fit of the finished project. Make sure to check your gauge before starting the pattern and adjust your needle size if necessary.
4. Special Techniques
Lastly, be on the lookout for any special techniques or stitches that may be required for the herringbone stitch pattern. This could include things like decreasing or increasing stitches, working with multiple colors, or using a specific cast-on or bind-off method. If you’re unfamiliar with any of these techniques, consult a knitting reference book or online tutorial for more information before attempting the pattern.
In conclusion, reading a knitting pattern for the herringbone stitch may seem daunting at first, but with a little familiarity with stitch abbreviations, repeat pattern instructions, stitch count and gauge, and any special techniques, you’ll be able to confidently follow the pattern and create stunning herringbone stitch projects.
Common mistakes to avoid when knitting the herringbone stitch
Knitting the herringbone stitch can be challenging, especially for beginners. To ensure a successful project, it’s important to be aware of common mistakes and how to avoid them. Here are some key things to keep in mind when working on the herringbone stitch:
1. Miscounting stitches:
One of the most common mistakes knitters make when working on the herringbone stitch is miscounting stitches. This can lead to an uneven pattern and an overall messy look. To avoid this, make sure to pay close attention to the number of stitches in each row and double-check your work before moving on to the next row.
2. Incorrect tension:
Tension plays a crucial role in achieving a neat and uniform herringbone stitch. When knitting too tightly, the stitches can become difficult to work with and the fabric may become stiff. On the other hand, knitting too loosely can result in uneven stitches and an overall sloppy appearance. To ensure the right tension, practice knitting the herringbone stitch on a smaller swatch before starting your main project, and adjust your tension accordingly.
3. Not slipping stitches correctly:
The herringbone stitch requires slipping stitches to create the characteristic diagonal pattern. It’s important to slip the stitches correctly, either purlwise or knitwise, depending on the pattern instructions. Misplaced or twisted slipped stitches can disrupt the pattern and make it difficult to continue the stitch correctly. Take your time to ensure that the slipped stitches are positioned and oriented correctly before moving on.
4. Not using a lifeline:
The herringbone stitch can be complex and time-consuming, so it’s a good idea to use a lifeline. A lifeline is a spare piece of yarn or thread that is threaded through a row of stitches. It acts as a safety net, allowing you to easily frog (undo) your work if you make a mistake. By regularly inserting a lifeline, you can minimize the risk of having to start over from the beginning if something goes wrong.
Avoiding these common mistakes will help you achieve beautiful and consistent herringbone stitch projects. Remember to take your time, pay attention to detail, and practice on smaller swatches before committing to larger projects. With patience and perseverance, you’ll master the herringbone stitch and create stunning knitted items!
Variations of the Herringbone Stitch
The herringbone stitch is a popular knitting technique that creates a beautiful, textured fabric with a distinctive zigzag pattern. While the traditional herringbone stitch is commonly used in knitting patterns, there are also several variations of this stitch that can add even more interest and depth to your projects.
Reversible Herringbone Stitch
One variation of the herringbone stitch is the reversible herringbone stitch. This stitch creates a fabric that looks the same on both sides, making it perfect for scarves, blankets, and other items that will be seen from both sides. To create the reversible herringbone stitch, you will need to alternate between knitting and slipping stitches on both the right and wrong sides of the fabric. This creates a dense, textured fabric that is warm and cozy.
Herringbone Lace Stitch
If you’re looking to add a touch of elegance to your knitting projects, the herringbone lace stitch is a great choice. This variation combines the classic herringbone pattern with lace stitches to create a delicate, openwork fabric. To create the herringbone lace stitch, you will need to incorporate yarn overs and decreases into the traditional herringbone stitch pattern. This creates eyelets and creates a lacy effect that is perfect for shawls, lightweight sweaters, and other garments.
Cabled Herringbone Stitch
For knitters who love cables, the cabled herringbone stitch is a must-try variation. This stitch combines the herringbone pattern with cable twists to create a richly textured fabric. To create the cabled herringbone stitch, you will need to incorporate cable crosses into the traditional herringbone stitch pattern. This creates raised, intertwining cables that add depth and dimension to your knitting projects. The cabled herringbone stitch is ideal for cozy sweaters, scarves, and accessories.
- Reversible Herringbone Stitch
- Herringbone Lace Stitch
- Cabled Herringbone Stitch
Inspiration for incorporating the herringbone stitch into your knitting projects
The herringbone stitch is a versatile and visually appealing knitting technique that can add texture and interest to your projects. Whether you’re knitting a sweater, hat, or scarf, incorporating the herringbone stitch can take your project to the next level. Here are some ideas and inspiration to get you started:
1. Herringbone Stitch Sweater
A herringbone stitch sweater is a classic and timeless choice. The herringbone pattern can be used to create subtle texture or bold and graphic designs, depending on your preference. Experiment with different colors and yarn weights to create a unique and personalized sweater.
2. Herringbone Stitch Hat
A herringbone stitch hat is a great way to showcase the intricate herringbone pattern in a smaller project. Choose a cozy yarn and experiment with different stitch counts and decreases to create a hat that fits perfectly and highlights the beauty of the herringbone stitch.
3. Herringbone Stitch Scarf
A herringbone stitch scarf is a classic accessory that can add sophistication to any outfit. Experiment with different yarns and stitch counts to create a scarf that is soft, warm, and drapes beautifully. The herringbone stitch will create a textured and visually interesting design that will make your scarf stand out.
4. Herringbone Stitch Blanket
A herringbone stitch blanket is a great project for showcasing the beauty of this stitch. Whether you choose to knit a baby blanket or a large throw, the herringbone stitch will add elegance and charm to your project. Experiment with different colors and yarns to create a blanket that is both visually stunning and cozy.
By incorporating the herringbone stitch into your knitting projects, you can create unique and eye-catching pieces that will stand out. Whether you choose to knit a sweater, hat, scarf, or blanket, the herringbone stitch will add texture and visual interest to your project. So grab your needles, pick out some beautiful yarn, and let the herringbone stitch inspire your next knitting adventure.