
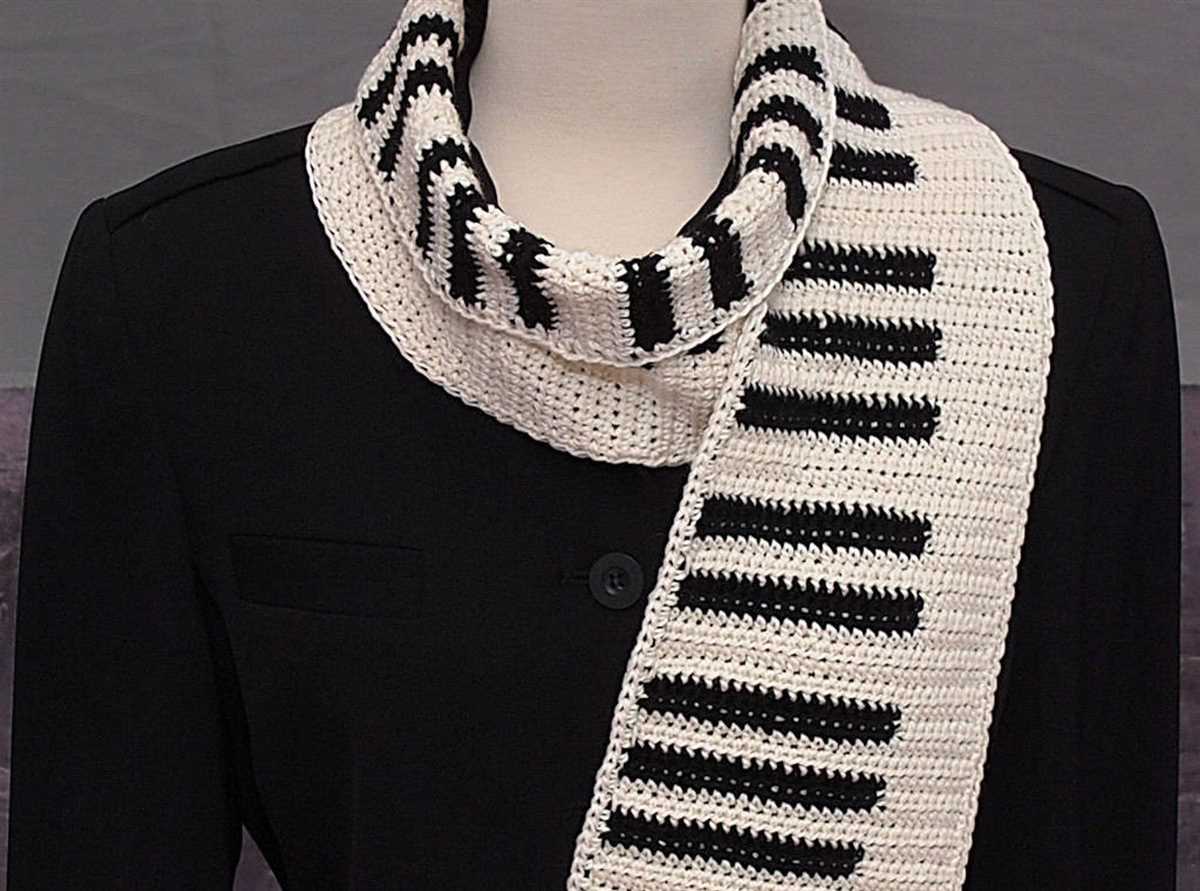
If you’re a music lover and a knitting enthusiast, this piano scarf knitting pattern is perfect for you! This pattern is a fun and creative way to show off your love for music and keep warm during the colder months. Whether you’re a professional pianist or just a fan of the instrument, this scarf will add a touch of musicality to your wardrobe.
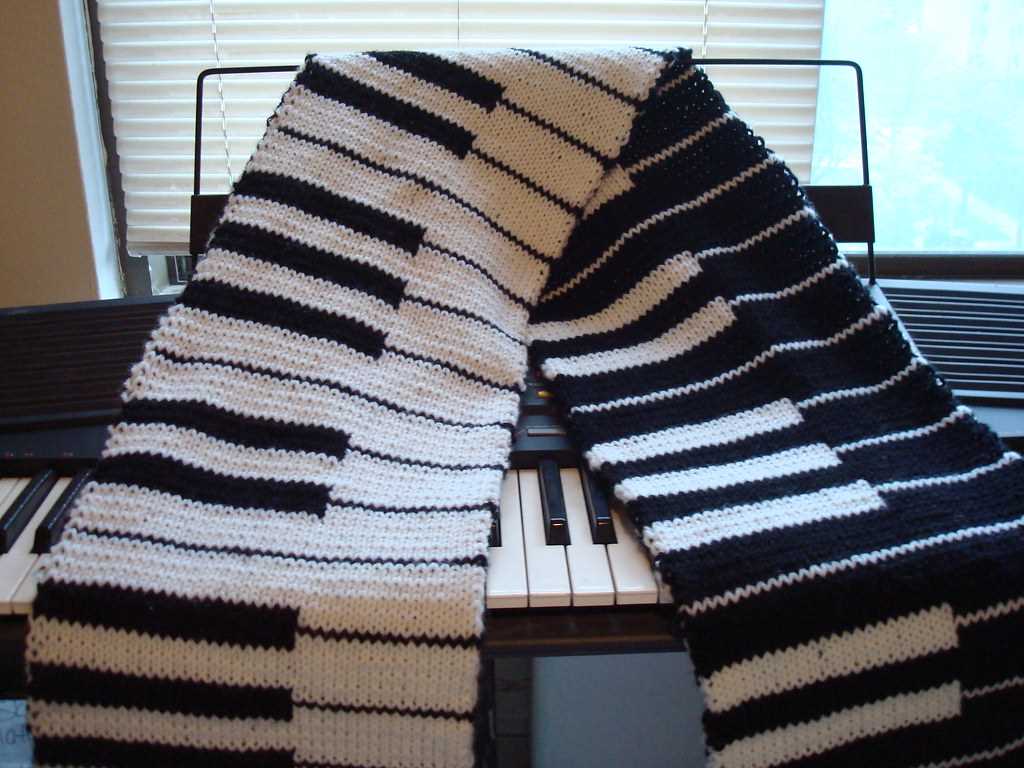
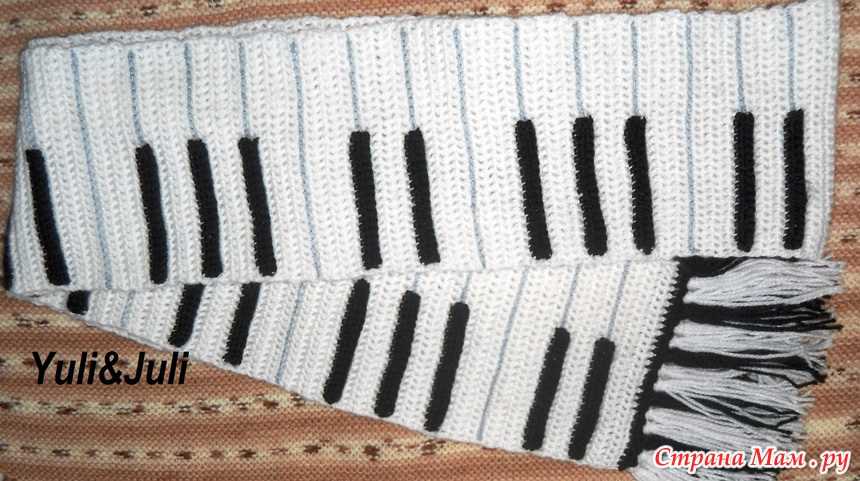
The piano scarf knitting pattern features a black and white color scheme, mimicking the keys of a piano. The design incorporates simple colorwork techniques to create the iconic piano keyboard pattern. It’s a great project for knitters of all skill levels, from beginners to advanced.
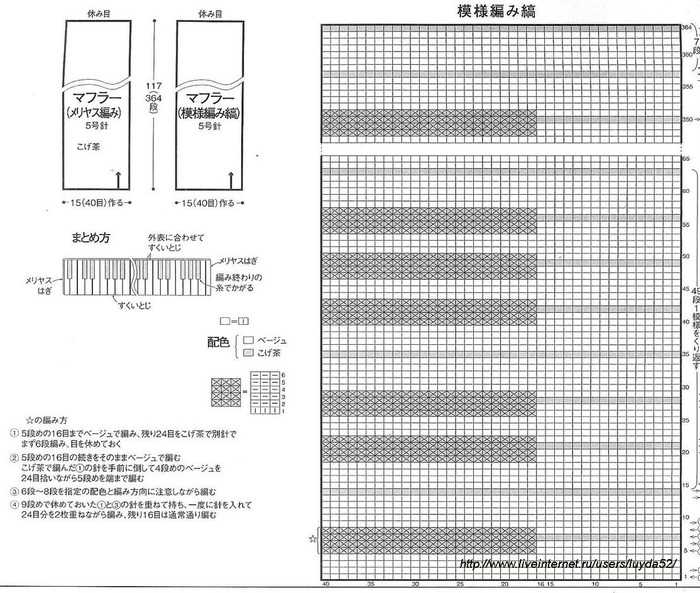
The pattern includes detailed instructions and a chart to guide you through each step of the knitting process. You’ll need basic knitting supplies, such as knitting needles and yarn in black and white. The finished scarf is long enough to wrap around your neck and keep you warm, while also making a stylish statement.
Whether you’re knitting this scarf for yourself or as a gift for a fellow music lover, the piano scarf knitting pattern is a unique and charming project. So grab your knitting needles and get ready to create a one-of-a-kind musical accessory!
Choose the right yarn and needles

When knitting a piano scarf, it’s important to choose the right yarn and needles to achieve the desired result. The type of yarn you choose will greatly impact the final texture and drape of the scarf. For this pattern, a medium-weight yarn made from natural fibers such as wool or alpaca would be ideal. These fibers have a nice elasticity and warmth, which is perfect for a cozy scarf.
As for needle size, it’s important to consider the gauge of the pattern and your personal knitting style. The recommended needle size for this pattern is typically US size 7 (4.5mm), but you can adjust it based on your tension and desired outcome. If you tend to knit tightly, you might want to go up a needle size to achieve the right gauge and prevent a stiff fabric. On the other hand, if you knit more loosely, you may need to go down a needle size to ensure a tight and consistent stitch.
- Yarn weight: Medium
- Yarn fiber: Wool or alpaca
- Recommended needle size: US size 7 (4.5mm)
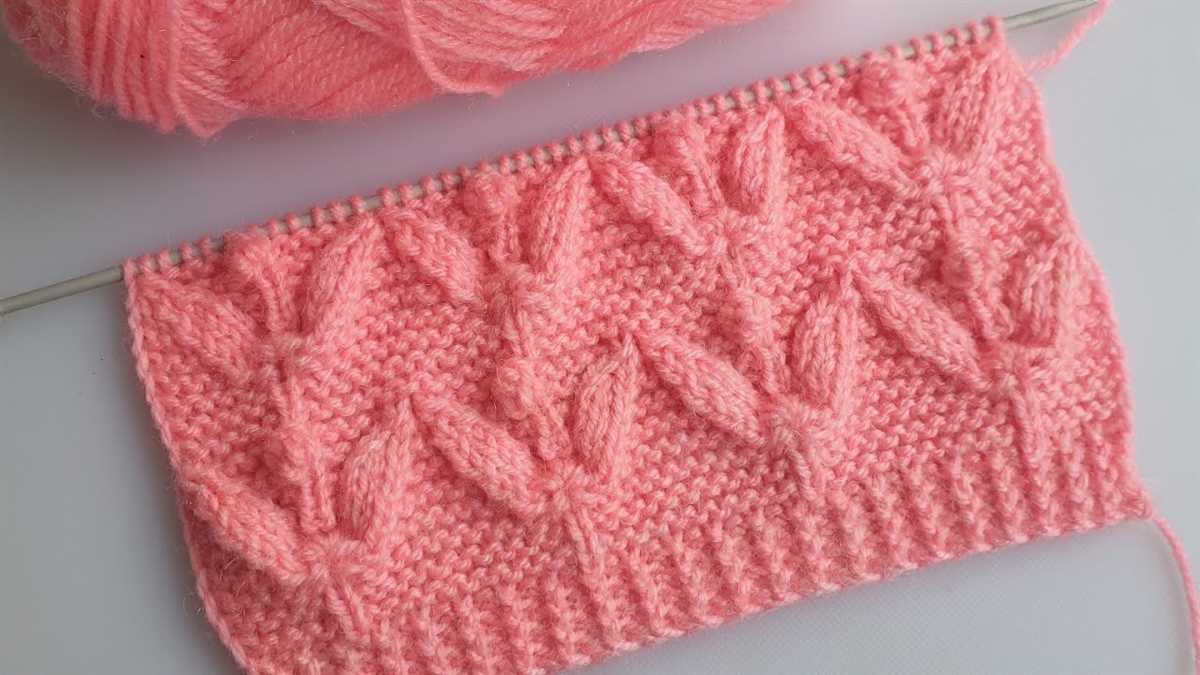
It’s also a good idea to consider the color of the yarn. For a piano scarf, you might want to choose a yarn in contrasting black and white shades to mimic the keys of a piano. Alternatively, you could opt for a colorful yarn that reflects your personal style and adds a unique touch to the scarf.
When selecting your yarn and needles, it’s helpful to keep in mind the final dimensions and desired feel of the scarf. Experiment with different yarns and needle sizes to find the right combination that achieves the look and texture you envision. Remember, knitting is a creative process, so don’t be afraid to get creative with your choices!
Cast on and create the base

The first step in knitting a piano scarf is to cast on the necessary number of stitches to create the base. Depending on the desired width of the scarf, you will need to determine how many stitches to cast on. This can vary depending on your knitting gauge and the thickness of your yarn.
Once you have determined the number of stitches to cast on, you can begin the process. You can use any cast-on method that you are comfortable with, such as the long-tail cast-on or the knitted cast-on. Make sure to keep your tension consistent to ensure an even and neat base.
Tip: It can be helpful to use stitch markers to mark the beginning and end of each row, especially if you are a beginner or working with a complex pattern.
After casting on, you will continue to knit each row in the base color until the desired length of the scarf is reached. Make sure to check your gauge periodically to ensure that your scarf is turning out as desired.
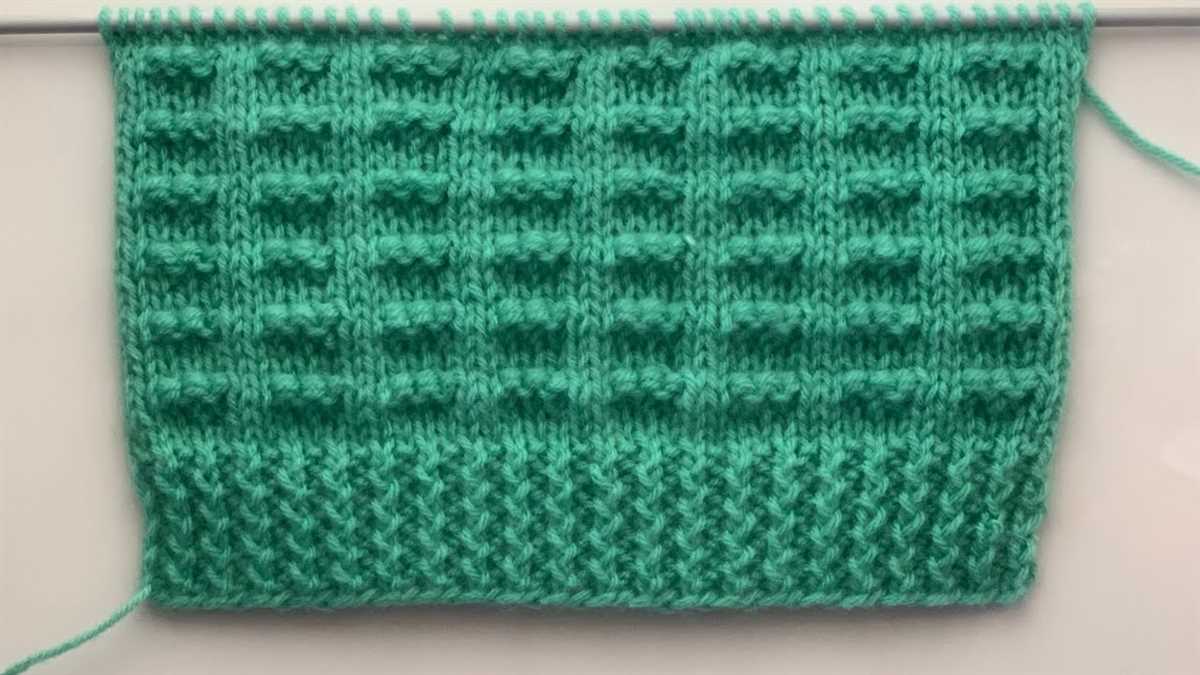
Tip: If you want to add some visual interest to the base of your piano scarf, you can consider adding a simple stitch pattern such as garter stitch or seed stitch. This can create additional texture and make the scarf more unique.
Add the first set of piano keys
Once you have completed the initial set up for the piano scarf knitting pattern, it is time to start adding the first set of piano keys. This section will guide you through the process step by step.
Materials needed:
- Black yarn for the keys
- White yarn for the background
- Knitting needles size US 6 (4mm)
- Tapestry needle for seaming
Instructions:
Step 1: Using the black yarn, cast on 5 stitches.
Step 2: Knit the first row with the black yarn.
Step 3: Switch to the white yarn and knit the next row.
Step 4: Repeat steps 2 and 3 two more times to have a total of three rows of white background.
Step 5: Switch back to the black yarn and knit the next row.
Step 6: For the next row, you will create the keys. Knit 3 stitches with black yarn, then switch to white yarn and knit 3 stitches, and finally switch back to black yarn to knit the last 3 stitches.
Step 7: Repeat steps 5 and 6 two more times to have a total of three rows of keys.
Congratulations! You have successfully added the first set of piano keys to your scarf. Continue following the pattern to complete the rest of the piano keys and create a beautiful piano design on your scarf.
Knit the black keys
When knitting a piano scarf, it’s important not to forget about the black keys. These keys play an integral role in the overall design and add a unique touch to the finished scarf. To knit the black keys, you can use black yarn or choose a contrasting color that stands out against the white keys.
The black keys are usually narrower and shorter than the white keys, resembling small rectangles. To create this shape, you can use the intarsia knitting technique. Start by knitting across the row in your main color (white) until you reach the first stitch where a black key should be.
Next, switch to the black yarn and knit across those stitches, creating a rectangle shape for the black key. Continue knitting in your main color until you reach the next black key. Repeat this process until all the black keys have been knit.
To add even more detail to the black keys, you can use duplicate stitch embroidery or surface crochet to create the illusion of individual keys. This technique allows you to easily add the appearance of thin black lines on each key, giving them a more realistic look.
- Placing the black keys evenly along the piano scarf is crucial for achieving a balanced design.
- Consider using a chart or template to help guide you in placing the black keys in the correct positions.
- Remember to weave in any loose ends or secure them with knots to ensure the black keys are securely attached to the scarf.
Once you’ve completed knitting the black keys, you’ll have a piano scarf that truly captures the essence of the instrument. Whether you’re knitting it as a gift for a musician or simply as a stylish accessory for yourself, the black keys will undoubtedly make your scarf stand out from the crowd.
Continue with the white keys

The next step in the piano scarf knitting pattern is to continue with the white keys. Using white yarn, follow the pattern chart to knit the next set of keys. Remember to switch to the appropriate color for each key as indicated on the chart.
Start by knitting the C key with white yarn. Knit the required number of stitches for the C key, then switch to the next color for the D key. Continue this pattern for each white key, switching colors as needed.
Pro tip: To make the keys more pronounced, you can use duplicate stitch embroidery to add a contrasting color to each key. Simply thread a tapestry needle with the desired color and embroider over the knit stitches to create the appearance of the black keys on a piano.
- Next, continue knitting the E, F, G, A, and B keys with white yarn, switching colors as indicated on the chart.
- Make sure to keep track of your stitch count and follow the pattern chart carefully to ensure the correct placement of each key.
- As you knit, you’ll start to see the piano keyboard design taking shape.
- Once you’ve completed all the white keys, you can move on to the next section of the pattern to add the black keys and finishing touches to your piano scarf.
Create the keyboard pattern
Knitting a piano scarf with a keyboard pattern can be a fun and challenging project for experienced knitters. The pattern consists of rows of black and white keys, resembling a piano keyboard. To create this pattern, you will need to follow a chart or graph that represents each stitch as a black or white square.
Start by casting on the desired number of stitches for your scarf. It is recommended to use a light-colored yarn for the background and a contrasting color for the keys. You can choose to knit the scarf in a single color or use multiple colors to create a more vibrant design.
Step 1: Knit the white keys
Begin knitting the white keys by following the chart or graph. Each white key stitch is represented as a white square on the chart. Knit the white stitches using the main color yarn, and be sure to maintain the correct tension to create consistent stitches.
Step 2: Knit the black keys
After completing the white keys, it’s time to knit the black keys. The black key stitches are represented as black squares on the chart. Switch to the contrasting color yarn and knit the black stitches according to the chart.
Step 3: Repeat the pattern
Continue knitting the white and black keys in the pattern sequence until you reach the desired length of your scarf. Pay attention to the chart and make sure to follow the correct color sequence to maintain the keyboard pattern.
Once you have finished knitting the pattern, you can bind off the stitches and weave in any loose ends. Block the scarf if needed to give it a polished and professional look. Your piano scarf with a keyboard pattern is now ready to be worn or gifted to a music-loving friend!
Knit the second set of piano keys
After completing the first set of piano keys, it’s time to move on to the second set. For this pattern, you will need to have completed the first set of keys and have them attached to your scarf.
Start by casting on the required number of stitches, as indicated in the pattern. Pay close attention to any changes in stitch count or color changes that may be necessary for the second set of keys. This will ensure that your keys align correctly and create the desired effect.
Once you have cast on, work the second set of keys according to the pattern instructions. This may involve knitting or purling specific stitches, changing colors, or working with different stitch patterns. Follow the pattern carefully to create the desired design.
As you work through the second set of piano keys, make sure to keep your tension consistent and avoid any gaps or loose stitches. This will help the keys to lay flat and maintain their shape.
Continue knitting the second set of keys until you have completed all the required rows or stitches. Once finished, you can weave in any loose ends and block the scarf to ensure that the keys are well-defined and the scarf lays flat.
With the second set of piano keys complete, your scarf will be one step closer to resembling a real piano keyboard. The repetition of the keys and the careful attention to detail in the knitting pattern will create an eye-catching and unique accessory.
Add finishing touches to the keyboard pattern
After knitting the main body of the keyboard scarf, it’s time to add the finishing touches to complete the intricate design. This includes incorporating the black keys and embellishing the white keys to achieve a realistic piano keyboard look.
Incorporating the black keys:
- Using a contrast color yarn, such as black, start by knitting small rectangles to represent the black keys. The size of these rectangles can vary depending on your preference and the overall scale of the scarf.
- Ensure that the black key rectangles are evenly spaced along the length of the white keys. You can refer to a real piano keyboard or a pattern guide for accurate placement.
- Once the rectangles are knitted, sew them onto the white keys using a tapestry needle and the same contrast yarn. Make sure the black keys are securely attached to create a polished finish.
- If desired, you can also add some additional stitching or embroidery to enhance the appearance of the black keys and give them a more defined look.
Embellishing the white keys:
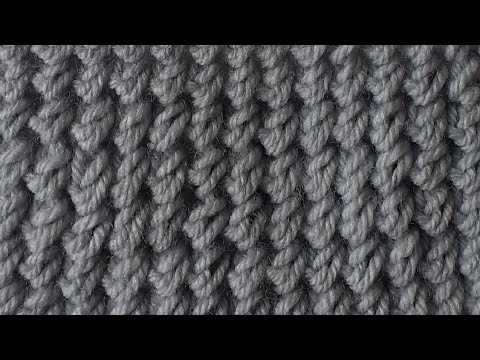
- To add dimension and realism to the white keys, consider adding texture or stitch patterns that mimic the appearance of piano keys.
- You can use techniques like slip stitch colorwork to create lines or stripes running across the white keys, imitating the separation between each key on a piano.
- Experiment with different stitch patterns, such as seed stitch or moss stitch, to create a textured effect that resembles the smooth surface of piano keys.
- Additionally, you can use a crochet hook to add crochet chains or surface slip stitches along the edges of the white keys, giving them a more polished and refined look.
With these finishing touches, your keyboard scarf will have an authentic piano keyboard design that showcases your knitting skills and love for music.
Complete the scarf body
The next step in knitting the piano scarf is to complete the scarf body. Once you have finished knitting the black and white stripe pattern for the keyboard, you can continue knitting the body of the scarf in a solid black color.
To complete the scarf body, you will need to continue knitting in the stockinette stitch, which means knitting one row and purling the next. This will create a smooth, flat texture for the body of the scarf. You can continue knitting in the stockinette stitch until you reach your desired length for the scarf.
Remember to always keep the edges of the scarf neat and even by knitting the first and last stitch of each row. This will help give the scarf a polished look and prevent it from curling at the edges.
If you want to add some extra visual interest to the scarf, you can also consider adding a border or decorative pattern along the edges. This could be a simple ribbing pattern or a contrasting color stripe. Get creative and make the scarf truly unique to your style!
Block and finish the scarf
Once you have completed knitting the piano scarf according to the pattern, it is important to block and finish it to give it a polished and professional look. Blocking helps to even out your stitches and make the scarf appear more uniform.
Materials you will need:
- Piano scarf
- Pins
- Blocking board or mat
- Spray bottle filled with water
- Towel
Instructions:
- Lay your piano scarf flat on a clean surface.
- Using your pins, secure the edges of the scarf to the blocking board or mat, making sure to align the stitches evenly.
- Fill the spray bottle with water and lightly mist the entire surface of the scarf. Be careful not to saturate it.
- Smooth out any wrinkles or uneven areas with your hands.
- Leave the scarf to dry completely. This usually takes a few hours.
- Once dry, carefully remove the pins and lift the scarf off the blocking board or mat.
- Lay the scarf flat on a clean towel and gently roll it up to remove any excess water. Do not wring or twist the scarf.
- Unroll the towel and reshape the scarf, gently stretching it if necessary.
- Allow the scarf to air dry completely.
After the scarf has dried, it is ready to be worn or gifted. The blocking process will help to enhance the visual appeal of your knitting, giving the scarf a more polished and professional look. Enjoy showing off your beautiful piano scarf!
Show off your piano scarf
After putting in the time and effort to knit your beautiful piano scarf, it’s time to show it off and flaunt your knitting skills! Whether you’re a seasoned pianist or simply appreciate the beauty of musical instruments, this unique and stylish scarf is sure to catch everyone’s attention.
Here are a few ways you can showcase your piano scarf:
- Wear it with pride: Wrap the piano scarf around your neck or drape it over your shoulders to create a fashionable and eye-catching accessory. Let the bold black and white keys make a statement and show off your love for music.
- Pair it with your favorite outfit: The versatility of the piano scarf allows it to be paired with a variety of outfits. Whether you’re going for a casual look with jeans and a sweater or dressing up for a night out, the scarf will add a unique touch to your ensemble.
- Show it off at music events: If you’re attending a concert, recital, or any music-themed event, wearing the piano scarf is a fantastic way to display your passion for music and knitting. You may even spark a conversation with fellow music enthusiasts!
- Use it as a decorative piece: Don’t limit the piano scarf to only being worn around your neck. Display it as a decorative piece in your home by draping it over the back of a chair or hanging it on a wall. This way, you can admire your handiwork and add a touch of musical flair to your living space.
Regardless of how you choose to showcase your piano scarf, be prepared for compliments and inquiries about your knitting skills. You can proudly share your knitting pattern and inspire others to try their hand at creating their own unique musical accessories.