
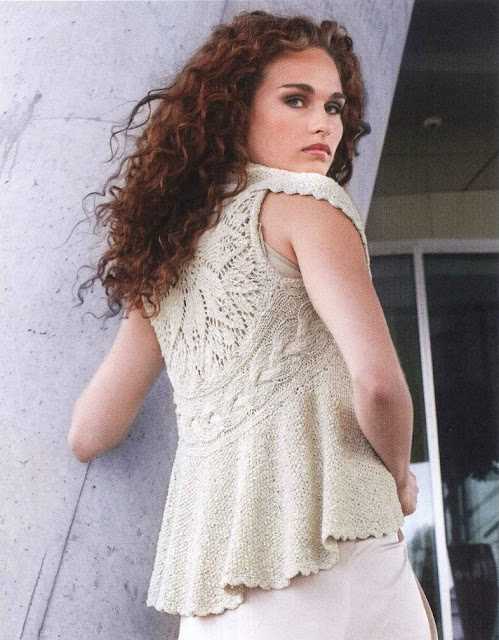
If you’re looking for a stylish and versatile addition to your wardrobe, a sleeveless jacket is the perfect choice. Whether you’re dressing up for a special occasion or simply want to add some extra warmth to your outfit, a sleeveless jacket can be the perfect accessory. Plus, knitting your own jacket allows you to customize the pattern and colors to create a truly unique piece.
Creating your own sleeveless jacket may seem daunting, but with the right knitting pattern and a little patience, you’ll be able to create a beautiful garment that you’ll be proud to wear. There are many different knitting patterns available, ranging from simple and basic designs to more intricate and detailed patterns. The pattern you choose will depend on your level of knitting experience and the design you prefer.
When selecting a knitting pattern for your sleeveless jacket, it’s important to consider the yarn and needle size that the pattern calls for. Using the recommended materials will ensure that your finished jacket looks and fits as intended. Additionally, take the time to gauge your knitting to ensure that you’re achieving the correct stitch count and tension.
Once you’ve chosen a pattern and gathered your materials, it’s time to begin knitting your sleeveless jacket. The pattern will provide you with step-by-step instructions for casting on, knitting the body, shaping the armholes, and adding any finishing touches. Don’t be afraid to take your time and go slowly, especially if you’re new to knitting. With practice and patience, you’ll soon have a beautiful sleeveless jacket that you can wear with pride.
Sleeveless Jacket Knitting Pattern: Create Your Own Stylish Piece
Are you looking for a fun and creative knitting project? Look no further than a sleeveless jacket knitting pattern. With this pattern, you can create your own stylish and unique jacket that is perfect for any season. Whether you’re a beginner or an experienced knitter, this project is perfect for you.
One of the great things about knitting is that it allows you to express your personal style and create one-of-a-kind pieces. With a sleeveless jacket knitting pattern, you have the freedom to choose your own yarn colors and textures to create a jacket that is truly unique to you. You can experiment with different stitch patterns and techniques to add interesting details and textures to your jacket.
If you’re new to knitting, don’t worry! This sleeveless jacket knitting pattern is designed for knitters of all skill levels. The pattern includes detailed instructions and helpful tips to guide you through the process step by step. You can start with a simple stitch pattern and gradually build your skills as you become more comfortable with the knitting process.
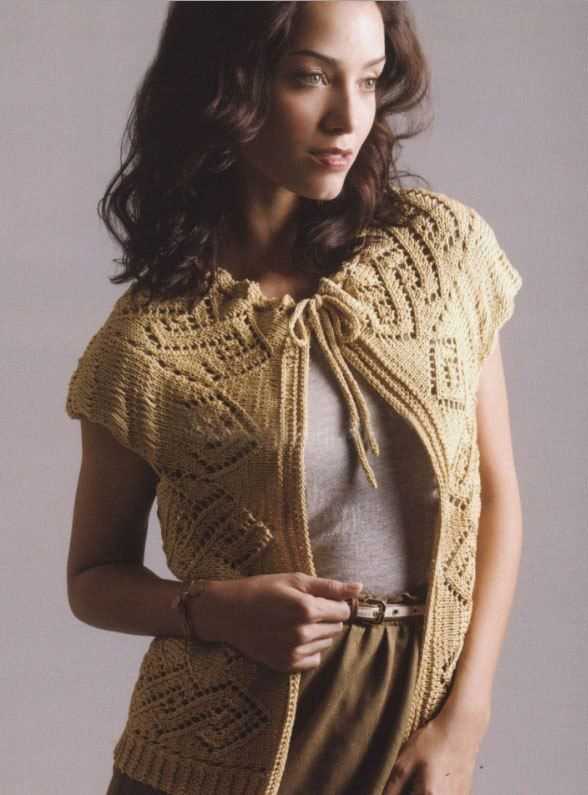
When it comes to choosing a sleeveless jacket knitting pattern, there are many options available. You can find patterns for different styles and lengths, allowing you to create a jacket that suits your personal taste. Whether you prefer a classic and elegant design or a more modern and funky style, you can find a pattern that fits your needs.
- With a sleeveless jacket knitting pattern, you can create a versatile piece that can be dressed up or down depending on the occasion. Pair it with a blouse or a dress for a formal look, or wear it over a t-shirt or a sweater for a more casual outfit.
- Knitting your own jacket also allows you to customize the fit and size to ensure a perfect fit. You can easily adjust the pattern to accommodate your specific measurements and preferences.
- Not only is knitting a sleeveless jacket a fun and enjoyable project, but it also allows you to create a sustainable and eco-friendly garment. By making your own clothing, you reduce your reliance on fast fashion and contribute to a more sustainable fashion industry.
In conclusion, a sleeveless jacket knitting pattern is a great way to unleash your creativity and create a stylish and unique piece of clothing. Whether you’re a beginner or an experienced knitter, you can find a pattern that suits your skill level and personal style. Start knitting today and enjoy the process of creating your own fashionable jacket.
Choose Your Yarn and Needles

When it comes to knitting a sleeveless jacket, one of the most important decisions you’ll need to make is choosing the right yarn and needles for your project. The type of yarn you use will determine the overall look, feel, and weight of the finished jacket, while the size of your needles will affect the stitch definition and drape of the fabric.
Yarn: There is a wide variety of yarns available for knitting, each with its own unique characteristics. For a sleeveless jacket, you’ll want to choose a yarn that is durable, yet soft and comfortable to wear. You may want to consider using a yarn with some natural fibers, such as wool or cotton, as they tend to have good breathability and insulation properties.
Needles: The size of your needles will determine the gauge of your knitted fabric, which in turn will affect the fit and sizing of your jacket. Most knitting patterns will specify a recommended needle size, but it’s important to swatch and check your gauge before starting your project. If your stitches are too loose, try using smaller needles; if they are too tight, try using larger needles.
It’s also worth considering the type of needle you prefer to work with. Some knitters prefer traditional straight needles, while others prefer circular needles for their versatility and ease of use. Whichever type of needles you choose, make sure they are the correct length for your project, as well as comfortable for you to hold and manipulate.
Ultimately, the choice of yarn and needles for your sleeveless jacket will largely depend on your personal preferences and the intended use of the garment. Take some time to explore different options, experiment with swatching, and find the combination that will result in a beautiful and functional sleeveless jacket.
Understanding the Gauge and Measurements
Before you start knitting your sleeveless jacket, it is important to understand the concept of gauge and measurements. Gauge refers to the number of stitches and rows per inch or centimeter in a knitted fabric. It determines the size and fit of the finished project. Getting the gauge right is crucial if you want the sleeveless jacket to fit well.
To determine the gauge for the sleeveless jacket, you will need to knit a gauge swatch. A gauge swatch is a small sample of the pattern worked in the recommended yarn and needle size. It allows you to measure your stitches and rows to find out if they match the pattern’s required gauge. The gauge swatch should be at least 4 inches (10 cm) square, and you should follow the pattern instructions for knitting it.
When measuring your gauge swatch, use a ruler or tape measure to count the number of stitches and rows within a 1-inch (2.5 cm) area. Compare these numbers to the pattern’s gauge specifications. If your stitch and row counts match the pattern’s gauge, then you can proceed with confidence that your sleeveless jacket will turn out the correct size. However, if your gauge is different, you may need to adjust your needle size to achieve the correct gauge.
Once you have determined your gauge, you will need to take accurate measurements of your body to ensure a proper fit for the sleeveless jacket. Measure your bust, waist, and hip circumference, as well as the length from your shoulder to desired hemline. Use these measurements to select the appropriate size from the pattern, making any necessary adjustments for a custom fit.
By understanding the importance of gauge and taking accurate measurements, you can confidently knit a sleeveless jacket that fits you perfectly.
Cast On and Knit the Back Piece
Before you begin knitting the back piece of the sleeveless jacket, you will need to cast on the required number of stitches. Refer to the knitting pattern for the specific stitch count and any other instructions for casting on. To cast on, hold the knitting needle in your right hand and make a slipknot with the yarn. Insert the needle through the loop of the slipknot and pull the yarn to tighten it around the needle. This creates your first stitch.
Continue casting on the remaining stitches using your preferred method, such as long tail cast on or cable cast on. Make sure to keep the tension consistent throughout the process to ensure even stitches. Once all the stitches are cast on, you are ready to start knitting the back piece.
With the stitches cast on, begin working the back piece according to the knitting pattern instructions. Follow any specific stitch pattern or increase/decrease instructions as indicated in the pattern. Make sure to pay attention to the row gauge to ensure the proper sizing of your sleeveless jacket.
As you work each row, remember to keep track of your stitch count and any shaping instructions. This will help you stay organized and ensure accuracy in your knitting. Use stitch markers if necessary to mark key points in the pattern, such as the beginning and end of the row or any stitch pattern repeats.
Knit each row consistently, following the pattern instructions, until the back piece reaches the desired length. You can check the length by measuring from the cast-on edge to the current row. Once the back piece is complete, you can move on to knitting the front and other sections of the sleeveless jacket according to the pattern instructions.
Shape the Armholes with Decreases

Now that you have completed the body of the sleeveless jacket, it’s time to shape the armholes. This step is essential to ensure a proper fit and comfortable wear. Follow the instructions below to shape the armholes with decreases.
1. Begin shaping the armholes: Place a marker on each side of the work to indicate the start and end of the armhole. This will help you keep track of your decreases.
2. Decrease for the armholes: On the next row, work until you reach 4 stitches before the first marker. Slip the next stitch as if to knit, knit the next 2 stitches together, and pass the slipped stitch over the knit stitches. Slip the marker onto the right needle. Repeat this decrease on the other side when you reach 4 stitches before the second marker.
3. Continue shaping the armholes: Repeat the armhole decrease on every knit row, keeping the marker at the appropriate place. Remember to slip the marker from the left needle to the right needle before continuing with the decrease.
4. Adjust for size: The number of decreases required for the armholes may vary depending on the size of the sleeveless jacket you are making. Refer to your knitting pattern for the specific decrease instructions and stitch counts for each size.
5. Complete the armhole shaping: Continue making armhole decreases until the required number of stitches remain for the armhole shaping. This will create a curved edge for the armholes that fits seamlessly with the rest of the sleeveless jacket.
By following these instructions, you will successfully shape the armholes with decreases, giving your sleeveless jacket a professional finish and ensuring a comfortable fit. Remember to consult your knitting pattern for any additional guidance and specific stitch counts. Happy knitting!
Knit the Front Pieces and Shape the Neckline
When knitting the front pieces of the sleeveless jacket, you will first need to cast on the required number of stitches for each front piece. This can be found in the pattern instructions. It is recommended to use circular knitting needles for this project to accommodate the large number of stitches.
Once the stitches are cast on, you will begin working in the specified stitch pattern. This could be a simple stockinette stitch or a more intricate pattern, depending on the design you have chosen. Be sure to follow the pattern instructions closely to achieve the desired result.
As you continue knitting, you will eventually reach the point where the neckline shaping begins. To shape the neckline, you will need to decrease stitches at regular intervals. This creates a sloping edge that forms the desired shape of the neckline.
The pattern will specify how many stitches to decrease and at which points in the knitting to do so. Typically, these decreases are done on either side of a center stitch or stitches to maintain symmetry. The specific decrease method will also be outlined in the pattern, such as knit two stitches together (k2tog) or slip, slip, knit (ssk).
It is important to pay close attention to the pattern instructions and keep track of your stitches as you shape the neckline. Markers can be helpful in indicating where to make the decreases and keeping track of your progress. By carefully following the pattern, you will be able to shape the neckline of your sleeveless jacket with precision and achieve a professional-looking result.
Join the Front and Back Pieces at the Shoulders

Now that you have completed knitting the front and back pieces of the sleeveless jacket, it is time to join them together at the shoulders. This step is crucial in creating a seamless and professional finish to your garment.
To begin, lay the front and back pieces flat on a surface with the right sides facing up. Line up the shoulder edges of both pieces, making sure that the stitches match up evenly. You can use stitch markers to hold the pieces in place.
Next, using a tapestry needle and yarn that matches your knitting, start at one edge of the shoulder and sew the pieces together using a mattress stitch. This stitch creates an invisible seam that is strong and durable. Insert the needle under the first stitch of the front piece and then under the corresponding stitch of the back piece. Continue in this manner, alternating between the front and back stitches until you reach the other edge of the shoulder. Make sure to pull the yarn snugly but not too tight as you sew to ensure an even seam.
Repeat this process for the other shoulder, making sure to align the edges and use the same stitching technique. Once both shoulders are sewn together, you can weave in the ends of the yarn to secure them and create a neat finish. Congratulations, you have successfully joined the front and back pieces of your sleeveless jacket at the shoulders!
Add Ribbing to the Neckline and Armholes
When knitting a sleeveless jacket, it’s important to add ribbing to the neckline and armholes to give the garment a polished and finished look. Ribbing not only provides structure and stability to these areas but also adds a touch of style and visual interest.
To add ribbing to the neckline, begin by picking up stitches along the edge. Using a smaller size needle than the main body of the jacket, create a ribbing pattern by alternating knit and purl stitches. This will create a stretchy and flexible edge that will comfortably hug the neck. The number of stitches you pick up will depend on the desired width of the ribbing and the gauge of your knitting.
For the armholes, the process is similar. Start by picking up stitches around the armholes using a smaller size needle. Again, alternate knit and purl stitches in a ribbing pattern to create a flexible and snug edge. The number of stitches you pick up will depend on the circumference of the armholes and the desired width of the ribbing.
Remember to carefully measure and plan your ribbing before starting to ensure a proper fit. You can also experiment with different ribbing patterns, such as 2×2 or 1×1, to create different textures and designs. Adding ribbing to the neckline and armholes is a simple yet essential step that will elevate your sleeveless jacket knitting project to the next level.
Knit the Bottom Ribbing or Hem
Once you have completed the main body of the sleeveless jacket, it is time to knit the bottom ribbing or hem. This section will provide a finished look to the garment and also help to keep the jacket in place when worn.
To start, you will need to determine the desired length of the ribbing or hem. This will depend on the overall length of the jacket and your personal preference. Measure the length from the bottom of the jacket and make a note of this measurement.
Option 1: Knitting Ribbing
If you prefer a ribbed look for the bottom of the jacket, you can knit a ribbing section using a smaller needle size. Choose a needle size that will create a tight and stretchy fabric. Common choices for ribbing include a size US 4 or US 6.
Begin by casting on the desired number of stitches for the ribbing, making sure to use a stretchy cast-on method such as the long-tail cast-on. Knit the ribbing section in a rib stitch pattern of your choice, such as K2, P2 or K1, P1, for the desired length. Remember to keep the ribbing section slightly smaller than the actual measurement to ensure a snug fit.
Option 2: Knitting Hem
If you prefer a clean and smooth finish for the bottom of the jacket, you can knit a simple hem. To do this, fold the bottom edge of the jacket towards the wrong side by the desired hem length. Use a tapestry needle and matching yarn to sew the folded edge in place, securing it to the inside of the jacket. Make sure to sew the hem with small and even stitches to create a neat and invisible finish.
Once you have finished knitting the ribbing or hem, continue with any remaining finishing steps for the sleeveless jacket, such as weaving in loose ends and blocking the garment to shape. The bottom ribbing or hem will add the perfect final touch to your knitted sleeveless jacket, making it ready to wear and enjoy.
Seam the Sides of the Jacket

Once you have finished knitting the front and back pieces of the sleeveless jacket, it’s time to seam the sides together. This will create the body of the jacket and give it structure and shape.
To seam the sides, you will need a tapestry needle and the yarn that you used to knit the jacket. Begin by laying the front and back pieces flat with the right sides facing each other. Align the edges of the pieces to ensure a clean and even seam.
Thread the tapestry needle with the yarn and start at the bottom edge of the jacket. Insert the needle through both layers of fabric from the inside, and bring it back out through the outside of the fabric a few stitches up. Pull the yarn gently to bring the two pieces together.
Continue to sew the sides of the jacket together using a whipstitch or mattress stitch, whichever method you prefer. Make sure to keep your stitches even and tight, but not so tight that they distort the fabric.
When you reach the armhole, you can either sew it closed completely or leave it open for a more relaxed fit. If you choose to sew it closed, make sure to match up the edges of the front and back armholes and sew them together using the same stitching method as before.
Once you have reached the top edge of the jacket, tie off the yarn and weave in any loose ends. Give the seam a gentle tug to ensure it is secure and then try on your new sleeveless jacket!
Finishing Touches: Buttons, Pockets, or Embellishments
Once you have completed the main body of your sleeveless jacket, it’s time to add the finishing touches to make it truly unique and personalized. Here are some ideas for buttons, pockets, or embellishments that you can consider:
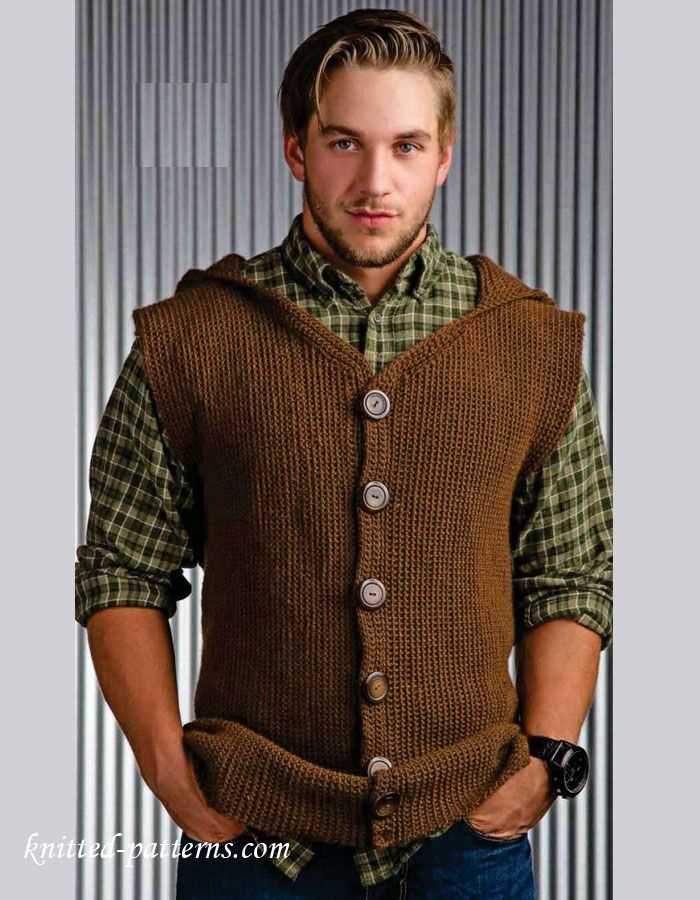
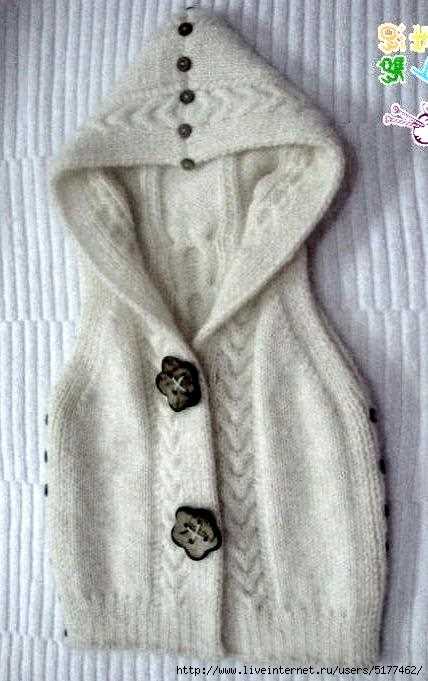
Buttons
Adding buttons to your sleeveless jacket can not only provide a functional closure but also add an aesthetic element to the design. Choose buttons that complement the yarn and color of your jacket. You can opt for traditional round or square buttons, or explore unique shapes and designs to add a touch of creativity. Consider the size and number of buttons based on your personal preference and the style of the jacket.
Pockets

Pockets can add both style and convenience to your sleeveless jacket. You can choose between patch pockets, which are sewn onto the surface of the jacket, or knitted-in pockets that are integrated into the design. Pockets can be square, rounded, or uniquely shaped to match the overall aesthetic of the jacket. Think about the size and placement of the pockets based on their functionality and how they will visually enhance the finished piece.
Embellishments
If you want to add a touch of flair to your sleeveless jacket, consider incorporating embellishments. These can be in the form of embroidery, appliques, beads, or lace trims. Choose embellishments that complement the overall design and style of your jacket. Keep in mind that too many embellishments can overwhelm the garment, so it’s important to strike a balance and keep it tasteful.
In conclusion, the finishing touches of buttons, pockets, or embellishments can truly elevate your sleeveless jacket from a basic garment to a unique and personalized piece. Consider your personal style and the overall design of the jacket when choosing these finishing details. Whether you opt for functional closures with buttons, added convenience with pockets, or a touch of creativity with embellishments, these final touches will make your sleeveless jacket truly one-of-a-kind.