
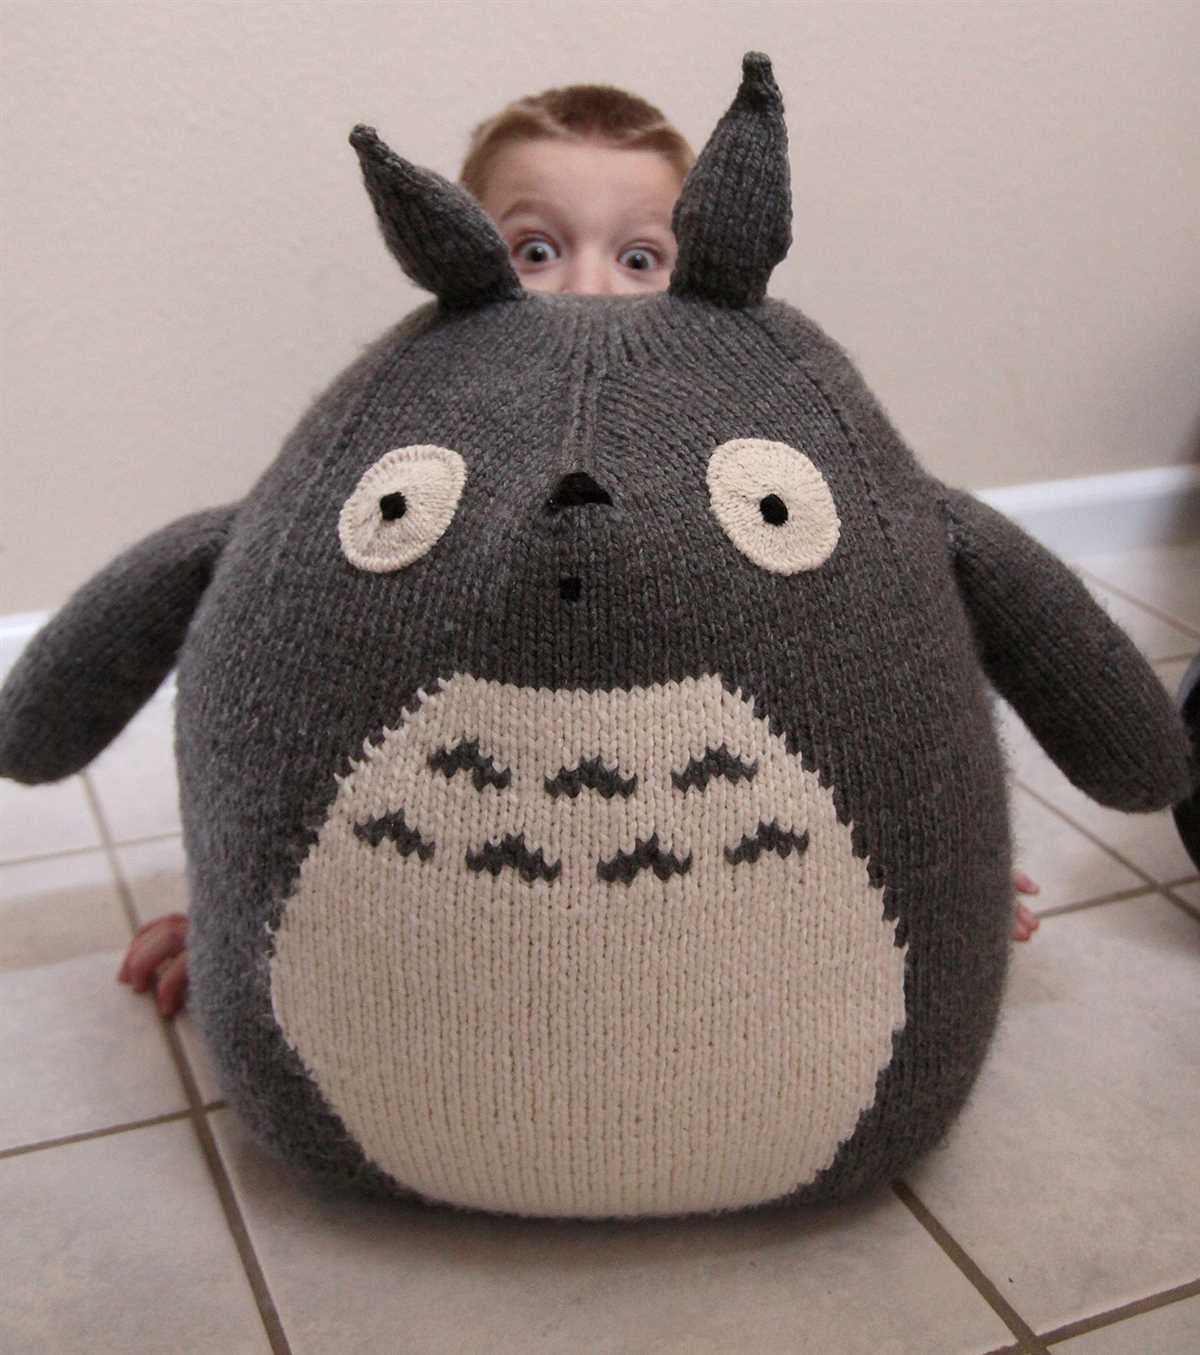
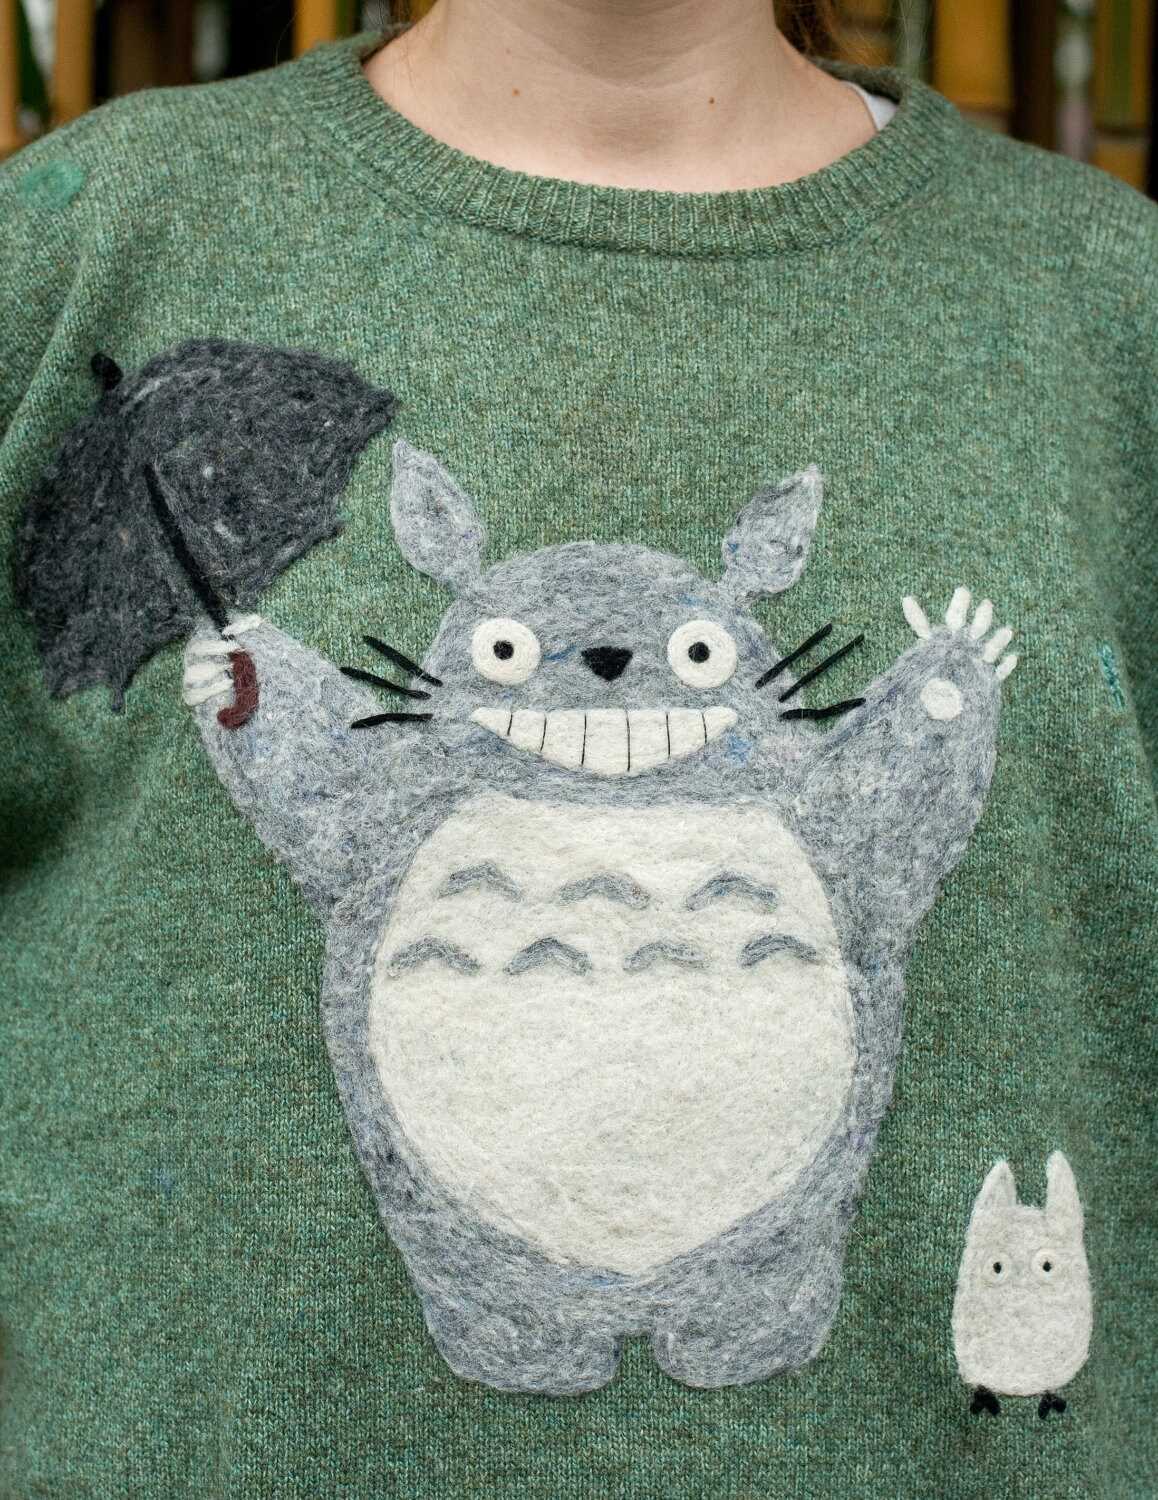
Are you a fan of the lovable Studio Ghibli character, Totoro? Do you want to stay cozy and cute during the chilly months? Well, we have the perfect solution for you! Introducing the Totoro sweater knitting pattern, a delightful project that will not only keep you warm but also showcase your love for this iconic character.
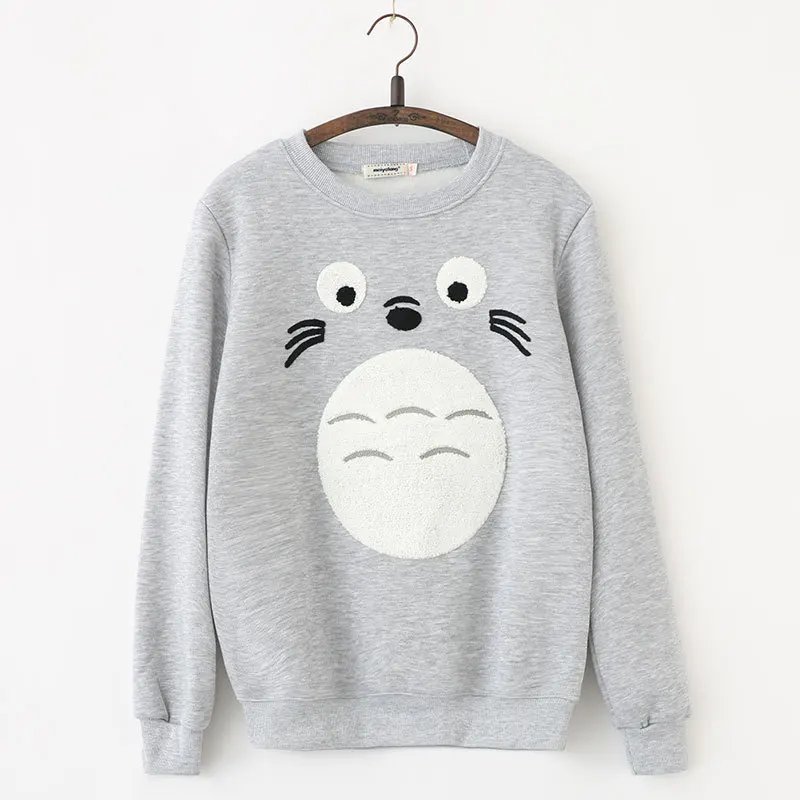
The Totoro sweater knitting pattern is a popular choice among knitting enthusiasts who want to create a unique and stylish piece of clothing. Whether you’re a beginner or an experienced knitter, this pattern is suitable for all skill levels. With its distinct design featuring Totoro’s cute face and signature leaf umbrella, the sweater is guaranteed to catch everyone’s attention.
Knitting your own Totoro sweater not only allows you to express your creativity, but it also gives you the freedom to choose your favorite colors and yarns. You can customize the size and fit to ensure the perfect fit for you or the lucky recipient of your handmade gift. Plus, the process of knitting can be incredibly relaxing and therapeutic, making it an enjoyable hobby to take up during your free time.
Totoro Sweater Knitting Pattern

The Totoro sweater is a popular knitting pattern loved by fans of the iconic Japanese animated film “My Neighbor Totoro”. With its adorable Totoro-inspired design, this sweater is perfect for showcasing your love for the beloved character.
To start knitting the Totoro sweater, you will need the following materials:
- Yarn in various colors, including light gray, dark gray, white, and black.
- Knitting needles in the appropriate size for your yarn.
- Tapestry needle for weaving in ends.
- Stitch markers to help keep track of your progress.
Step 1: Begin by casting on the required number of stitches for your size. This will typically be provided in the knitting pattern you are following.
Step 2: Knit the body of the sweater, following the pattern instructions for creating the Totoro design. This may involve knitting colorwork sections to create the face, ears, and belly of Totoro.
Step 3: Once the body is complete, it’s time to move on to the sleeves. Follow the pattern instructions to knit the sleeves, making sure to incorporate any Totoro design elements as needed.
Step 4: After completing the sleeves, it’s time to finish the sweater by knitting the neckline and hem. This can be done using ribbing or a different stitch pattern, following the pattern instructions.
Once you have finished knitting all the pieces, carefully sew them together using a tapestry needle and the seaming technique recommended in the pattern. Make sure to weave in any loose ends and block the sweater to ensure a professional finish.
The Totoro sweater knitting pattern allows you to create a unique and whimsical garment that showcases your love for Totoro. Whether you’re knitting it for yourself or as a gift for a fellow Totoro fan, this sweater is sure to be a cherished addition to any wardrobe.
Materials Needed

To knit a Totoro sweater, you will need the following materials:
- Yarn: Choose a soft and warm yarn in a color of your choice. Acrylic or wool blends work well for sweaters. Make sure to buy enough yarn to complete the entire project.
- Knitting Needles: Use knitting needles in a size appropriate for the yarn you have chosen. Check the yarn label for recommended needle sizes. You may need different needle sizes for different parts of the sweater.
- Circular Needles: Circular needles are useful for knitting the body of the sweater, especially if it is a larger size. Choose a size that is comfortable for you to work with.
- Double-Pointed Needles: Double-pointed needles are used for knitting the sleeves and other smaller sections of the sweater. Make sure they are the same size as your regular knitting needles.
- Stitch Markers: Stitch markers are helpful for marking specific points in your knitting, such as increases or decreases. Use small, colorful markers that are easy to see and move along the needles.
- Yarn Needle: A yarn needle is used for weaving in loose ends and sewing any seams. Choose a needle with a large eye that can easily accommodate the yarn.
- Scissors: A pair of sharp scissors is necessary for cutting the yarn and trimming any excess.
- Tape Measure: Use a tape measure to ensure accurate sizing and to measure your progress as you knit.
- Totoro Pattern: Lastly, you will need a Totoro sweater knitting pattern. You can find free patterns online or purchase a printed pattern from a knitting store.
Once you have gathered all the necessary materials, you will be ready to start knitting your Totoro sweater. Make sure to read through the pattern and familiarize yourself with the instructions before beginning. Happy knitting!
Getting Started
Welcome to the world of Totoro sweater knitting! If you are a fan of Studio Ghibli and love the adorable characters from “My Neighbor Totoro,” you’re in for a treat. This knitting pattern allows you to recreate Totoro’s likeness on a cozy sweater that you can wear with pride. Whether you’re a beginner or an experienced knitter, this project is sure to bring joy and warmth to your wardrobe.
Materials:
- Yarn: To achieve the best results, choose a medium weight yarn in a color that resembles Totoro’s fur. Shades of gray or brown are recommended.
- Knitting Needles: Size US 7 (4.5 mm) straight needles or size needed to obtain gauge.
- Tapestry Needle: For weaving in ends and sewing on any additional embellishments.
- Stitch Markers: Optional, but can be helpful for keeping track of stitch patterns.
Gauge:
It’s important to check your gauge before starting the project to ensure the correct size. In stockinette stitch, using the recommended size of needles, measure 4 inches by 4 inches (10 cm by 10 cm). Adjust the needle size if needed to obtain the correct gauge.
Pattern:
- Begin by casting on the required number of stitches for your size.
- Follow the provided chart or written instructions for creating the Totoro design on the front of the sweater. This may involve colorwork or intarsia techniques, so be prepared to read and follow the instructions carefully.
- Continue knitting according to the pattern until the desired length for the sweater body is reached.
- Work the sleeves according to the instructions, either in the round or using flat knitting and seaming.
- Finish the neckline and hem according to the pattern instructions.
- Weave in any loose ends and block the finished sweater to give it a polished look.
This Totoro sweater knitting pattern is a labor of love and a wonderful way to showcase your knitting skills while paying homage to one of the most beloved animated characters. Whether you’re making this sweater for yourself or as a gift for a fellow Totoro fan, enjoy the process and embrace the coziness that comes with wearing your finished creation.
Front Panel

When knitting the Totoro sweater, the front panel is an important component that sets the stage for the adorable design. The front panel is worked separately from the back panel, starting at the bottom and working upwards. It is knitted in a combination of stockinette stitch and cable pattern to create the unique texture of the Totoro character.
To begin, cast on the required number of stitches, as specified in the pattern. The front panel is typically wider than the back panel, as it needs to accommodate for the bust area. Once the stitches are cast on, start working in stockinette stitch for a few inches. This provides a smooth and even base for the cable pattern to be worked on later.
The cable pattern used in the front panel creates the iconic belly and leaf design of Totoro. It involves crossing stitches over each other, creating a textured and three-dimensional effect. The cable pattern is usually done over a set number of stitches, with additional stitches on each side for the stockinette stitch border.
To maintain the cable pattern properly, it is important to carefully follow the instructions provided in the pattern. Pay attention to the placement of the cable crosses and the direction in which the stitches are crossed. This ensures that the Totoro character is accurately represented in the final knitted piece.
Totoro Sweater Knitting Pattern: Back Panel

When knitting the Totoro sweater, the back panel is an essential piece that provides structure and stability to the garment. It is knitted separately and later joined with the front panel and sleeves to create a complete sweater. Here’s a step-by-step guide on how to knit the back panel for your Totoro sweater:
1. Cast On
Start by casting on the required number of stitches for the back panel. Make sure to use the recommended yarn and needle size mentioned in the pattern to achieve the desired gauge. A provisional cast on method can be used to easily join the back panel with the front panel later.
2. Work in Pattern
Follow the knitting pattern instructions to work in the specified stitch pattern for the back panel. This may include knit, purl, and other stitch combinations to create the desired texture or design. Continue knitting in the pattern until the back panel reaches the specified length as indicated in the pattern.
3. Shape Armholes and Neckline
Once the back panel reaches the desired length, you will need to shape the armholes and neckline. This will involve decreasing stitches at the edges to create a curved armhole shape and a neckline that is lower in the front compared to the back. Follow the pattern instructions carefully to ensure accurate shaping.
4. Bind Off
After shaping the armholes and neckline, you will need to bind off the remaining stitches. Again, follow the pattern instructions to determine the appropriate bind off method to use. This will help secure the stitches and give a neat finished edge to the back panel.
With the completion of the back panel, you are one step closer to completing your Totoro sweater. Remember to weave in any loose ends and block the back panel before proceeding to join it with the other pieces. Stay tuned for the next steps in this Totoro sweater knitting pattern!
Sleeves

The sleeves of the Totoro sweater are an important part of the overall design. They add warmth and comfort to the garment, while also showcasing the cute Totoro motif. The sleeves are knitted separately and then sewn onto the body of the sweater. This allows for easy customization and adjustment of the sleeve length if desired.
To start knitting the sleeves, you will need to cast on the required number of stitches, as specified in the pattern. It is important to achieve the correct gauge to ensure that the sleeves fit properly. The knitting pattern will guide you through the specific stitch pattern and shaping techniques required to create the Totoro design on the sleeves.
Once the sleeves are complete, you can seam them onto the body of the Totoro sweater using a whip stitch or the seaming method of your choice. Make sure to align the sleeves with the armholes of the body and secure them firmly in place. This will ensure that the sleeves are properly attached and will not come loose with wear.
After attaching the sleeves, you can finish off any remaining details, such as ribbing or cuffs, as specified in the pattern. These details will add a polished look to the sleeves and provide a comfortable fit around the wrists. Once all the finishing touches are complete, you will have a beautiful Totoro sweater with adorable sleeves ready to wear or gift to a Totoro fan.
Neckline

The neckline is an important element of the Totoro sweater knitting pattern. It adds style and personality to the finished garment. There are several options for the neckline, each providing a different look and feel.
Crew Neck: The crew neck is a classic and versatile option. It is a round, close-fitting neckline that sits high on the neck. This neckline is great for keeping you warm and cozy. It is also a popular choice for Totoro sweater designs, as it gives a casual, everyday look.
V-Neck: The V-neck is another popular option for the Totoro sweater. It features a V-shaped neckline, which creates a flattering and elongating effect. This neckline is great for those who prefer a more feminine and elegant look. It can be knit with a wide or narrow depth, depending on personal preference.
Mock Neck: The mock neck is a stylish and modern option. It is a shorter and less tight version of the turtleneck, sitting higher on the neck. This neckline provides a sophisticated and polished look, making it perfect for a more dressed-up Totoro sweater. It can be knit with a ribbed stitch pattern for added texture.
Turtleneck: The turtleneck is a cozy and classic option for colder weather. It features a high, fold-over collar that covers most of the neck. This neckline is great for keeping you warm and stylish during the winter months. It can be knit with a simple stockinette stitch or a ribbed stitch pattern for added texture.
When choosing the neckline for your Totoro sweater, consider your personal style, the amount of warmth you need, and the type of yarn you are using. Experiment with different options to find the one that suits you best.
Assembly
After all the pieces are knitted, it is time to assemble the Totoro sweater. Make sure to block all the pieces before starting the assembly process. Blocking helps to even out the stitches and make the finished sweater look more polished.
Begin by sewing the shoulder seams together using a mattress stitch. This stitch creates an invisible seam, giving the sweater a clean and professional finish. Once the shoulders are sewn, attach the sleeves to the armholes using the same mattress stitch technique.
Next, sew the side seams together, again using the mattress stitch. This will create the body of the sweater. Take care to match the stitches and line up the pattern correctly. Once the body is complete, it’s time to attach the hood. Sew the back of the hood to the neckline, then attach the front of the hood to the sides of the neckline.
Finally, add any finishing touches such as buttons or a zipper closure. Make sure to weave in all loose ends and trim any excess yarn. Once all the final touches are complete, the Totoro sweater is ready to be worn and enjoyed!
Finishing Touches
Once you’ve completed knitting your Totoro sweater, it’s time to add those finishing touches that will make your project truly special. These final steps will ensure that your sweater looks polished and professional, and they are well worth the effort.
Weaving in ends: The first step in finishing your sweater is weaving in all the loose ends. This means taking the tail of each yarn strand and threading it through the stitches on the wrong side of the sweater. This keeps the ends hidden and secure, preventing them from coming undone or showing through to the right side of the fabric.
Blocking: Blocking is an essential step in finishing any knitted garment. It helps to even out the stitches, relaxes the fabric, and gives it its final shape and dimensions. To block your Totoro sweater, wet it gently and lay it out flat on a clean towel, shaping it to the desired size. Use blocking pins to hold it in place, and leave it to dry naturally.
Seaming: If your Totoro sweater is knit in separate pieces, the next step is seaming them together. This can be done using a yarn needle and the mattress stitch, which creates a nearly invisible seam. Take your time and match up the stitches carefully to ensure a neat and seamless finish.
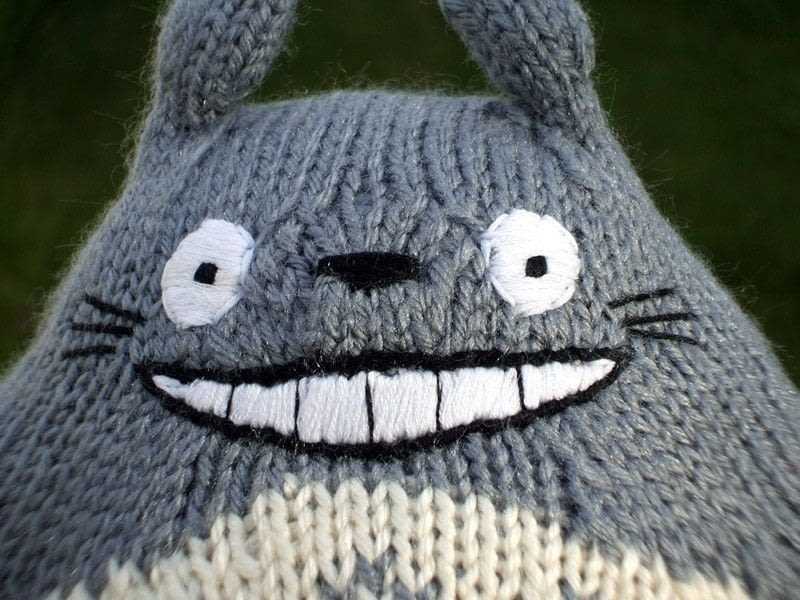
Embroidery: Adding embroidered details to your Totoro sweater can really bring it to life. Use a contrasting yarn or embroidery floss to embroider Totoro’s face, eyes, and whiskers onto the front of the sweater. You can use a reference image to guide you, or get creative and add your own personal flair.
Finishing touches: Finally, add any additional finishing touches you desire, such as buttons, ribbons, or decorative stitches. These little details can make a big difference in the overall look of your sweater. Consider adding a button closure at the neckline or embellishing the cuffs and hem with a delicate picot edge.
By following these finishing touches, your Totoro sweater will be transformed from a simple knitting project into a beautiful and unique garment that you can proudly wear or gift to someone special. Enjoy the process and let your creativity shine!
Tips and Tricks
Knitting a Totoro sweater can be a fun and rewarding project, but it can also come with its challenges. Here are some tips and tricks to help you along the way:
1. Choose the right yarn: When selecting the yarn for your Totoro sweater, consider the weight and texture of the yarn. A soft and bulky yarn would work well for a cozy and warm sweater, while a lighter weight yarn would be better for a more delicate and lightweight sweater.
2. Gauge swatch: Before starting your sweater, it’s important to knit a gauge swatch to ensure that you are knitting at the correct tension. This will help you achieve the desired size and fit for your sweater.
3. Read the pattern carefully: Before you start knitting, thoroughly read through the Totoro sweater knitting pattern. Make sure you understand all the instructions, abbreviations, and techniques used in the pattern. This will prevent any confusion or mistakes while knitting.
4. Take your time: Knitting a sweater is a time-consuming project, so take your time and enjoy the process. Break it down into smaller sections and focus on one part at a time. This will help you stay organized and avoid any mistakes or frustrations.
5. Mark your progress: Use stitch markers or scraps of yarn to mark your progress as you knit. This can be especially helpful for tracking increases, decreases, or stitch patterns in the pattern. It will make it easier to keep track of where you are in the pattern.
Conclusion:
With these tips and tricks, you are ready to embark on your Totoro sweater knitting journey. Remember to have fun, be patient, and enjoy the process. The end result will be a cozy and adorable sweater that you can proudly wear or gift to a loved one.