
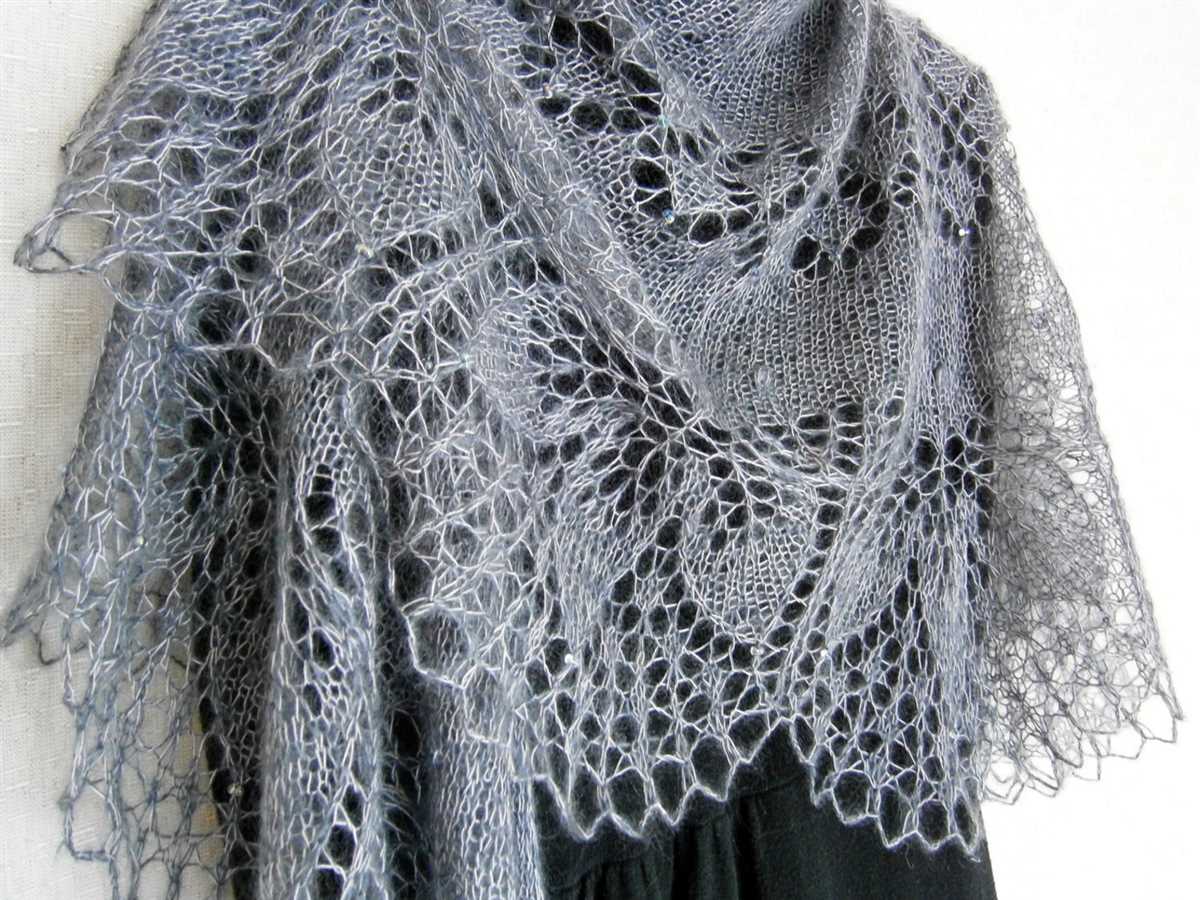
If you’re looking for a stylish and cozy accessory to keep you warm during the colder months, look no further than a mohair shawl. Mohair yarn is known for its softness and warmth, making it the perfect choice for a winter shawl. In this article, we will provide you with a knitting pattern to create your own mohair shawl.
Mohair is a luxurious, natural fiber that comes from the Angora goat. It is known for its silky texture and excellent insulating properties, making it ideal for cold weather garments. Mohair yarn is available in a variety of colors and weights, making it suitable for a wide range of projects.
This knitting pattern is suitable for both beginner and experienced knitters. The shawl is worked in a simple garter stitch pattern, making it easy to create even for those new to knitting. The finished shawl measures approximately 60 inches wide and 30 inches long, making it the perfect size for wrapping around your shoulders or draping over your arms.
To create this mohair shawl, you will need approximately 5 skeins of mohair yarn and size 8 (5mm) knitting needles. The pattern is worked in rows, beginning at the center and increasing gradually until the desired width is reached. Once the shawl is complete, you can add a simple lace edging or leave it plain for a more minimalist look.
Mohair Shawl Knitting Pattern
When it comes to knitting patterns, the mohair shawl is a popular choice among knitters. Mohair is a luxurious and lightweight yarn that adds a soft and fluffy texture to any project. The shawl itself is perfect for adding warmth and style to any outfit, making it a versatile accessory for any wardrobe.
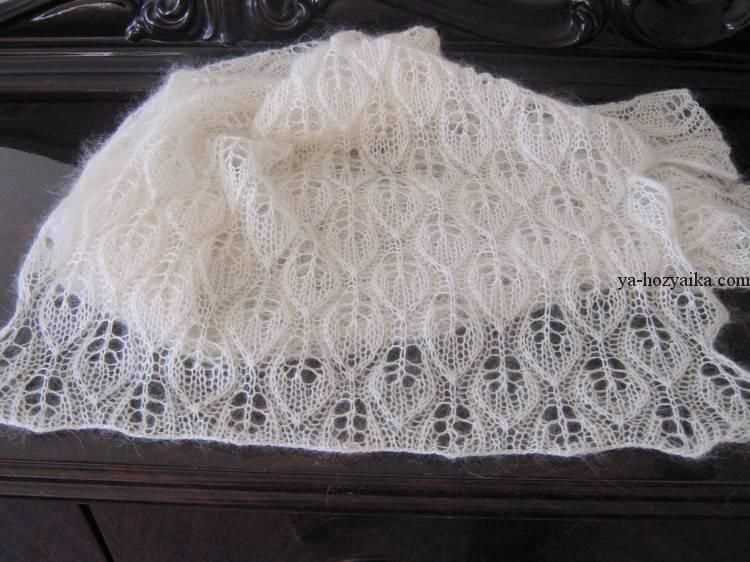
One of the great things about knitting a mohair shawl is the endless pattern possibilities. Whether you prefer lace patterns, cables, or simple garter stitch, mohair can be easily incorporated into any design. The combination of the delicate mohair yarn and intricate stitch patterns creates a beautiful and feminine shawl that is sure to impress.
To get started on your mohair shawl, you’ll need to gather your materials. In addition to the mohair yarn, you’ll also need a pair of knitting needles in the appropriate size for your chosen yarn weight. You may also want to have stitch markers, a tapestry needle for weaving in ends, and blocking tools on hand.
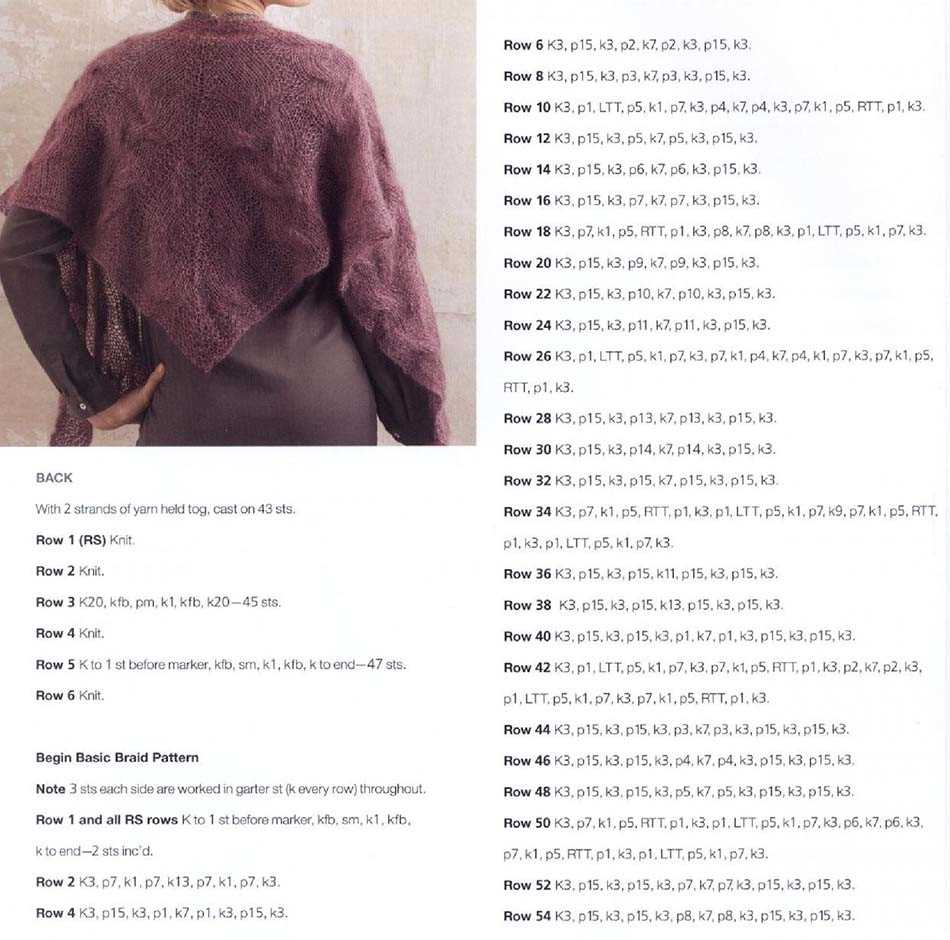
Once you have your materials ready, you can begin working on your mohair shawl. The pattern will typically include instructions on how to cast on, knit, purl, and bind off. It may also include specific stitch patterns or charts to follow. Be sure to read through the pattern carefully before you begin to ensure you understand all the instructions.
As you knit your mohair shawl, you’ll notice the yarn’s delicate and airy qualities. Be mindful of this as you handle the yarn, making sure not to pull too tightly or snag the delicate fibers. Take your time and enjoy the process, and soon you’ll have a beautiful mohair shawl that you can proudly wear or gift to someone special.
Choosing the Right Mohair Yarn

When it comes to knitting a mohair shawl, choosing the right yarn is crucial to ensure the best results. Mohair, a luxurious and soft natural fiber, is known for its beautiful halo effect and lustrous sheen. There are several factors to consider when selecting mohair yarn for your project.
Fiber Content: Mohair yarn is typically made from the hair of Angora goats. However, it can also be blended with other fibers like silk or nylon for added strength and drape. The blend you choose will depend on the desired characteristics of your shawl. A pure mohair yarn will have a fluffy halo and provide excellent insulation, while a blend with silk will add a smooth, lightweight feel.
Weight: Mohair yarn is available in different weights, ranging from lace to bulky. The weight of the yarn will determine the thickness and drape of your finished shawl. Lace-weight mohair is delicate and creates a light and airy fabric, perfect for a delicate shawl or wrap. On the other hand, bulky-weight mohair will result in a thicker and warmer shawl, suitable for colder weather.
Color: Mohair yarn is known for its ability to hold dye exceptionally well, resulting in vibrant and rich colors. When choosing the color for your shawl, consider the overall theme and pattern. Do you want a solid color or a variegated yarn with multiple shades? Will the yarn complement or contrast with your outfit? These are all factors to consider when selecting the perfect color for your mohair shawl.
Texture: The texture of mohair yarn can vary depending on its processing. While some mohair yarns may have a brushed or fuzzy texture, others may be smoother and silkier. Consider the texture you prefer and how it will enhance the overall look and feel of your shawl.
Ultimately, the right mohair yarn for your shawl will depend on your personal preferences and the desired outcome. Consider the fiber content, weight, color, and texture to find the perfect yarn that will bring your mohair shawl to life.
Essential Knitting Supplies for the Shawl
When it comes to knitting a mohair shawl, having the right supplies is essential to ensure a successful and enjoyable project. Here are some must-have knitting supplies for your shawl:
1. Knitting Needles:

Choose knitting needles that are suitable for mohair yarn, which can be delicate. Circular needles are a popular choice for shawls as they allow you to easily manage the increased number of stitches. Make sure to select the appropriate needle size to achieve the desired tension and drape for your shawl.
2. Mohair Yarn:
Invest in high-quality mohair yarn that is specifically designed for shawl knitting. Mohair is known for its softness, warmth, and beautiful sheen, making it an ideal choice for creating elegant and cozy shawls. Consider the color and weight of the yarn to achieve the desired look and feel of your shawl.
3. Stitch Markers:
Stitch markers are invaluable when knitting a shawl, especially if the pattern includes intricate stitch patterns or lacework. These markers can help you keep track of stitch counts, pattern repeats, and increases or decreases. Choose markers that can easily slide onto your knitting needles and won’t snag the delicate mohair yarn.
4. Tapestry Needle:
A tapestry needle is essential for weaving in loose ends and finishing touches on your shawl. Opt for a needle with a large eye to accommodate the thickness of the mohair yarn. Use the tapestry needle to seamlessly join different sections of your shawl, ensuring a polished and professional-looking finish.
5. Blocking Tools:
Blocking is an important step in finishing your mohair shawl. Invest in blocking tools, such as blocking mats, T-pins, and blocking wires, to shape and set your shawl’s lacework and overall dimensions. Blocking will help to enhance the drape and visual appeal of your finished shawl.
By having these essential knitting supplies on hand, you’ll be well-prepared to create a stunning and cozy mohair shawl. So gather your materials, find the perfect pattern, and get ready to start knitting!
Understanding the Pattern Instructions
When starting a new knitting project, it is essential to have a clear understanding of the pattern instructions before you begin. This will ensure that you are able to follow the instructions correctly and create a beautiful mohair shawl. Here are some key points to consider when reading and interpreting knitting pattern instructions:
1. Gauge

One of the first things to check in a knitting pattern is the recommended gauge. This is the number of stitches and rows per inch that should be achieved in order to create the correct size and shape of the finished shawl. It is important to knit a gauge swatch before starting the project to ensure that you are using the correct needle size and yarn weight to achieve the desired gauge. Adjustments may need to be made if your gauge is too tight or too loose.
2. Abbreviations
Knitting patterns often use abbreviations for commonly used stitches and techniques. It is important to familiarize yourself with these abbreviations before starting the pattern. Common abbreviations include “k” for knit, “p” for purl, “yo” for yarn over, and “k2tog” for knit two stitches together. The pattern should include a key or glossary that explains these abbreviations.
3. Stitch Patterns
The pattern instructions will typically include the stitch pattern or patterns used to create the design of the shawl. This could be a simple garter stitch, stockinette stitch, or a more complex lace or cable pattern. It is important to understand how these stitches are written in the pattern and how they are repeated throughout the rows. Pay attention to any special instructions or stitch counts provided.
4. Shaping and Finishing
A knitting pattern will usually include instructions for shaping the shawl, such as increasing or decreasing stitches to create the desired shape. Make sure to carefully read and understand these instructions, as they are crucial for achieving the correct size and fit. The pattern may also include instructions for finishing touches, such as binding off, blocking, or adding any additional embellishments.
By taking the time to read and understand the pattern instructions before starting your mohair shawl knitting project, you will set yourself up for success. Understanding the gauge, abbreviations, stitch patterns, and shaping instructions will ensure that you have a clear roadmap to follow and create a beautiful finished shawl.
Getting Started with Casting On
When starting a new knitting project, the first step is to cast on your stitches. Casting on is the process of creating the foundation row of stitches that will form the edge of your work. There are different methods of casting on, and the choice of method can depend on the desired edge finish and the type of stitch pattern you will be using.
One common method of casting on is the long-tail cast on. To begin, you will need to estimate the amount of yarn needed to create your foundation row. The long-tail cast on creates a neat and elastic edge, making it a popular choice for many knitters. To do the long-tail cast on, make a slipknot and place it on your needle. Then, using both the working yarn and the tail yarn, make a loop around your thumb and come up through the loop with your needle. This creates your first stitch. Continue making loops and bringing them up through the loop on your thumb until you have cast on the desired number of stitches.
Another method of casting on is the knitted cast on. This method creates a firm edge and is often used when a stretchy edge is not necessary. To do the knitted cast on, make a slipknot and place it on your needle. Then, insert your needle into the slipknot as if you were going to knit a stitch. Instead of knitting the stitch, however, bring your working yarn between the two needles, wrap it around the back needle, and pull it through to create a new stitch. Repeat this process until you have cast on the desired number of stitches.
As you become more experienced in knitting, you may discover other casting on methods that work best for certain projects or stitch patterns. Experimenting with different methods can help you achieve the desired outcome for your knitting project. Whether you choose the long-tail cast on, the knitted cast on, or another method, casting on is an essential step in getting started with any knitting project.
Knitting the Body of the Shawl

Once you have completed the border of your mohair shawl, it is time to start knitting the body. This is where you will create the main fabric of the shawl, using the chosen stitch pattern.
Before starting, make sure you have read the knitting pattern carefully and understand any specific instructions or stitch patterns required for the body. Gather all the necessary materials, such as your knitting needles and yarn, and set up a comfortable knitting space.
Begin by casting on the required number of stitches onto your knitting needles. You may find it helpful to use stitch markers to help you keep track of your stitches, especially if the pattern includes any shaping or stitch repeats.
Work each row of the body according to the knitting pattern, following any stitch instructions or pattern repeats. Take your time to ensure the stitches are neat and even, and don’t hesitate to use a stitch marker to mark your place if needed.
As you progress through the body of the shawl, you will gradually increase or decrease the number of stitches to shape the shawl as desired. Follow the instructions provided in the pattern for these shaping techniques, such as yarn overs or knit or purl decreases. Markers can again be helpful to keep track of these shaping points.
Continue knitting the body of the shawl until you have reached the desired length or have completed the required number of rows according to the knitting pattern. This may vary depending on the specific design and instructions provided.
Once you have finished knitting the body, it is time to proceed to the final steps of finishing the shawl, such as binding off, blocking, and adding any desired embellishments. These steps will vary depending on the pattern and your personal preferences.
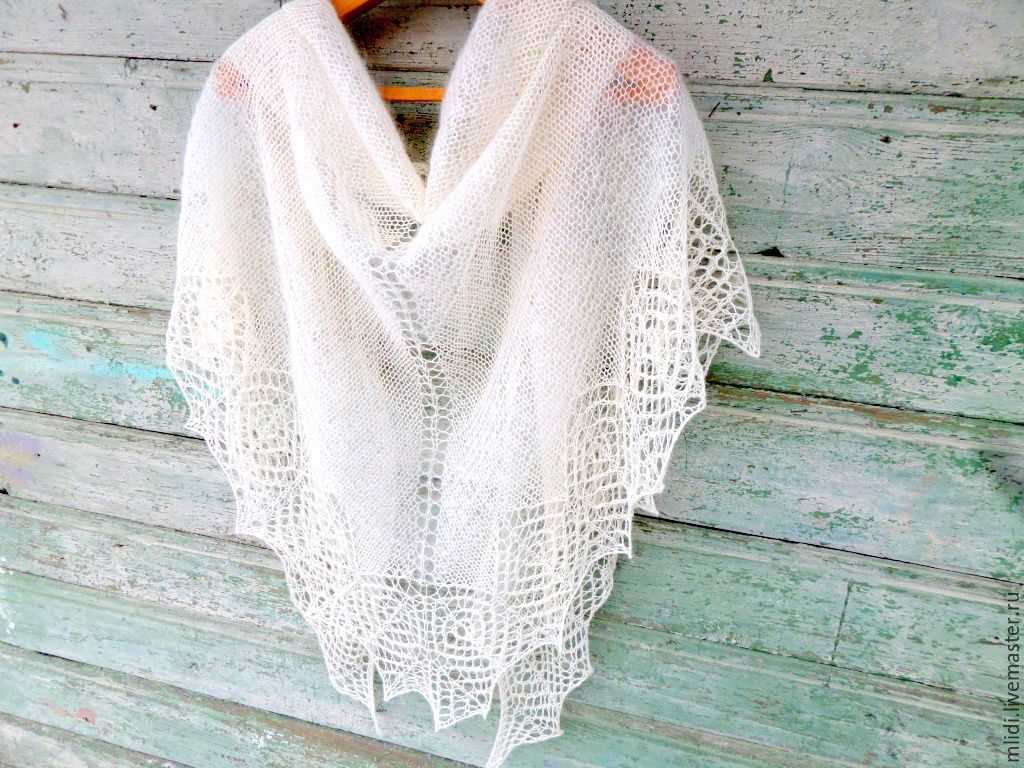
Creating the Border Stitch Design
One of the essential elements of a Mohair shawl is the border stitch design. This design adds an extra touch of elegance and intricacy to the overall pattern. To create the border stitch design, you will need to follow a specific set of instructions and pay attention to the details.
Choosing the Right Border Stitch Pattern
When selecting a border stitch pattern for your Mohair shawl, it is essential to consider the overall style and theme you want to achieve. There are various options available, such as lace, cables, or textured stitches. It is a good idea to browse through different stitch dictionaries or knitting pattern books to find inspiration and choose a design that complements the rest of your shawl.
Incorporating the Border Stitch into the Shawl Pattern
Once you have chosen a border stitch pattern, you will need to incorporate it into the overall shawl pattern. Depending on the complexity of the design, you may need to adjust the stitch count and repeat sections to ensure the border stitch flows seamlessly. It is crucial to carefully read and understand the instructions for both the main stitch pattern and the border stitch pattern to avoid any confusion.
Additionally, you may need to consider the placement of the border stitch design within the shawl. Some patterns have the border stitch running along all four edges of the shawl, while others may only have it along one or two edges. Think about how the border stitch will enhance the overall look of the shawl and create a cohesive design.
Experimenting with Color and Texture
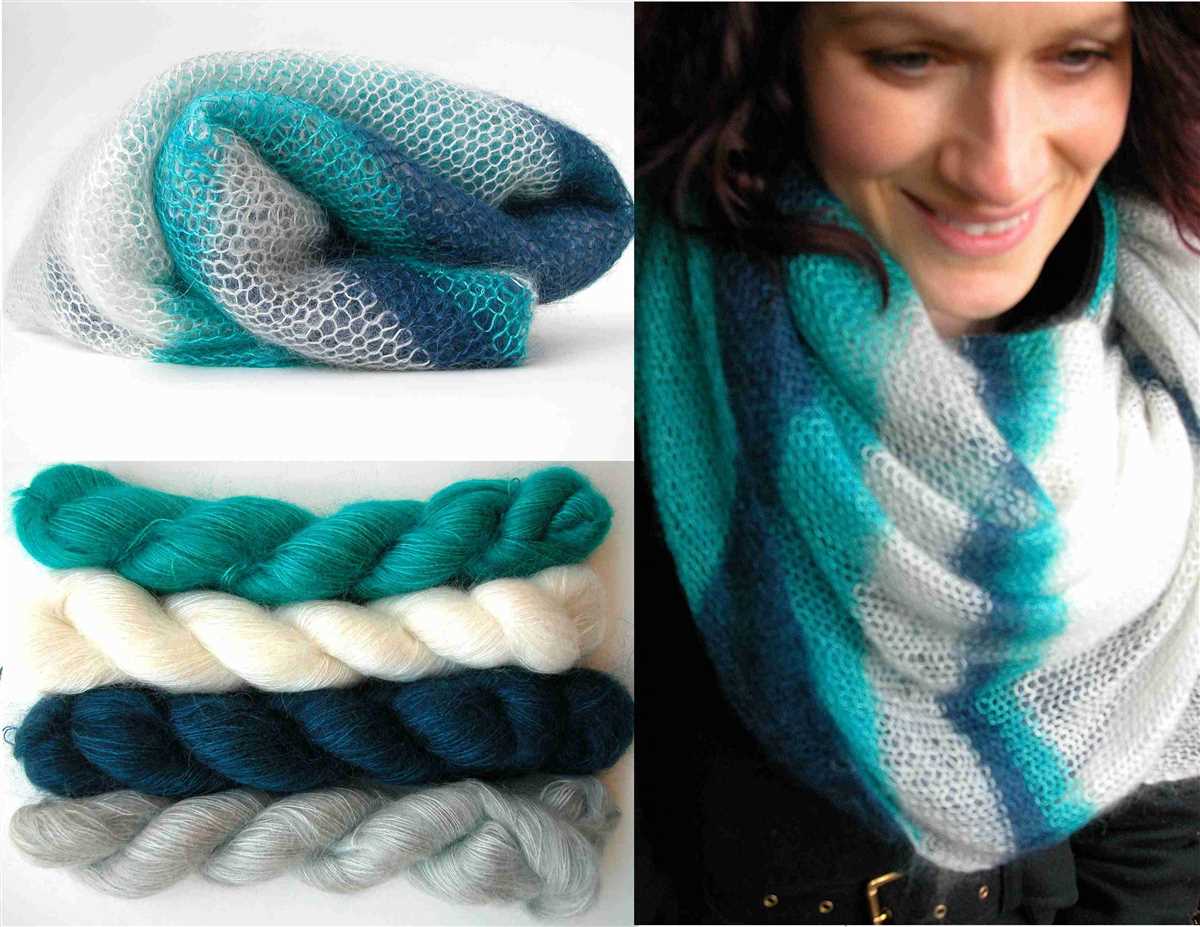
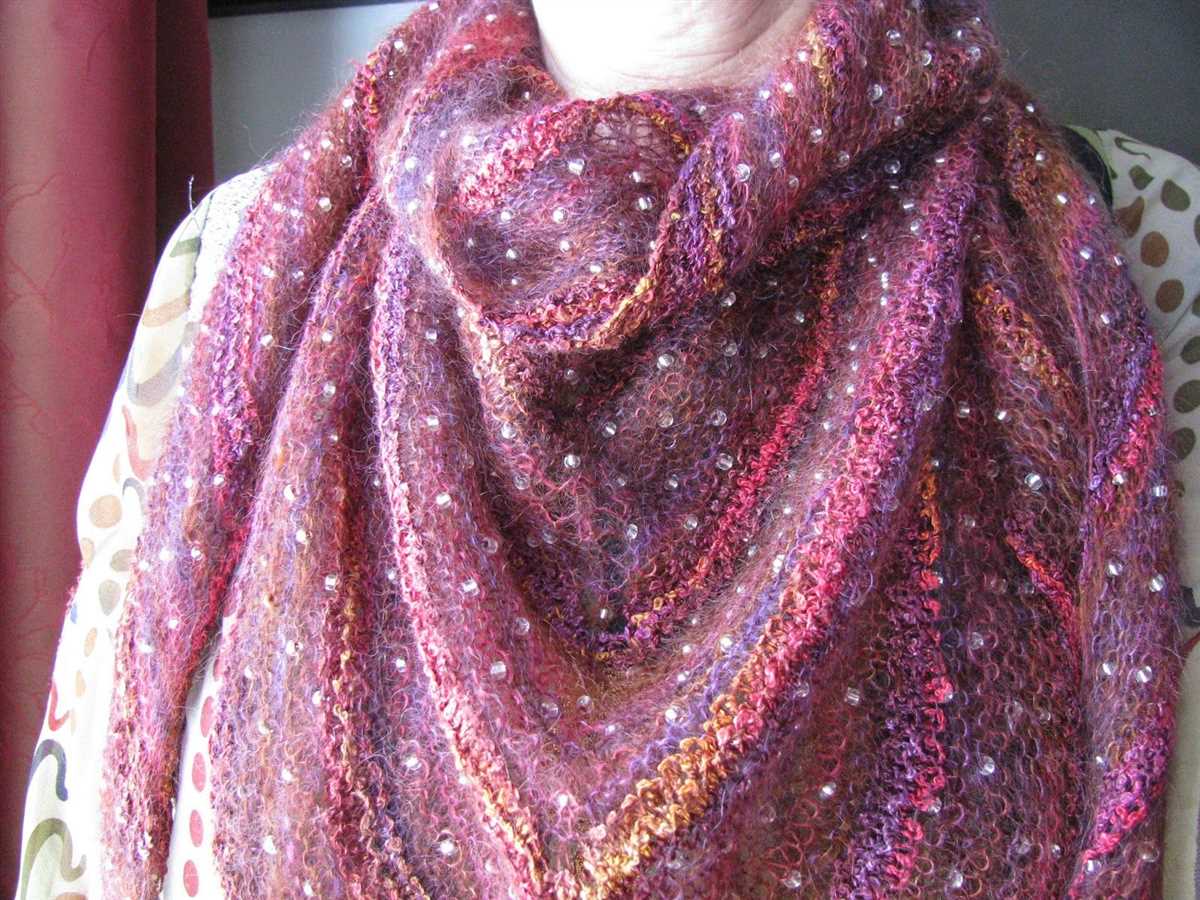
Lastly, don’t be afraid to experiment with color and texture when creating the border stitch design. Mohair yarn comes in various shades and can add depth and dimension to your shawl. Consider using a contrasting color for the border stitch to make it stand out or opt for a subtle color variation to create a delicate and harmonious look. Additionally, you can play with different stitch patterns and textures to add visual interest and make your border stitch design truly unique.
Shaping the Shawl with Decreases
When knitting a mohair shawl, shaping it with decreases is an important step to achieve the desired shape and drape. Decreases are stitches that are worked together to reduce the number of stitches on your needles. There are several different types of decreases that can be used, such as knit two together (k2tog), slip slip knit (ssk), and centered double decrease (cdd).
One common method of shaping a shawl is to work decreases at the edges. This creates a triangular or trapezoidal shape, depending on the rate and placement of the decreases. Typically, decreases are worked on every other row, or every row for faster shaping. The specific decrease pattern will depend on the design of the shawl and the desired finished shape.
To create a symmetrical shawl, the decreases are usually mirrored on both edges. For example, if you work a k2tog decrease at the beginning of a row, you would also work a k2tog decrease at the end of that row. This helps maintain balance and avoids any unwanted asymmetry in the final piece.
When working with mohair yarn, it’s important to consider the characteristics of the fiber. Mohair has a natural halo and can be quite slippery, so it’s important to securely anchor your stitches when working the decreases. You may find it helpful to use a smaller needle size or insert a lifeline to ensure the stitches do not slip or unravel during the shaping process.
Overall, shaping a mohair shawl with decreases is an essential technique for achieving the desired shape and flow of the finished piece. By carefully planning and executing the decreases, you can create a beautiful and functional shawl that showcases the unique qualities of mohair yarn.
Finishing the Shawl with Bind Off
Once you have completed knitting the main body of your mohair shawl, it is time to finish it off with a bind off. Binding off is the process of creating a neat edge that will prevent your knitting from unraveling. Follow these steps to bind off your shawl:
1. Knit two stitches. Start by knitting the first two stitches of your shawl with your working yarn. This will give you a sturdy edge for your bind off.
2. Slip the first stitch over the second stitch. Insert the left needle into the first stitch on the right needle and lift it up and over the second stitch and off the needle. You now have one stitch remaining on your right needle.
3. Knit one stitch. Knit the next stitch on your left needle with your working yarn, leaving two stitches on your right needle.
4. Repeat steps 2 and 3. Continue to slip the first stitch over the second stitch and knit one stitch until you have reached the end of your shawl and only one stitch remains on your right needle.
5. Cut the working yarn. Once you have bound off all the stitches, cut the working yarn, leaving a tail of about 6 inches. Thread the tail through the last stitch and pull tight to secure.
By following these steps, you can create a clean and professional-looking edge for your mohair shawl. Now you can wear and enjoy your beautiful creation!
Blocking and Caring for Your Mohair Shawl

Blocking is an important step in finishing your mohair shawl. It helps to shape and size the shawl, giving it a professional and polished look. To block your shawl, you will need to gently wash it first. Fill a basin with lukewarm water and a mild wool wash or gentle detergent. Gently agitate the water to create suds. Submerge the shawl in the water and let it soak for about 10 minutes, making sure it is fully saturated.
After soaking, carefully remove the shawl from the water and gently squeeze out the excess water. Avoid wringing or twisting the shawl, as this can damage the delicate fibers of mohair. Lay the shawl flat on a clean towel, shaping it into the desired dimensions. Use pins or blocking wires to hold the edges in place and stretch the shawl to its desired size and shape. Allow the shawl to air dry completely.
Caring for your mohair shawl:
- Hand wash only: Mohair is delicate and should not be put in the washing machine or dryer. Hand wash your shawl using a gentle detergent and lukewarm water.
- Avoid excessive heat: Mohair is sensitive to heat, so it is important to avoid exposing your shawl to high temperatures. Let it air dry instead of using a dryer or hanging it in direct sunlight.
- Store properly: When not in use, store your mohair shawl in a breathable bag or wrapped in acid-free tissue paper to protect it from dust and moths.
- Handle with care: Mohair fibers can easily snag or fray, so be mindful when wearing or handling your shawl. Avoid sharp objects or rough surfaces that can damage the delicate fibers.
- Refresh with steam: If your shawl becomes wrinkled or stretched out, gently steam it using a handheld steamer to restore its shape and remove any wrinkles.
By following these steps for blocking and caring for your mohair shawl, you can ensure that it remains beautiful and in pristine condition for years to come. Enjoy wearing your handmade shawl with confidence!
Styling and Wearing Your Mohair Shawl
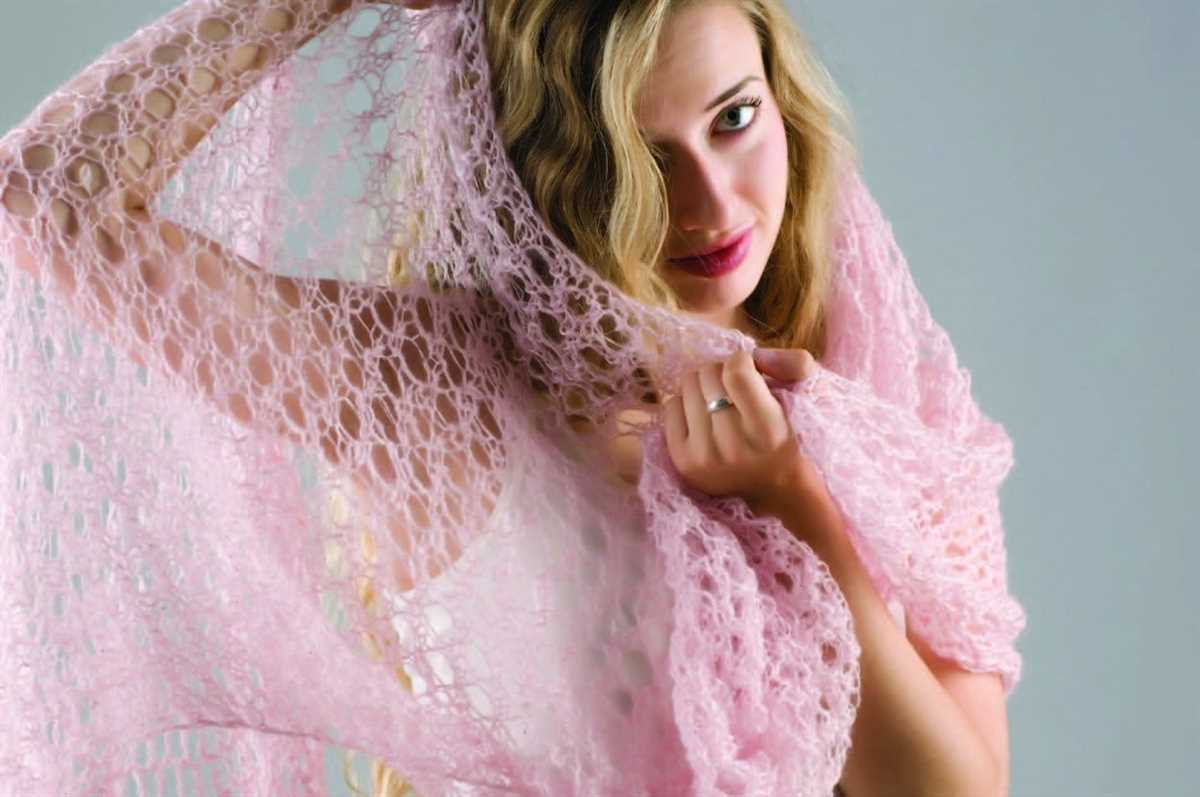
Once you have finished knitting your beautiful mohair shawl, it’s time to style it and show it off. The softness and delicacy of mohair makes it a versatile accessory that can be worn in many different ways.
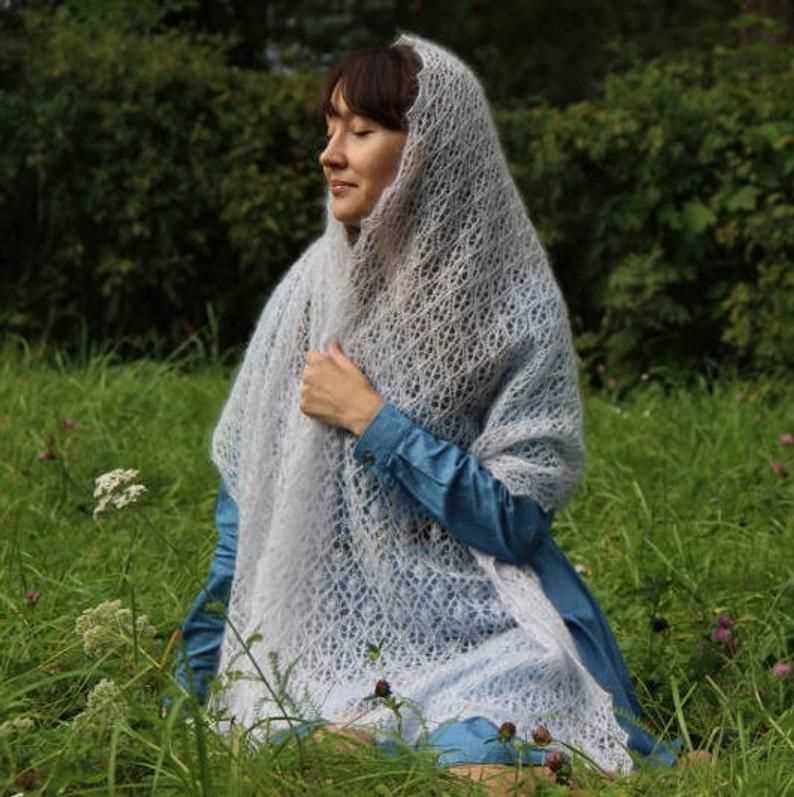
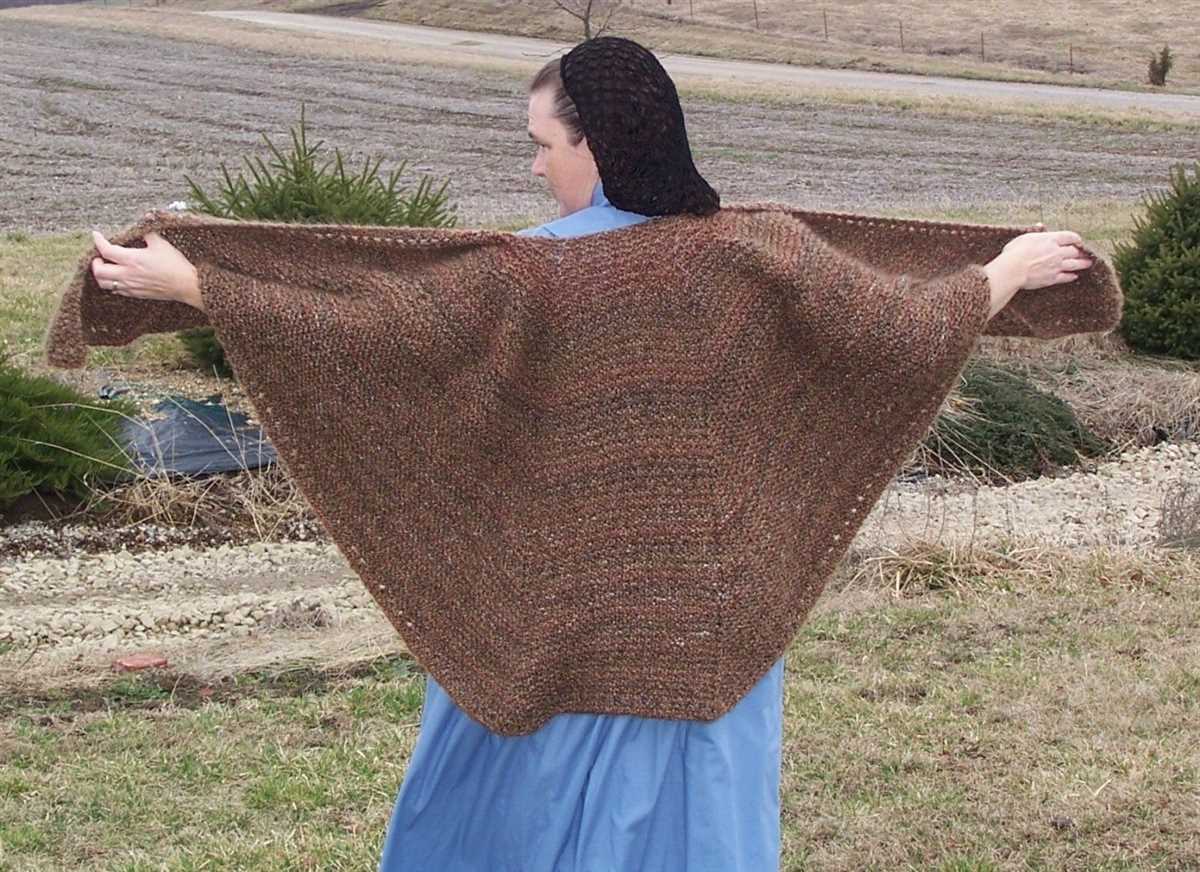
One classic way to wear your mohair shawl is draped over your shoulders. This adds an elegant touch to any outfit and allows you to showcase the intricate knitting pattern. Whether you’re attending a formal event or simply going out for a casual lunch, a mohair shawl can instantly elevate your look.
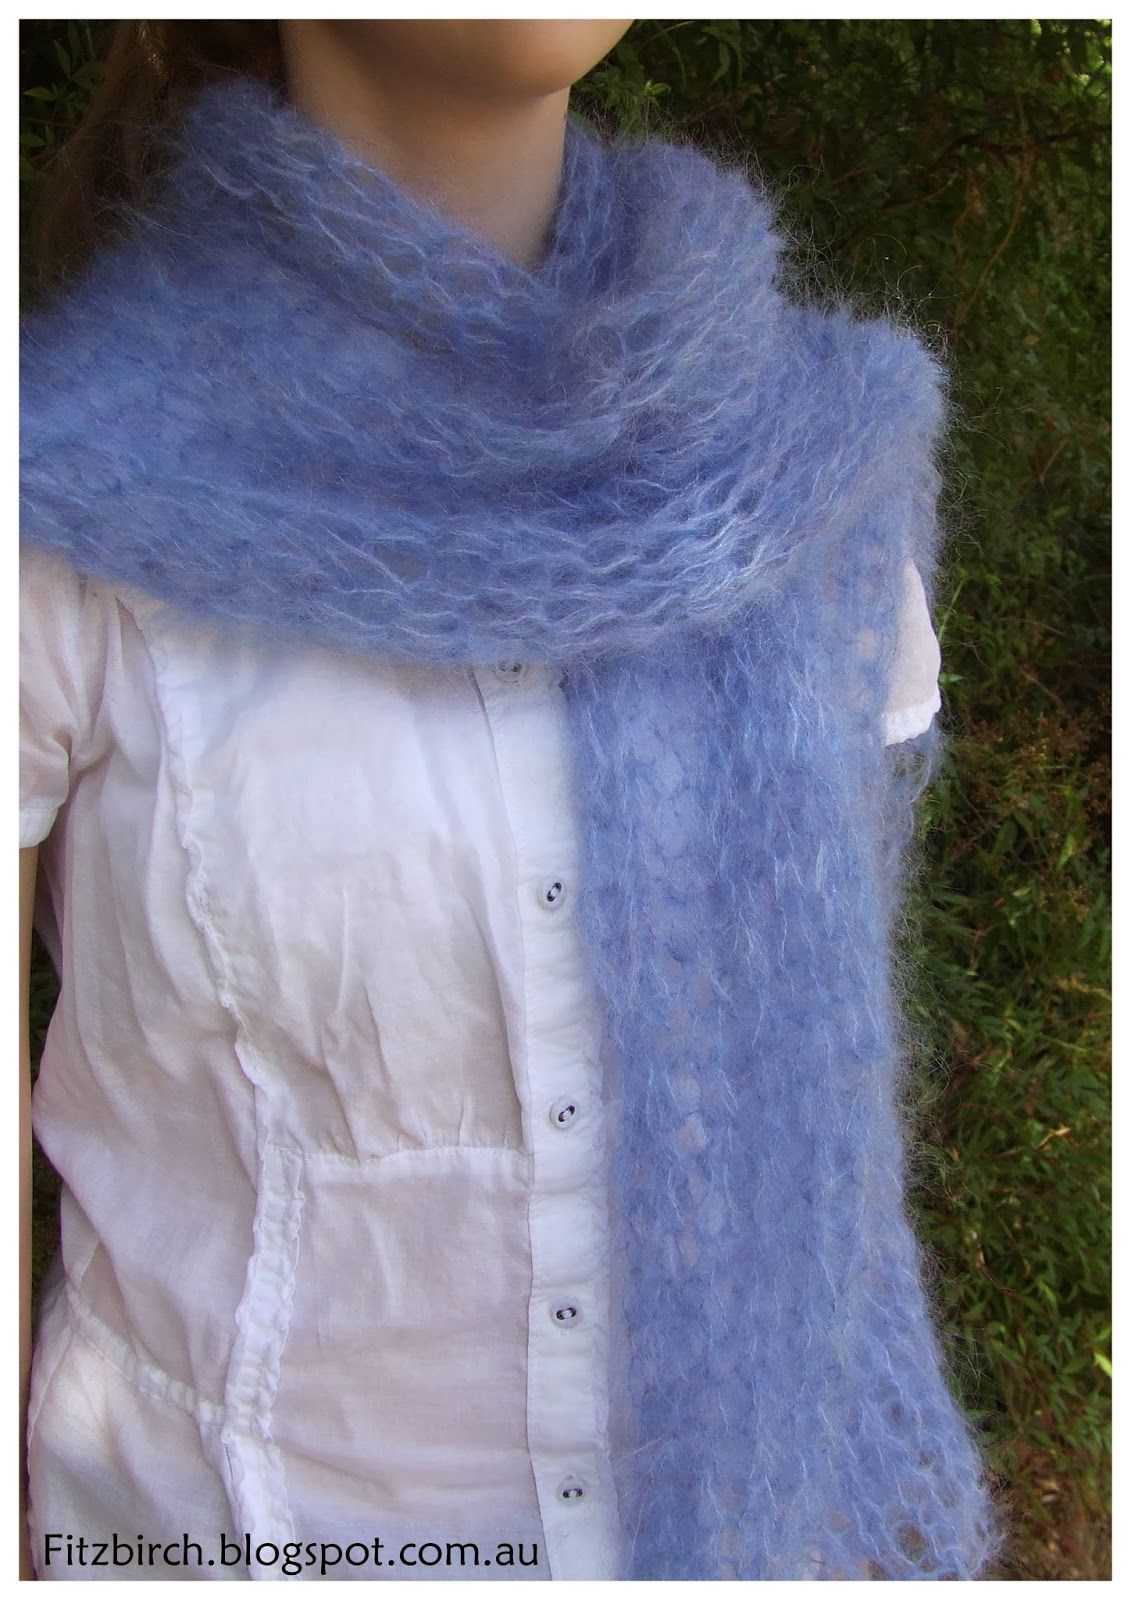
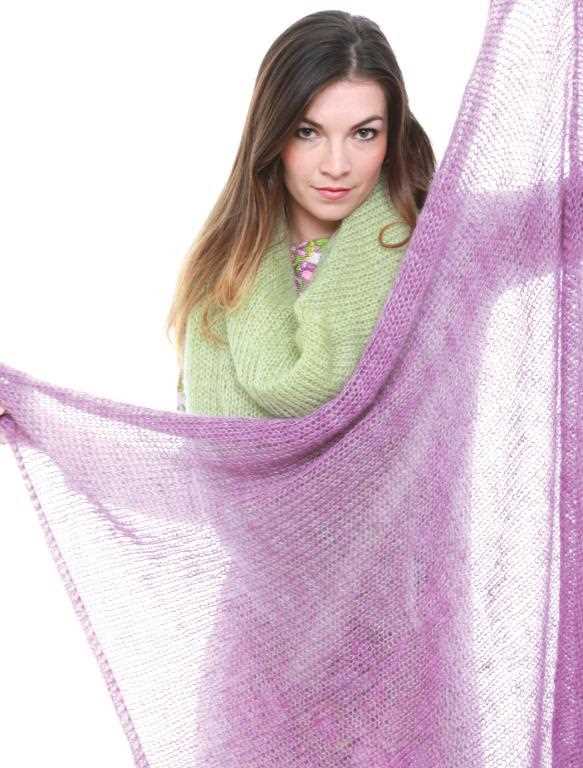
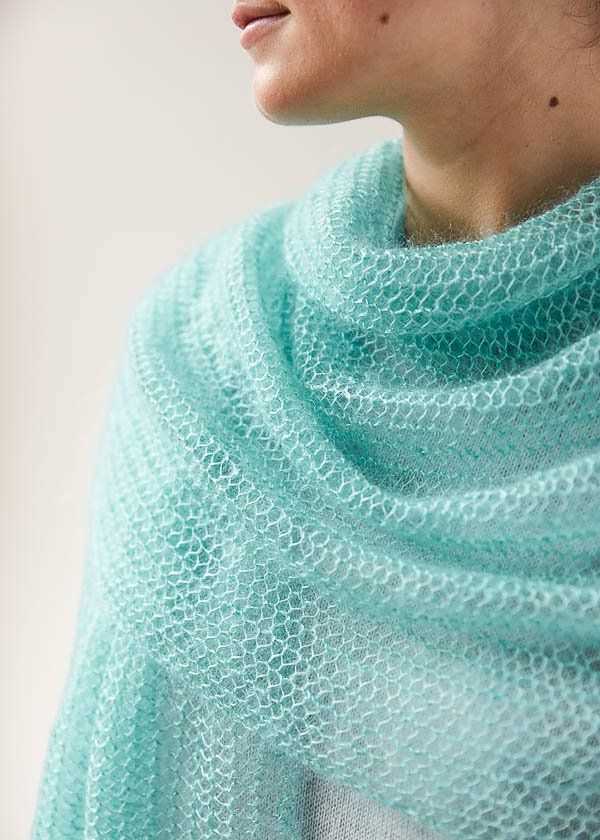
If you prefer a more bohemian style, you can wrap your mohair shawl around your neck like a scarf. This adds a cozy and laid-back vibe to your outfit, perfect for chilly autumn days or winter outings. The lightweight nature of mohair ensures that it won’t feel bulky or overwhelming, making it a great choice for layering.
For a modern and trendy look, you can also wear your mohair shawl as a belt. Simply fold it in half lengthwise and wrap it around your waist, tying it in a knot or a bow. This adds a touch of texture and interest to any basic outfit, making it a stylish and eye-catching accessory.
Another stylish way to wear your mohair shawl is to tie it around your handbag or tote. This not only adds a pop of color and texture to your bag, but also provides an extra layer of warmth and coziness. It’s a unique and fashionable way to incorporate your mohair shawl into your everyday style.
Whether you choose to drape it over your shoulders, wrap it around your neck, wear it as a belt, or tie it to your bag, your mohair shawl is sure to make a statement. Experiment with different styling techniques to find the look that best suits your personal style and occasions. With its luxurious texture and timeless appeal, your mohair shawl is a versatile accessory that will elevate any outfit.
Troubleshooting Tips and Common Mistakes
Knitting a mohair shawl can be a rewarding project, but it’s not without its challenges. Here are some troubleshooting tips and common mistakes to watch out for:
1. Tension Issues
One common mistake when knitting with mohair is knitting too tightly. Mohair has a tendency to stretch and can easily lose its shape if the tension is too tight. Make sure to keep your tension loose and relaxed to maintain an airy and soft texture in your shawl.
2. Dropped Stitches
Dropped stitches can be frustrating, especially when working with mohair, which can be difficult to unravel and fix. To avoid dropped stitches, make sure to count your stitches regularly and double-check your work before moving on to the next row or section. You can also use stitch markers to help keep track of your progress.
3. Splitting Yarn
Mohair yarn can be delicate and prone to splitting, especially if you’re using a small needle size. To avoid splitting, try using a slightly larger needle size or be more mindful of your tension. You can also run your fingers along the yarn as you work to keep it smooth and untangled.
4. Uneven Tension in Lace Patterns
Lace patterns can be particularly challenging with mohair due to its inherent fuzziness. It’s important to pay attention to your tension when working lace stitches to ensure an even and well-defined pattern. Take your time and use stitch markers to help you keep track of pattern repeats.
5. Blocking
After finishing your mohair shawl, blocking is essential to achieve the desired shape and drape. However, mohair can lose its shape easily, so be gentle when blocking. Use blocking wires or pins to gently stretch the shawl to the desired measurements and allow it to dry completely before removing the pins.
Conclusion
Knitting a mohair shawl can be a challenging yet fulfilling project. By keeping these troubleshooting tips in mind and being mindful of common mistakes, you can overcome any hurdles and create a beautiful and cozy shawl that you’ll love to wear or gift to someone special.